
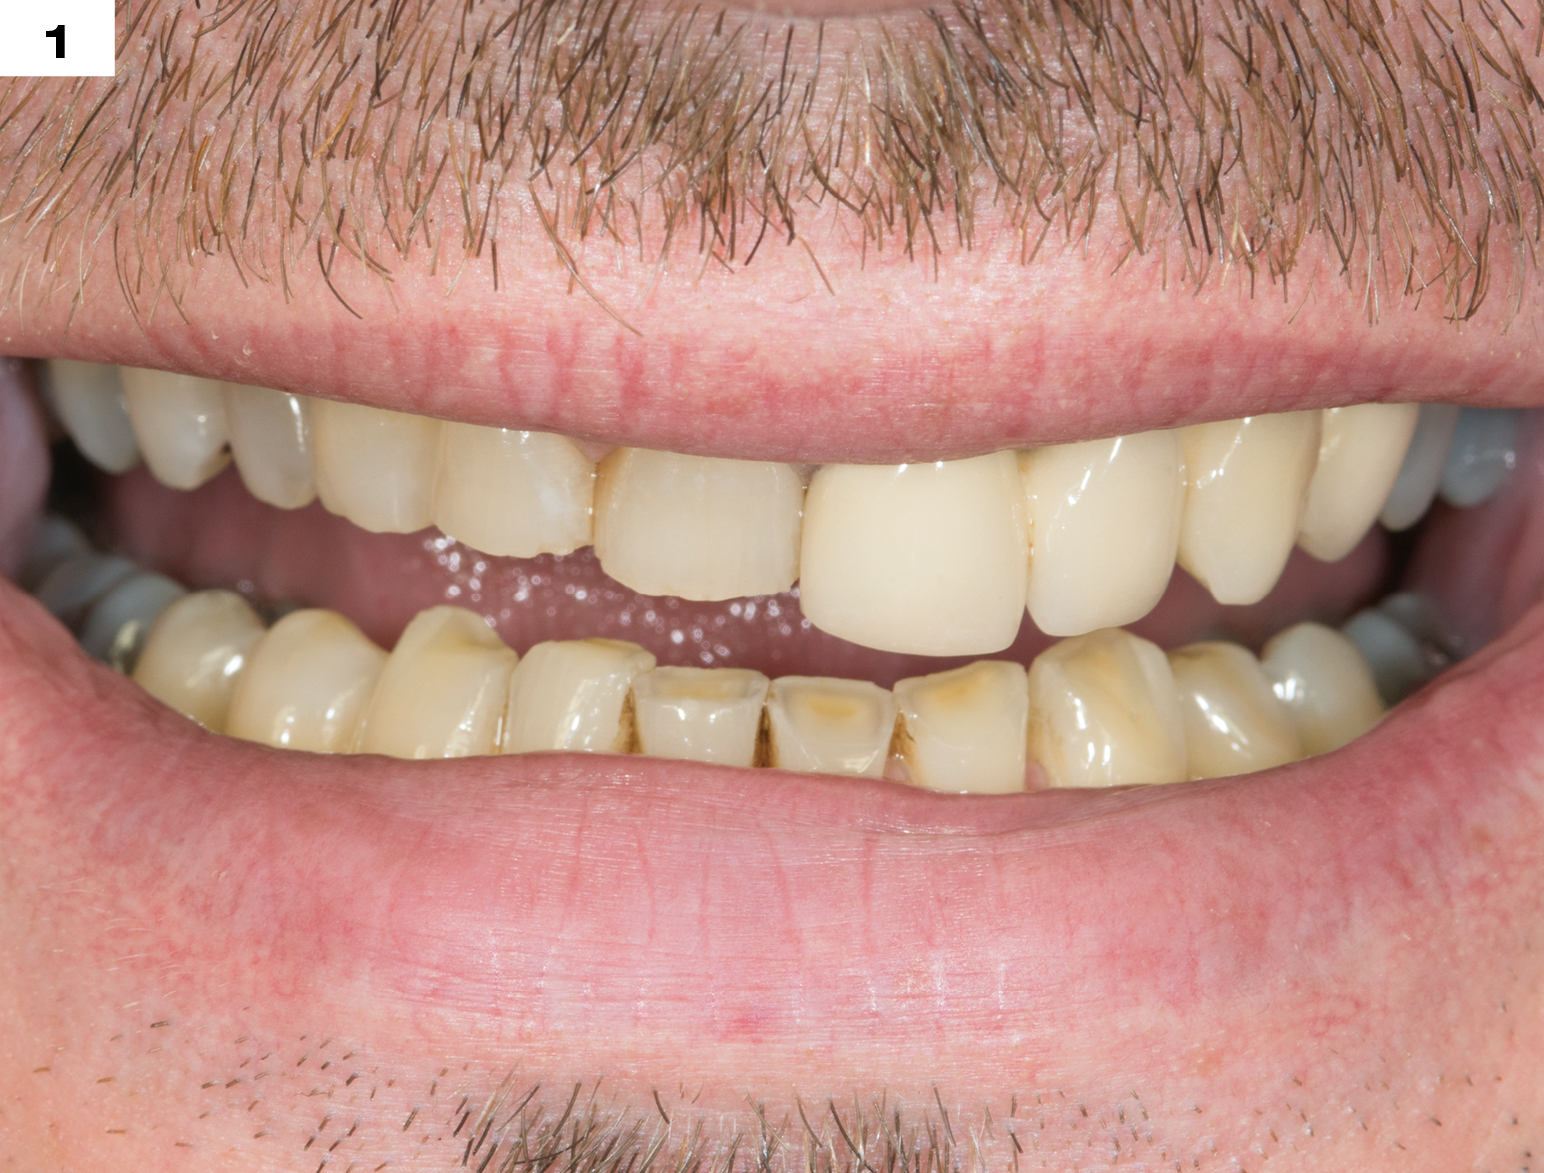
- Clinical Cases
- Sizes
- Shade Range
- Step By Step
- Mechanical Properties
- keyboard_arrow_up
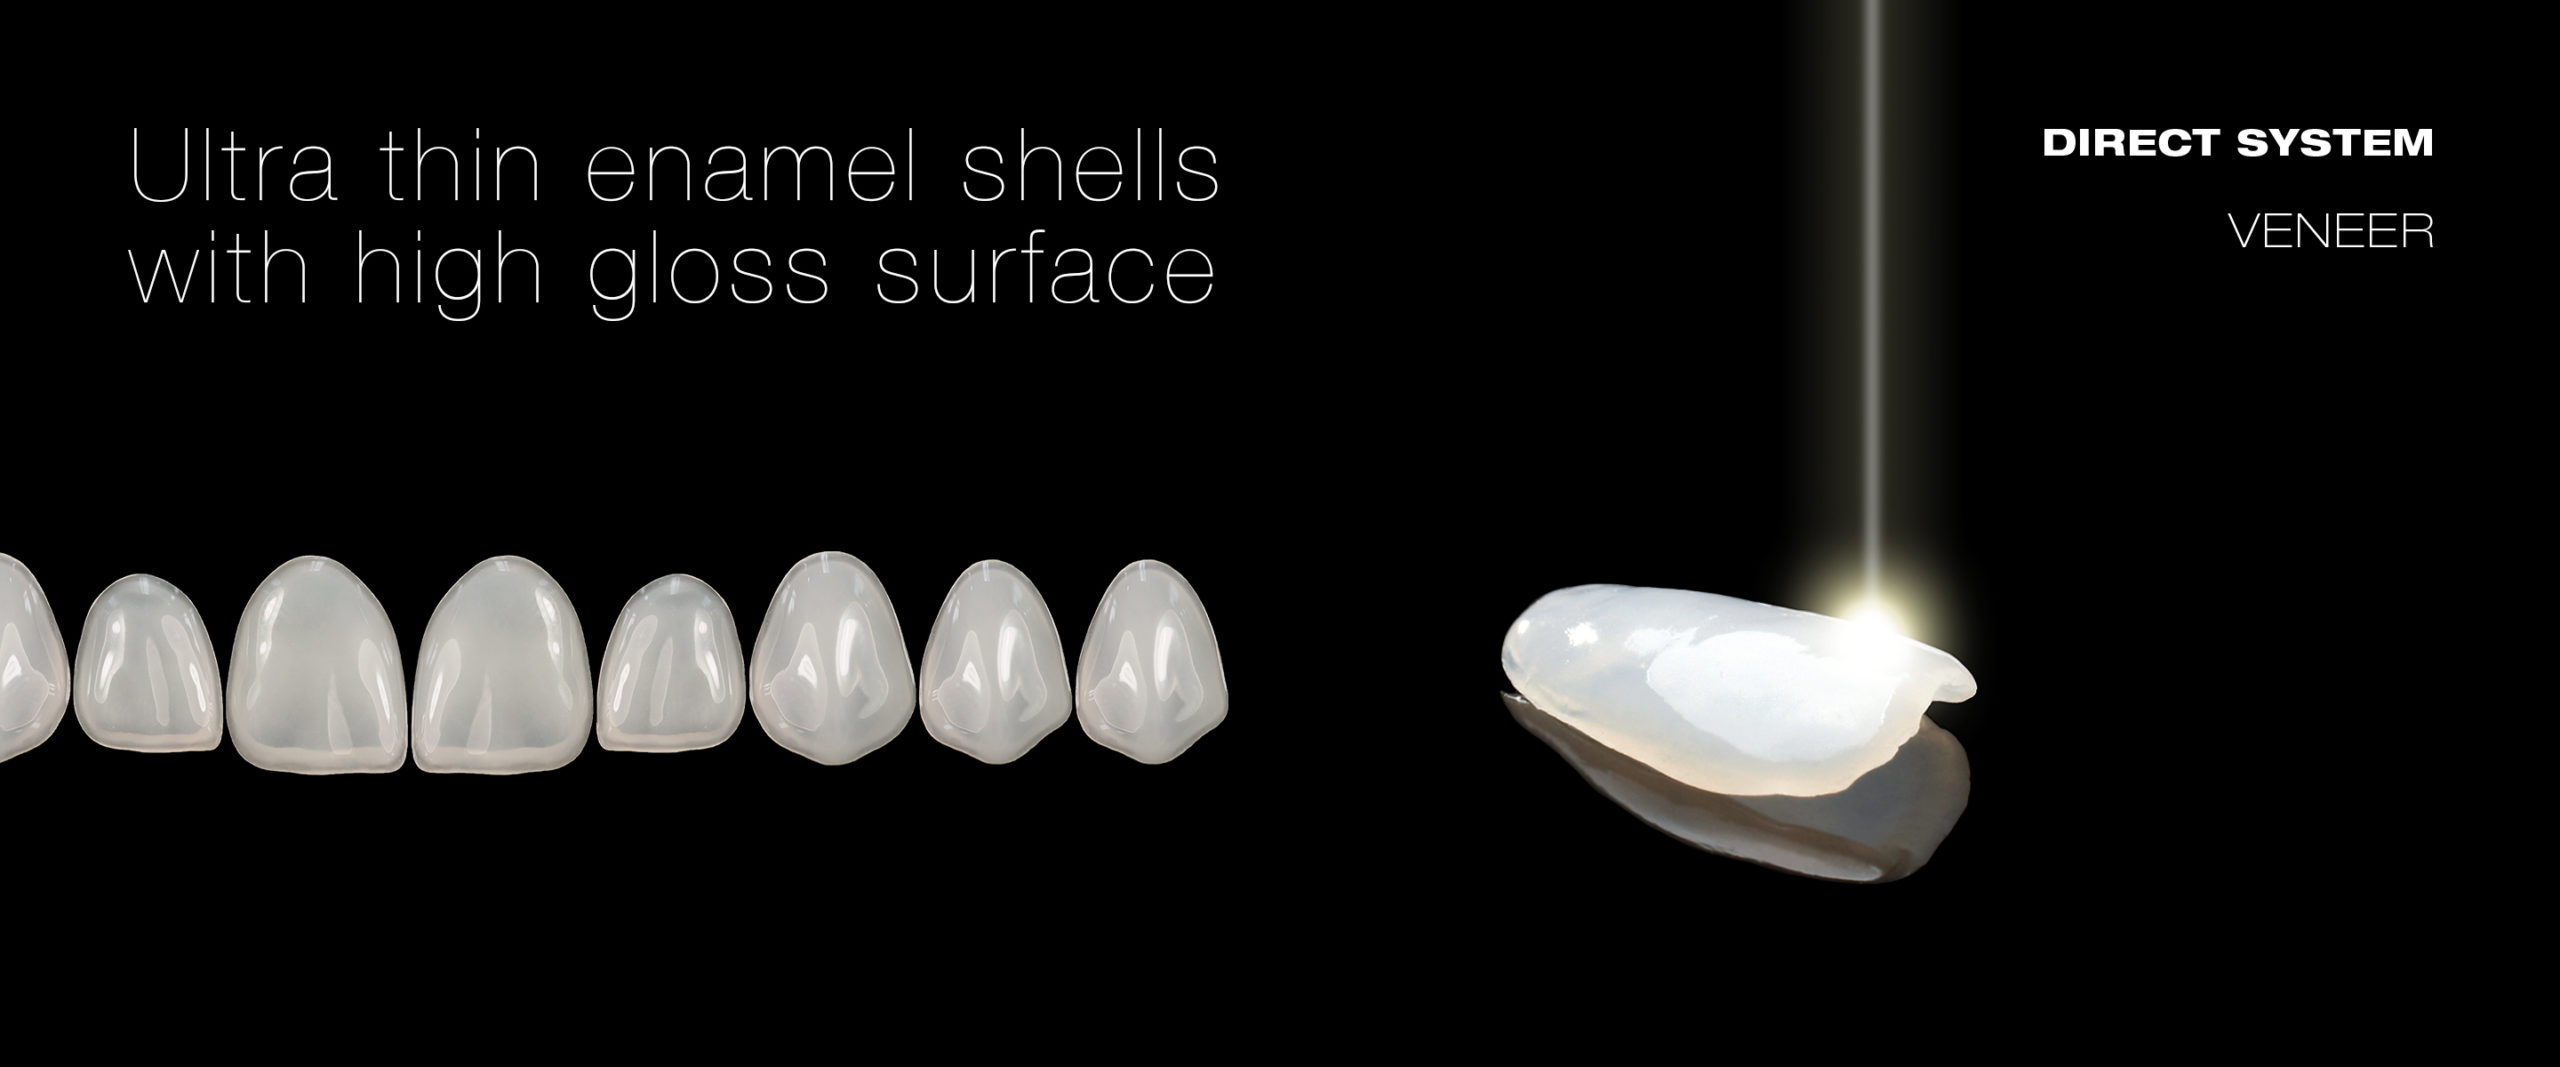
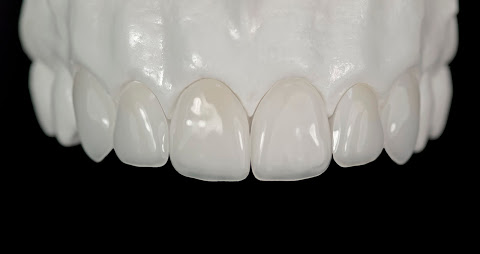
DIRECT VENEERs from edelweiss is state of the art for modern and minimally invasive esthetic dentistry. For the first time in the history of dental, it is now possible to work with prefabricated veneers made from nano-hybrid composite using modern laser technology. Never before has it been feasible to directly create the natural shape and youthful luminance of a tooth, so easily and perfectly in only one appointment. Its versatile area of application together with its time and cost saving procedure make edelweiss DIRECT VENEERs a sound investment in the future with the best interest of the patient in mind. Convince yourself.
Clinical Cases
Deciduous Incisal Teeth
Before & After / Step By Step

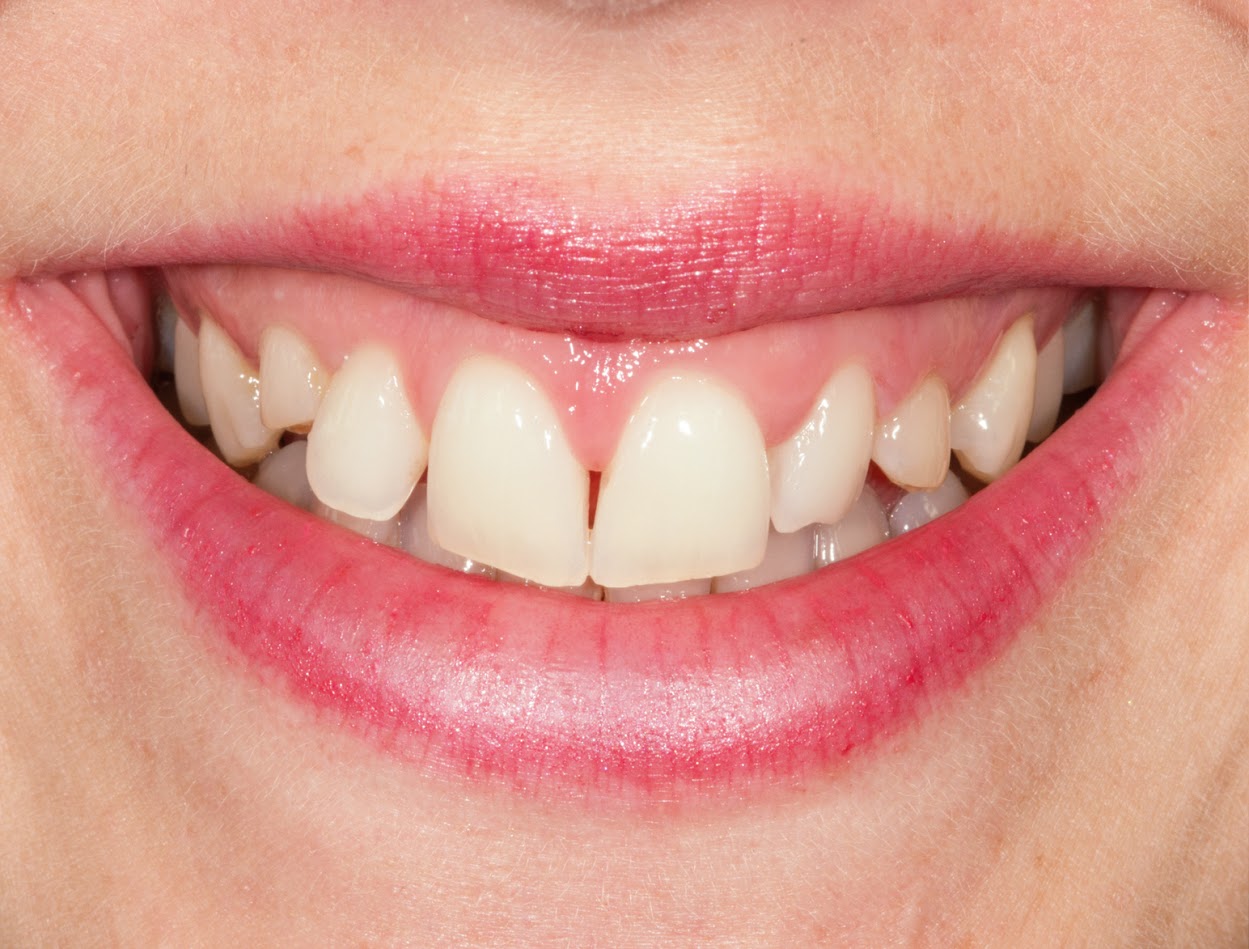
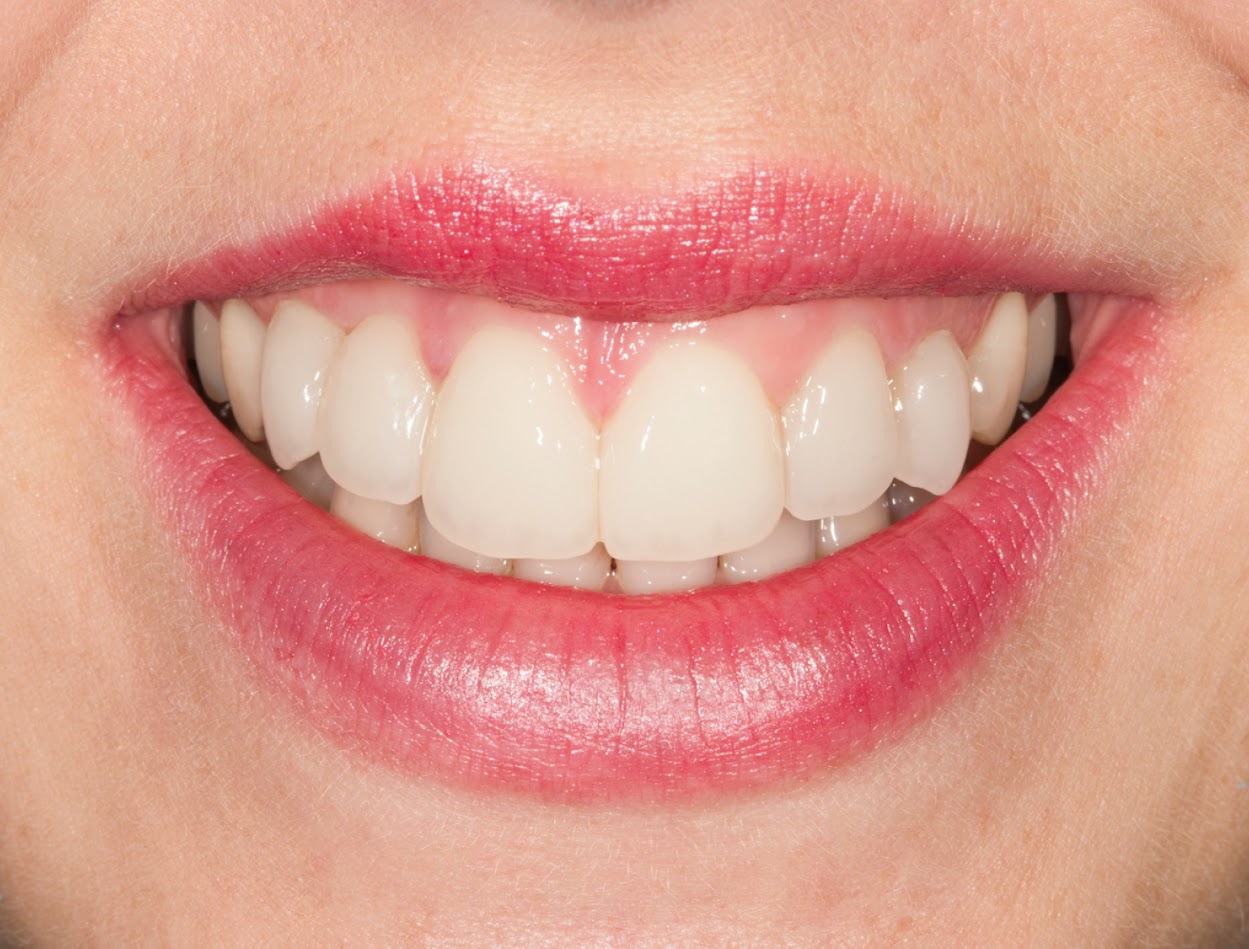
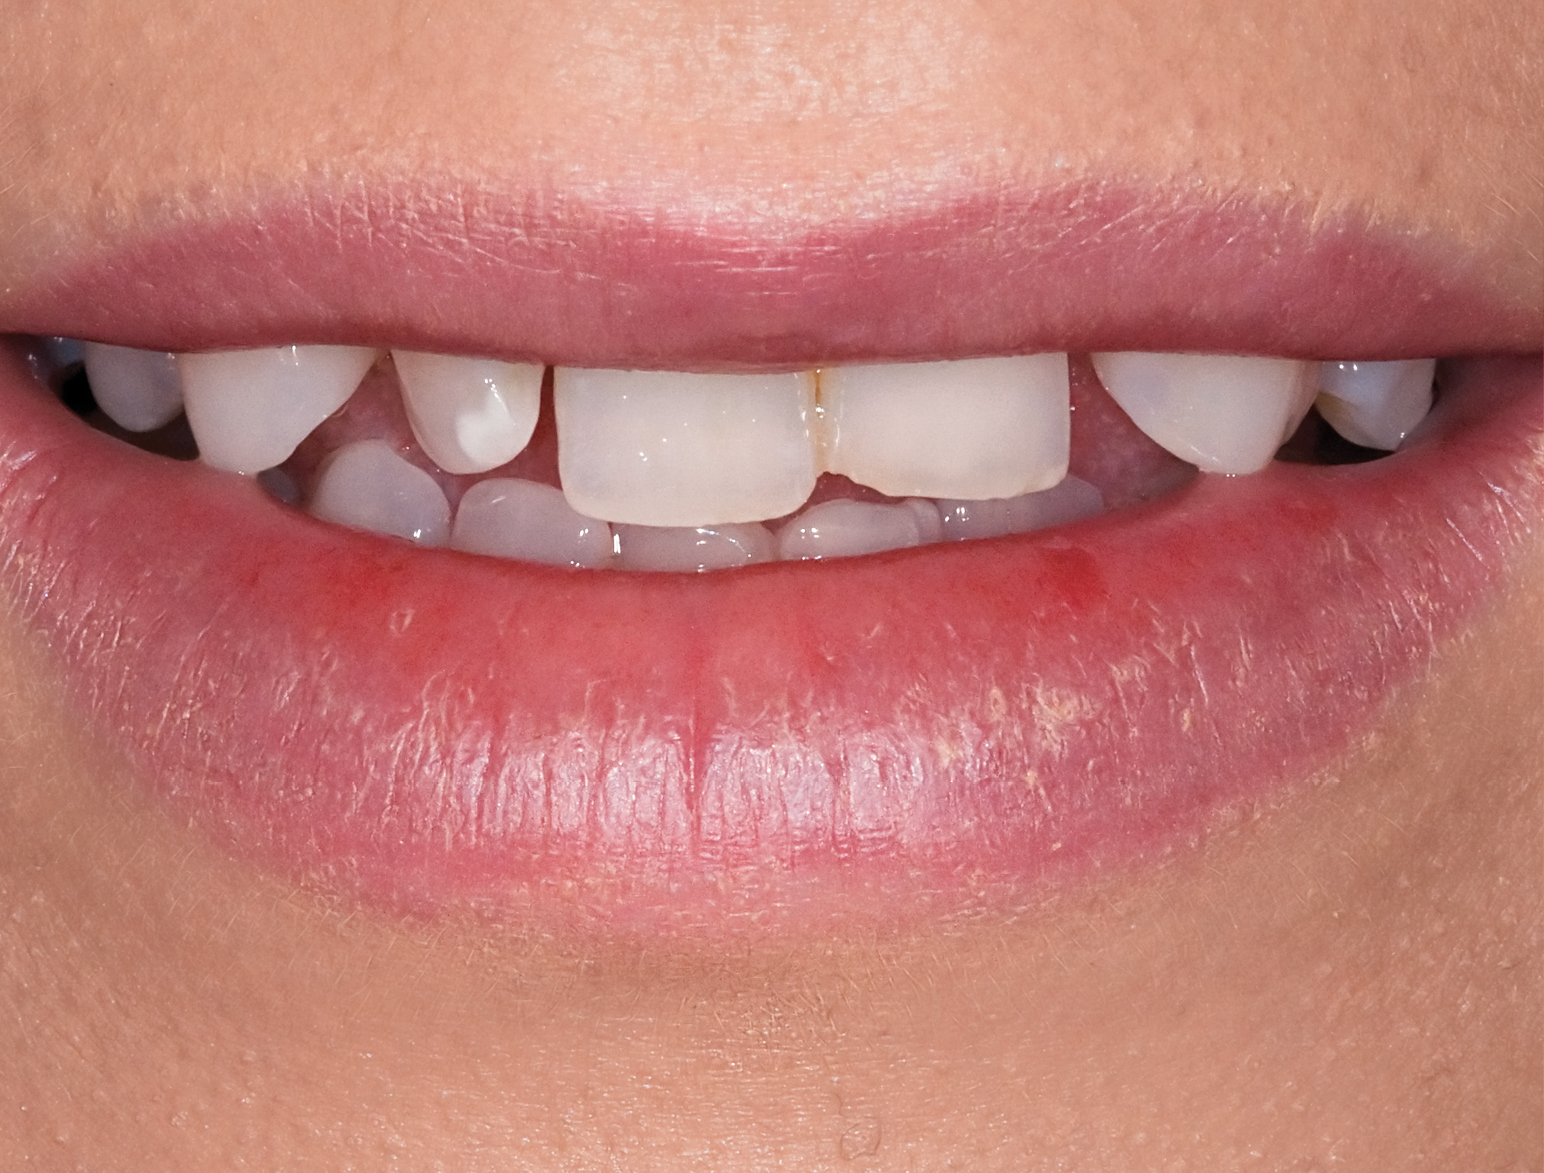
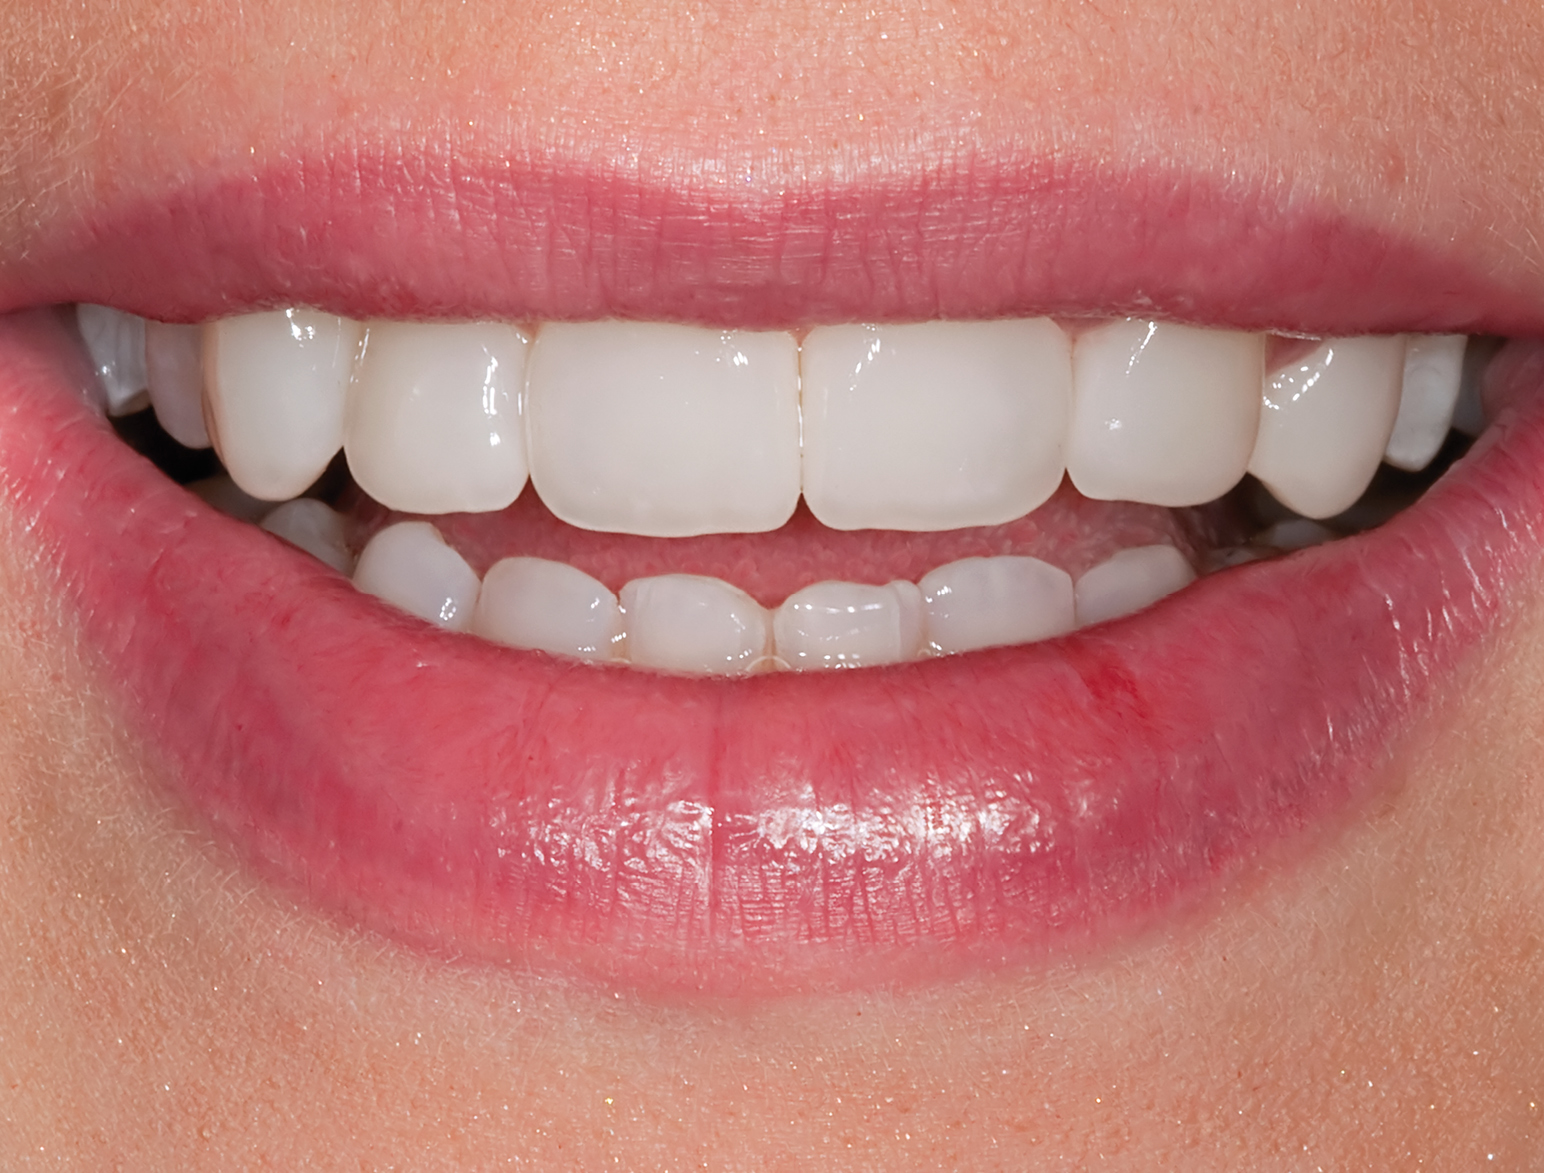
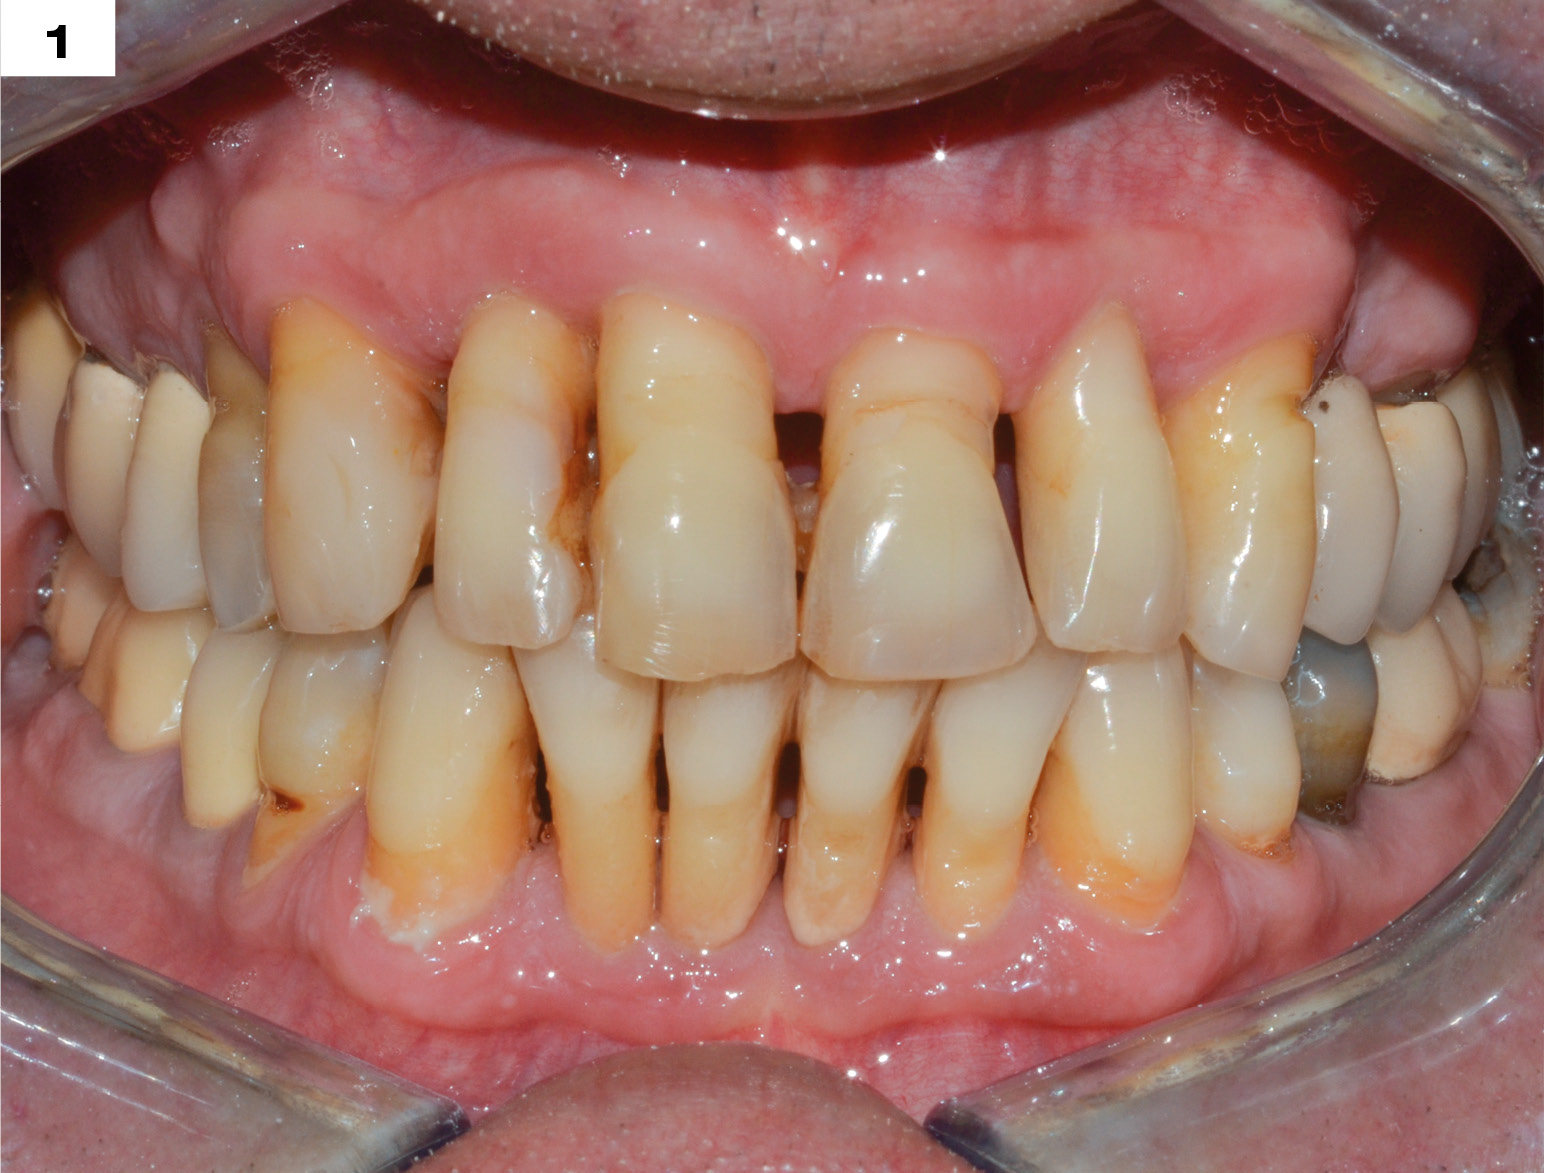
BEFORE

AFTER
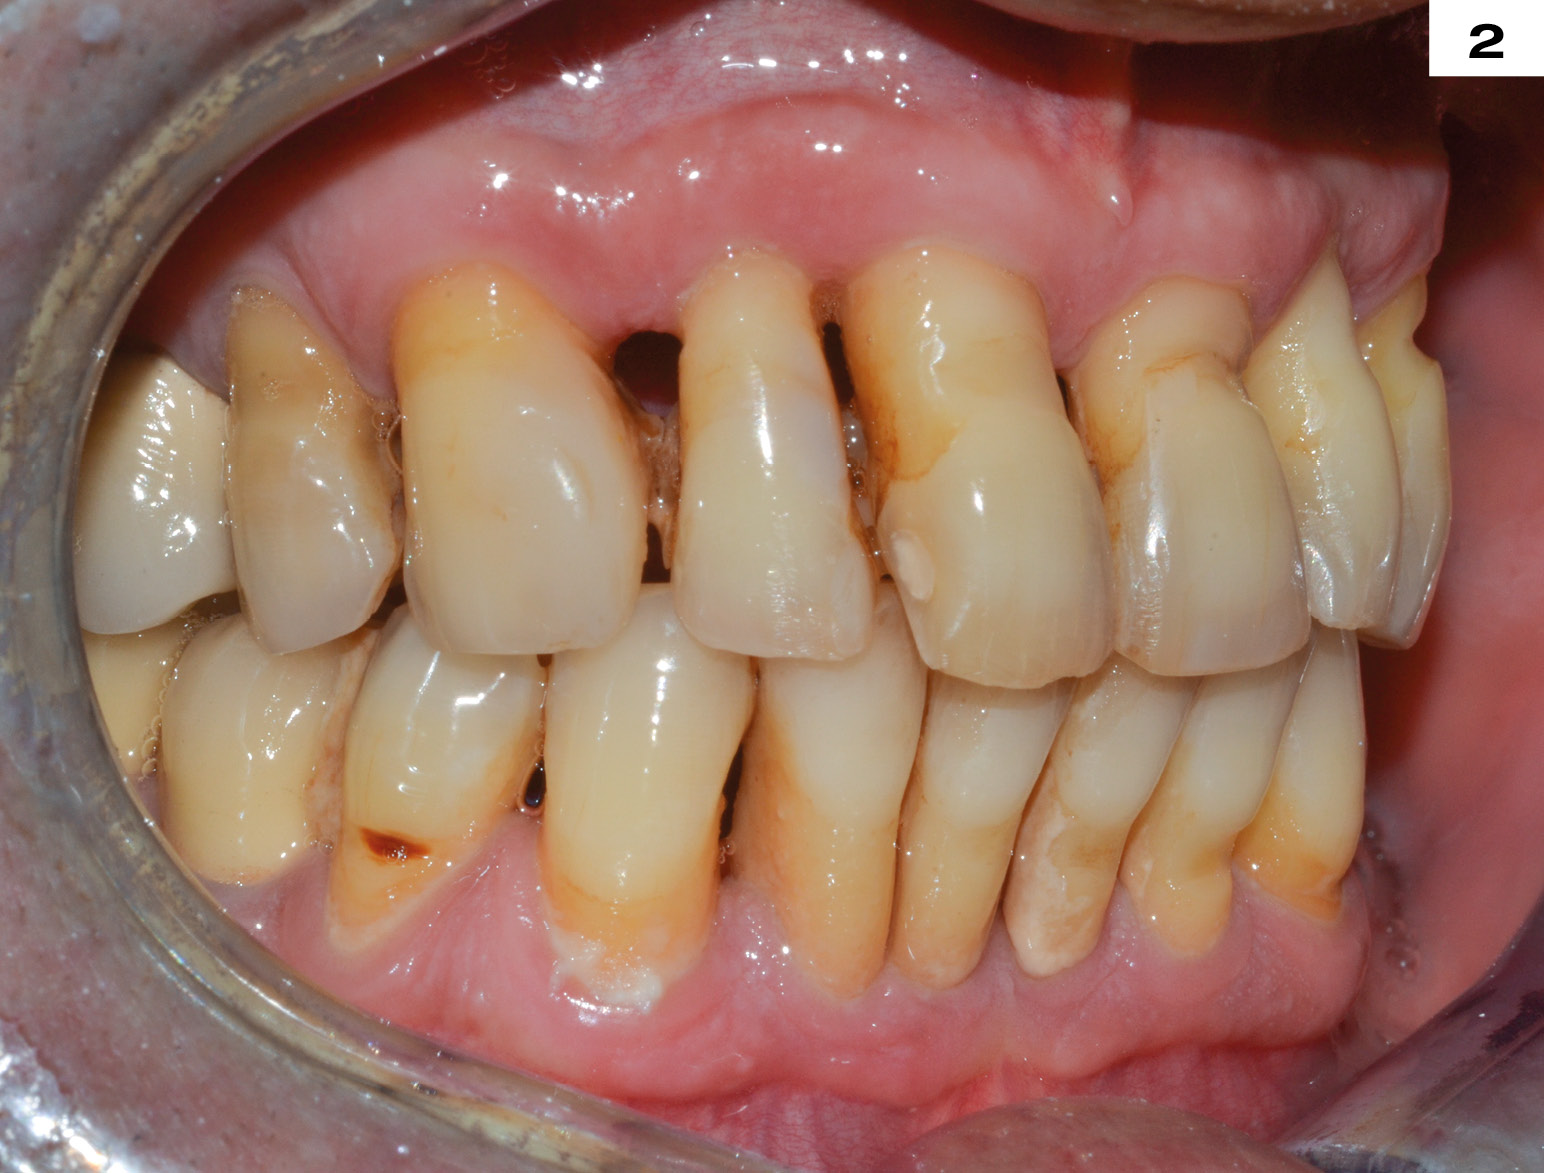
BEFORE
AFTER
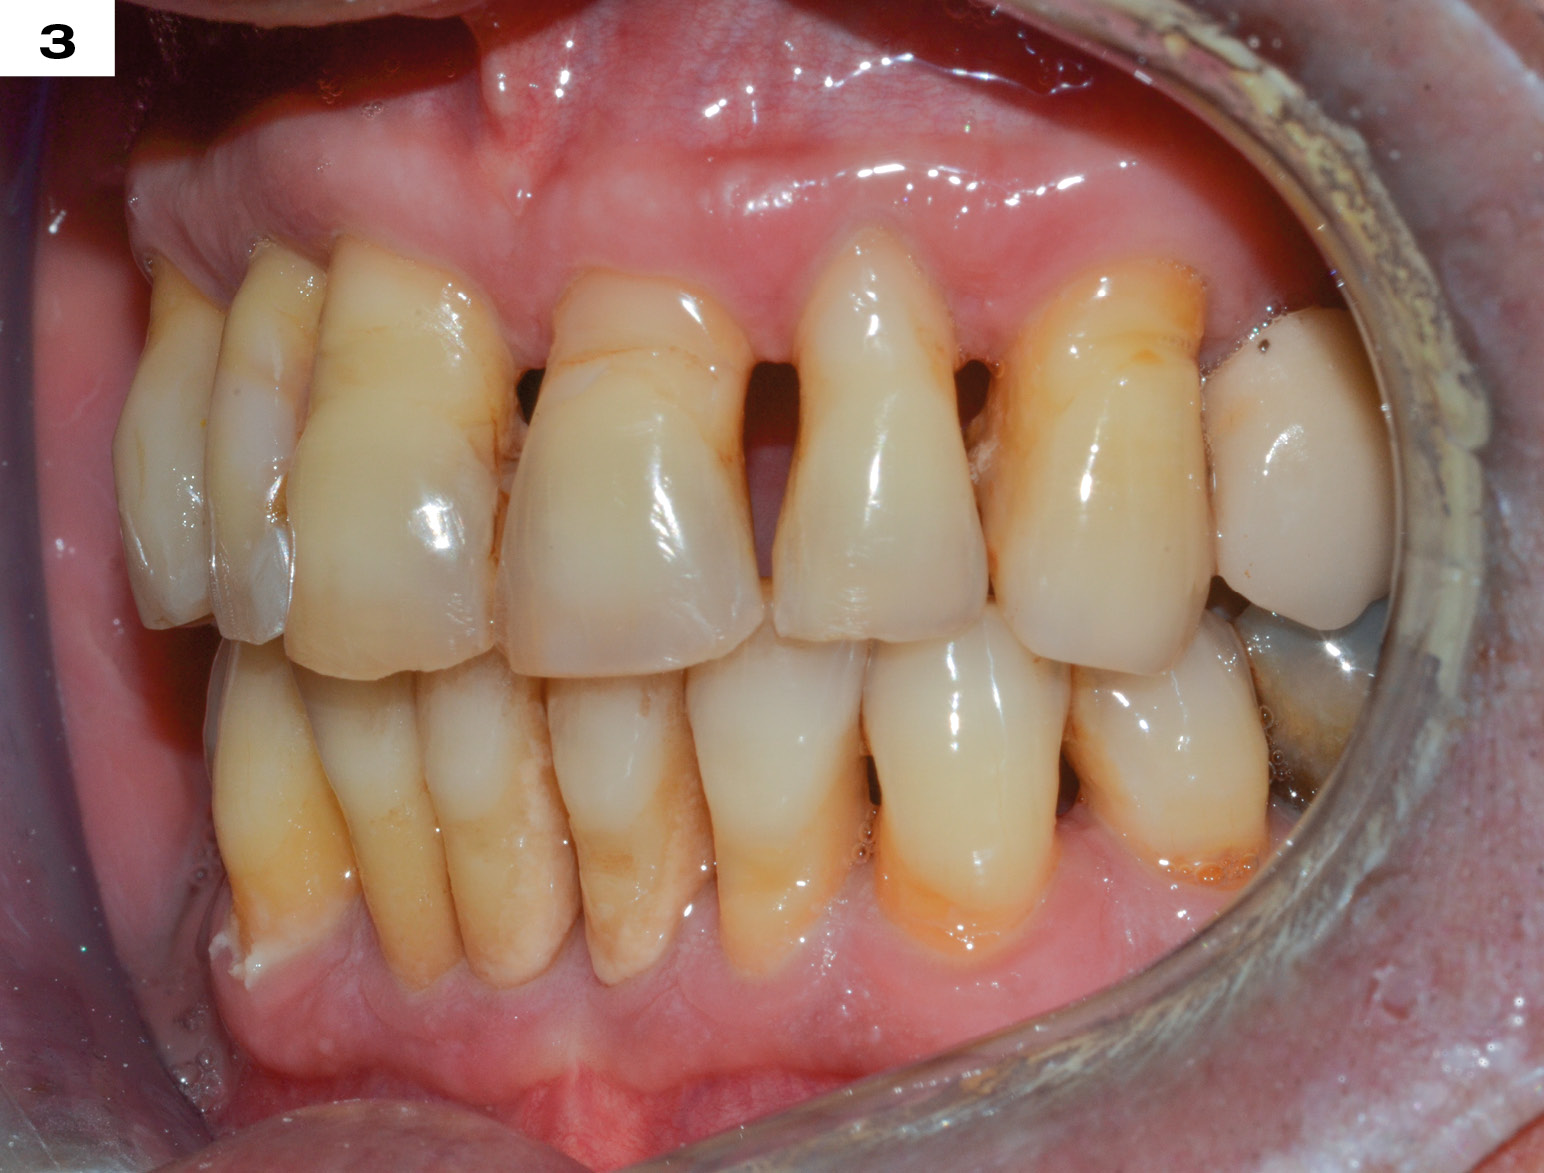
BEFORE
AFTER
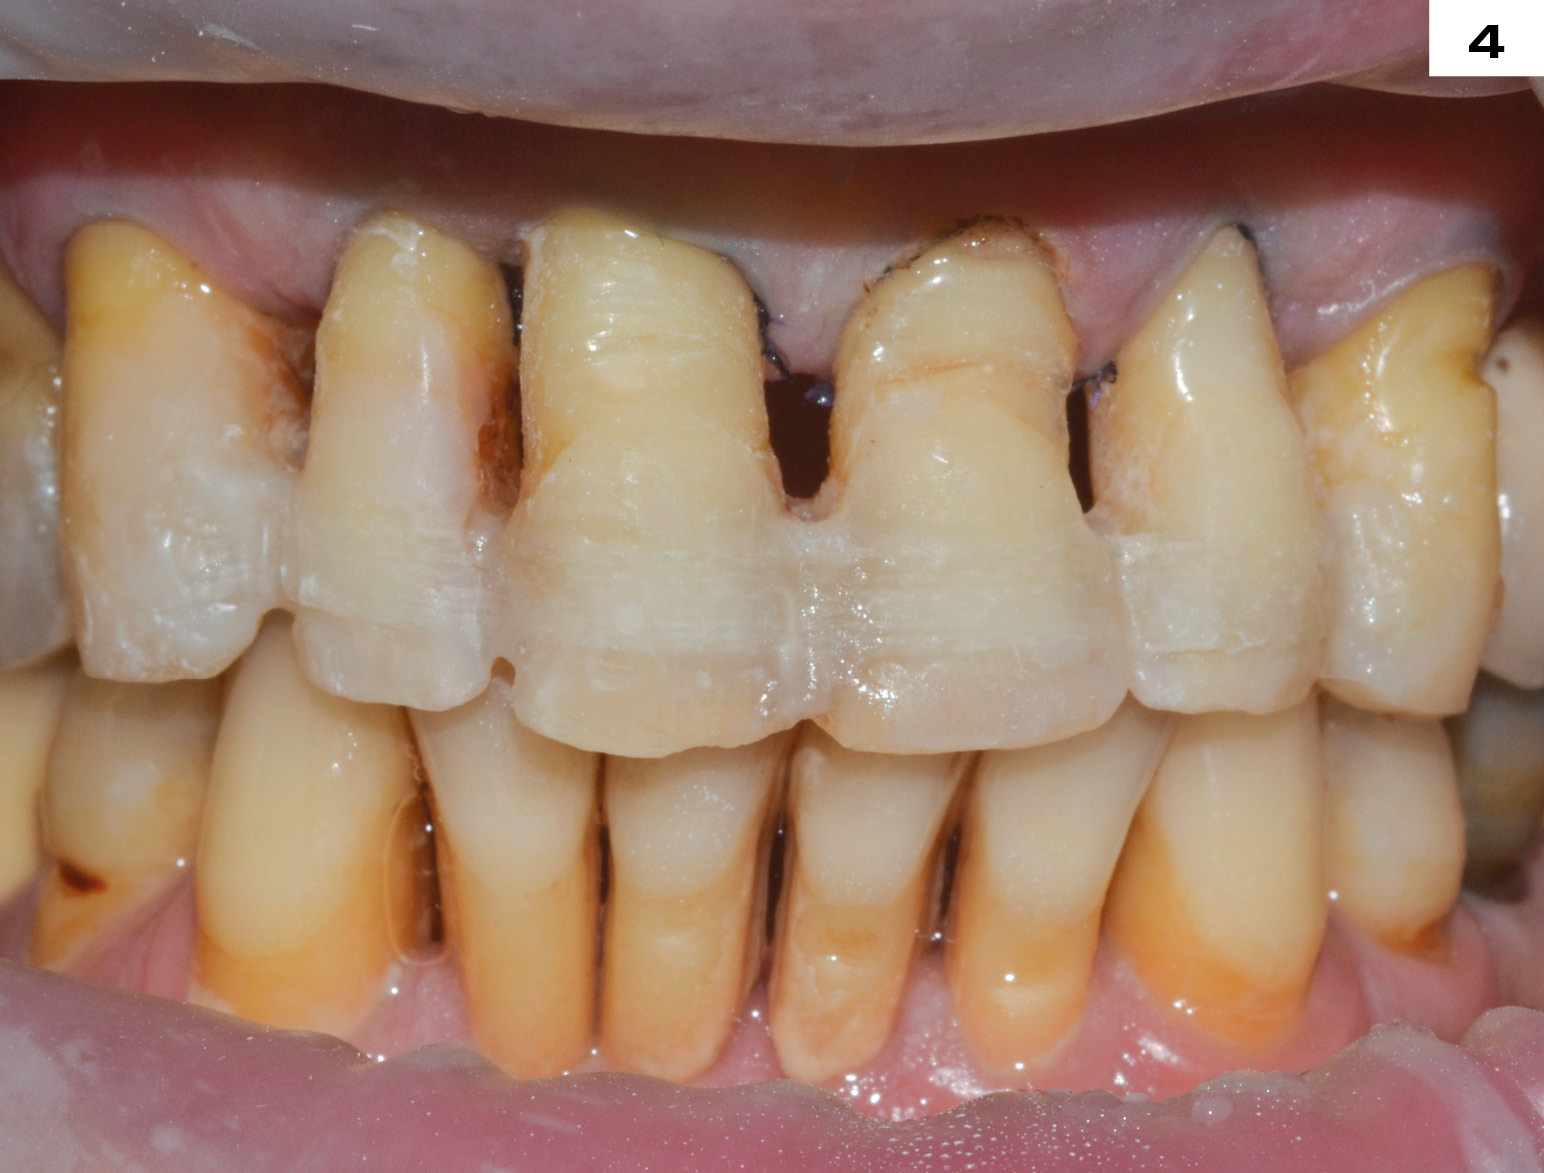
BEFORE
AFTER
BEFORE
AFTER
BEFORE
AFTER
BEFORE
AFTER
BEFORE
AFTER
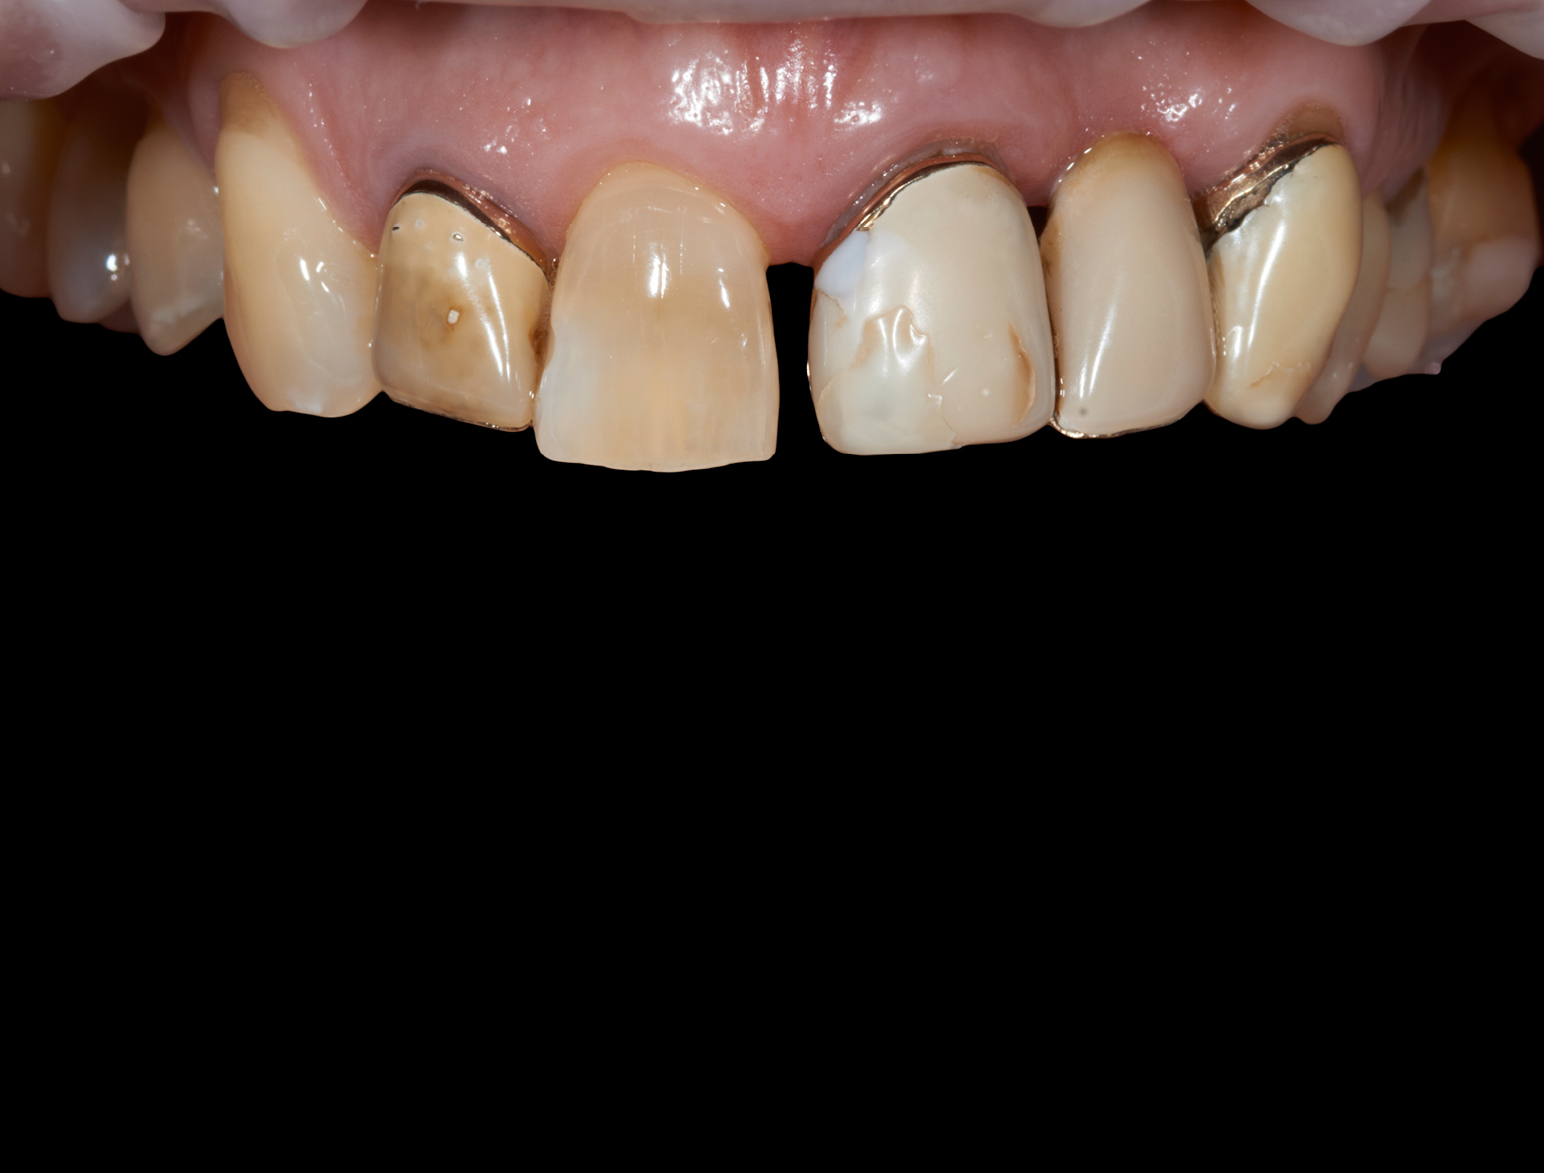
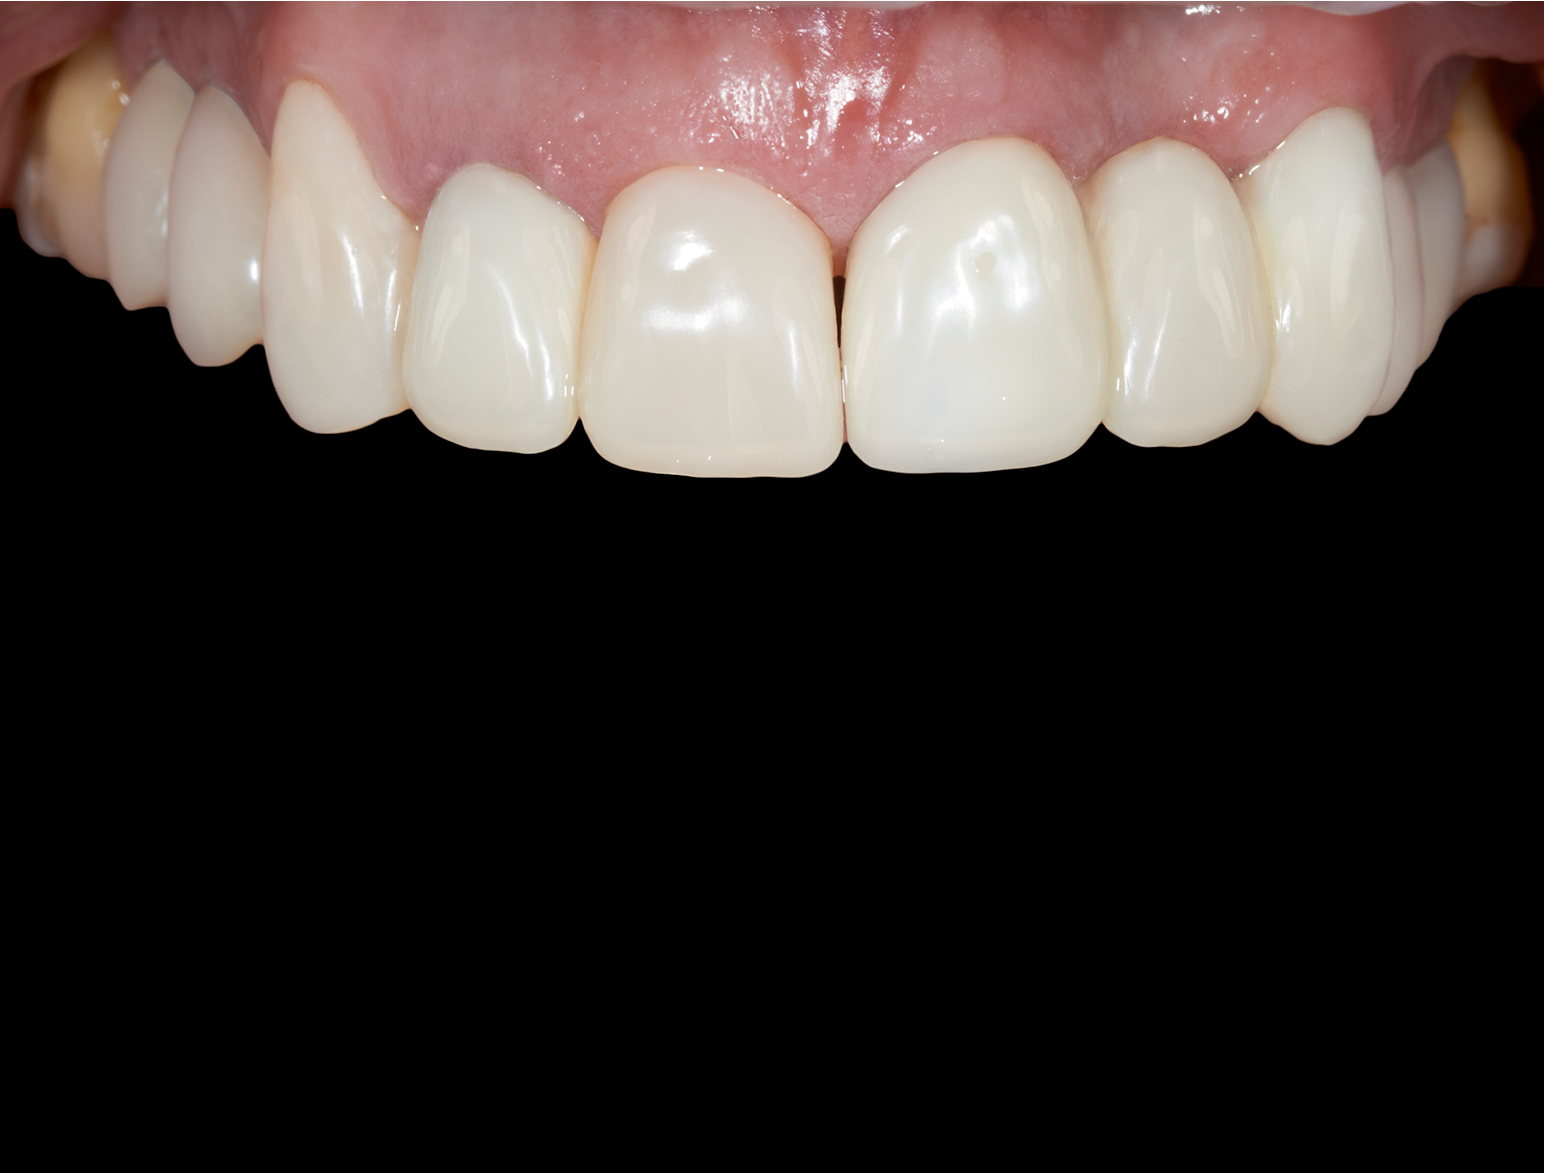
CROWN FACINGS / OLD RESTORATIONS
BEFORE & AFTER / STEP BY STEP

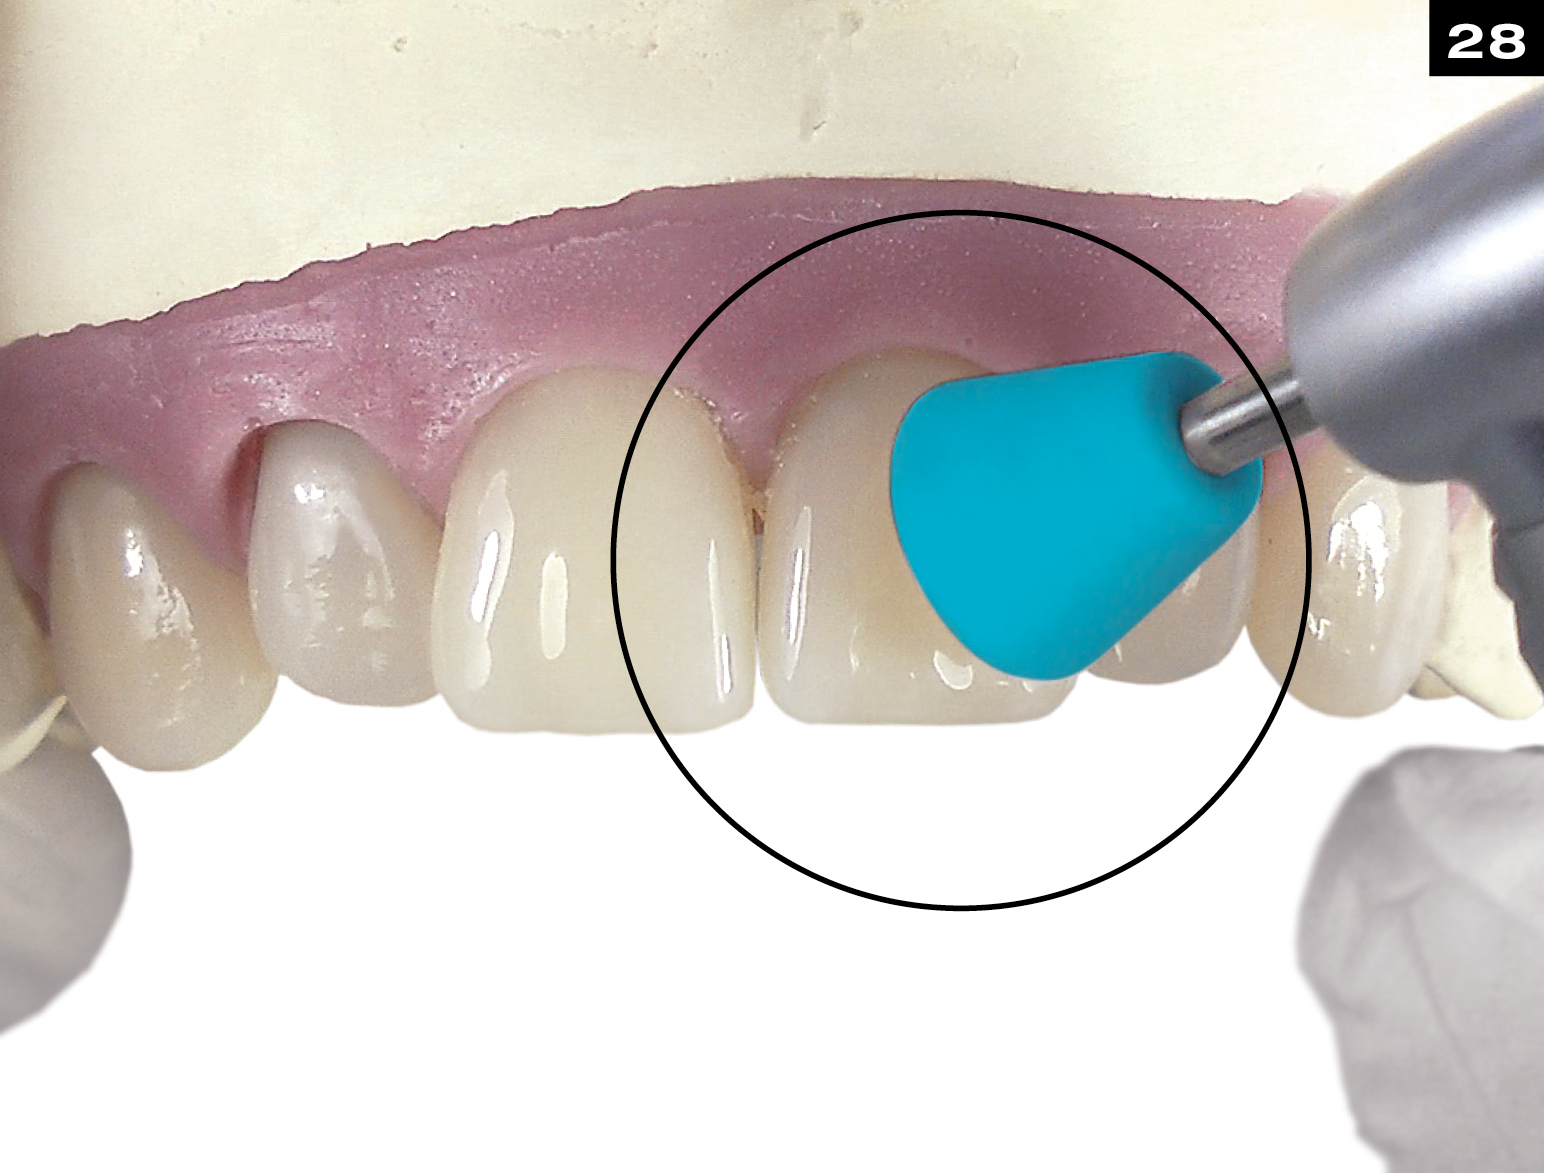
BEFORE

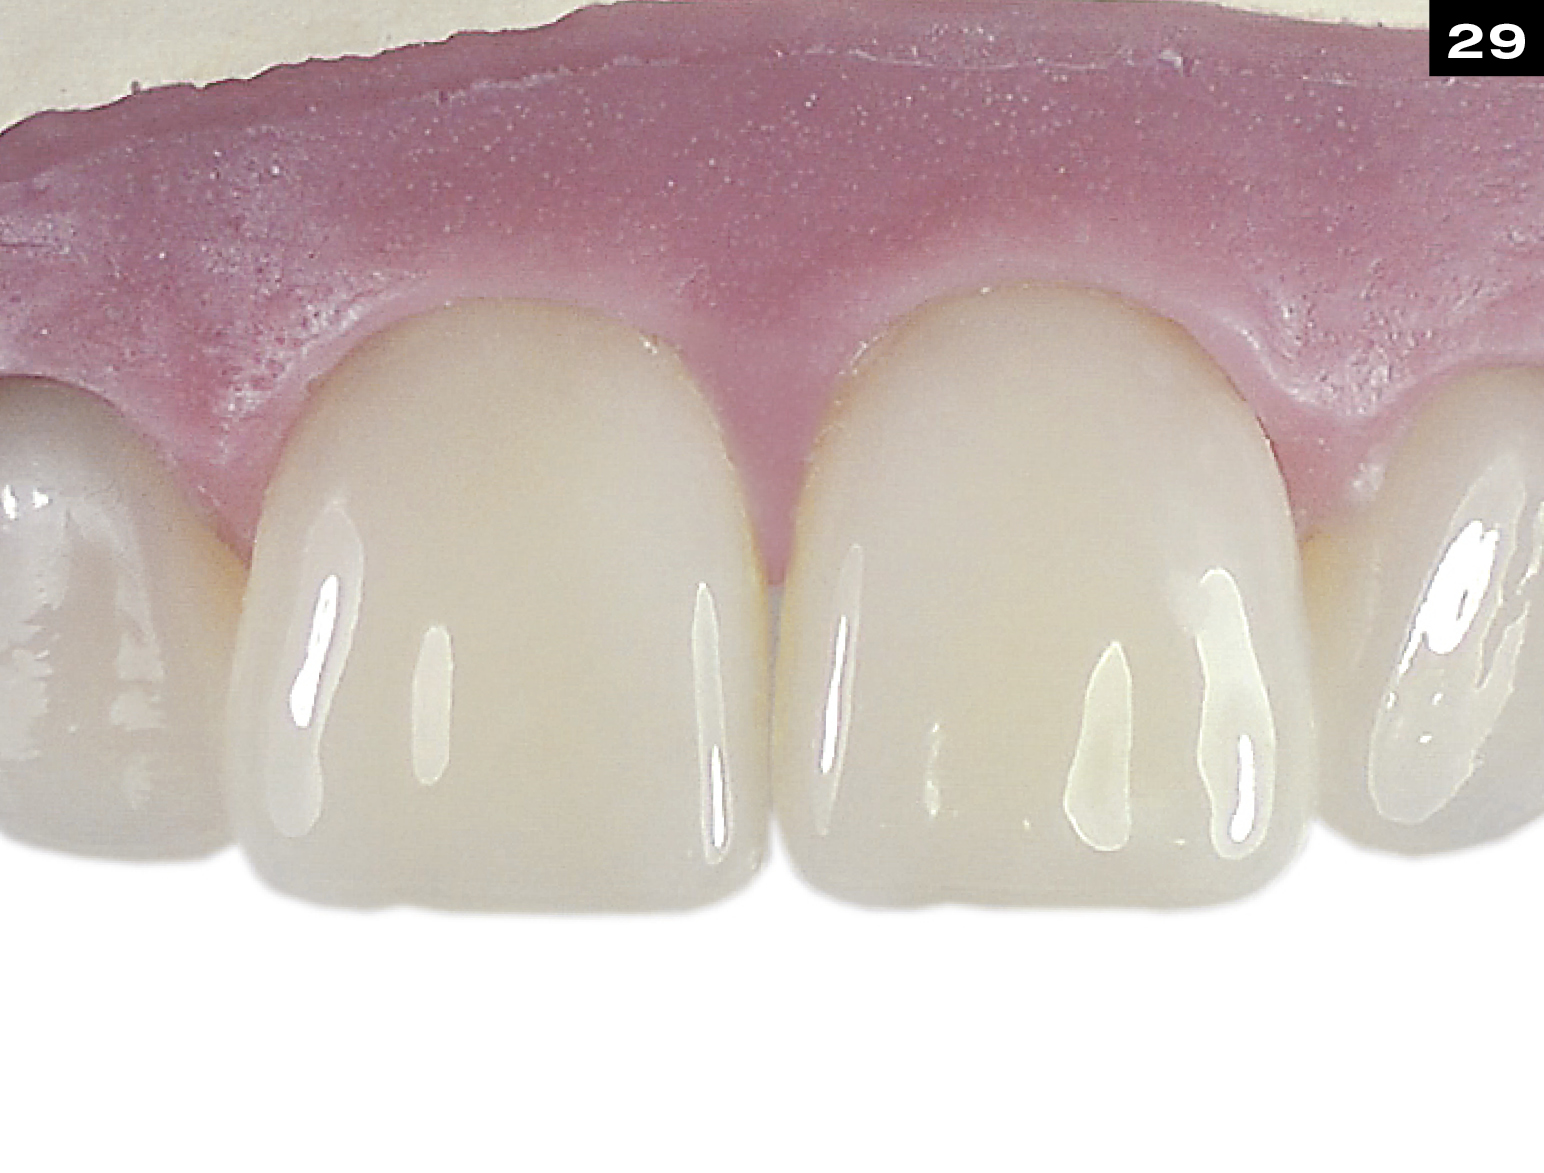
AFTER
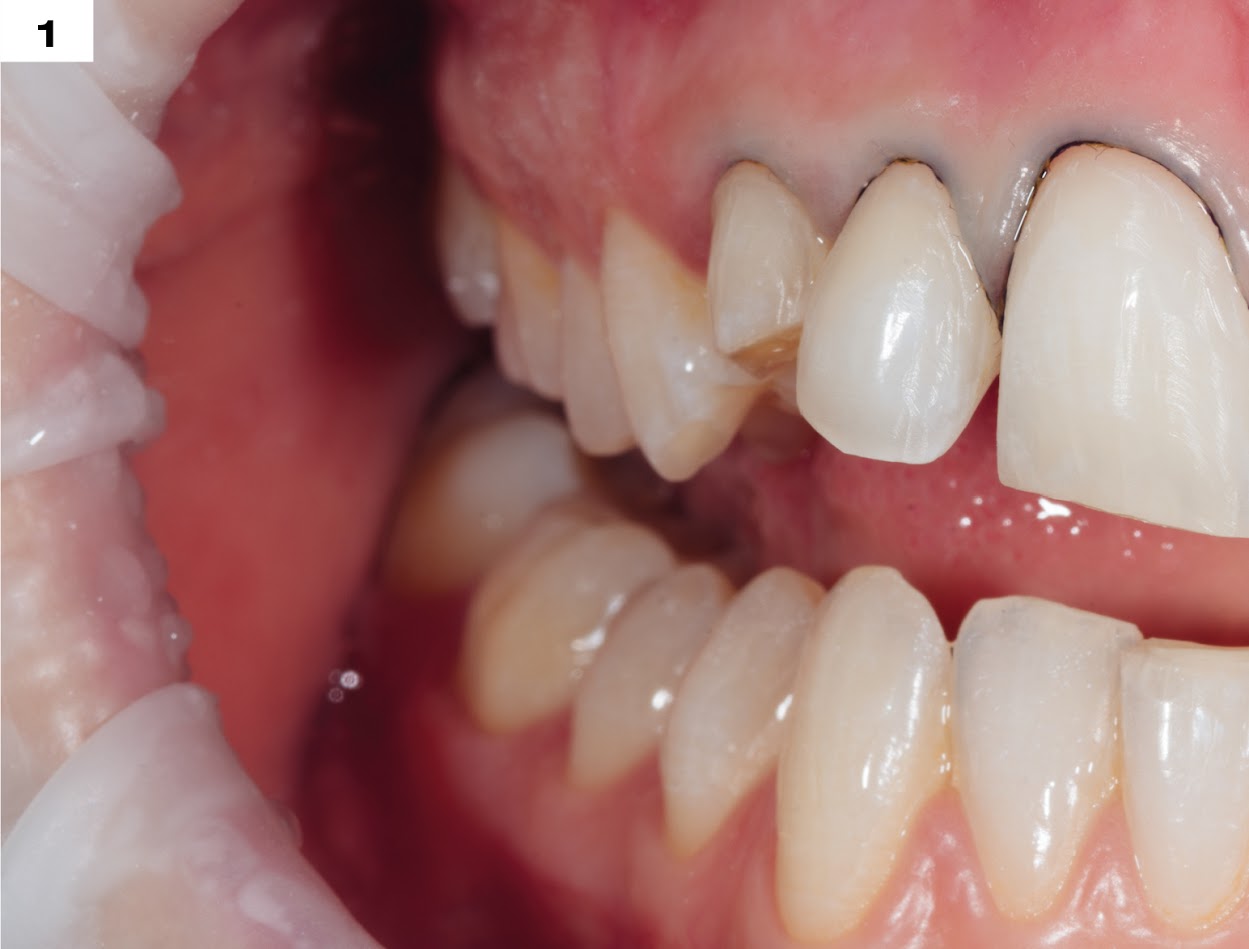
PREOPERATIVE SITUATION

ISOLATION WITH ULTRADENT OPAL DAM AND ETCHING WITH ULTRADENT CERAMIC ETCH
ETCHING WITH UPI ULTRA-ETCH
APPLYING UPI PEAK UNIVERSAL BOND
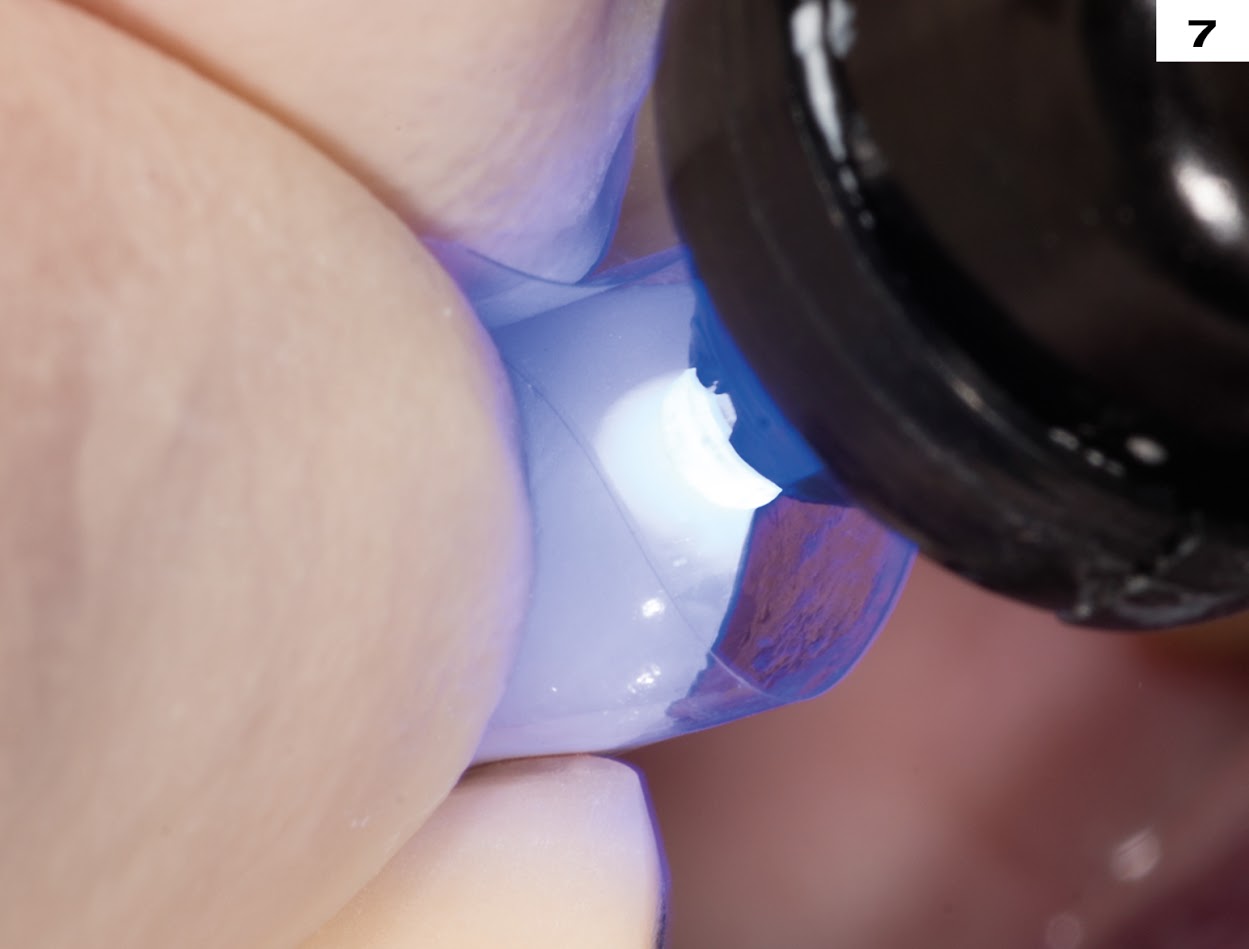
LIGHT CURING WITH VALO / UPI
COVERING METAL AREA WITH EDELWEISS OPAQUE WHITE
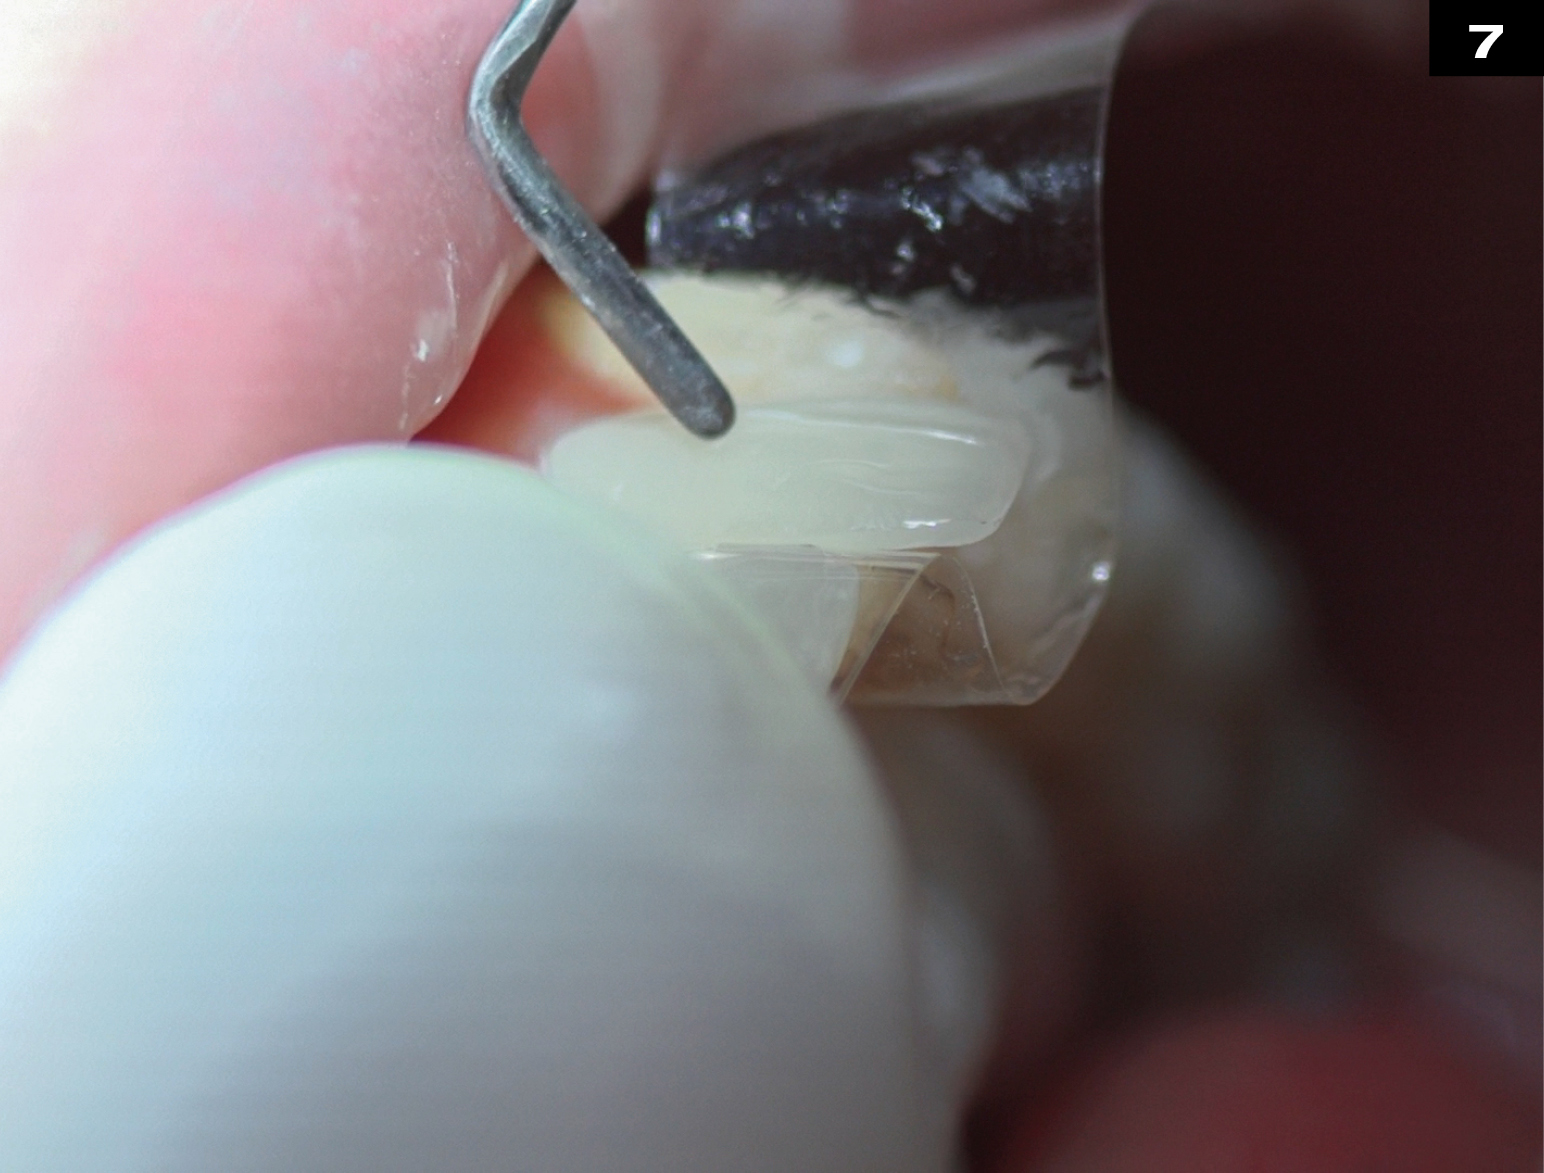
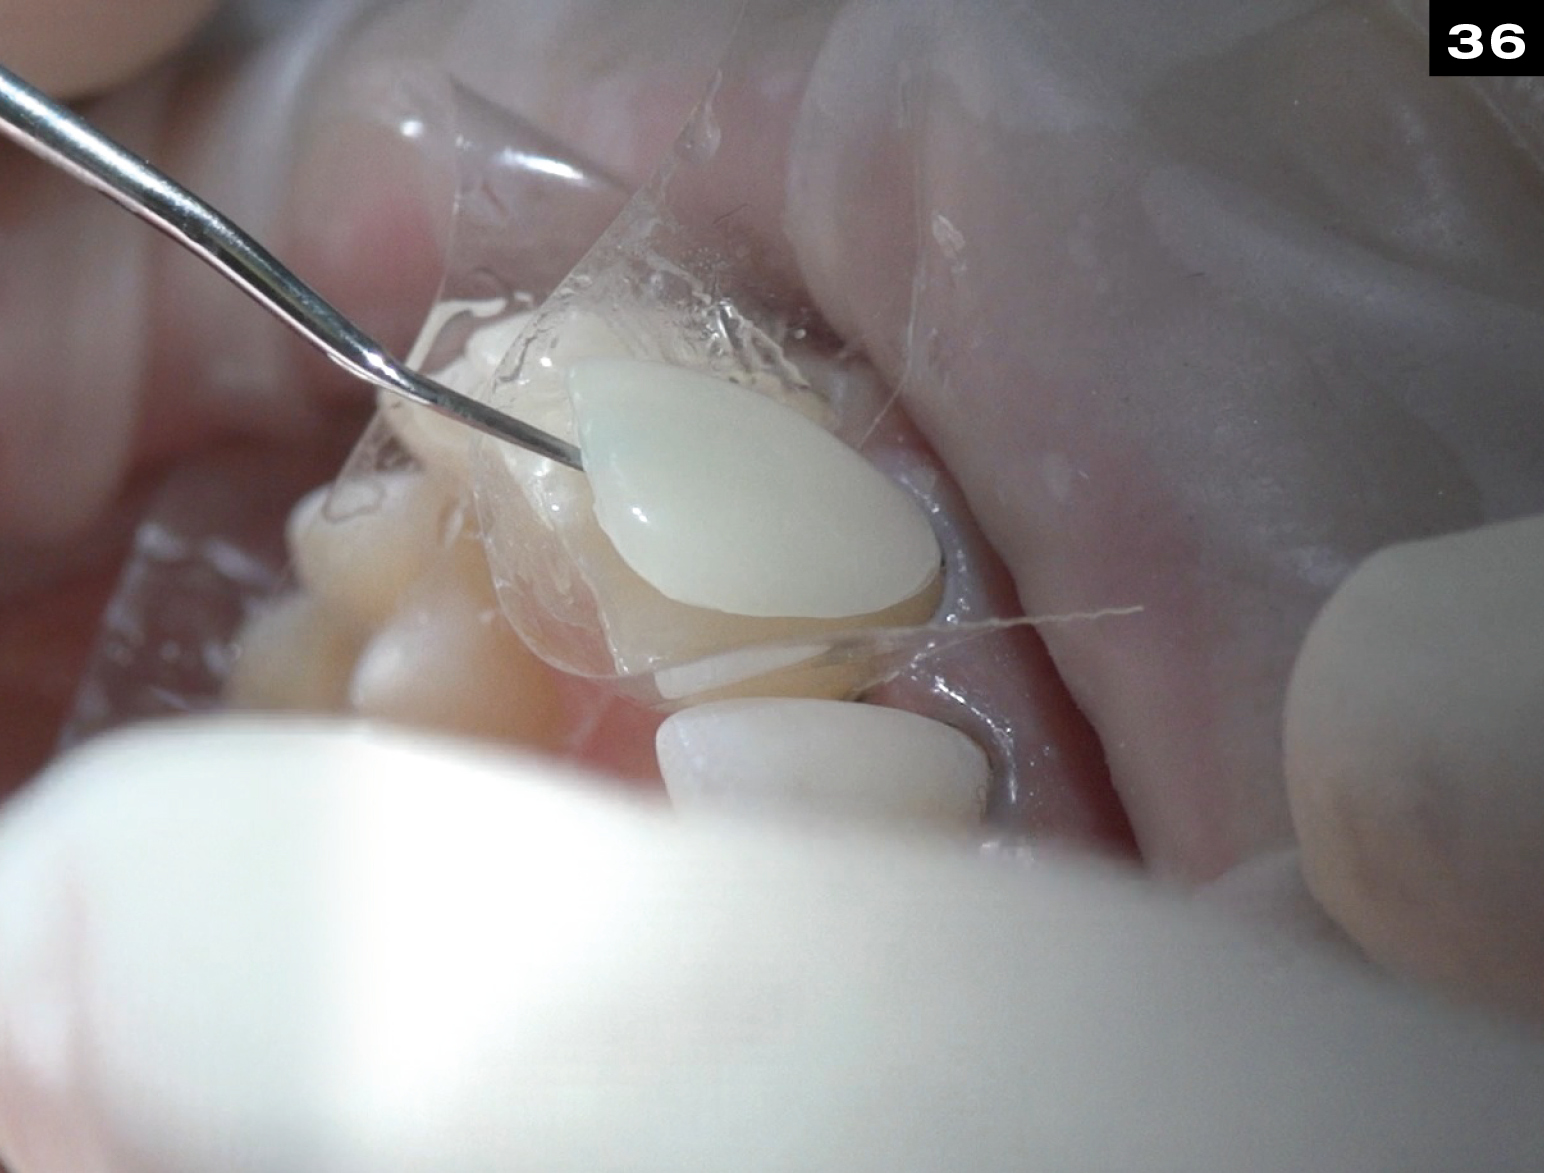
APPLICATION OF VENEER
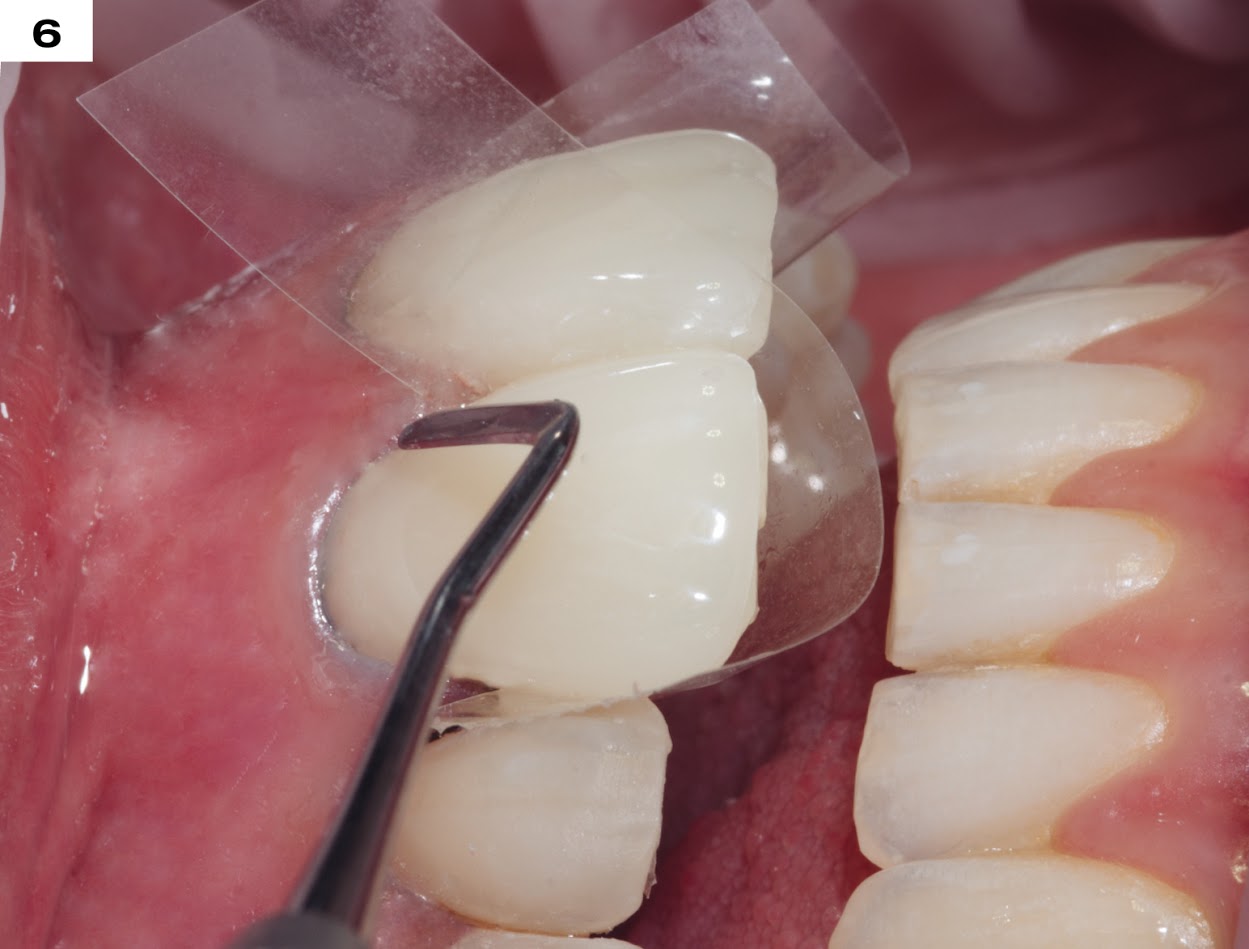
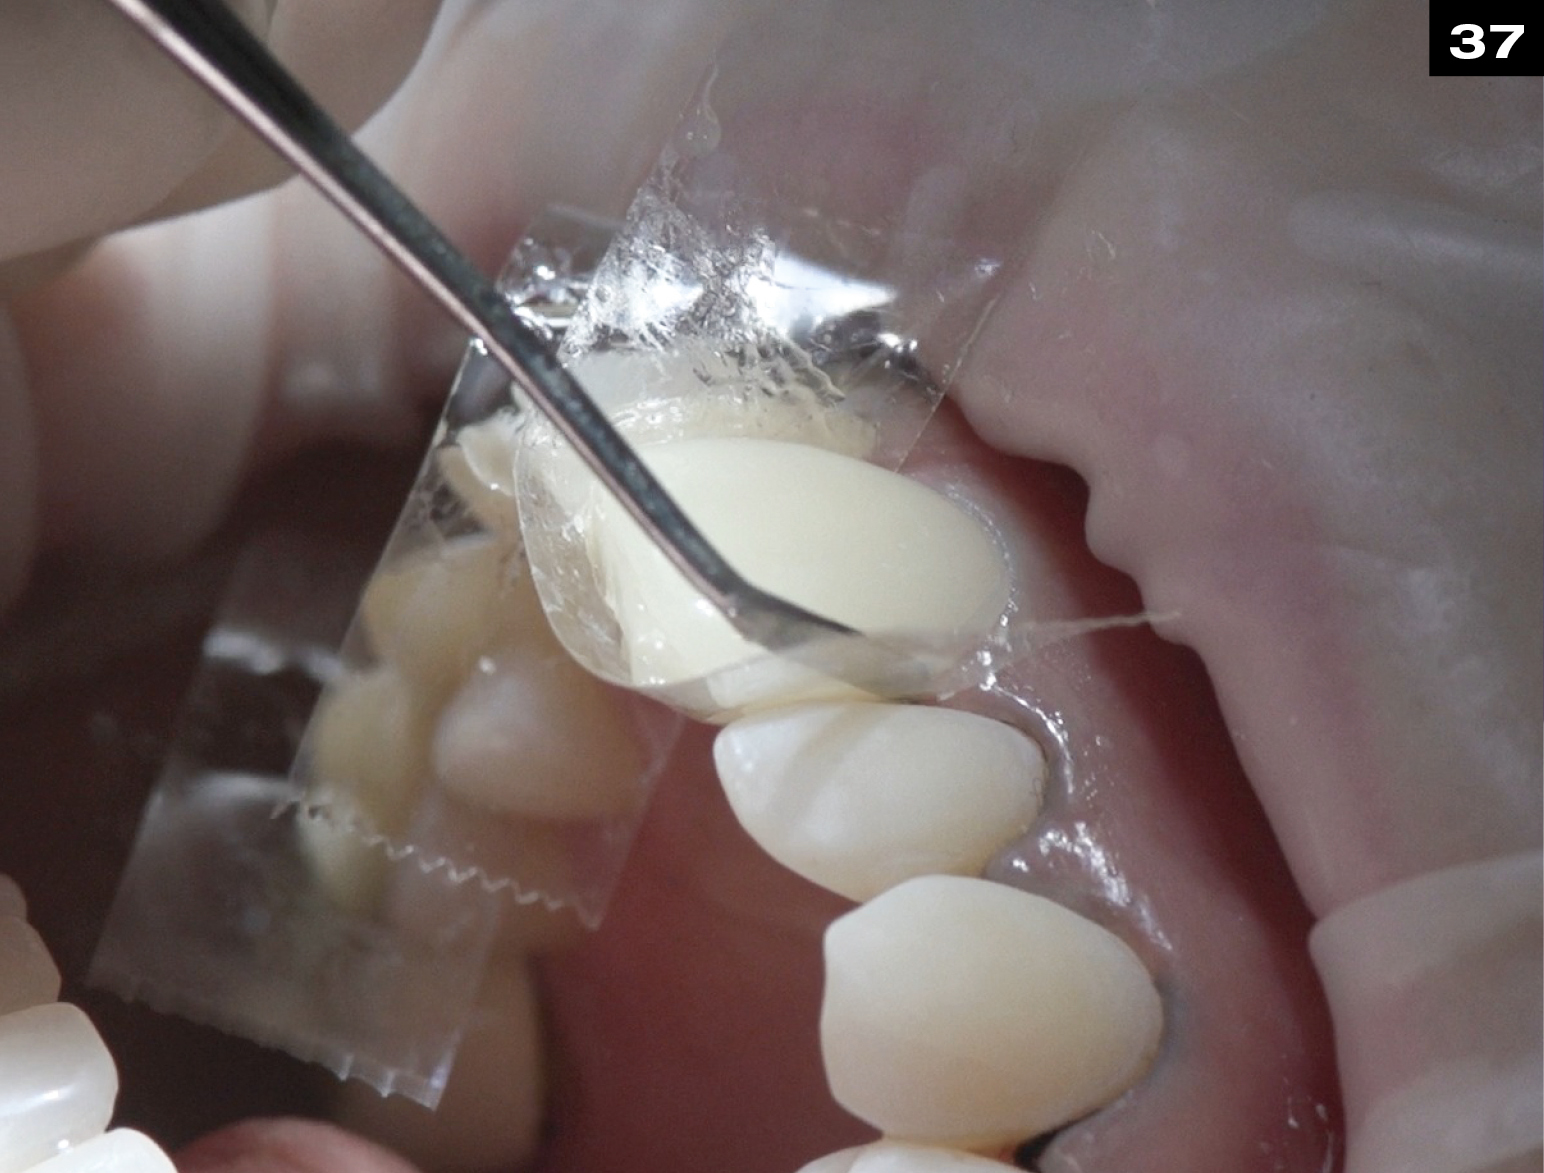
FINISH INTERPROXIMAL AREAS USING FINISH SOFLEX DISCS
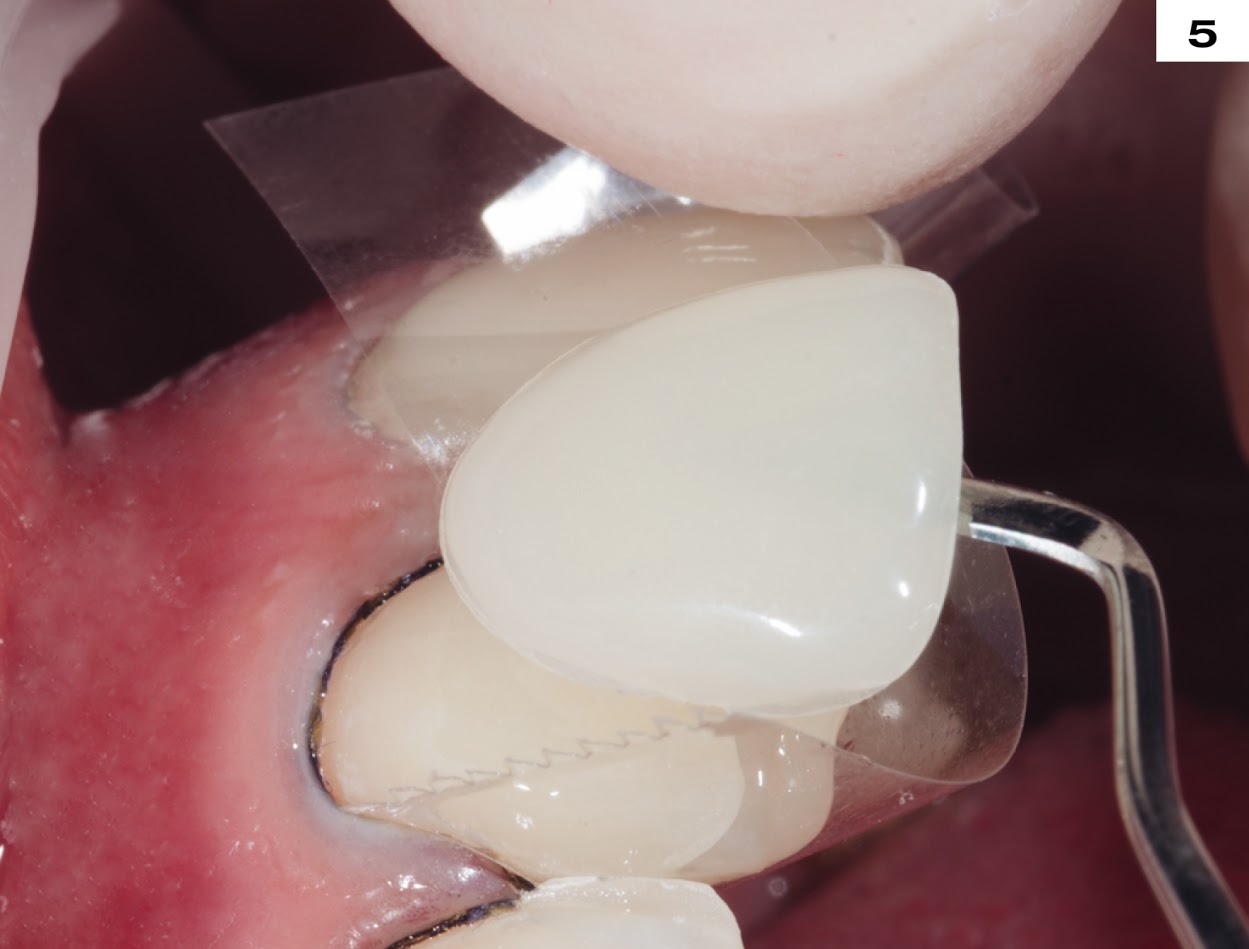
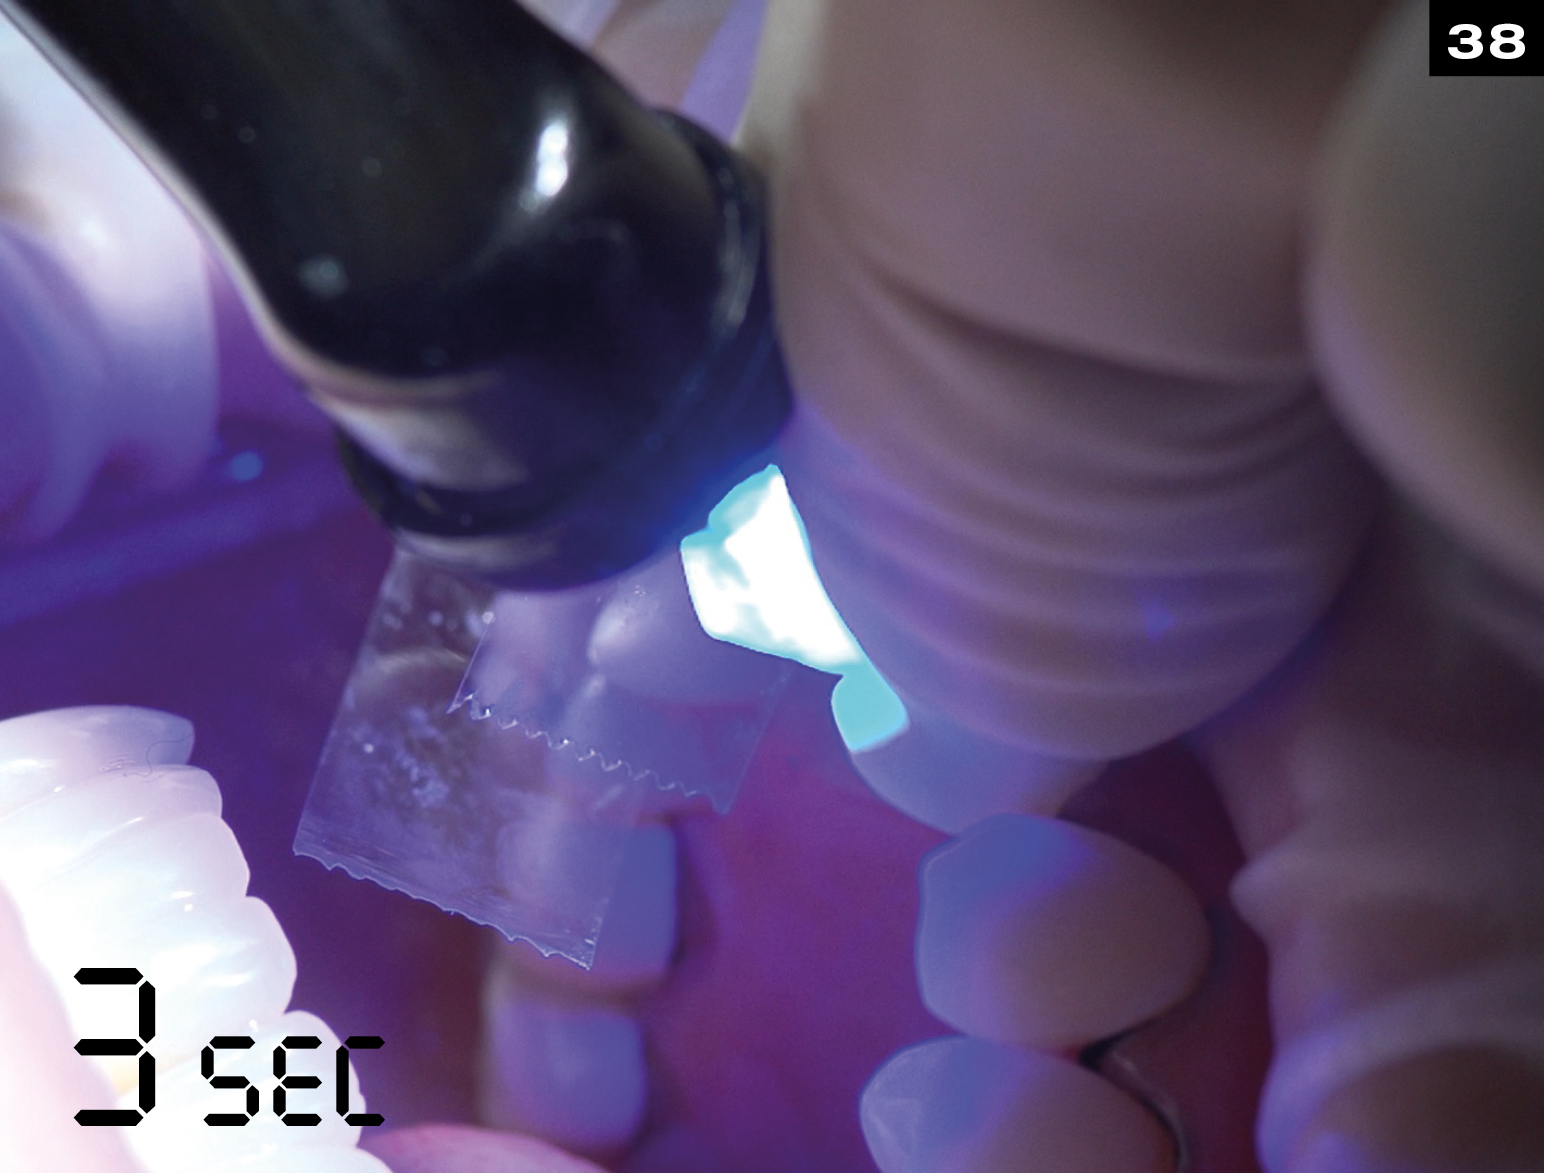
APPLICATION OF VENEER
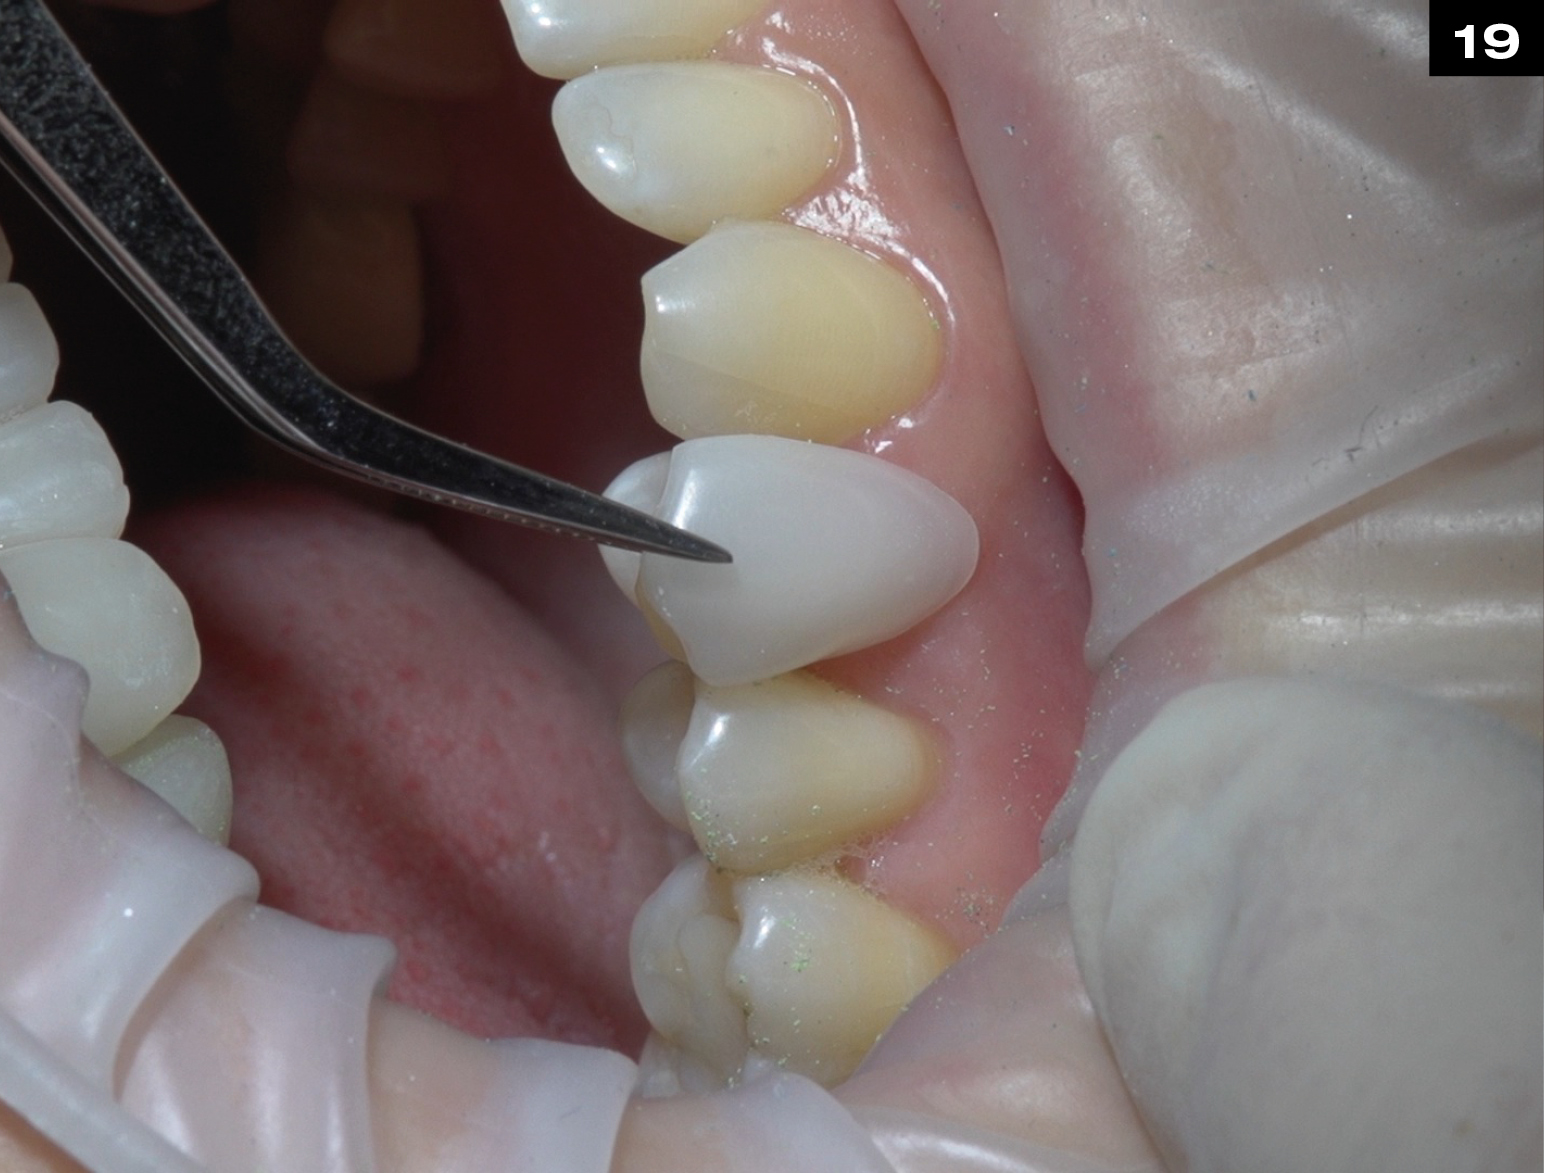
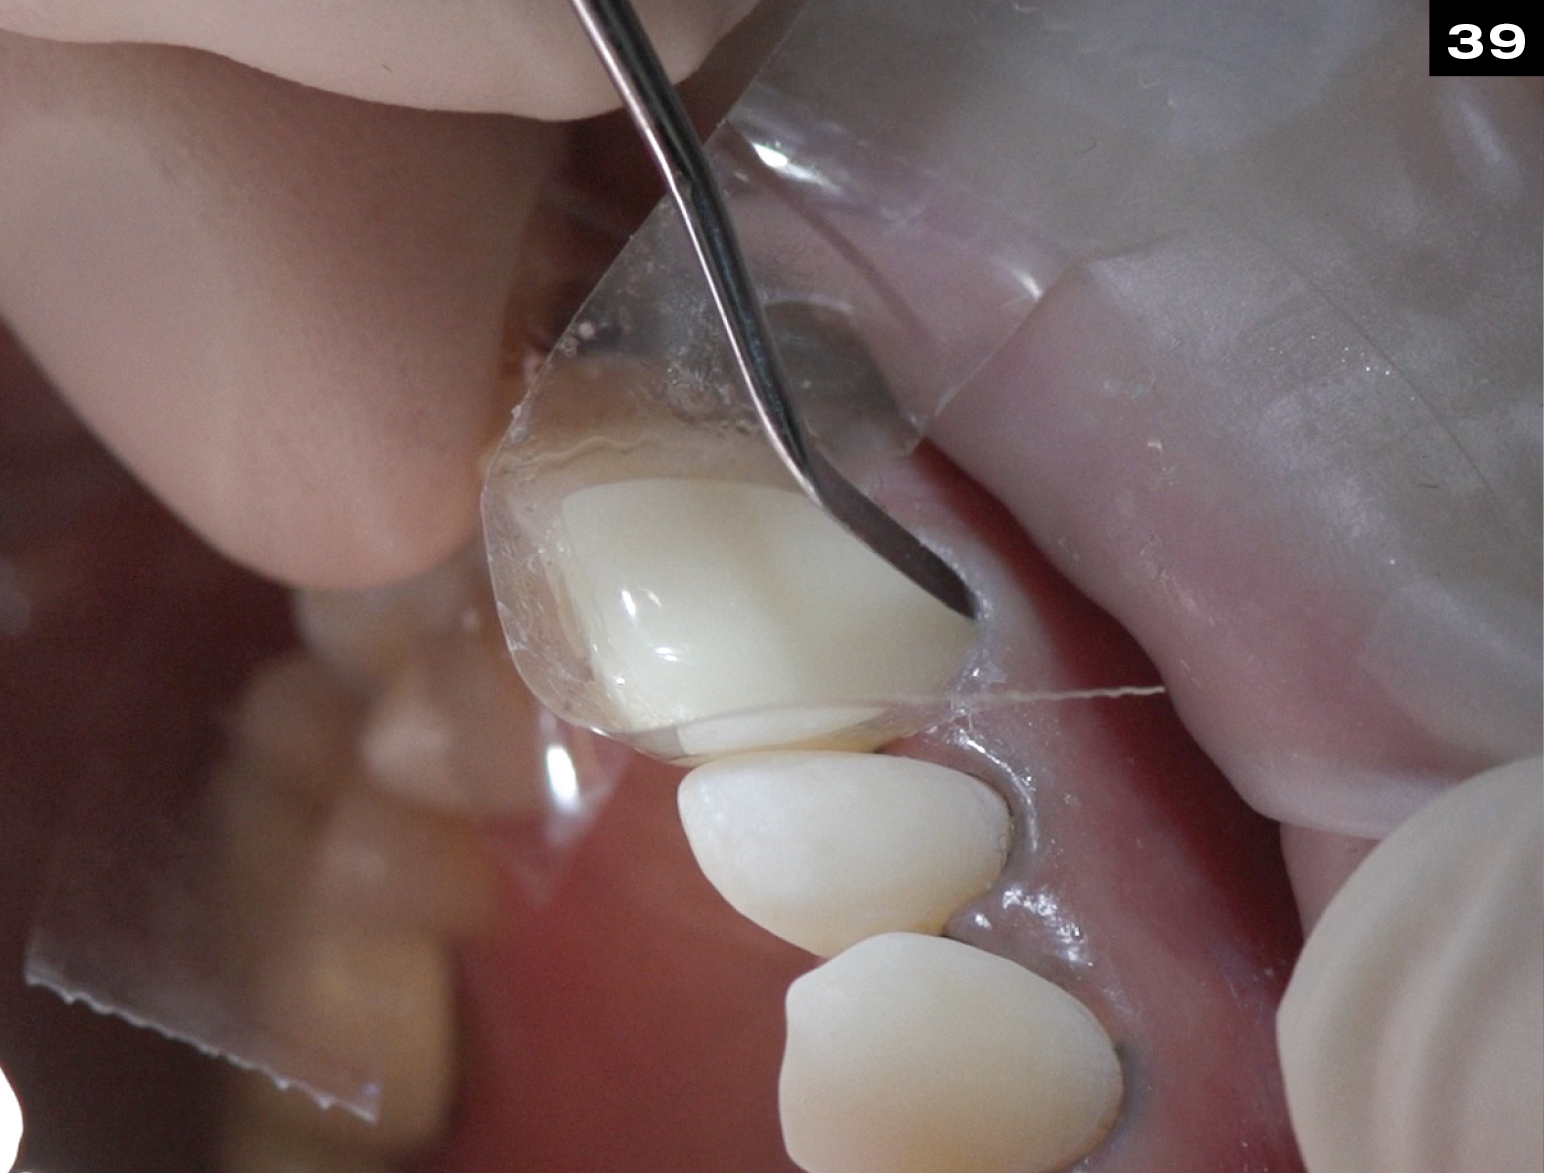
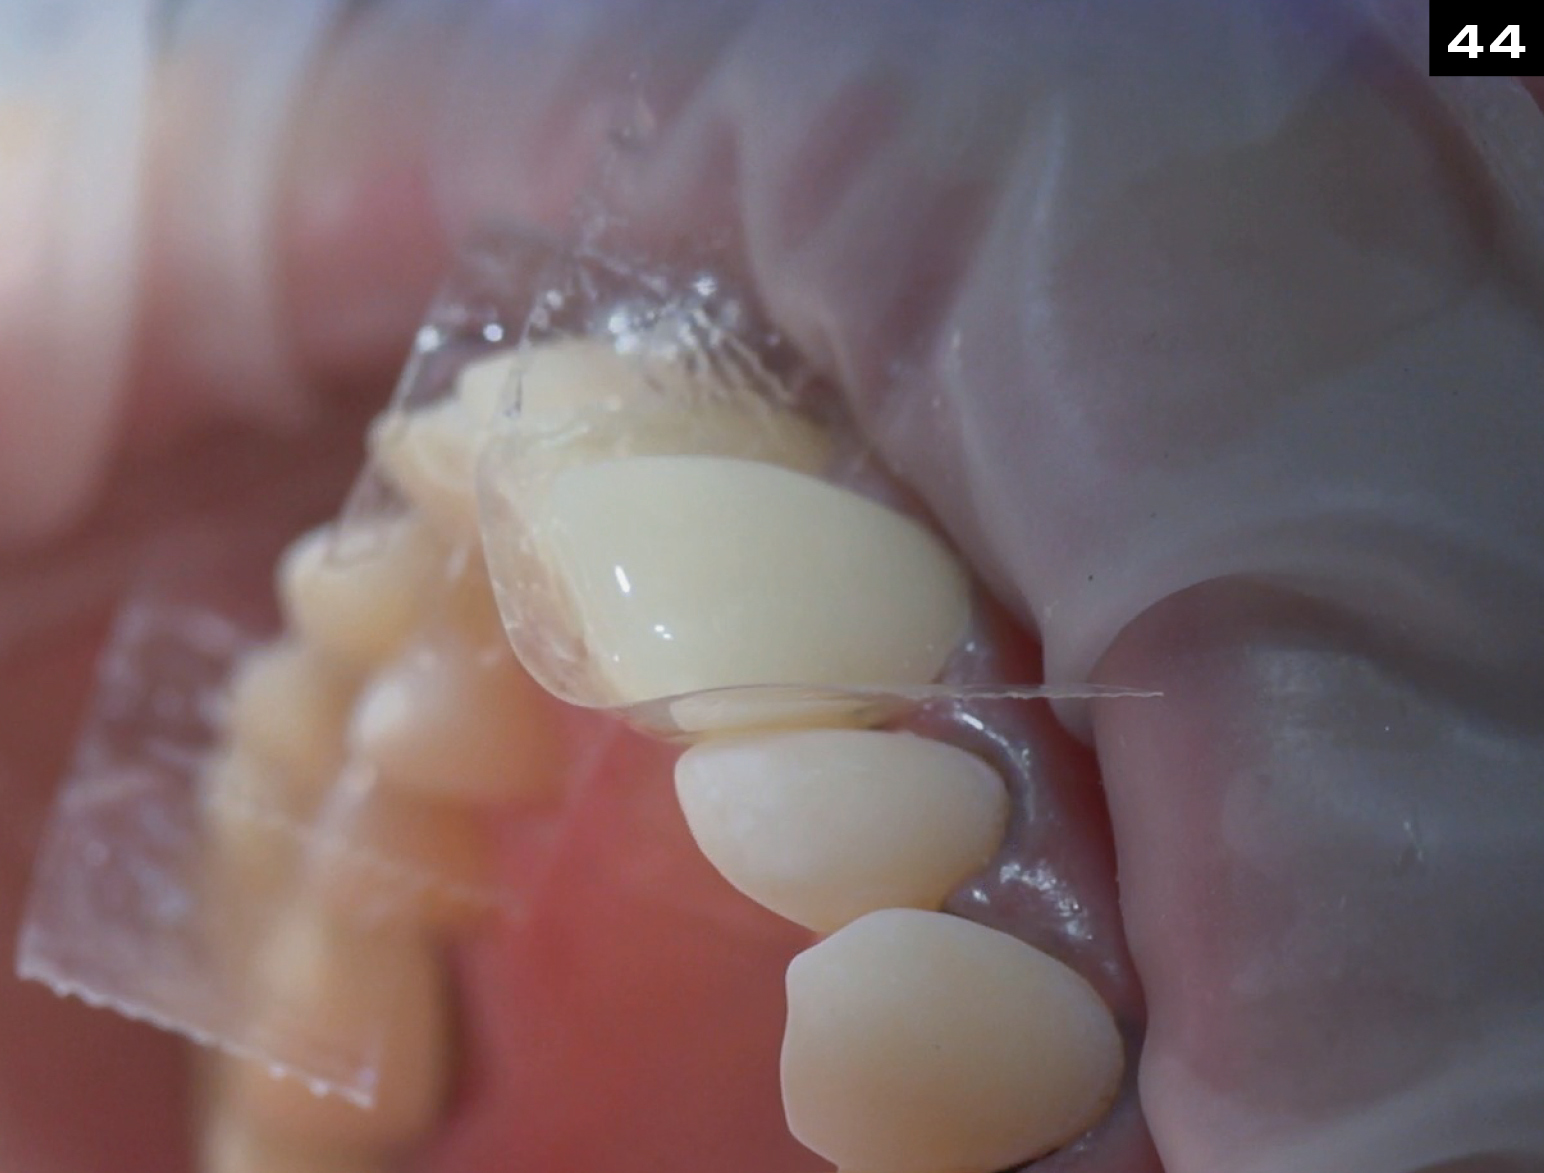
POSITION & PRESS THE VENEER INTO PLACE
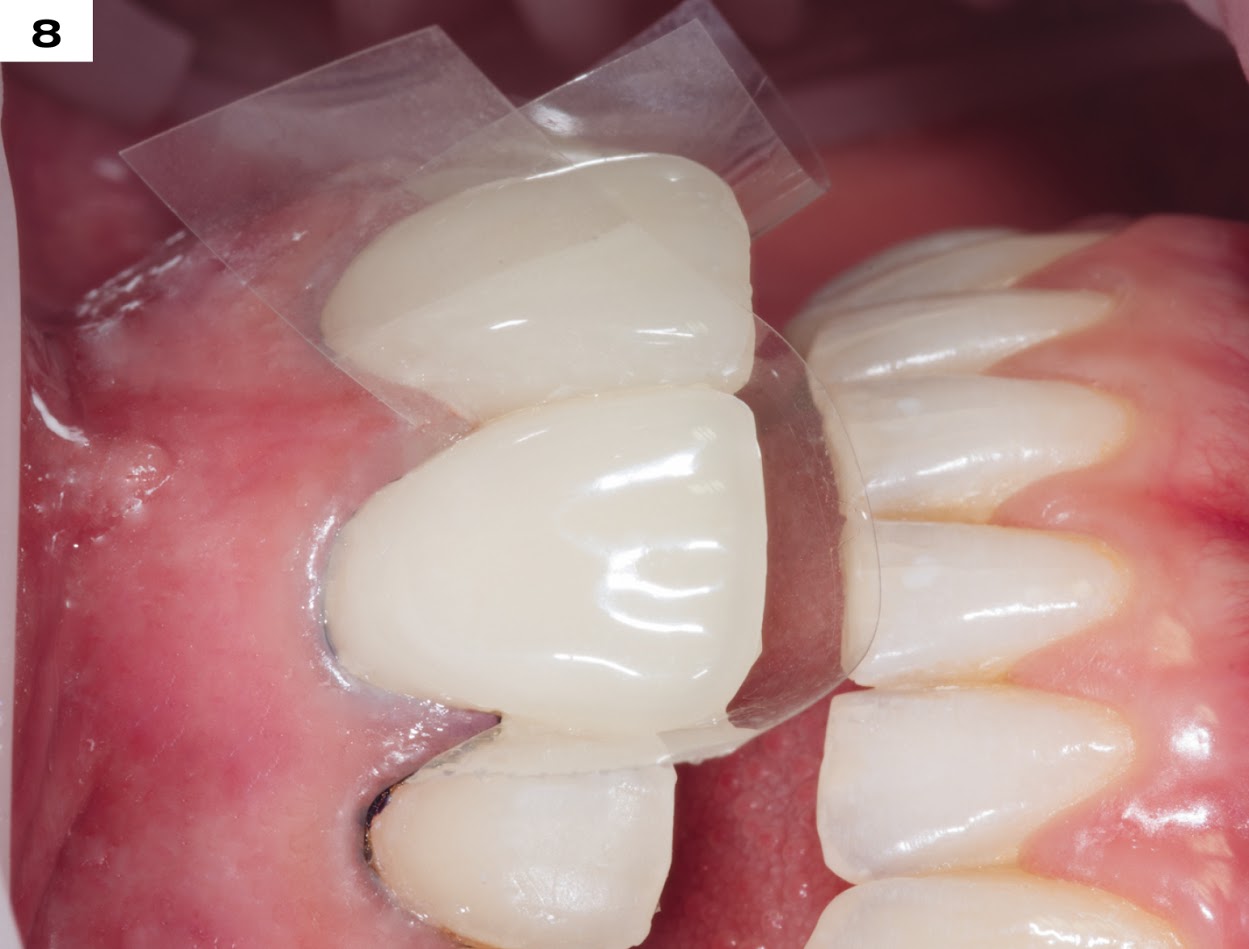
FINAL POSTOPERATIVE SITUATION

BEFORE

AFTER
BEFORE
AFTER
BEFORE
AFTER

BEFORE

AFTER
BEFORE
AFTER

BEFORE

AFTER
BEFORE
AFTER
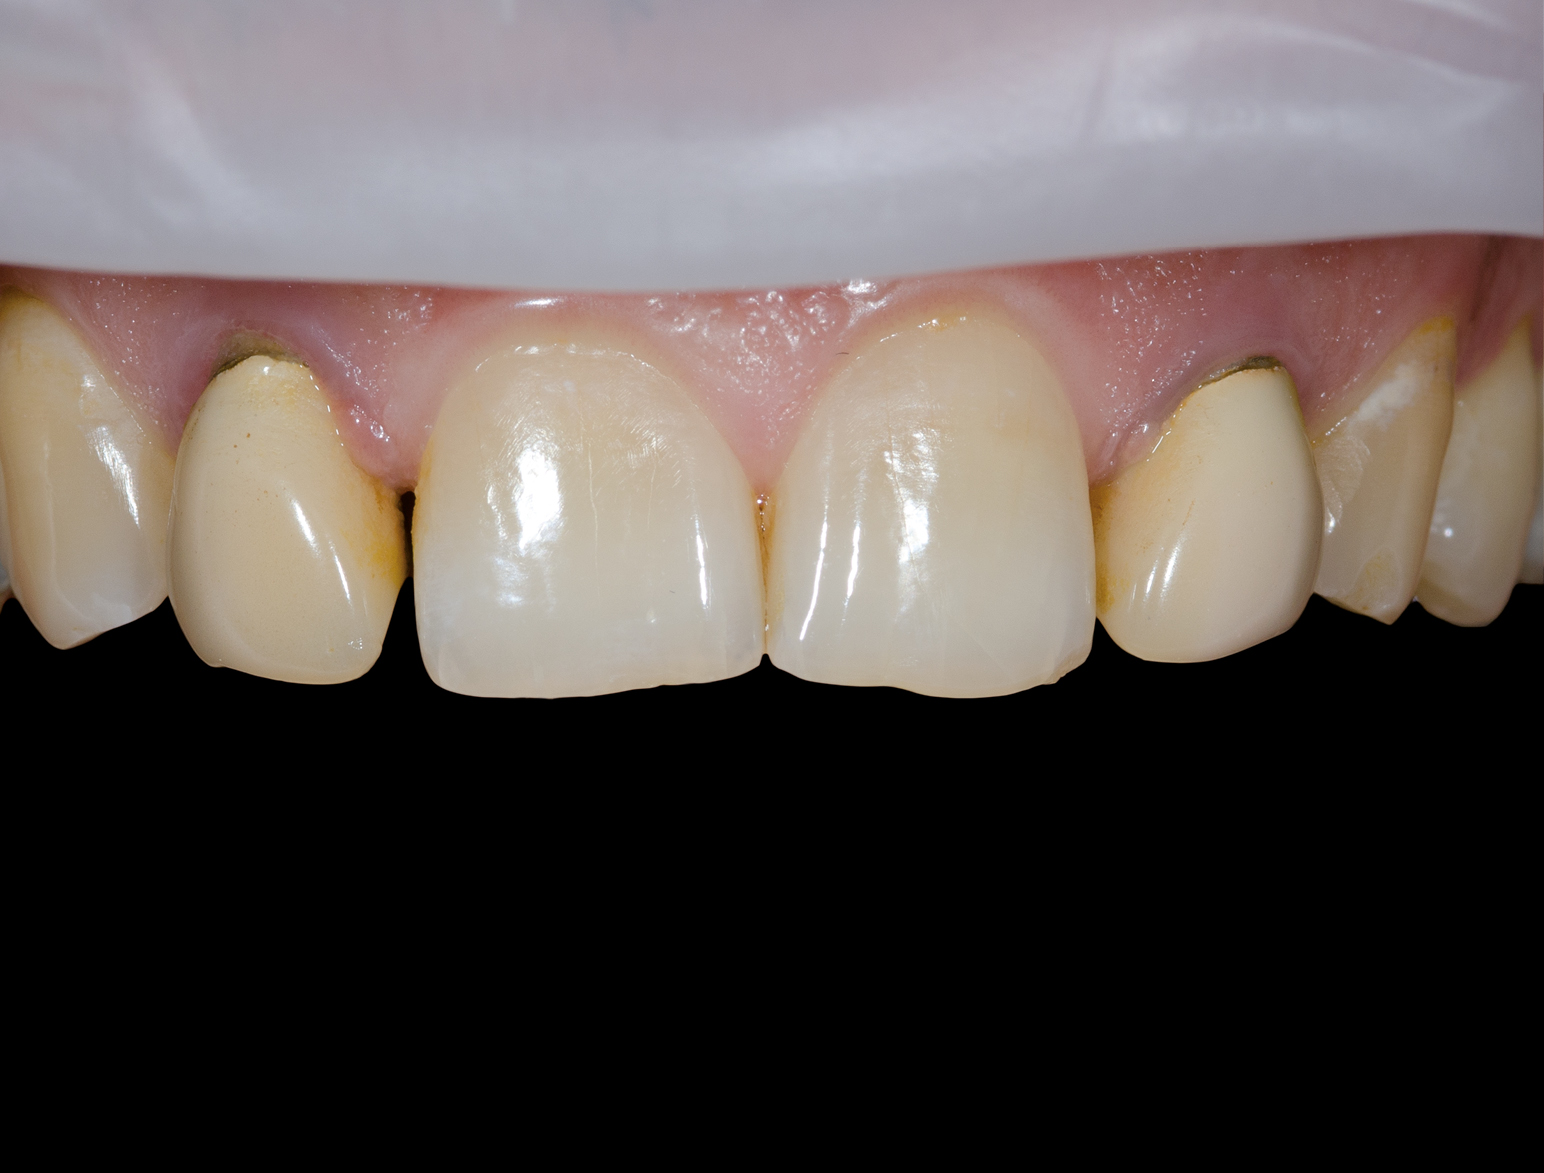
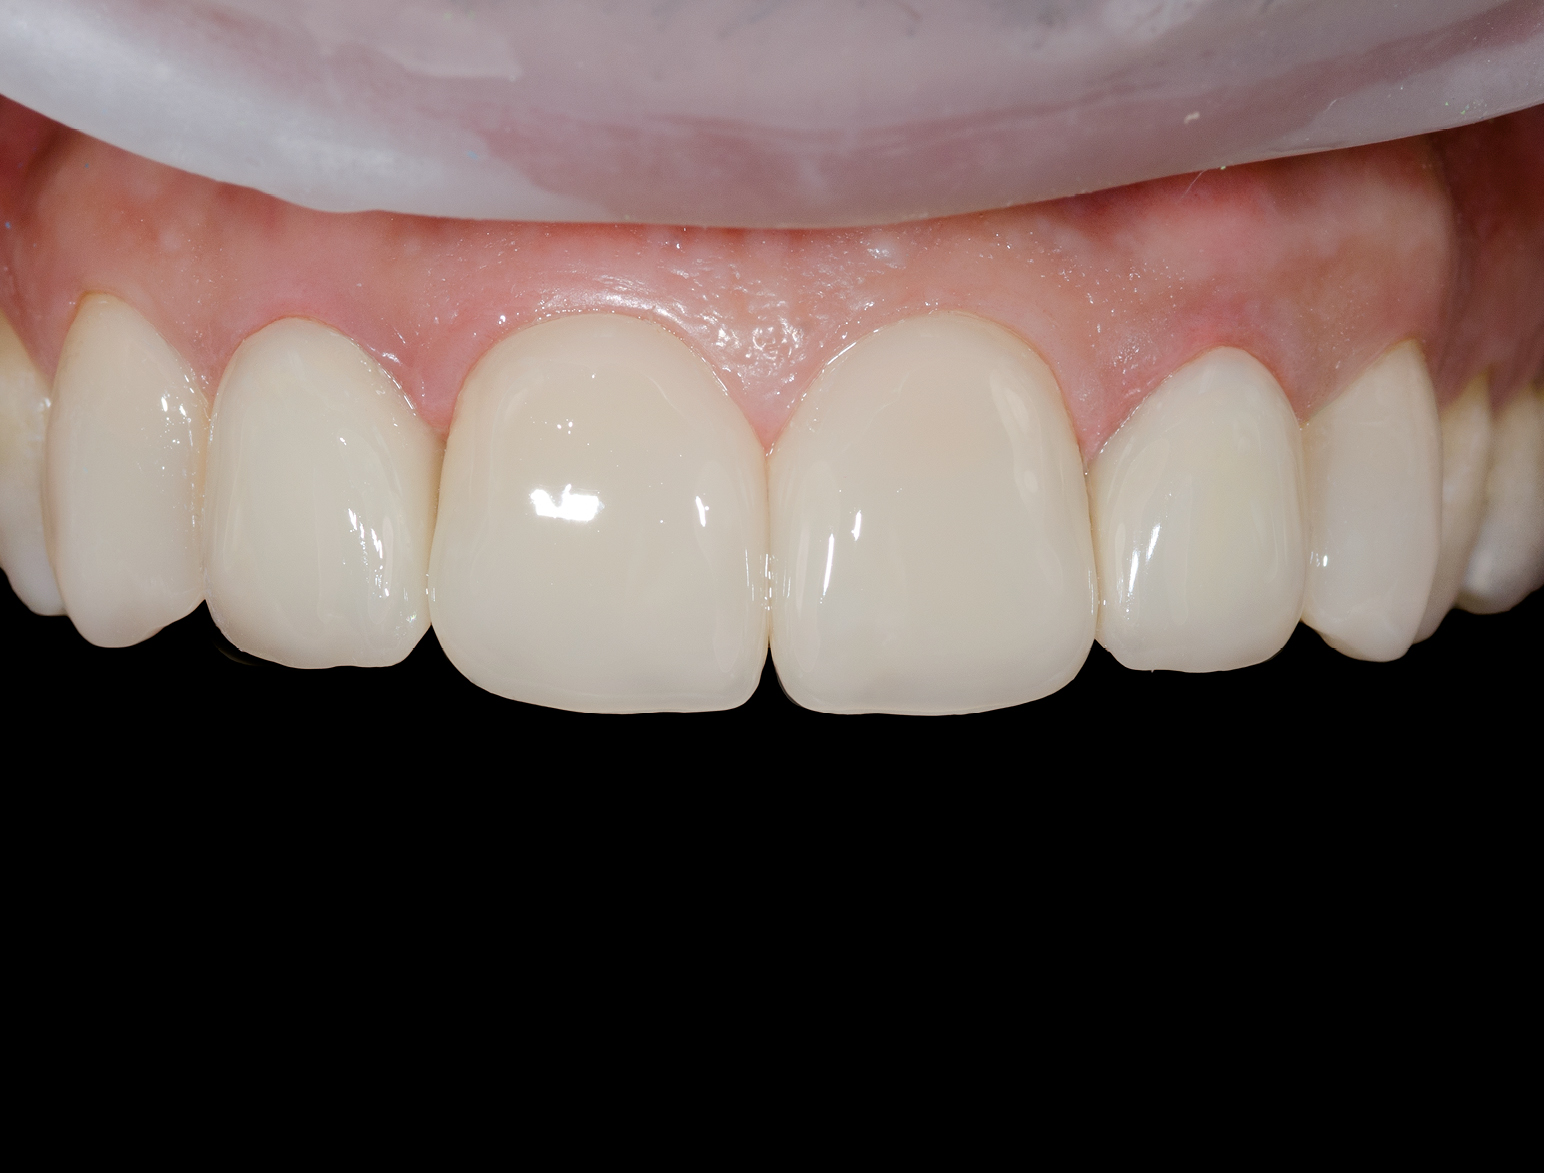
DIASTEMA / CARIES
BEFORE & AFTER / STEP BY STEP
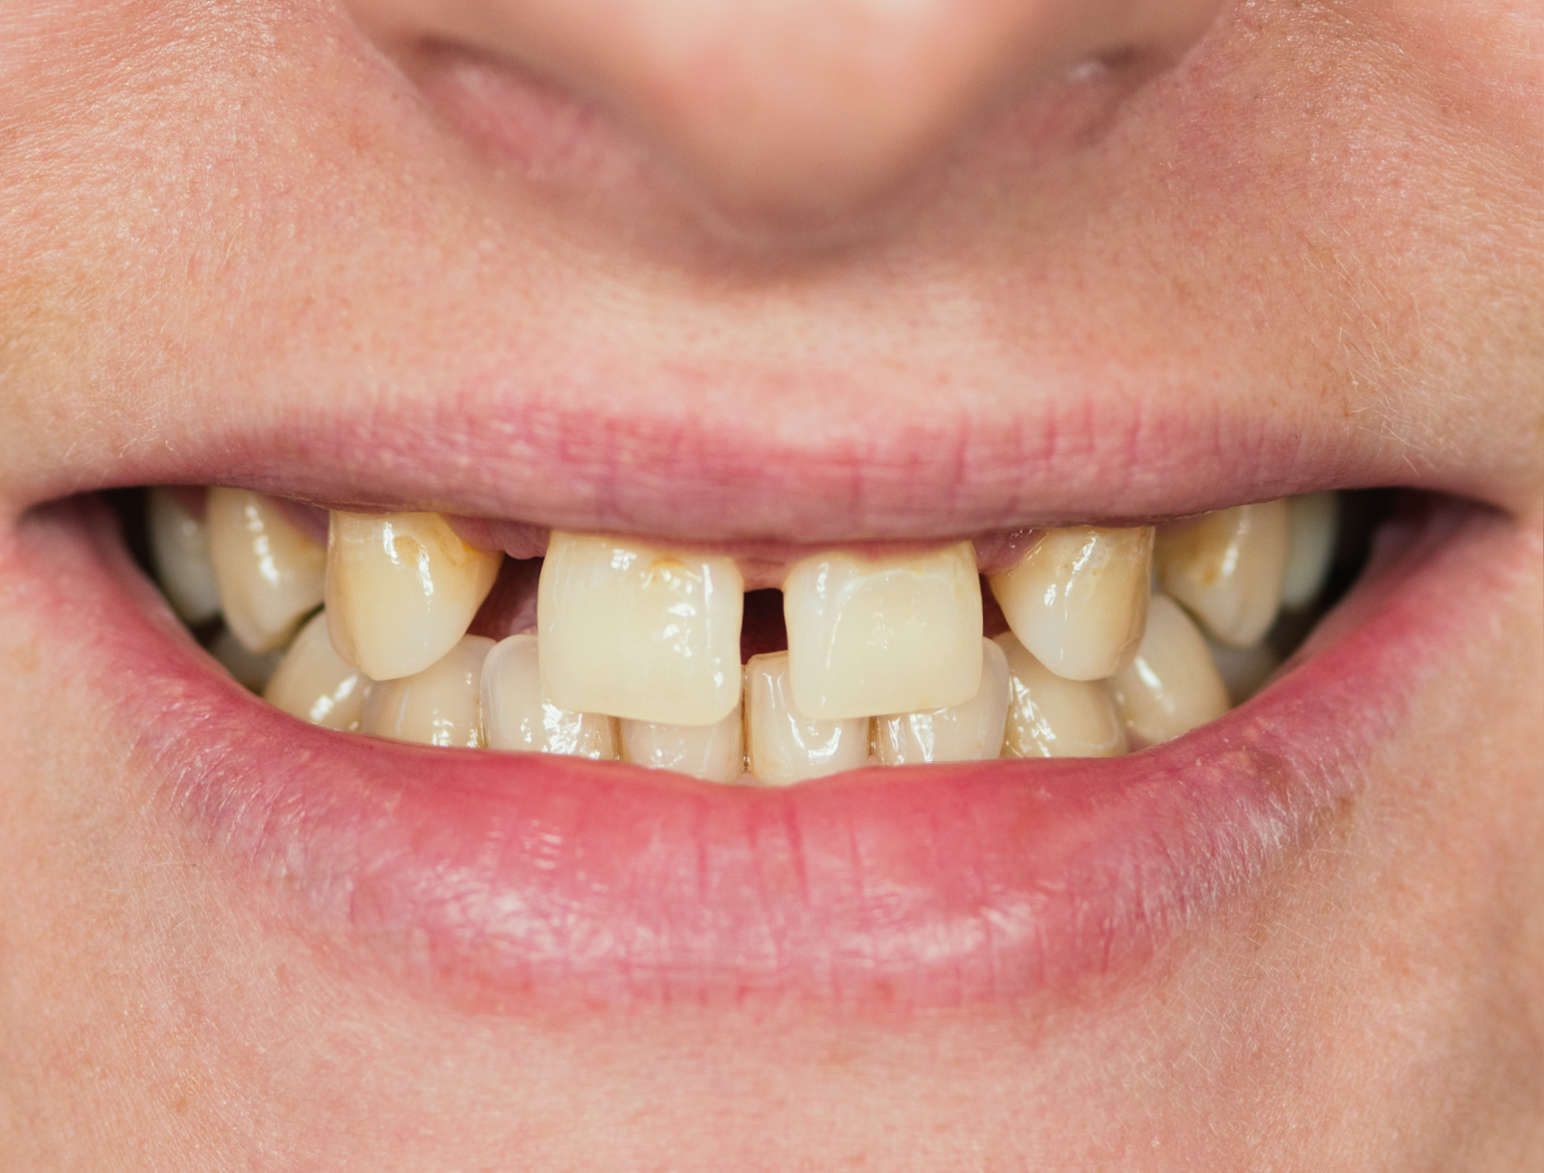
BEFORE
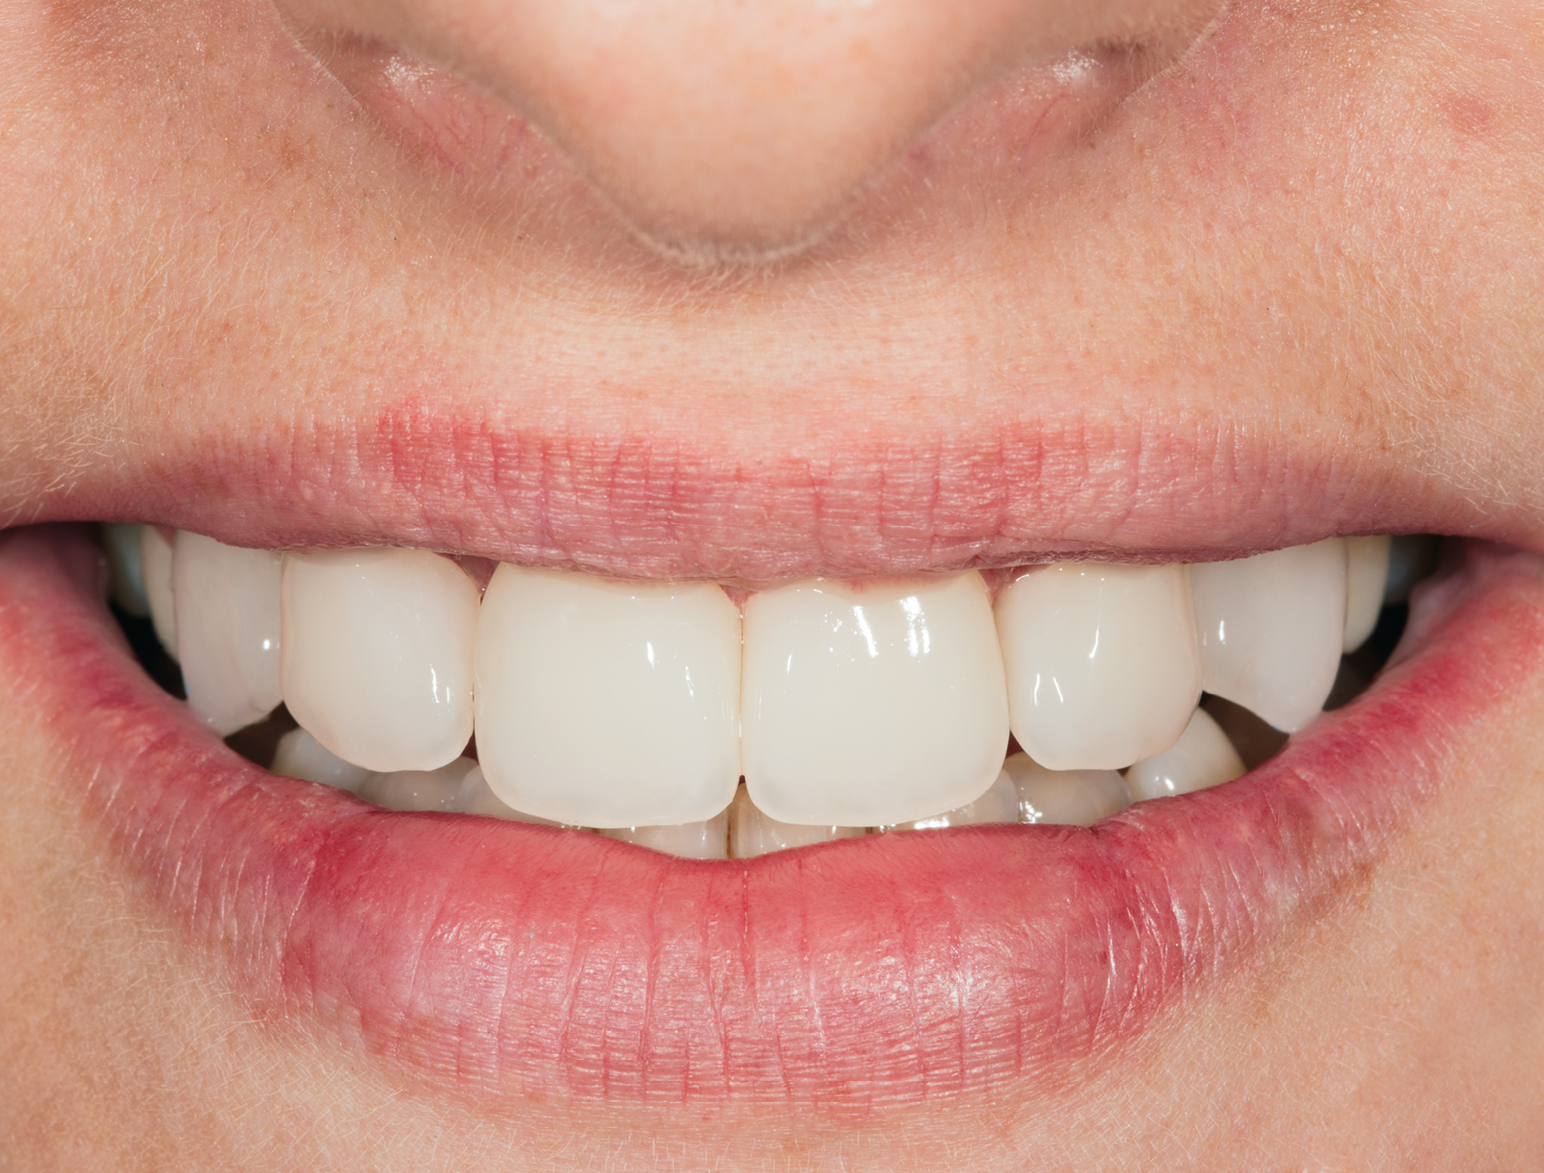
AFTER
BEFORE
AFTER
ANATOMICAL DEFORMITIES
BEFORE & AFTER / STEP BY STEP

BEFORE

AFTER
BEFORE
AFTER

BEFORE

AFTER
BEFORE
AFTER
MISALIGNED TEETH
BEFORE & AFTER / STEP BY STEP

BEFORE

AFTER
BEFORE
AFTER
ATTRITION / ABRASION
BEFORE & AFTER / STEP BY STEP

BEFORE

AFTER
BEFORE
AFTER

BEFORE

AFTER
BEFORE
AFTER
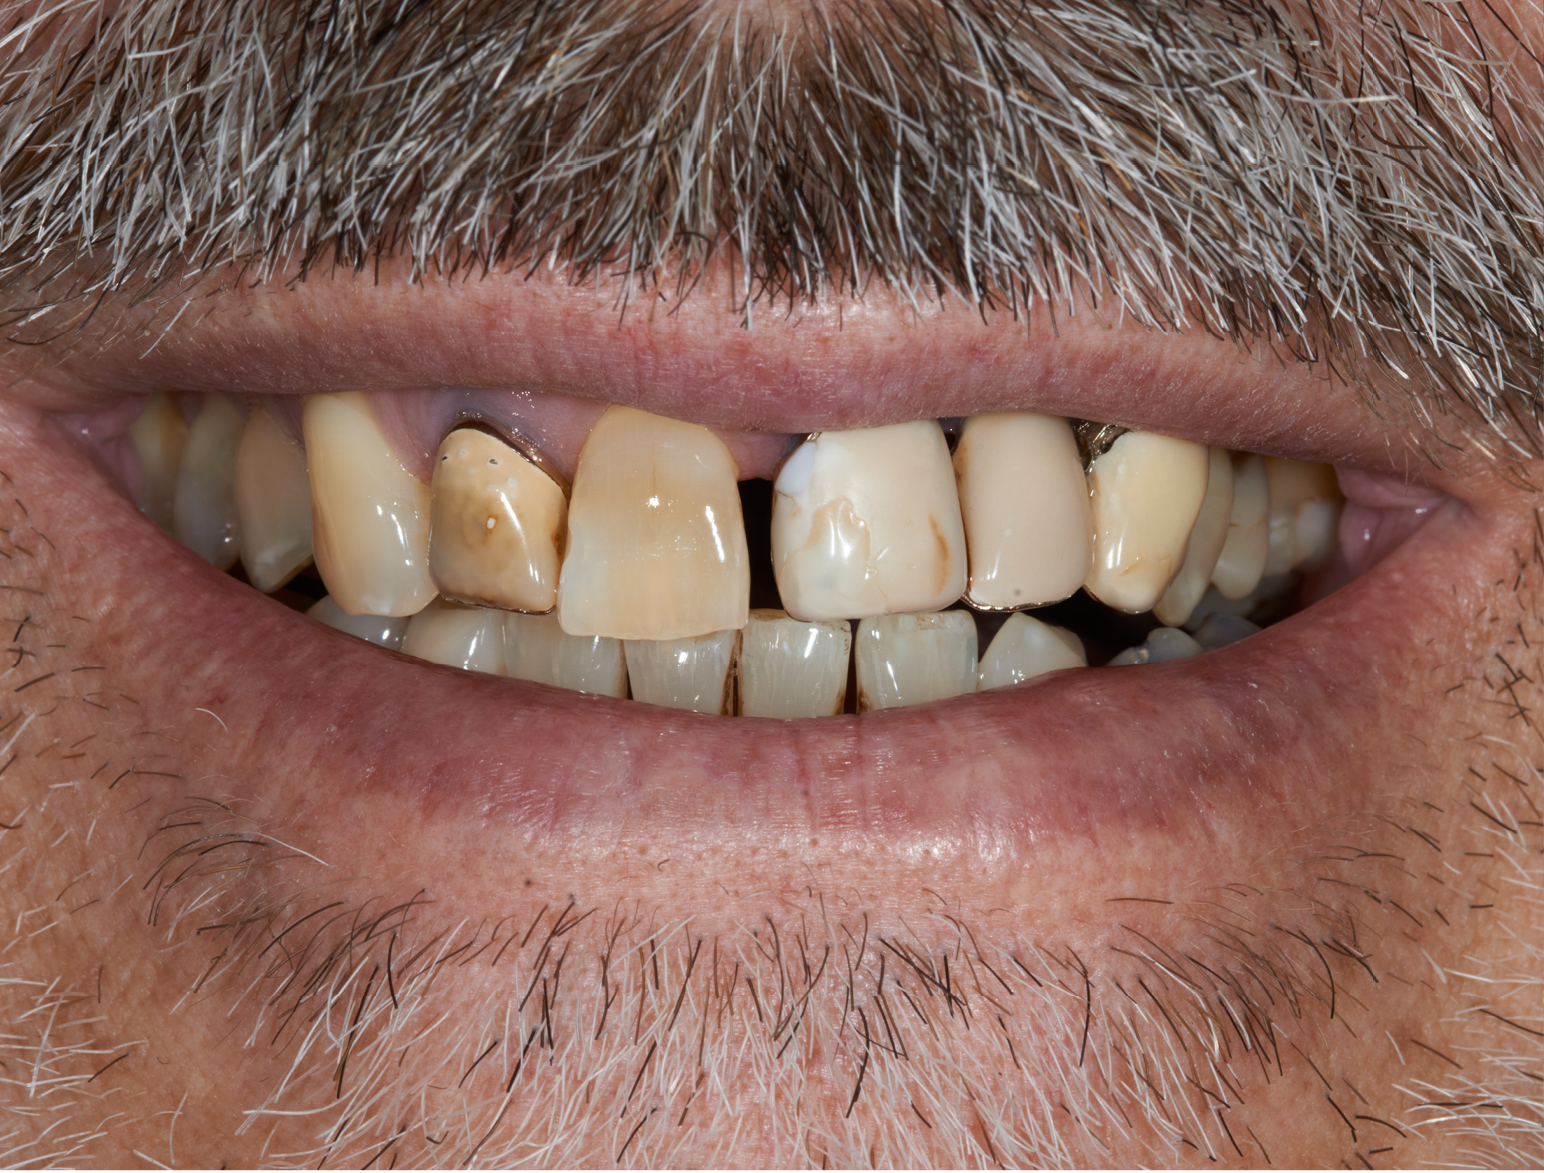
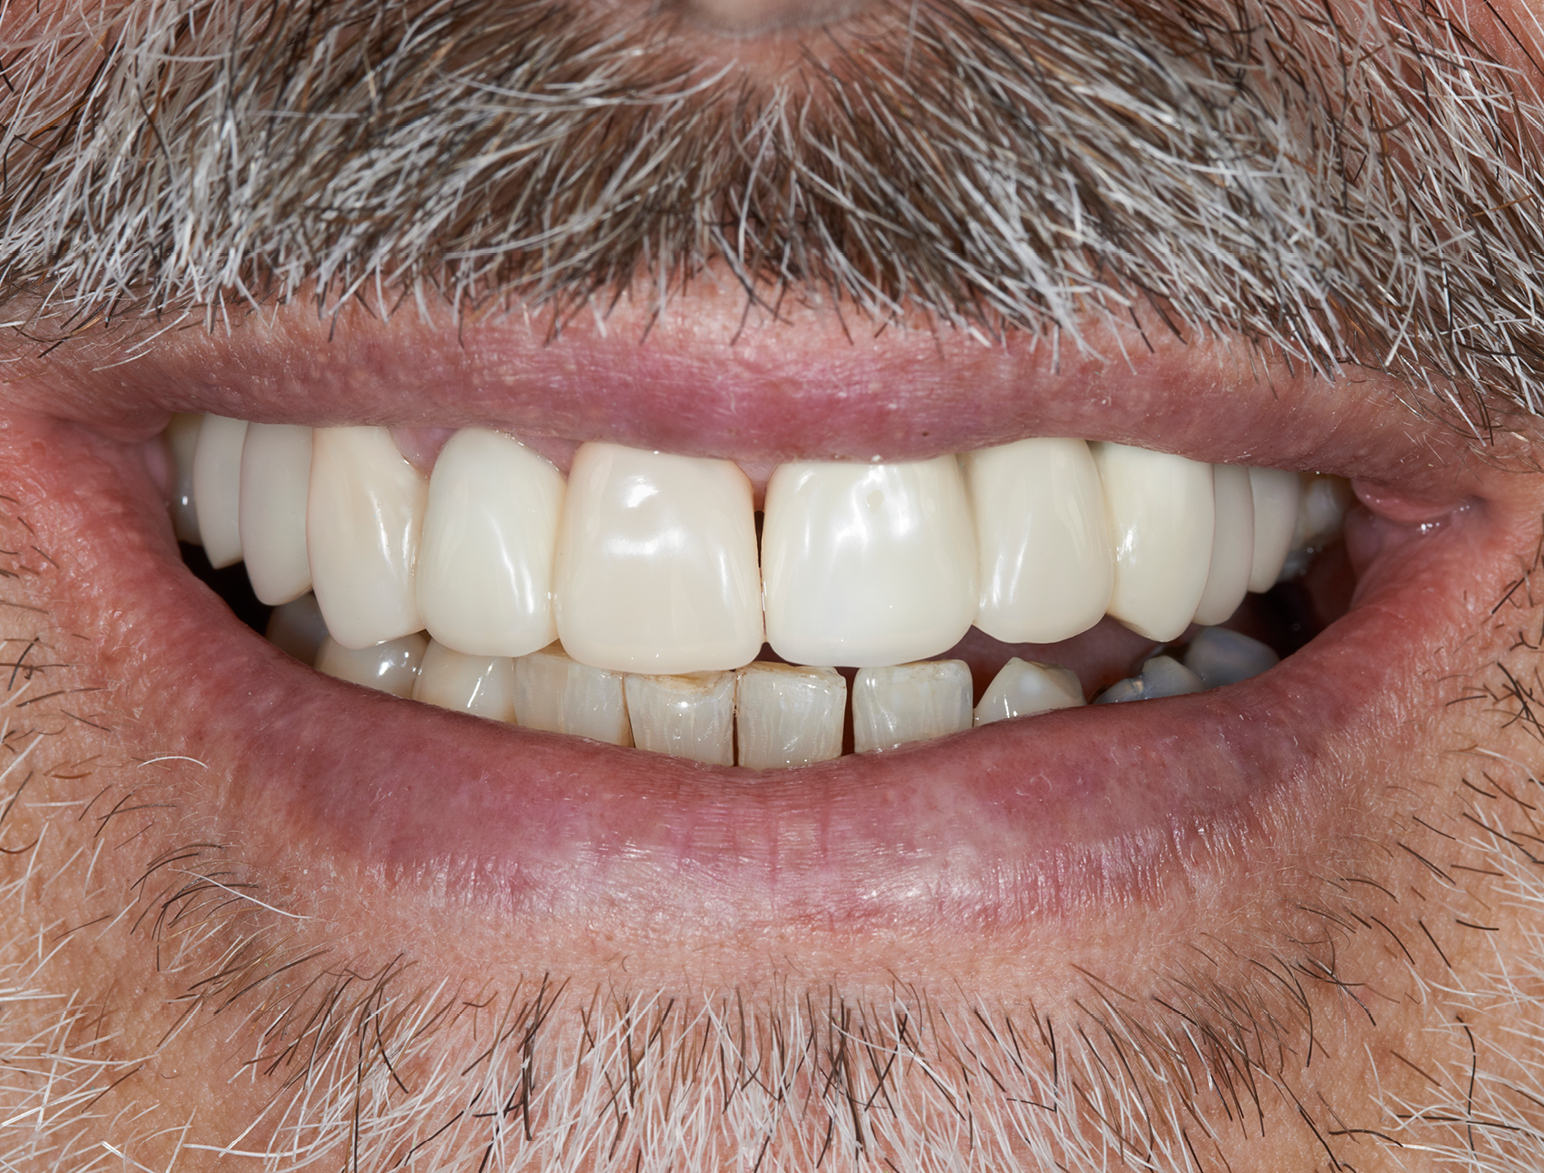
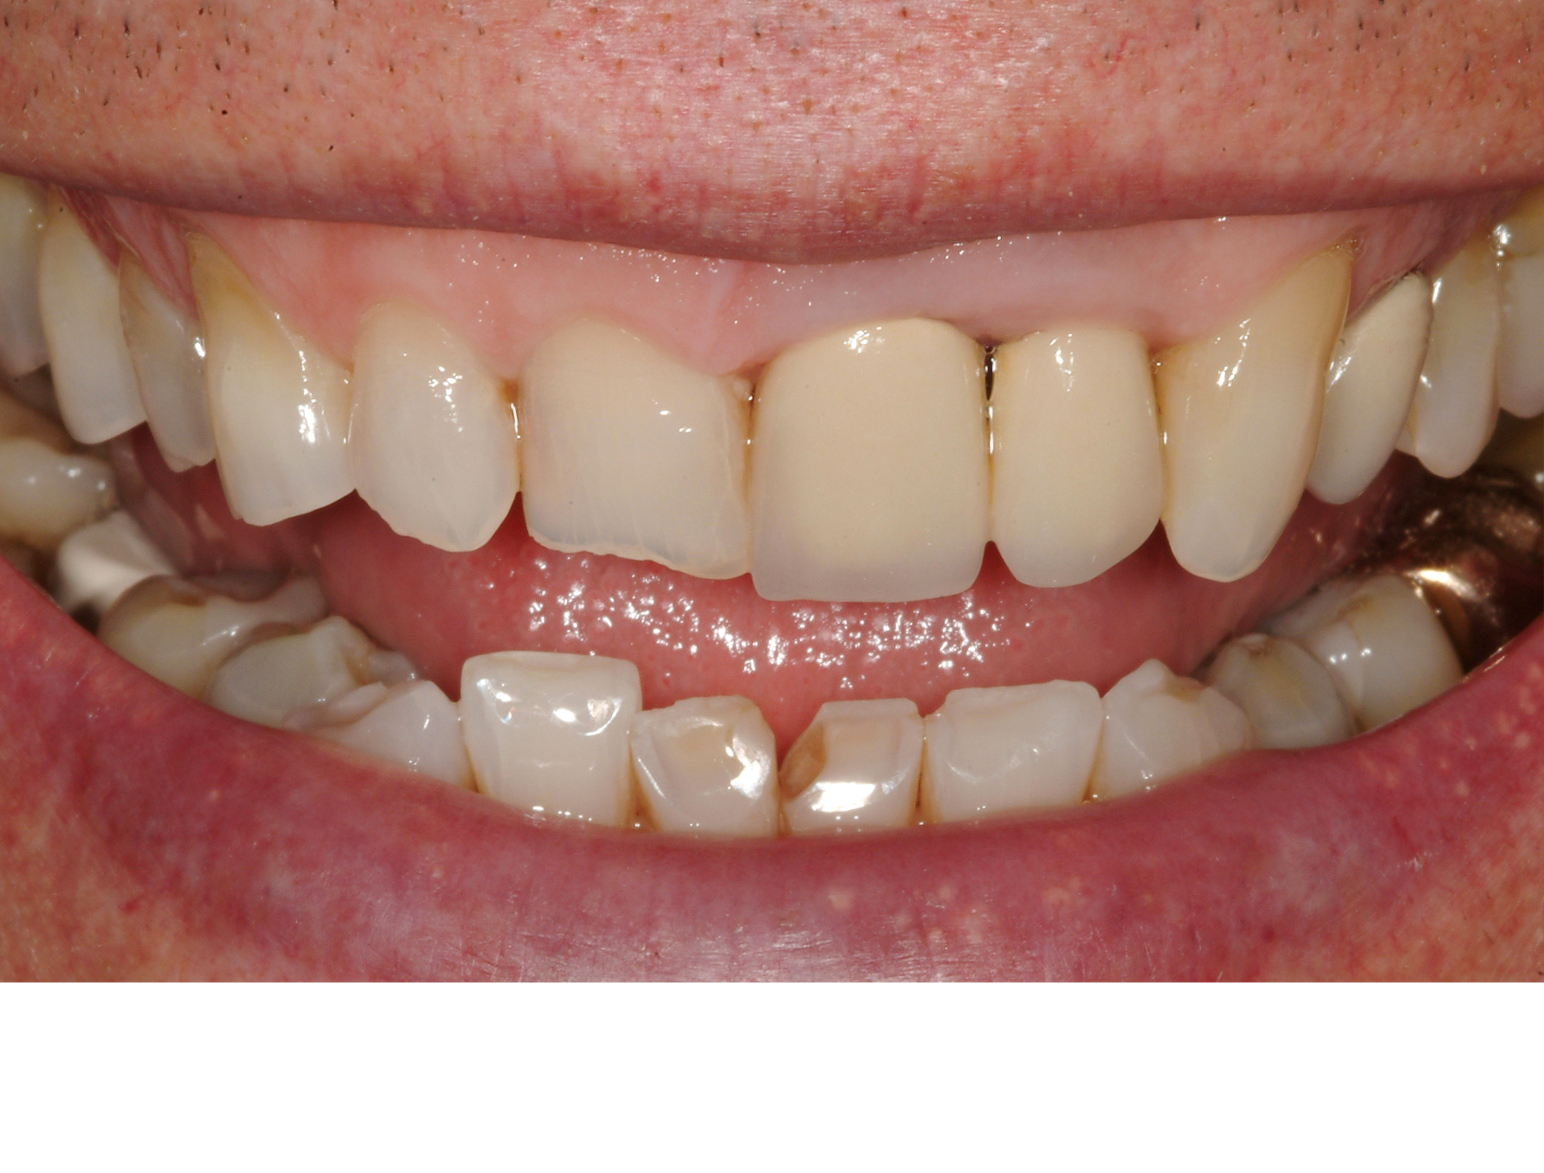
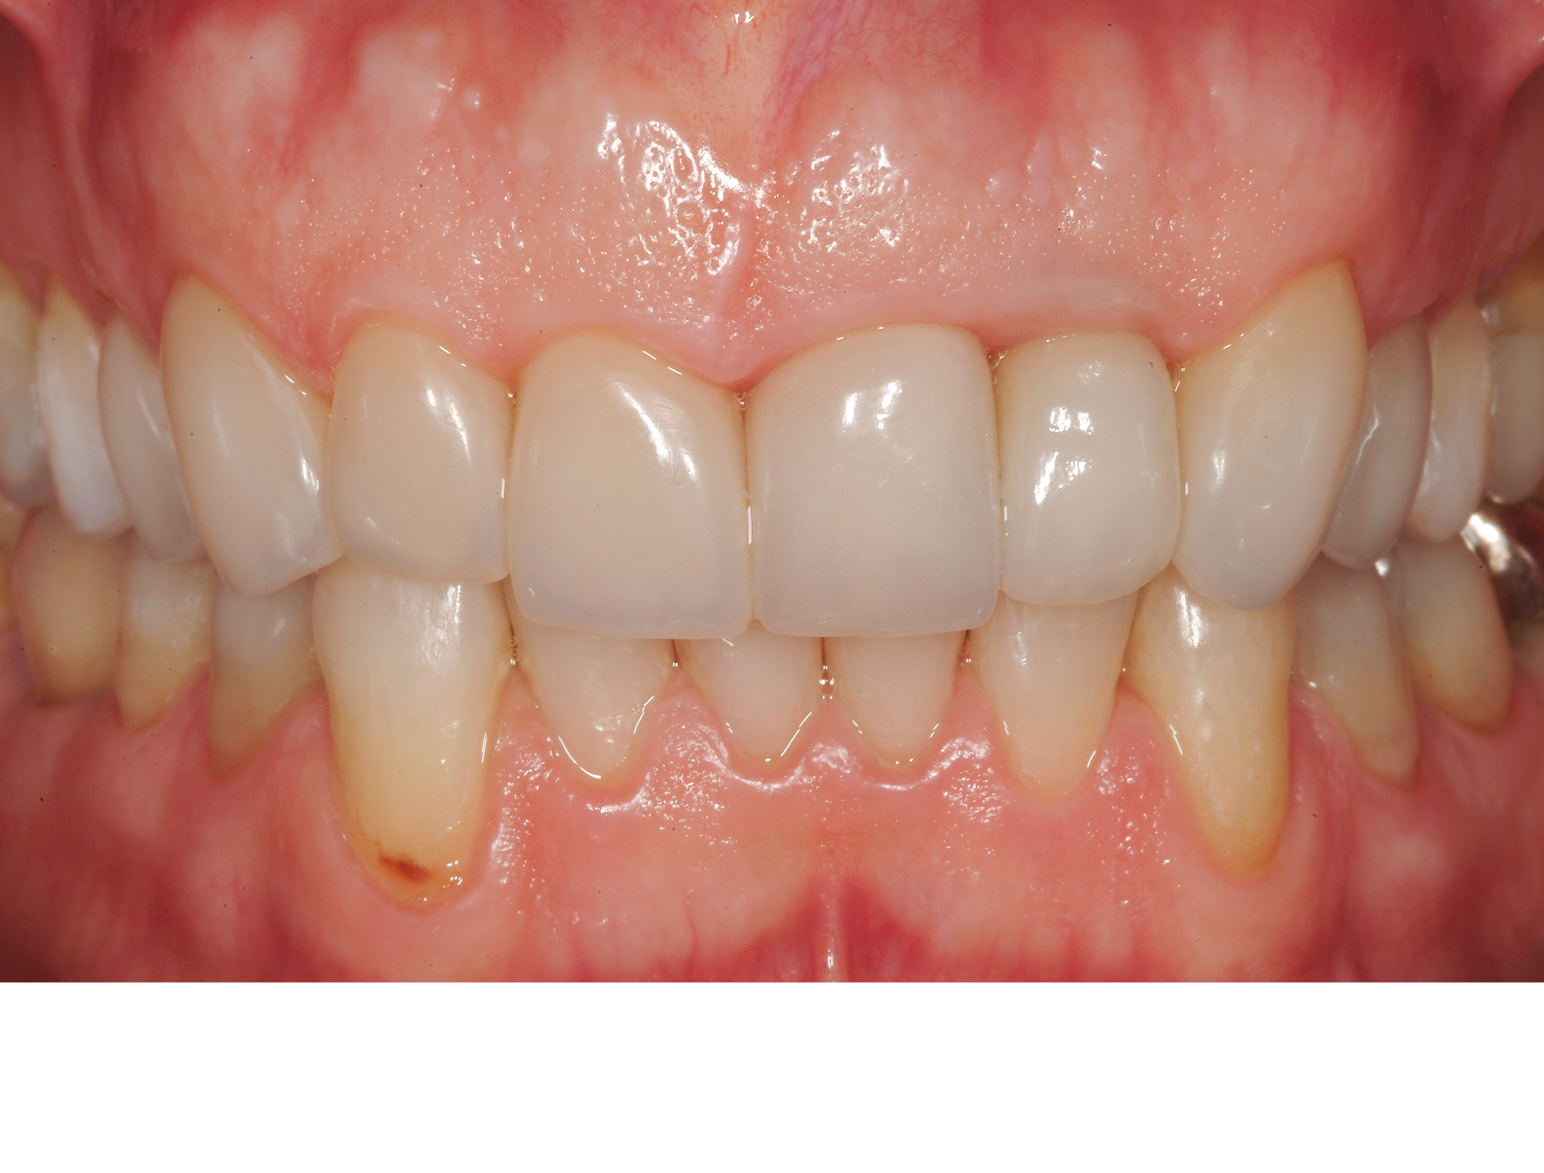
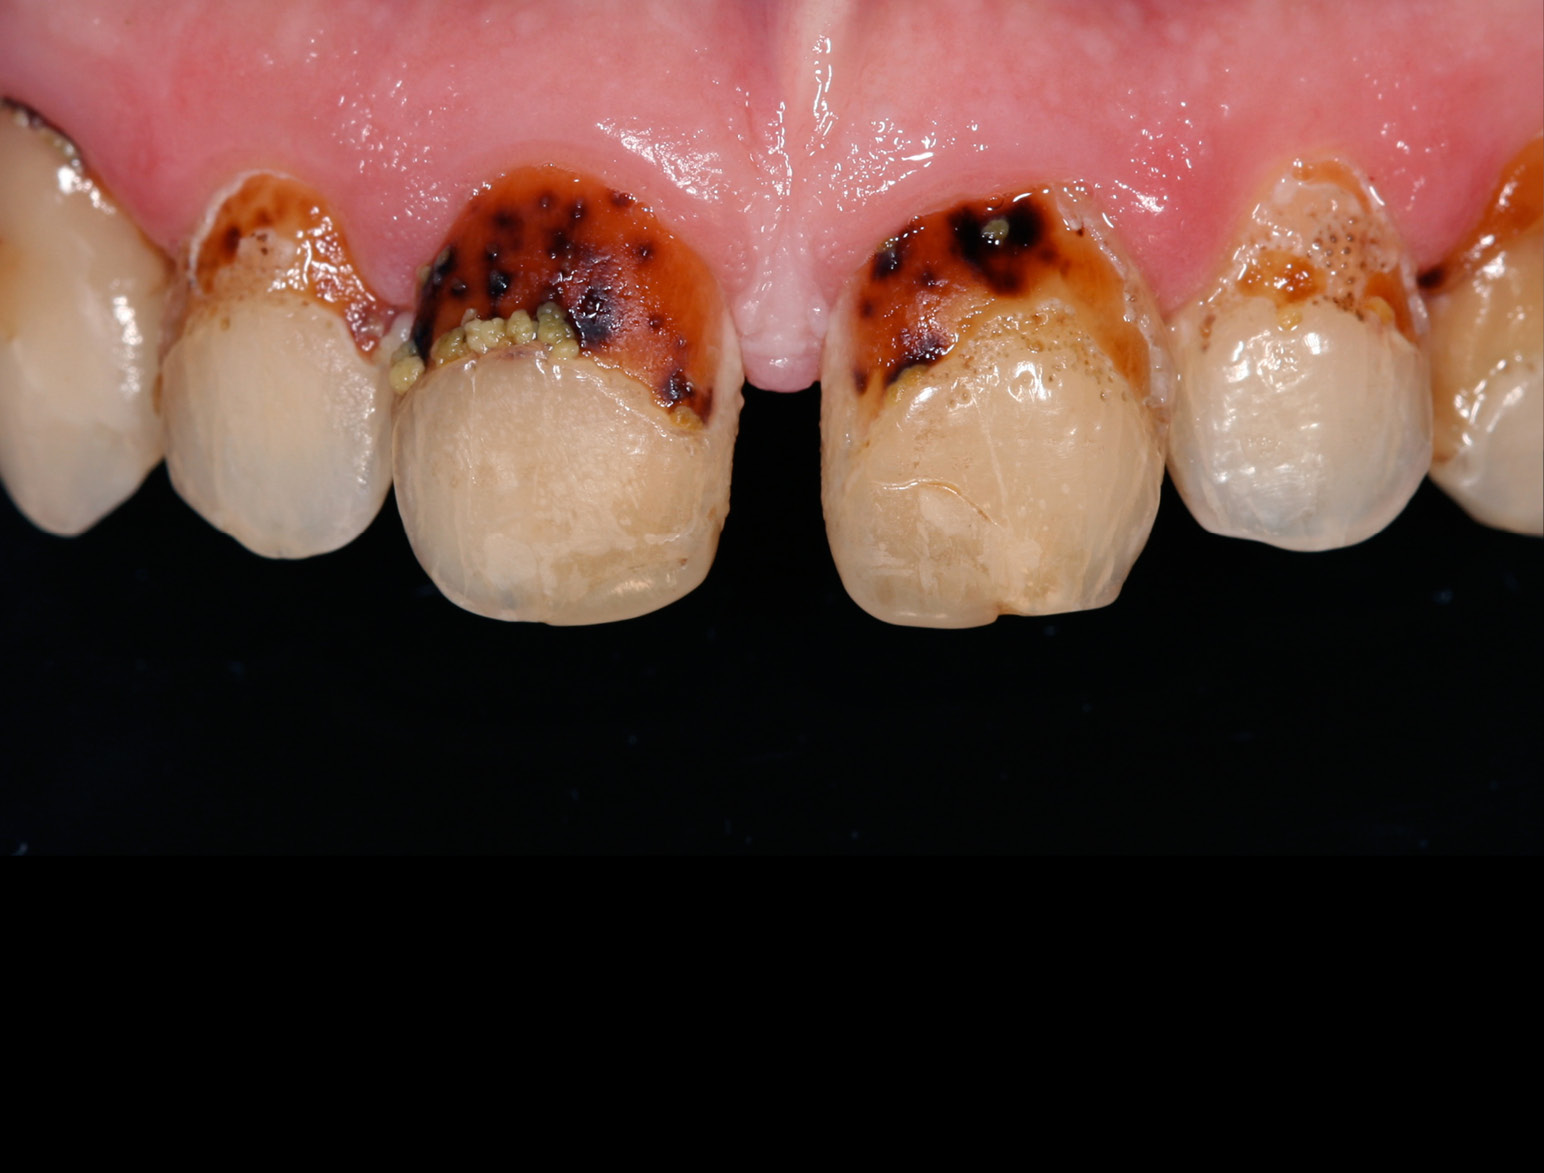
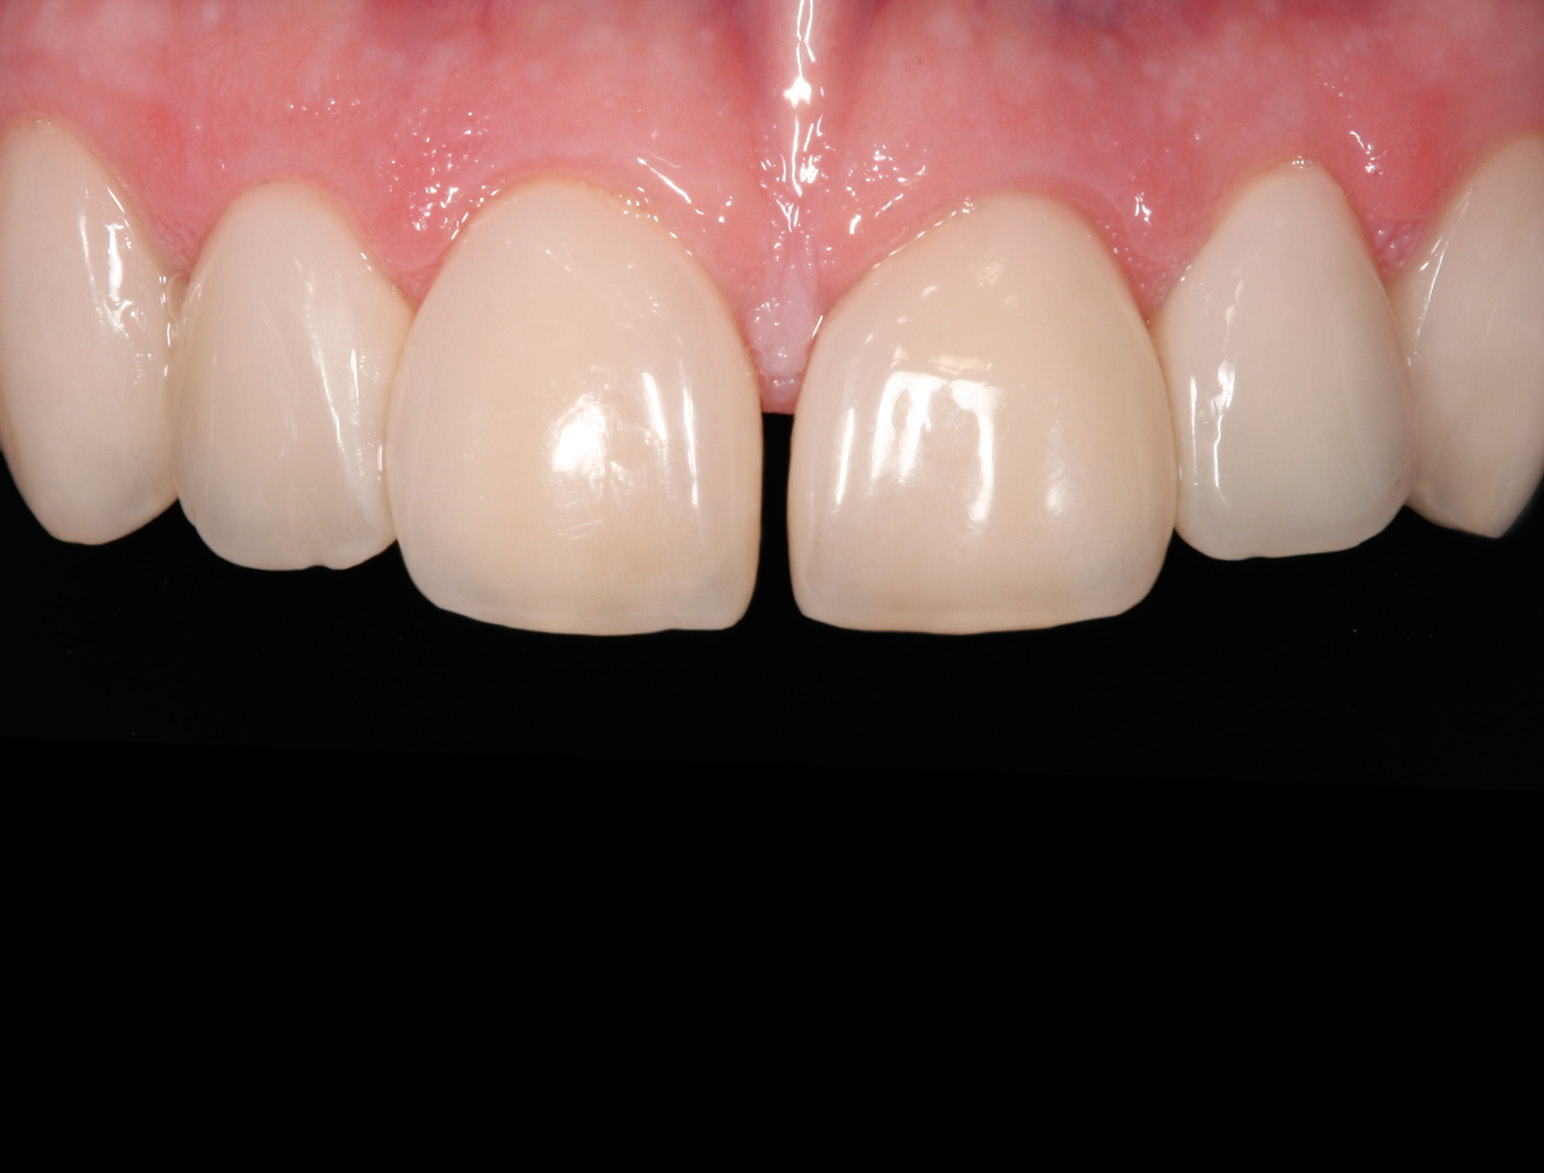
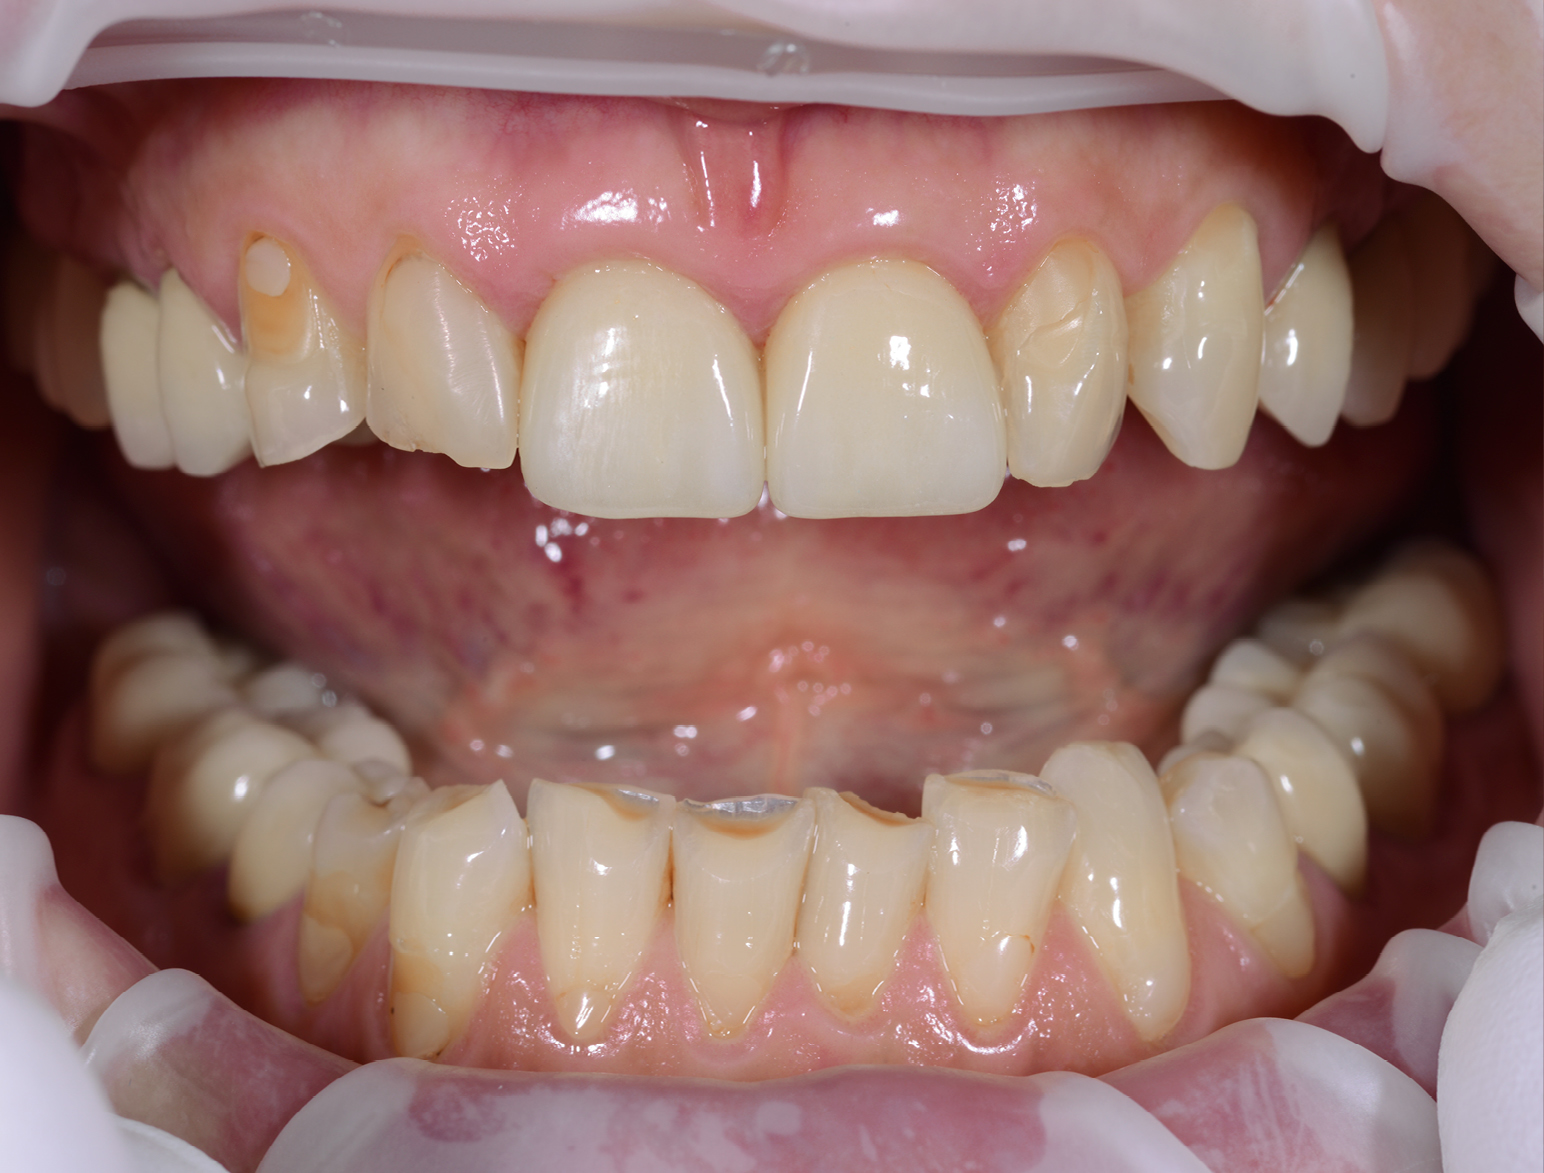
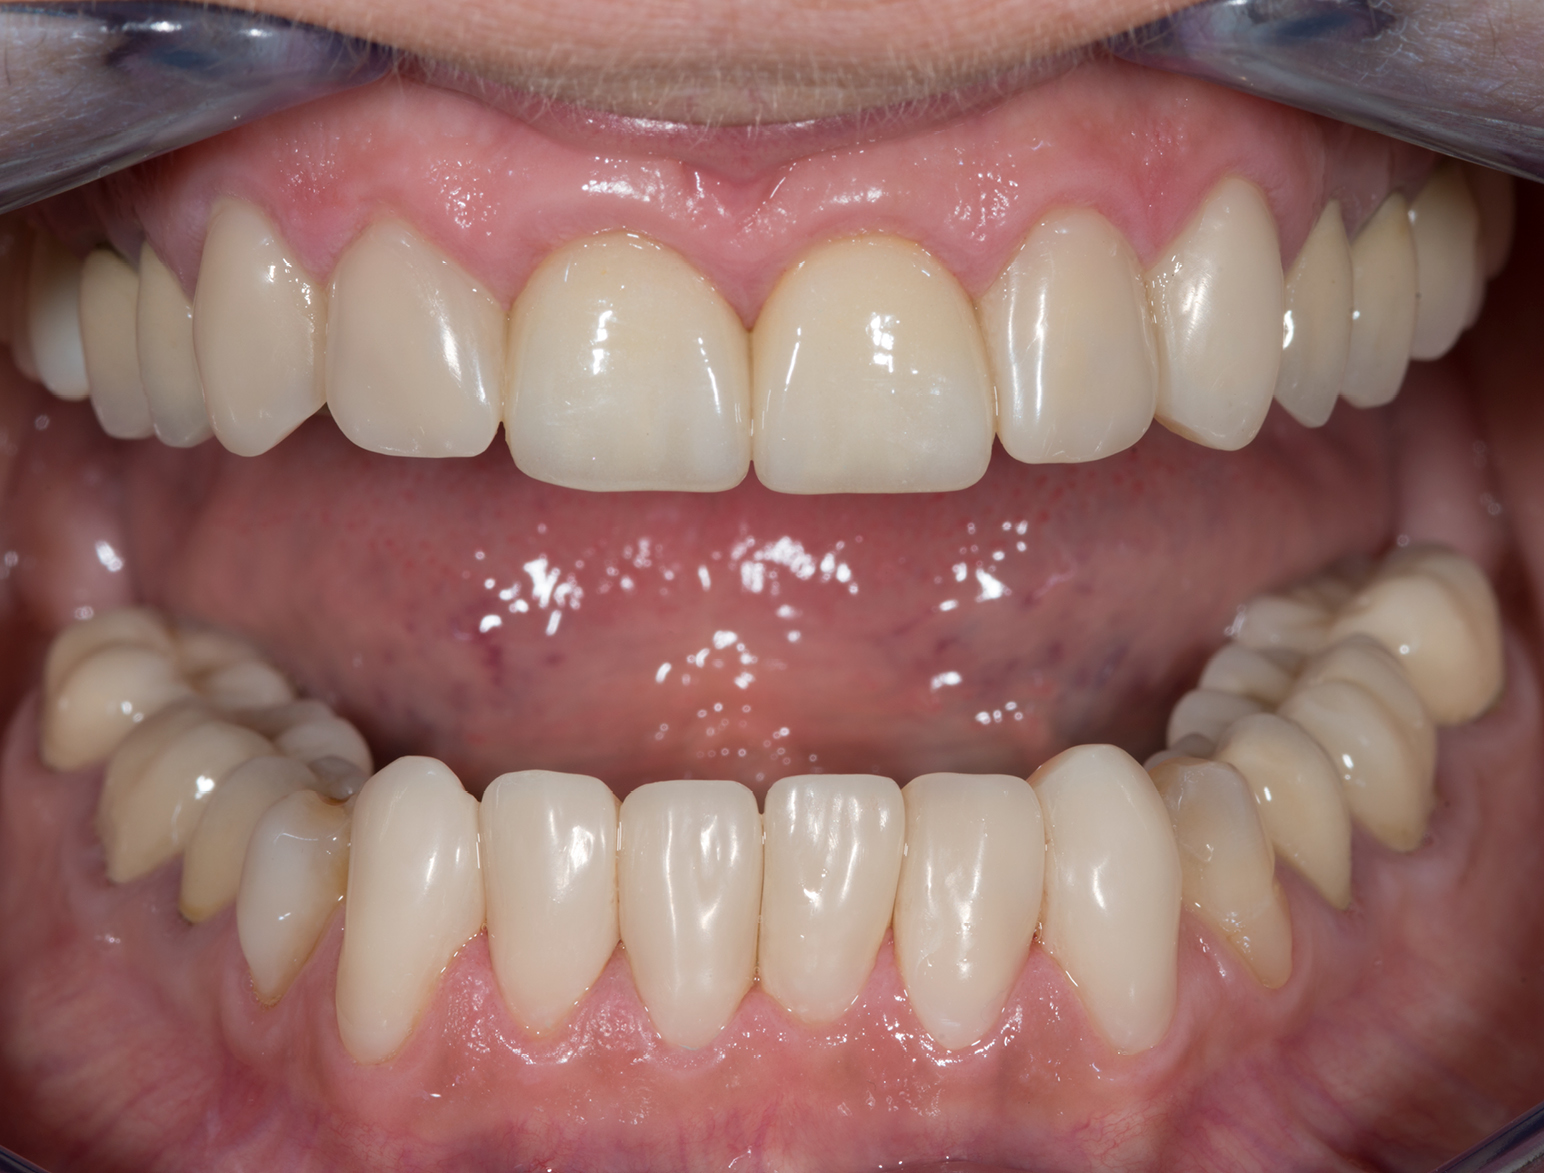
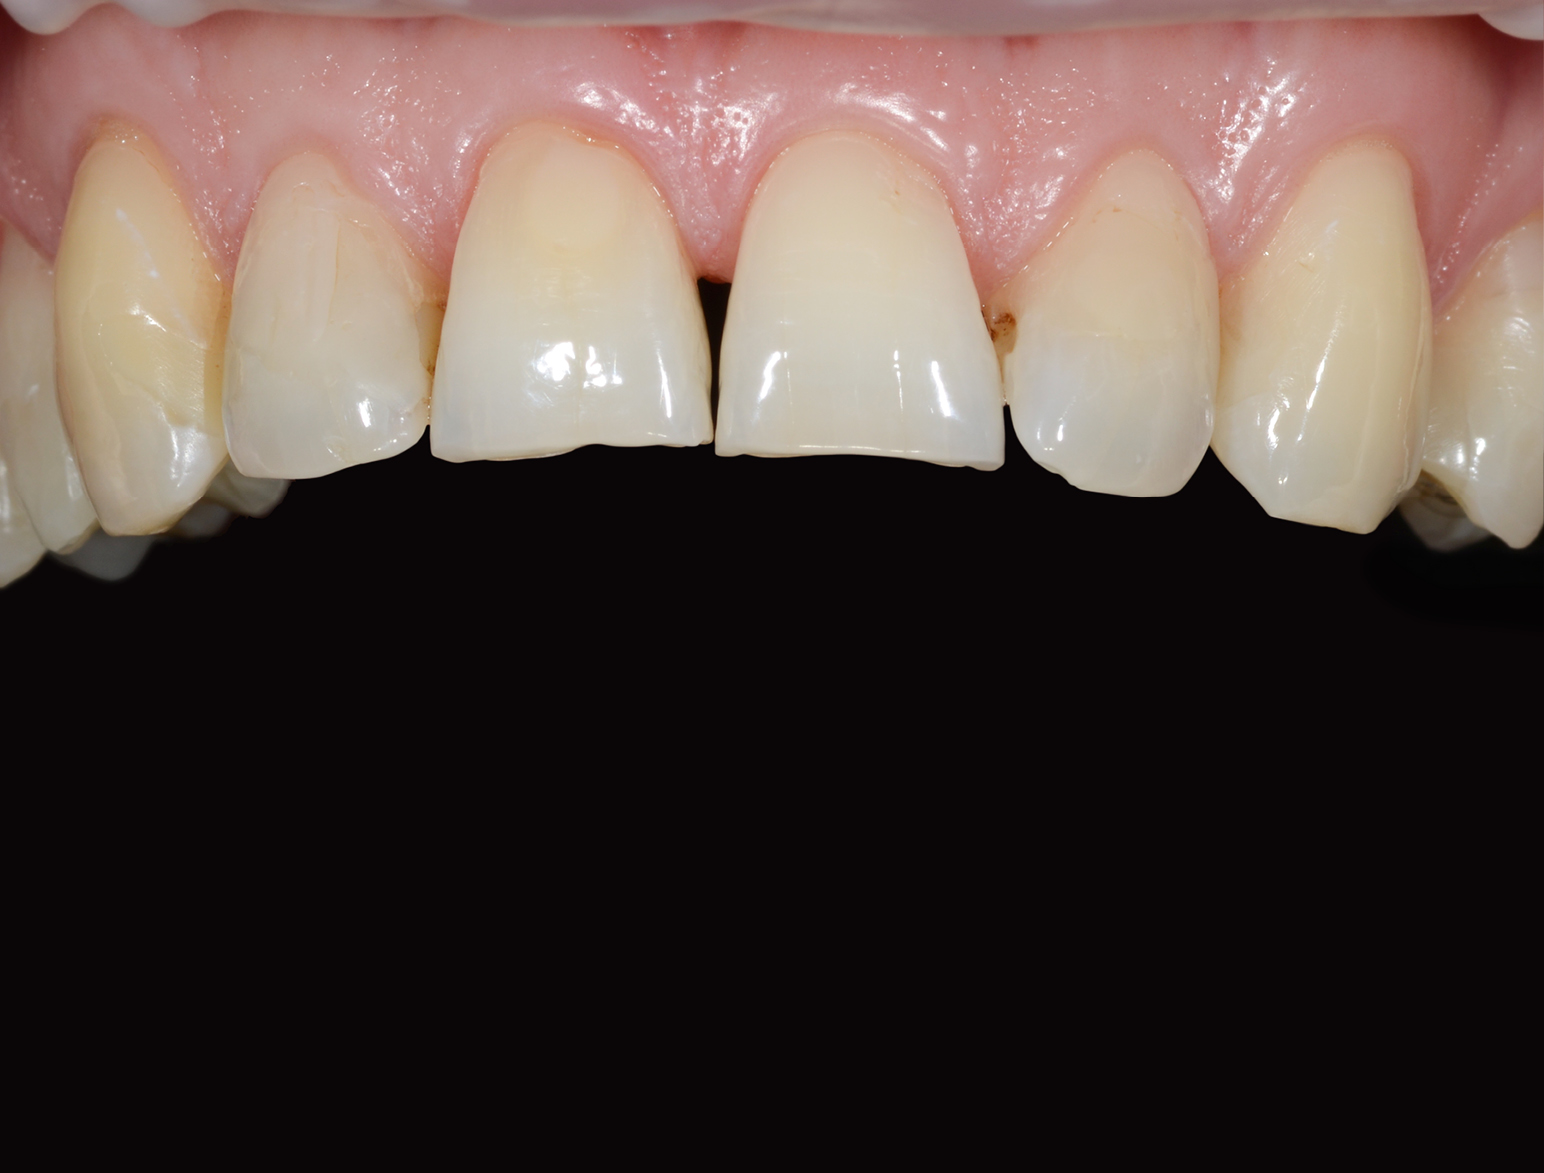
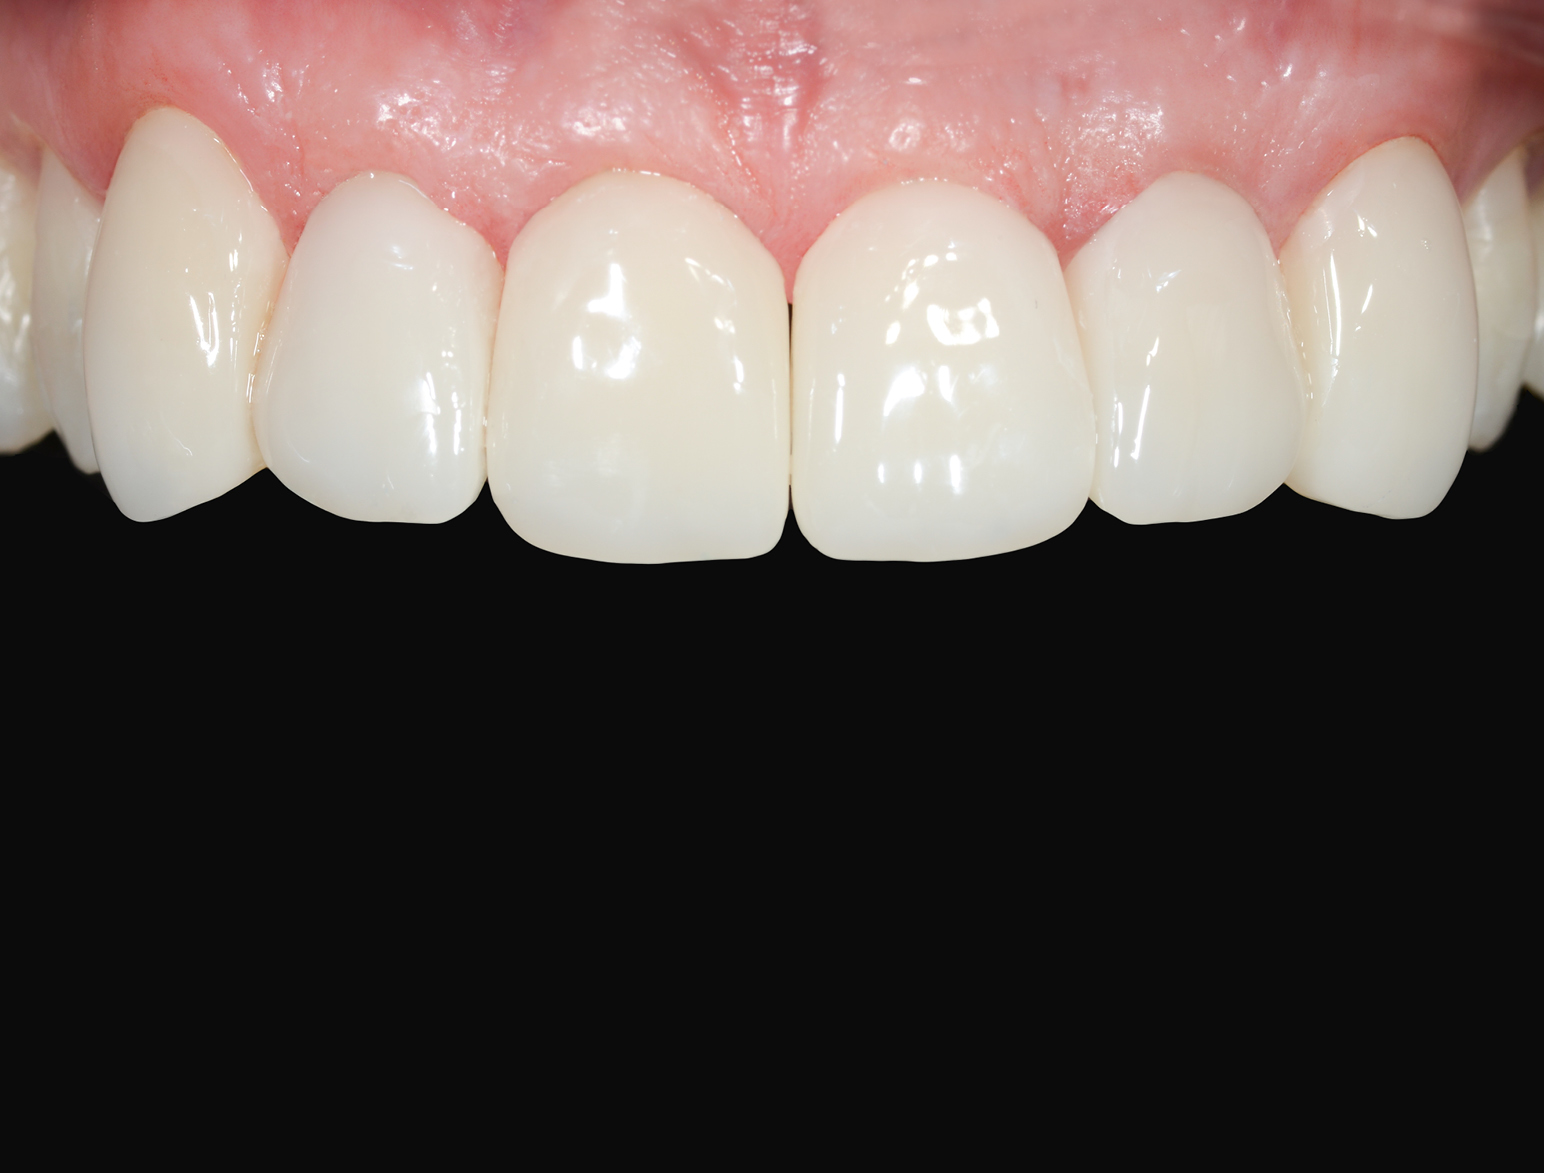
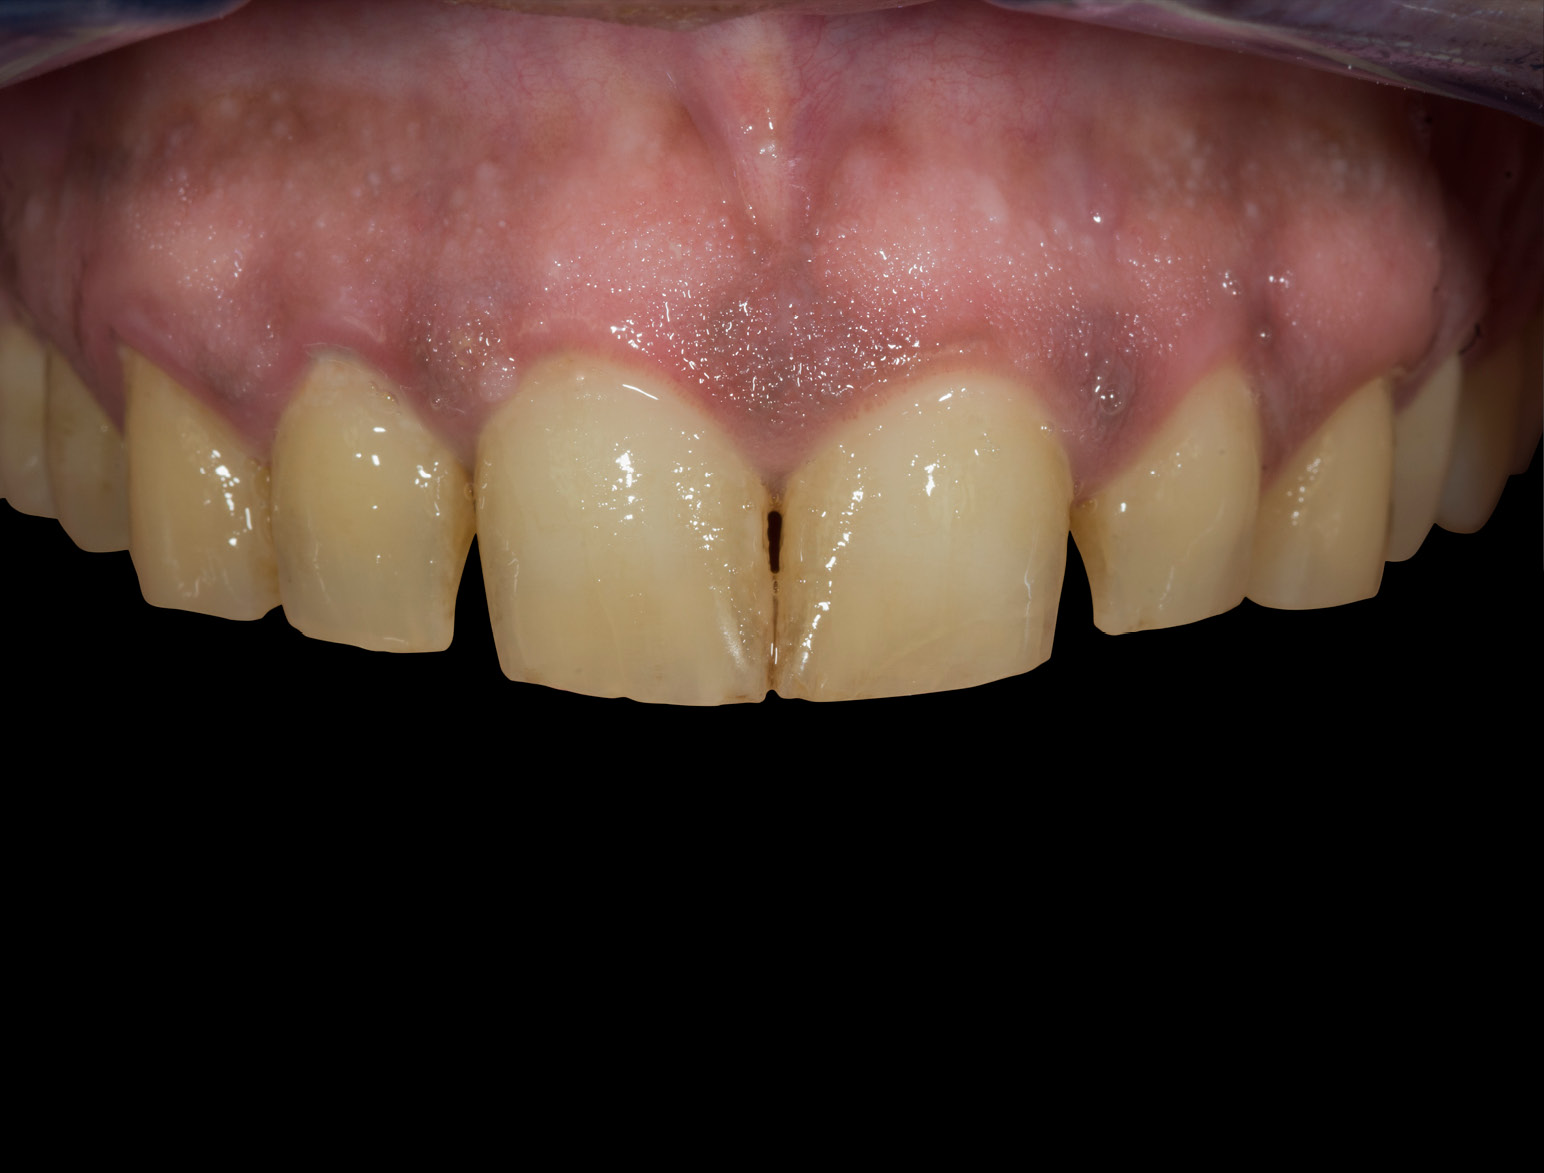
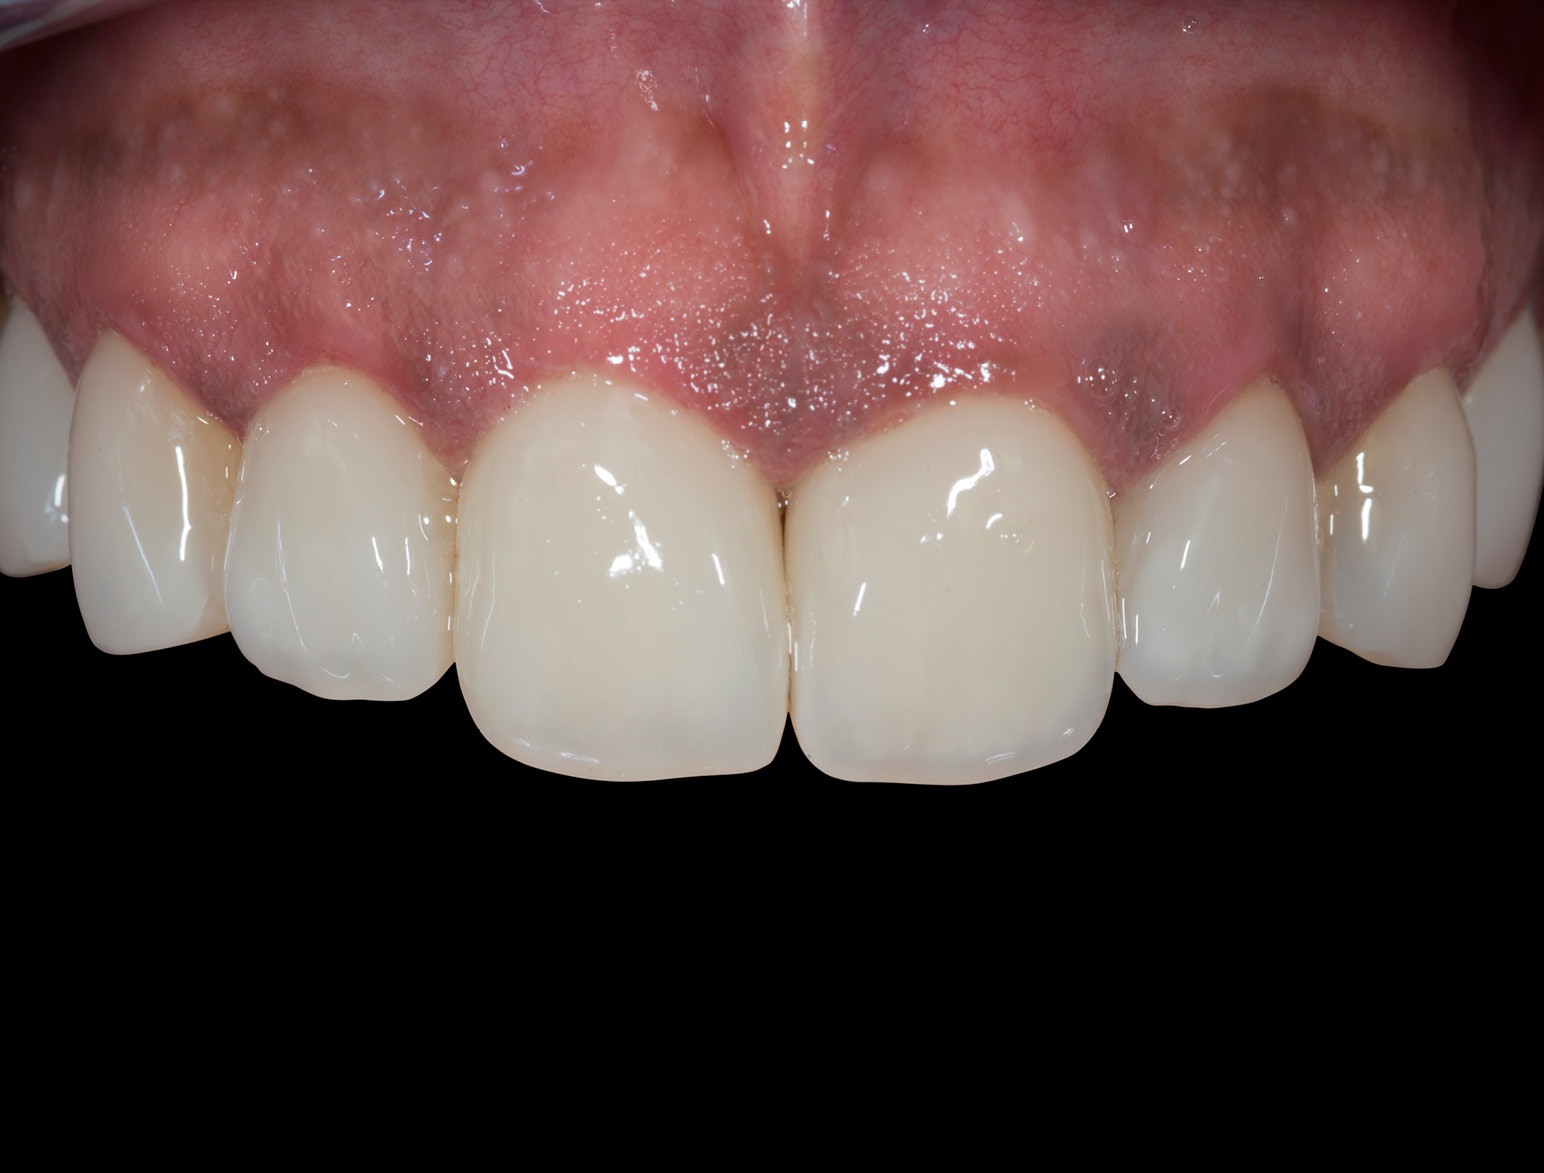
DISCOLORATION / DEVITAL
BEFORE & AFTER / STEP BY STEP
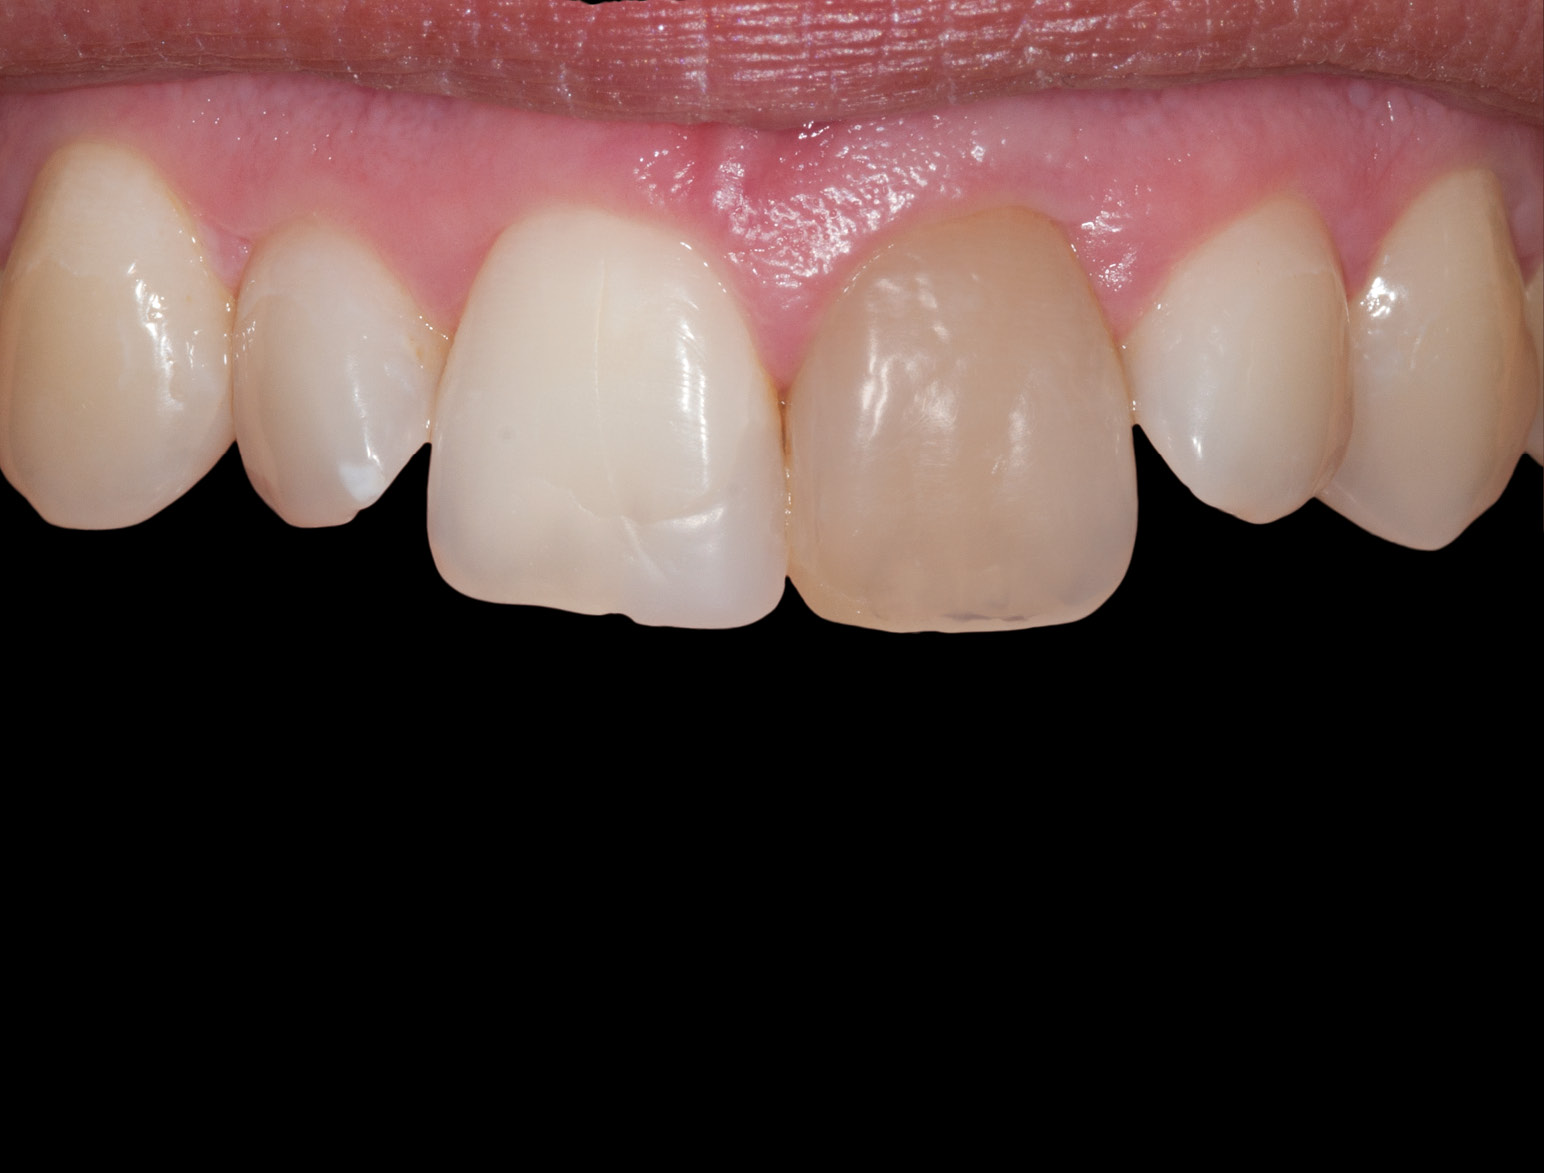
BEFORE
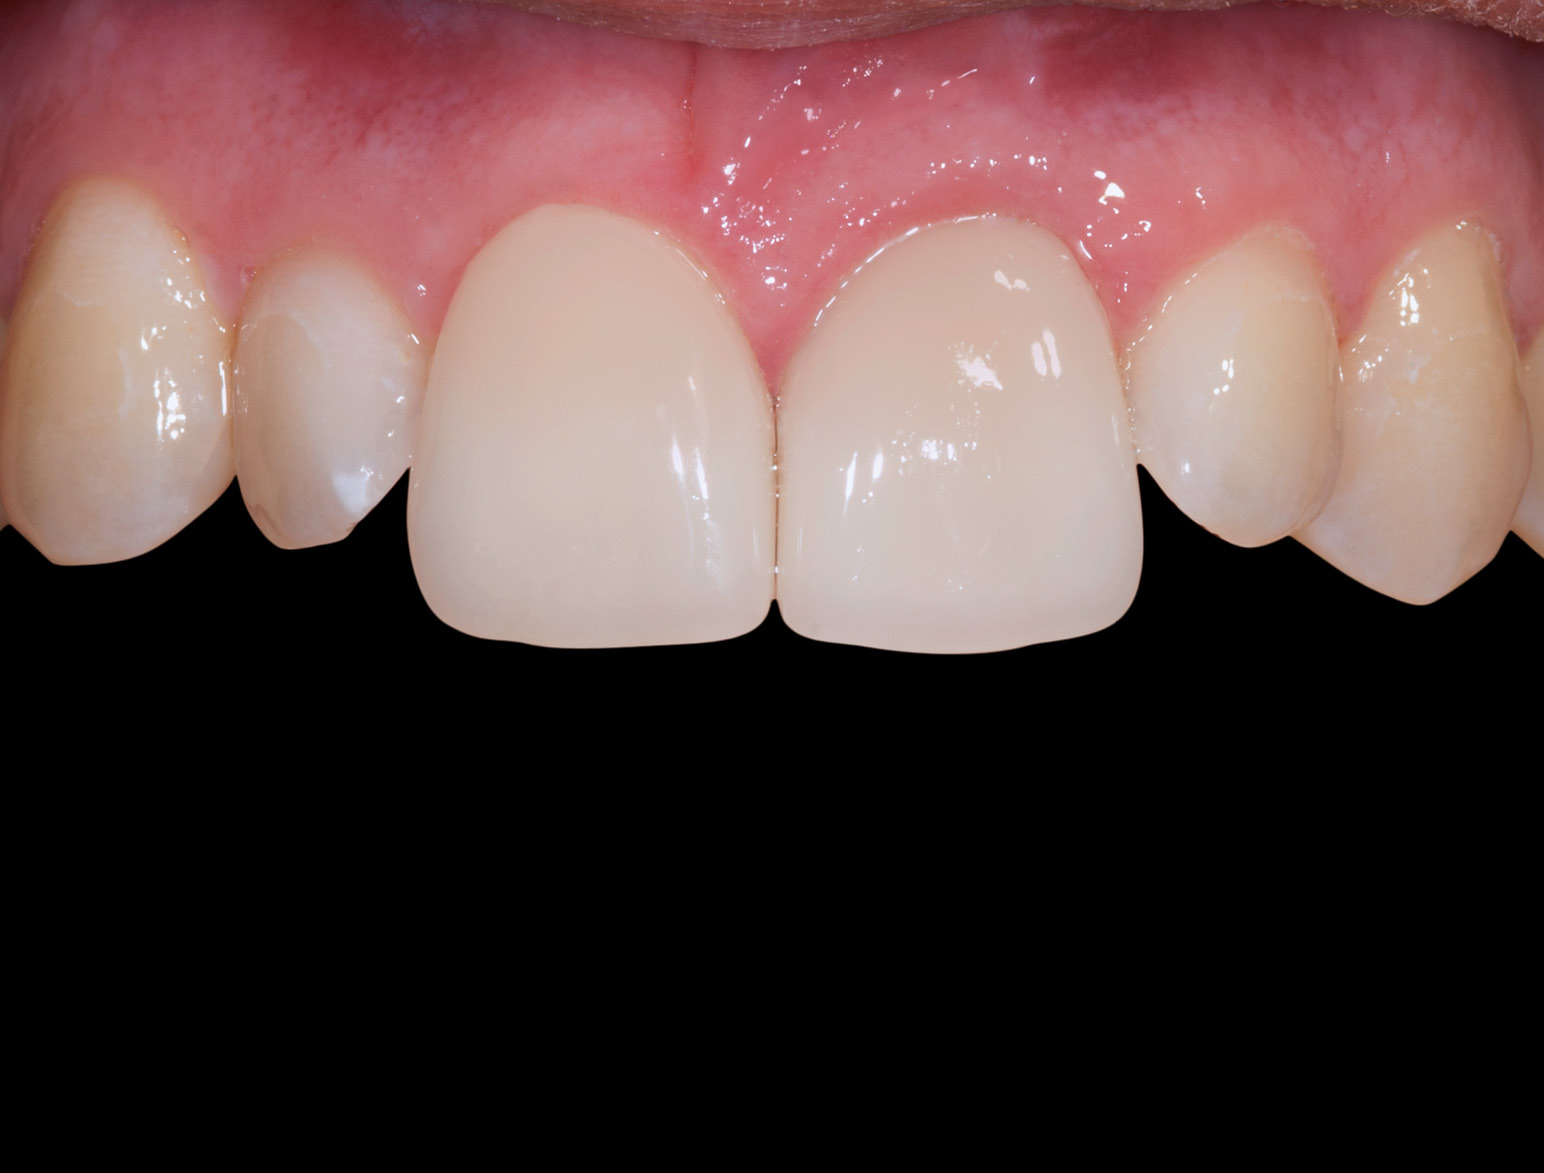
AFTER
BEFORE
AFTER
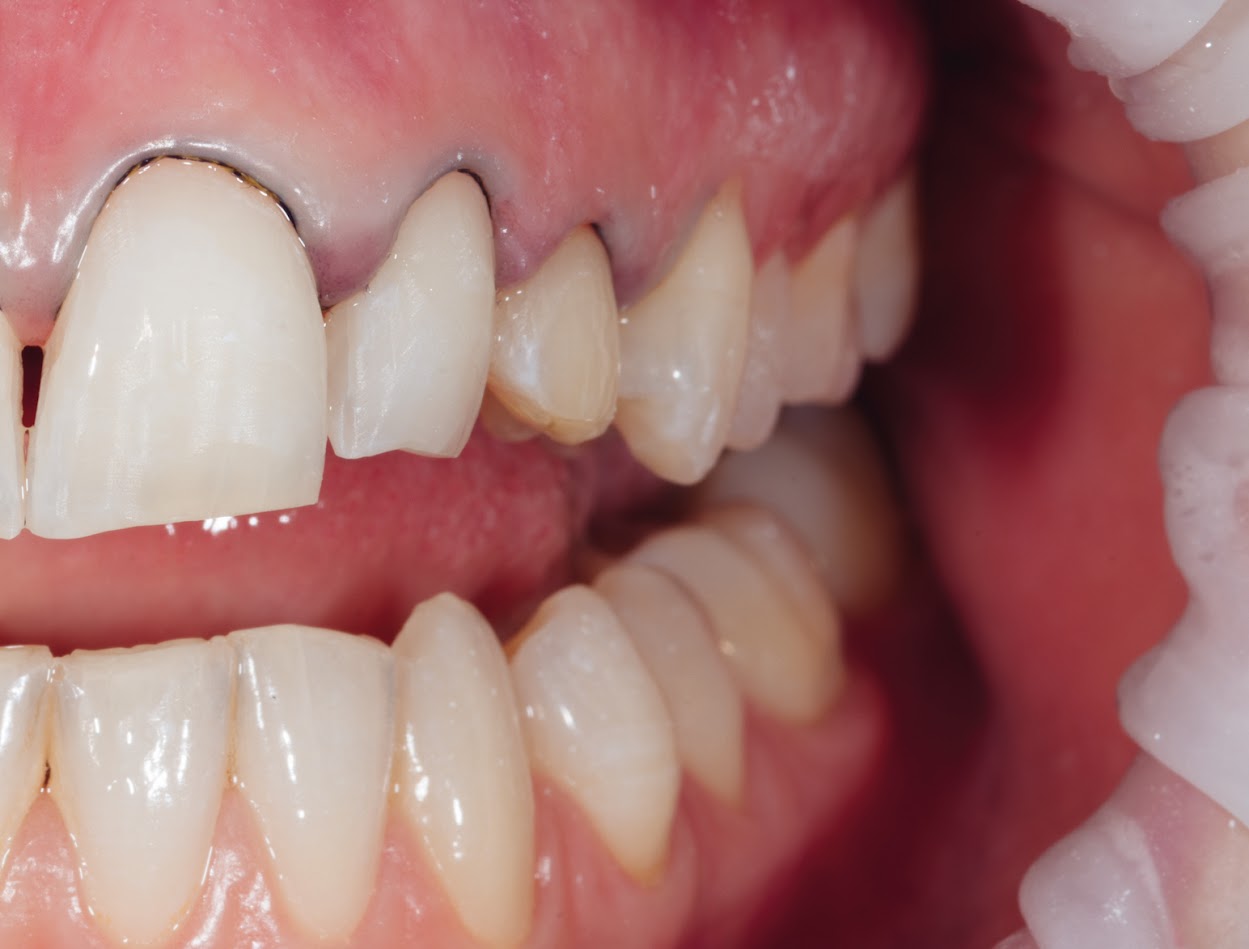
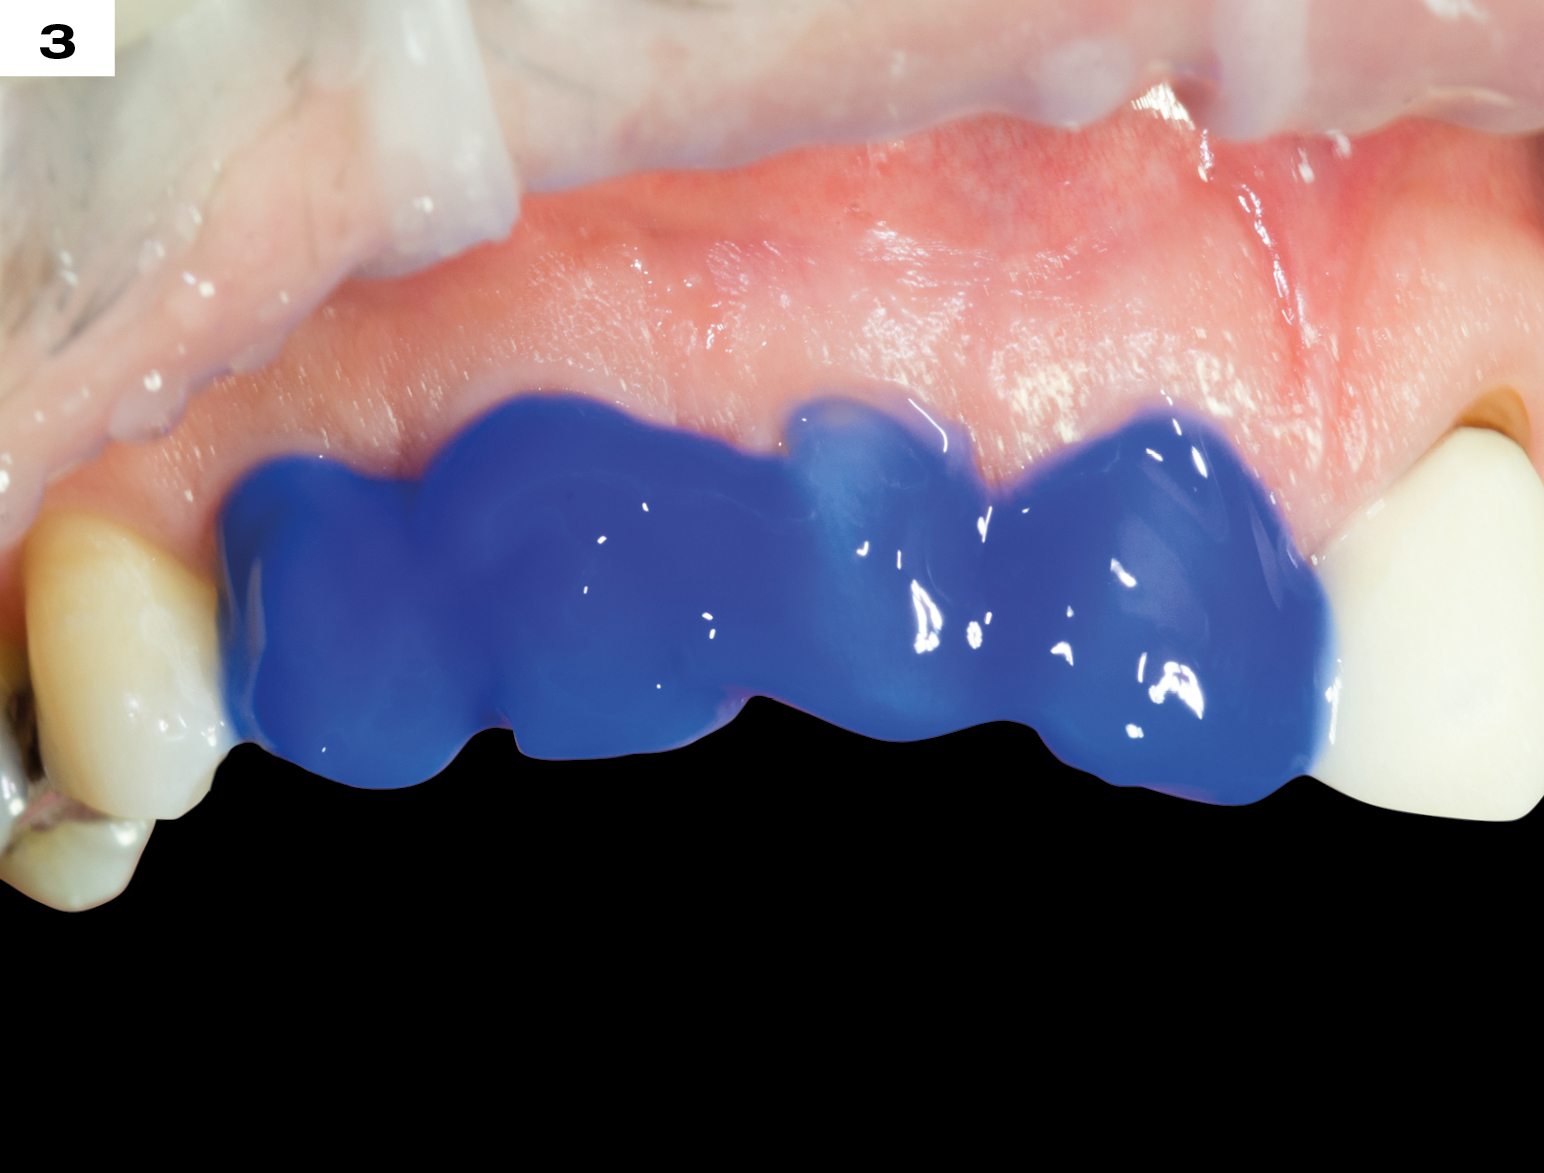
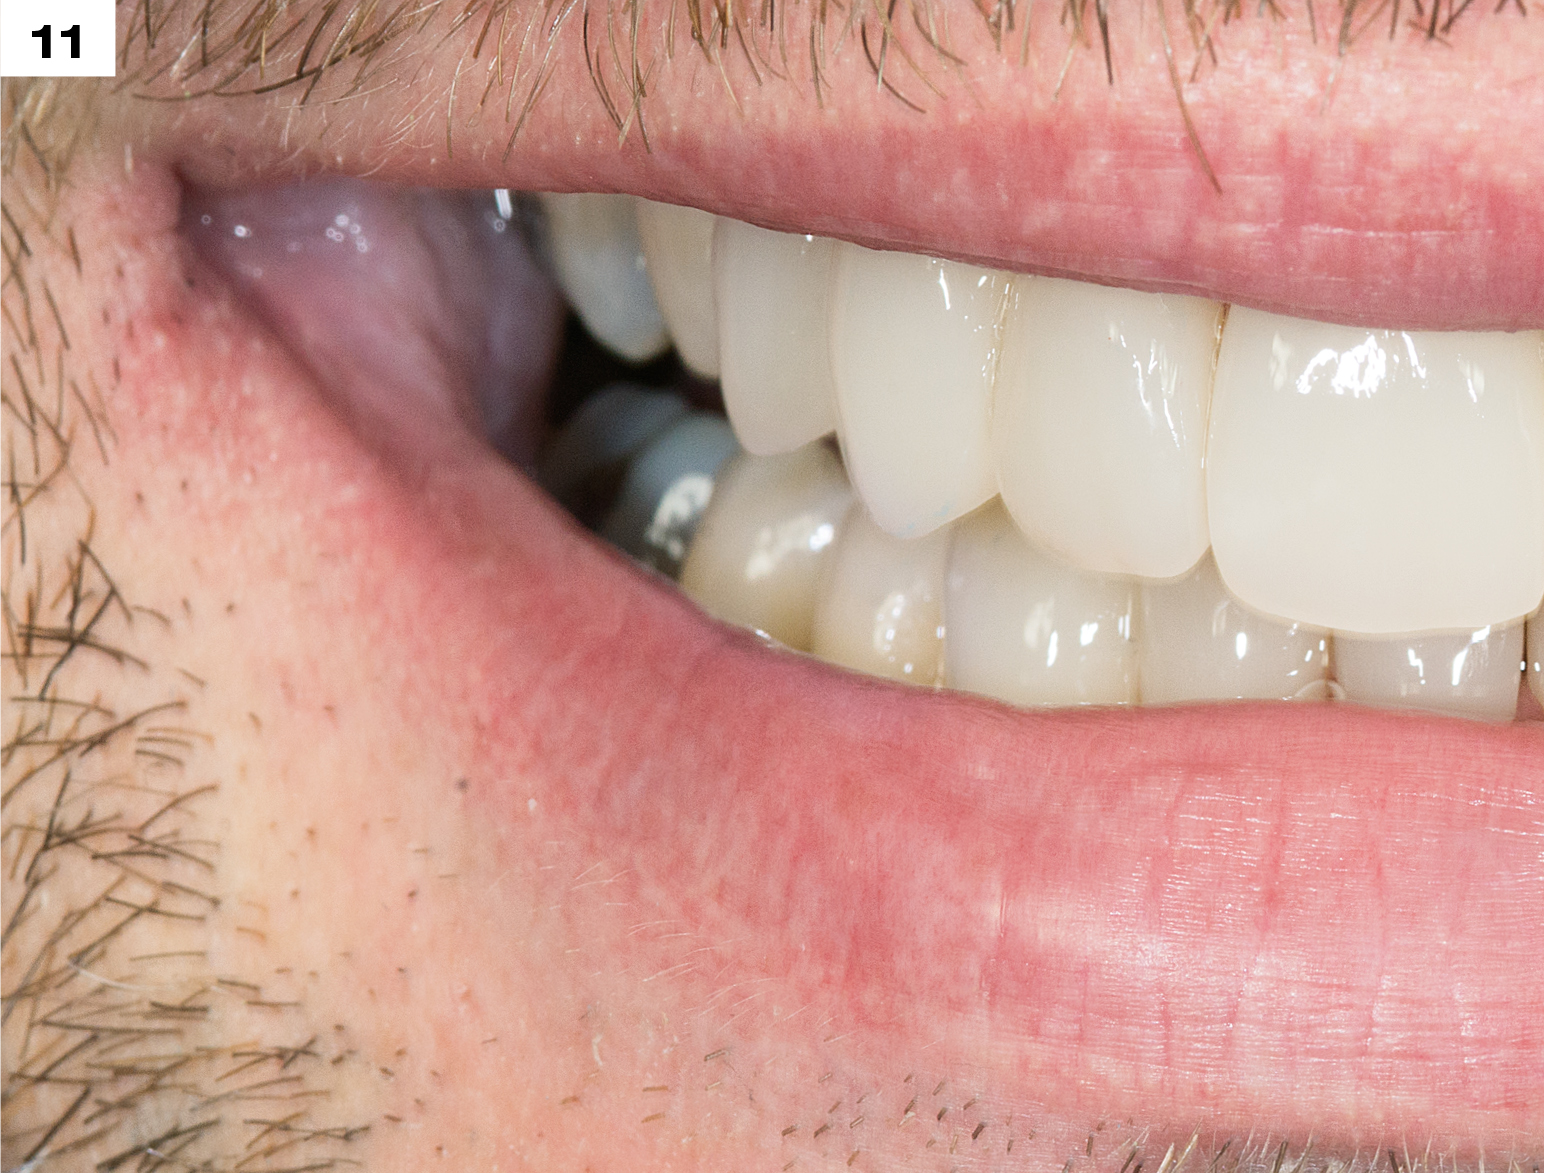
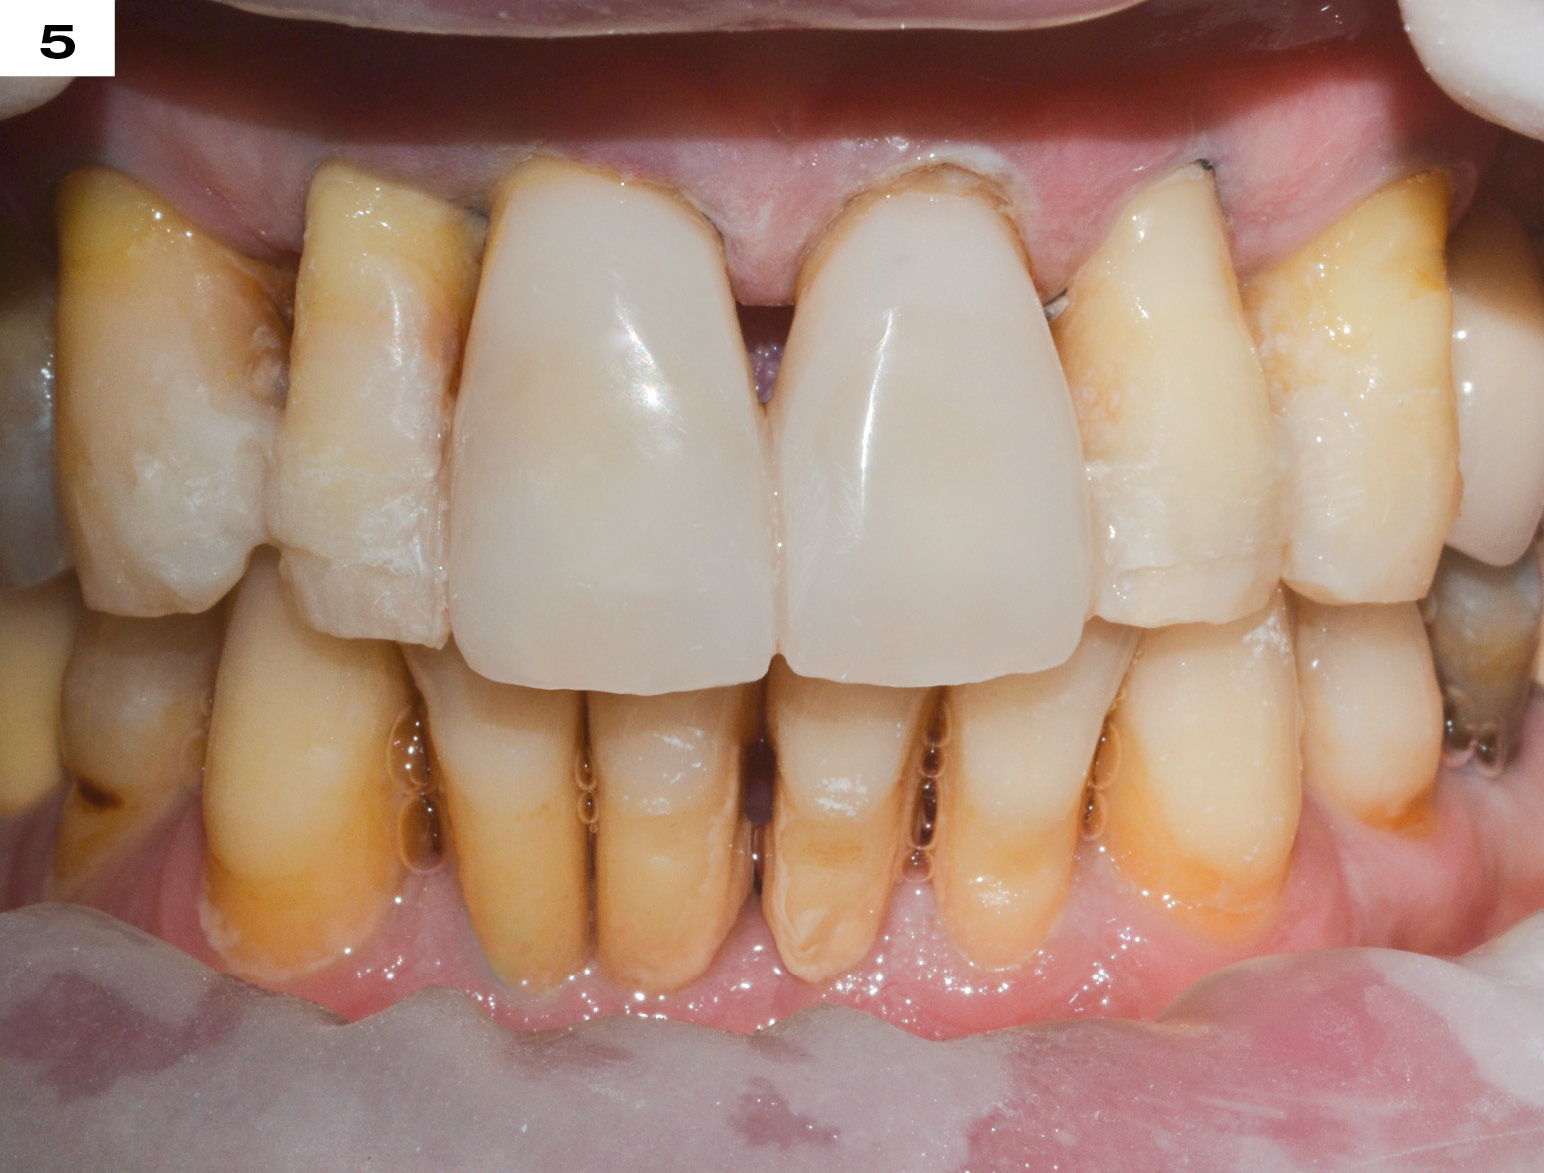
PERIODONTAL VENEER CASE
INCORPORATING FACIAL PLACED FIBRES PROVIDES TEETH STABILITY AND NATURAL ESTHETICS
BEFORE (FRONT VIEW)
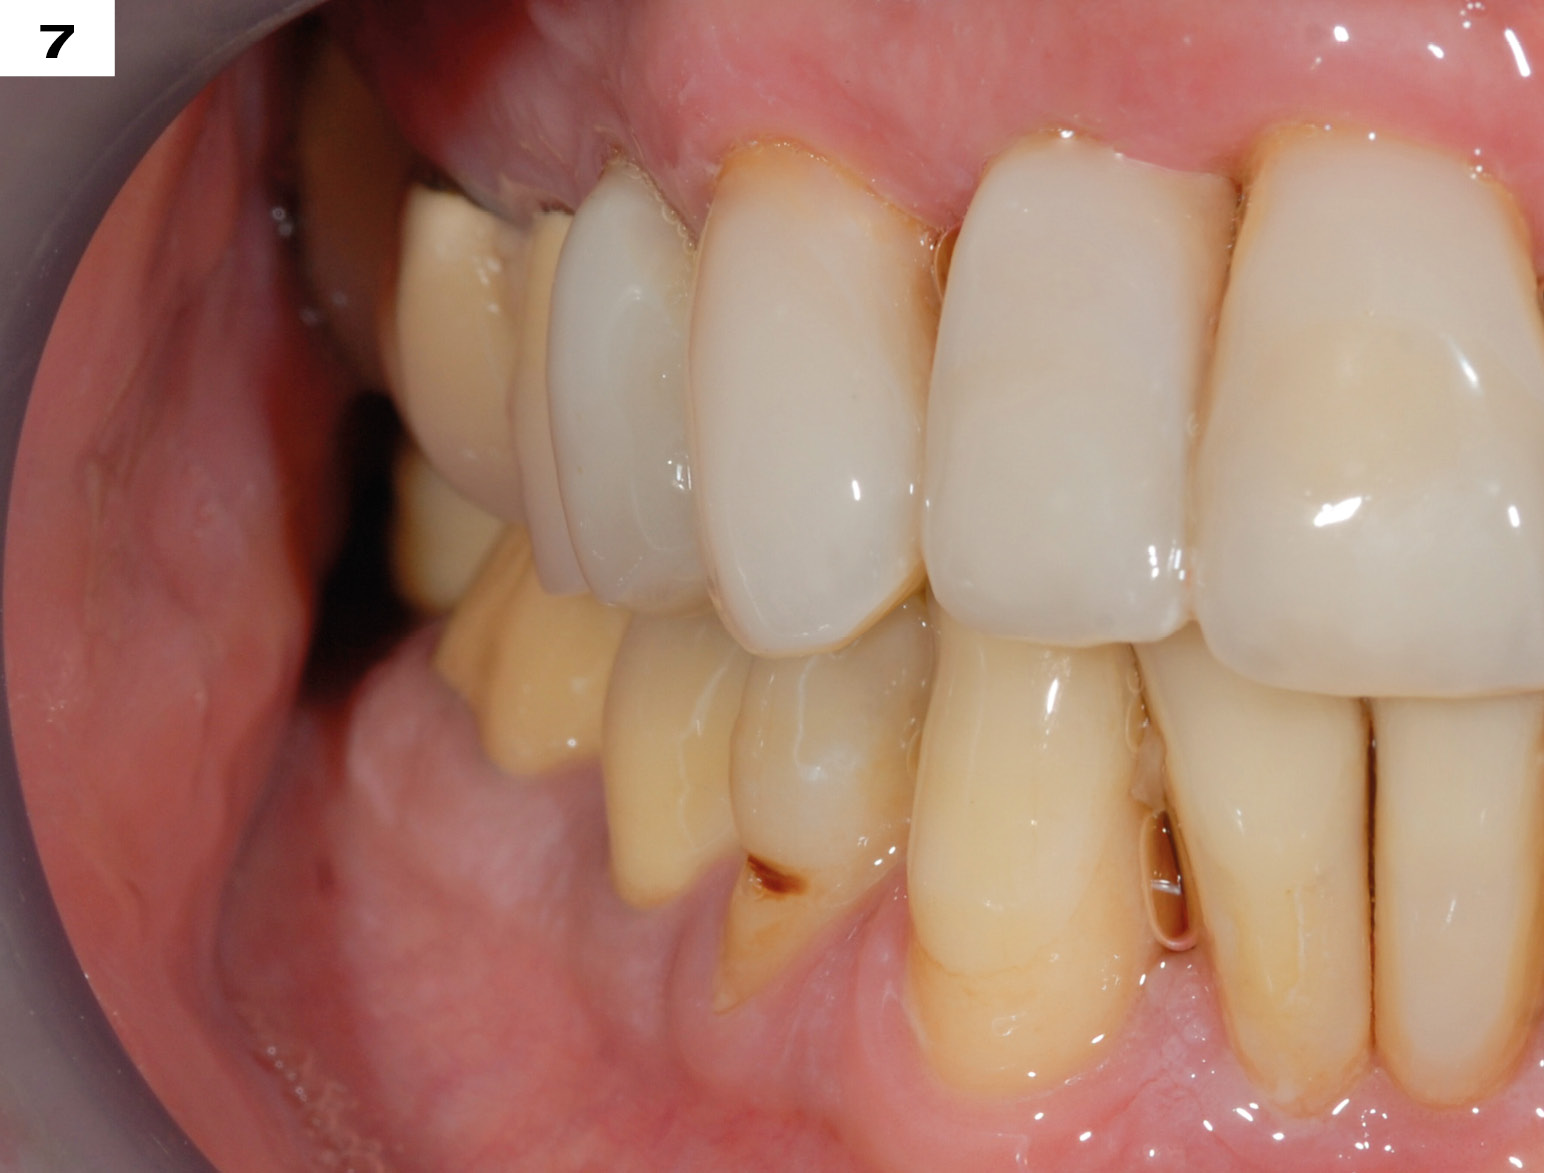
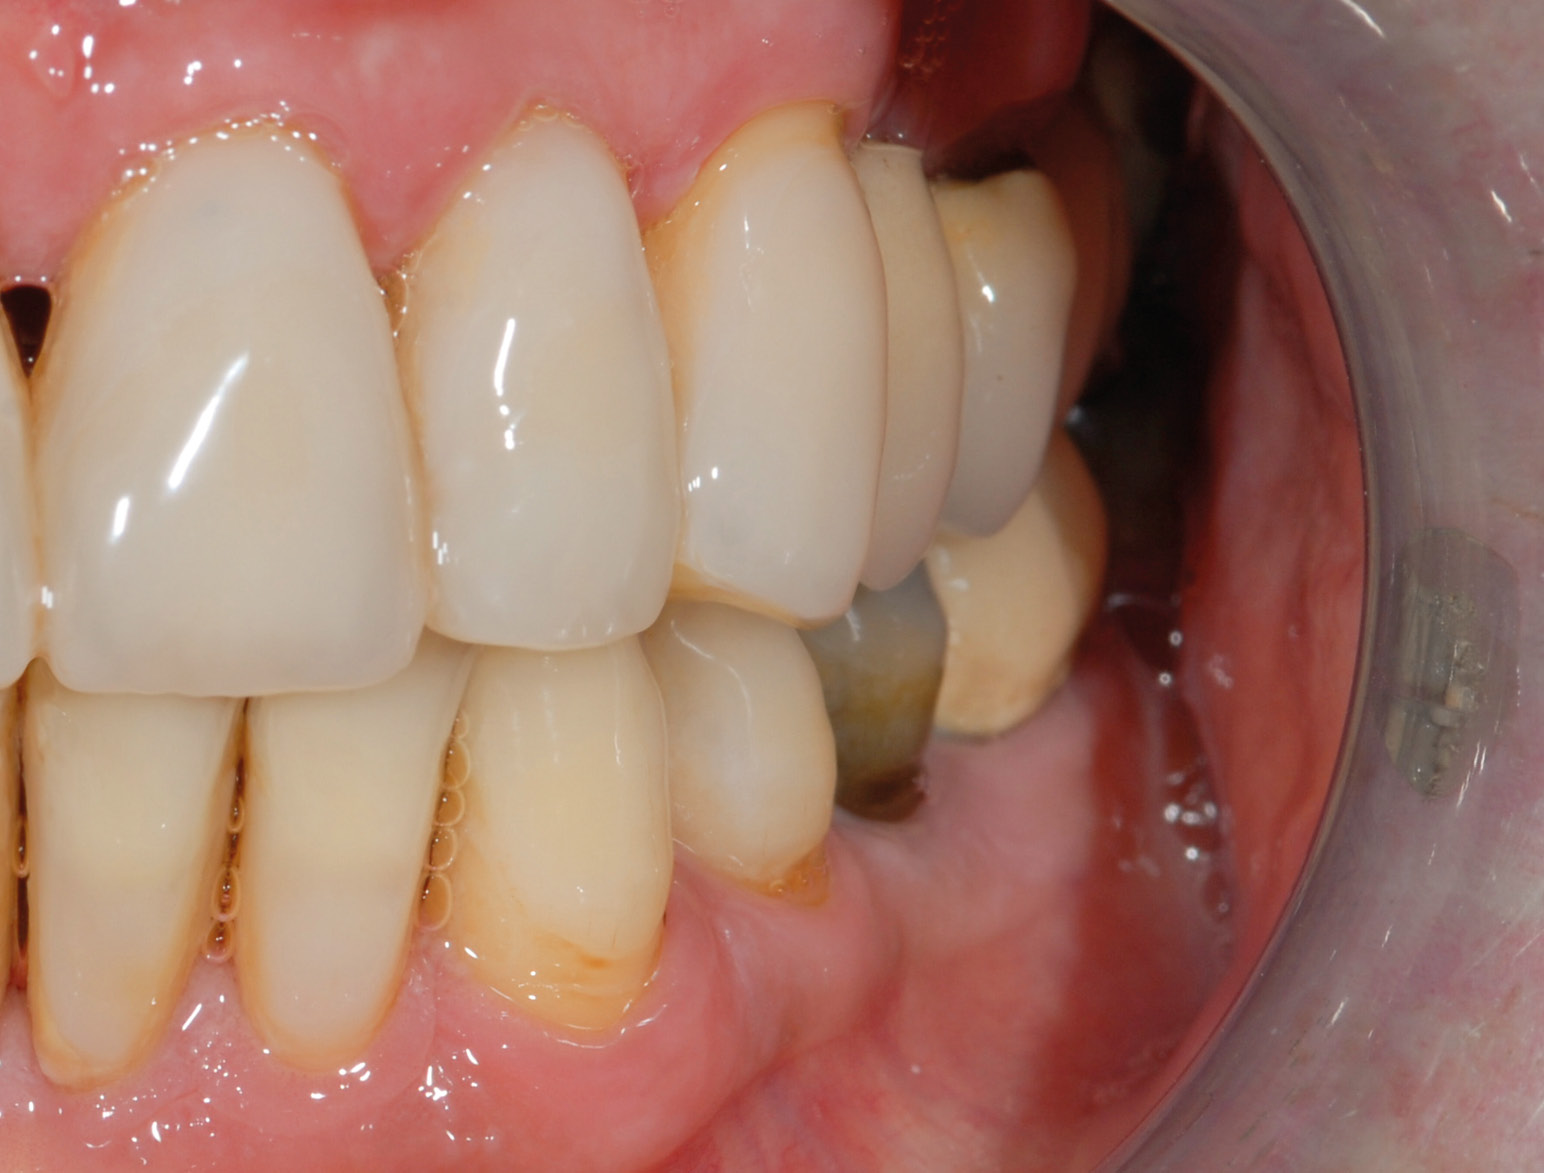
BEFORE (SIDE VIEW)
BEFORE (SIDE VIEW)
INCORPORATING FACIAL PLACED FIBRES PROVIDES THEETH STABILITY AND NATURAL ESTETHICS
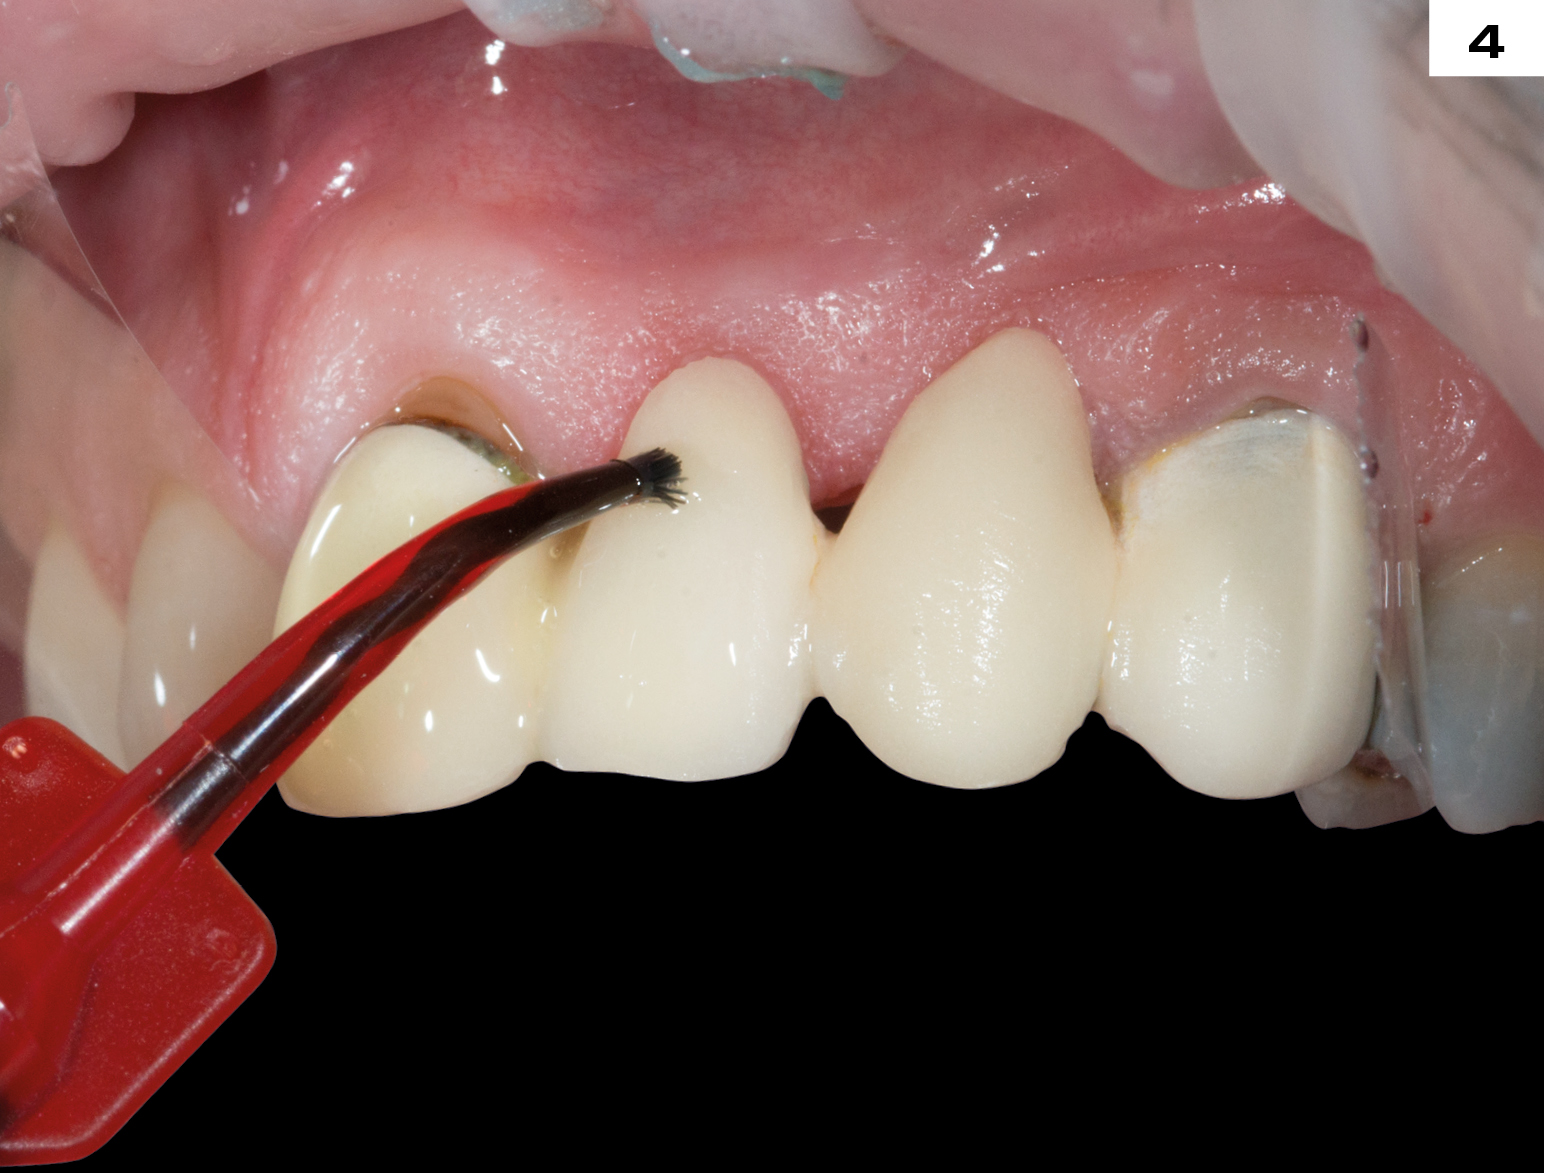
PLACED VENEER OVER FIBRES
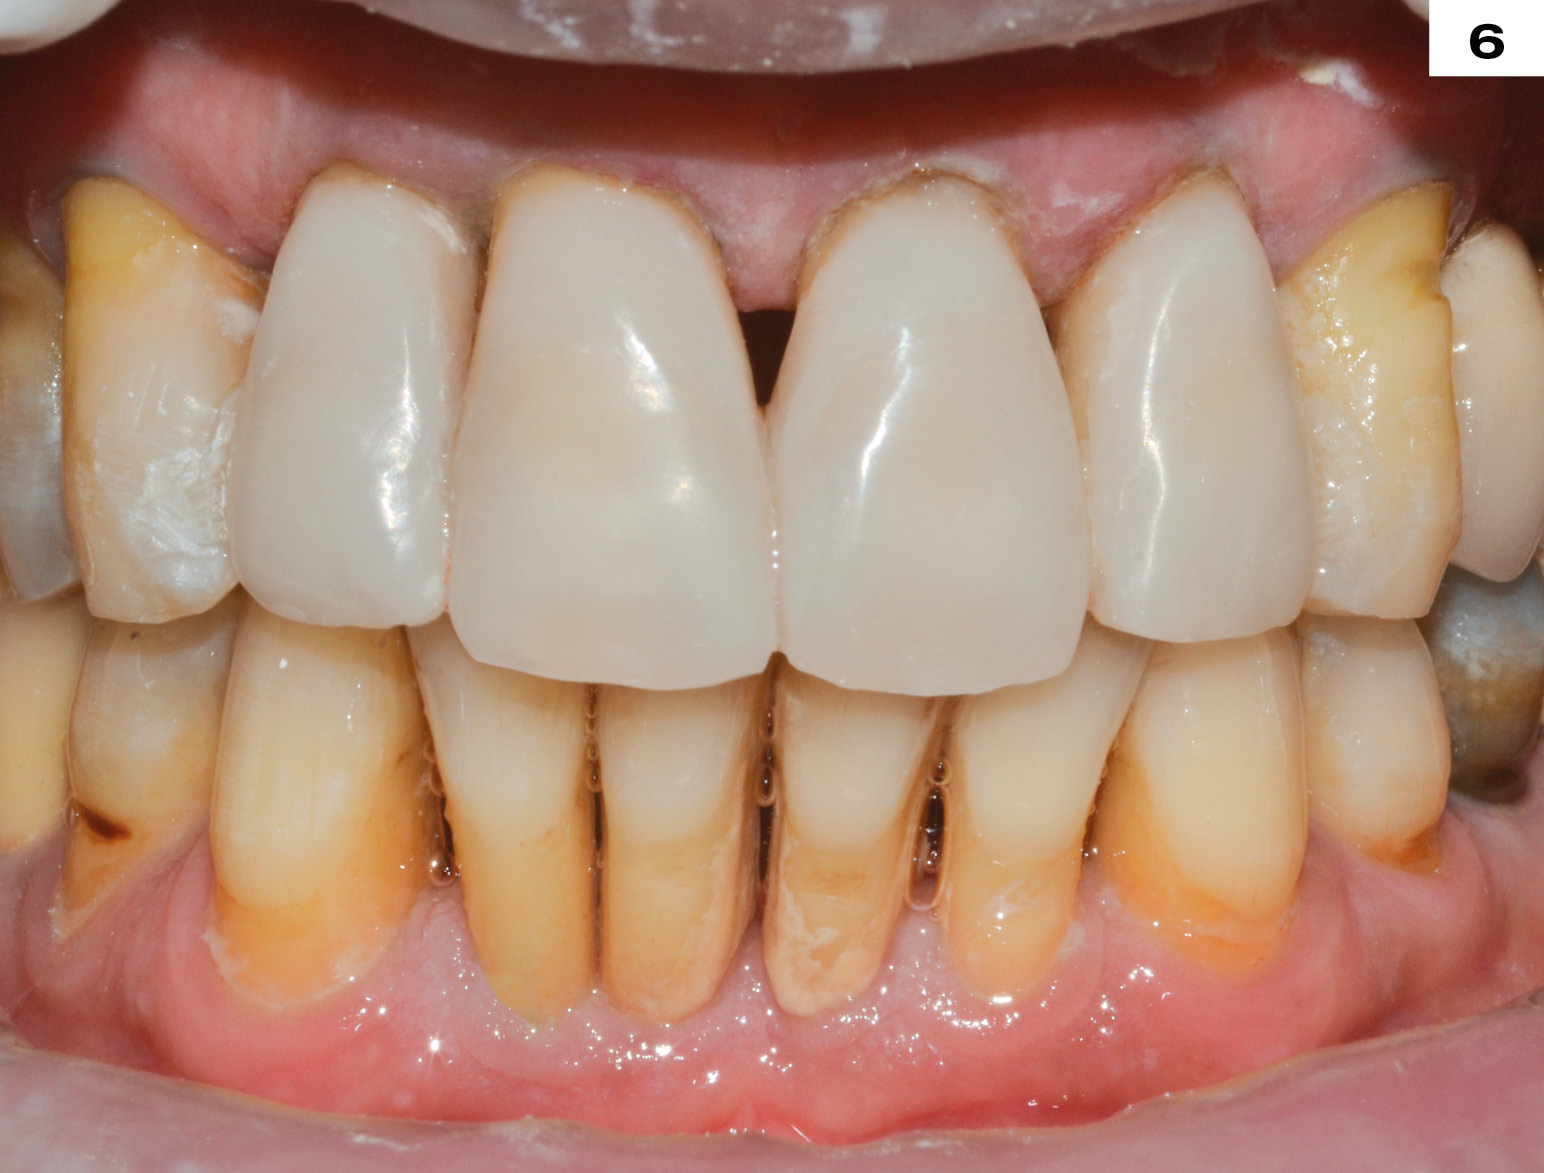
PLACED VENEER OVER FIBRES
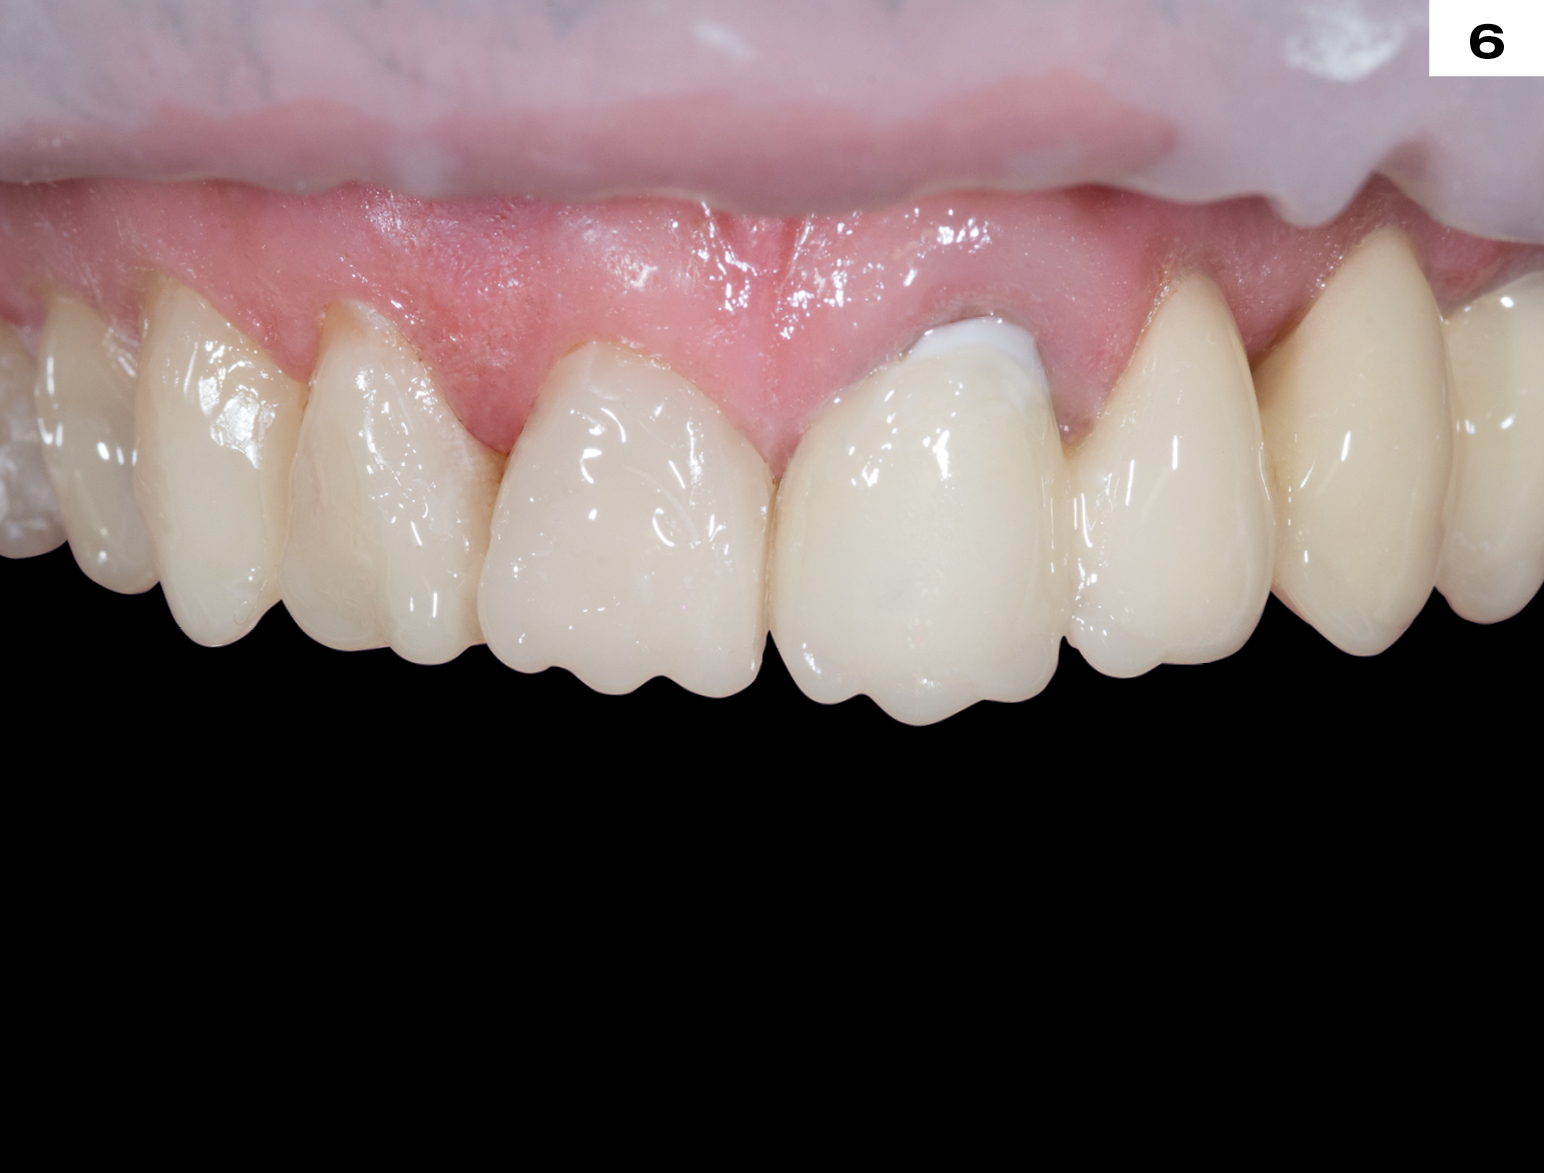
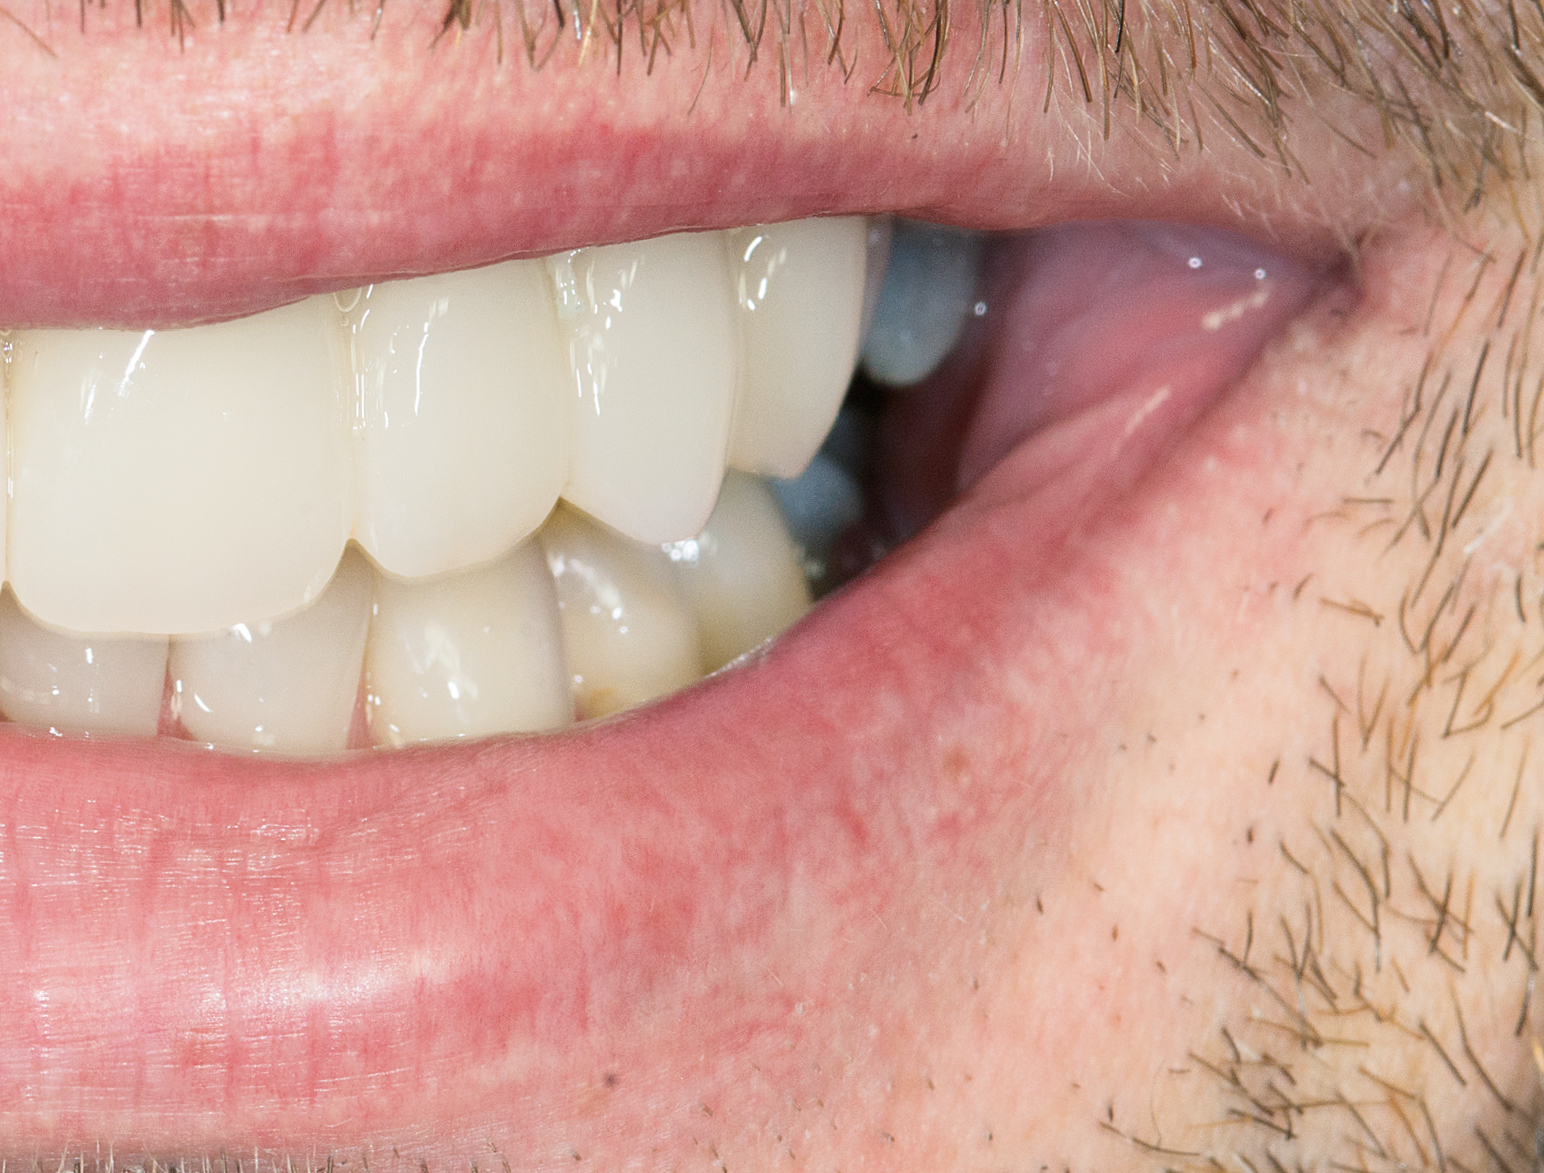
FINAL POSTOPERATIVE SITUATION
Sizes
ONE SIZE FOR ALL
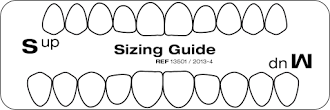
Based on a study of all shapes and size variations of natural tooth anatomy, prefabricated and contourable universal VENEER shapes for the upper and lower arch were developed in the following range of sizes (20 lower S/M 10 each – 30 upper S/M/L 10 each – 6 upper XS)
THE CHOICE
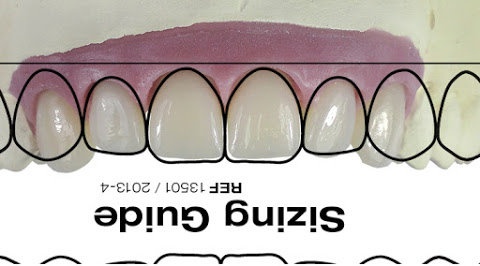
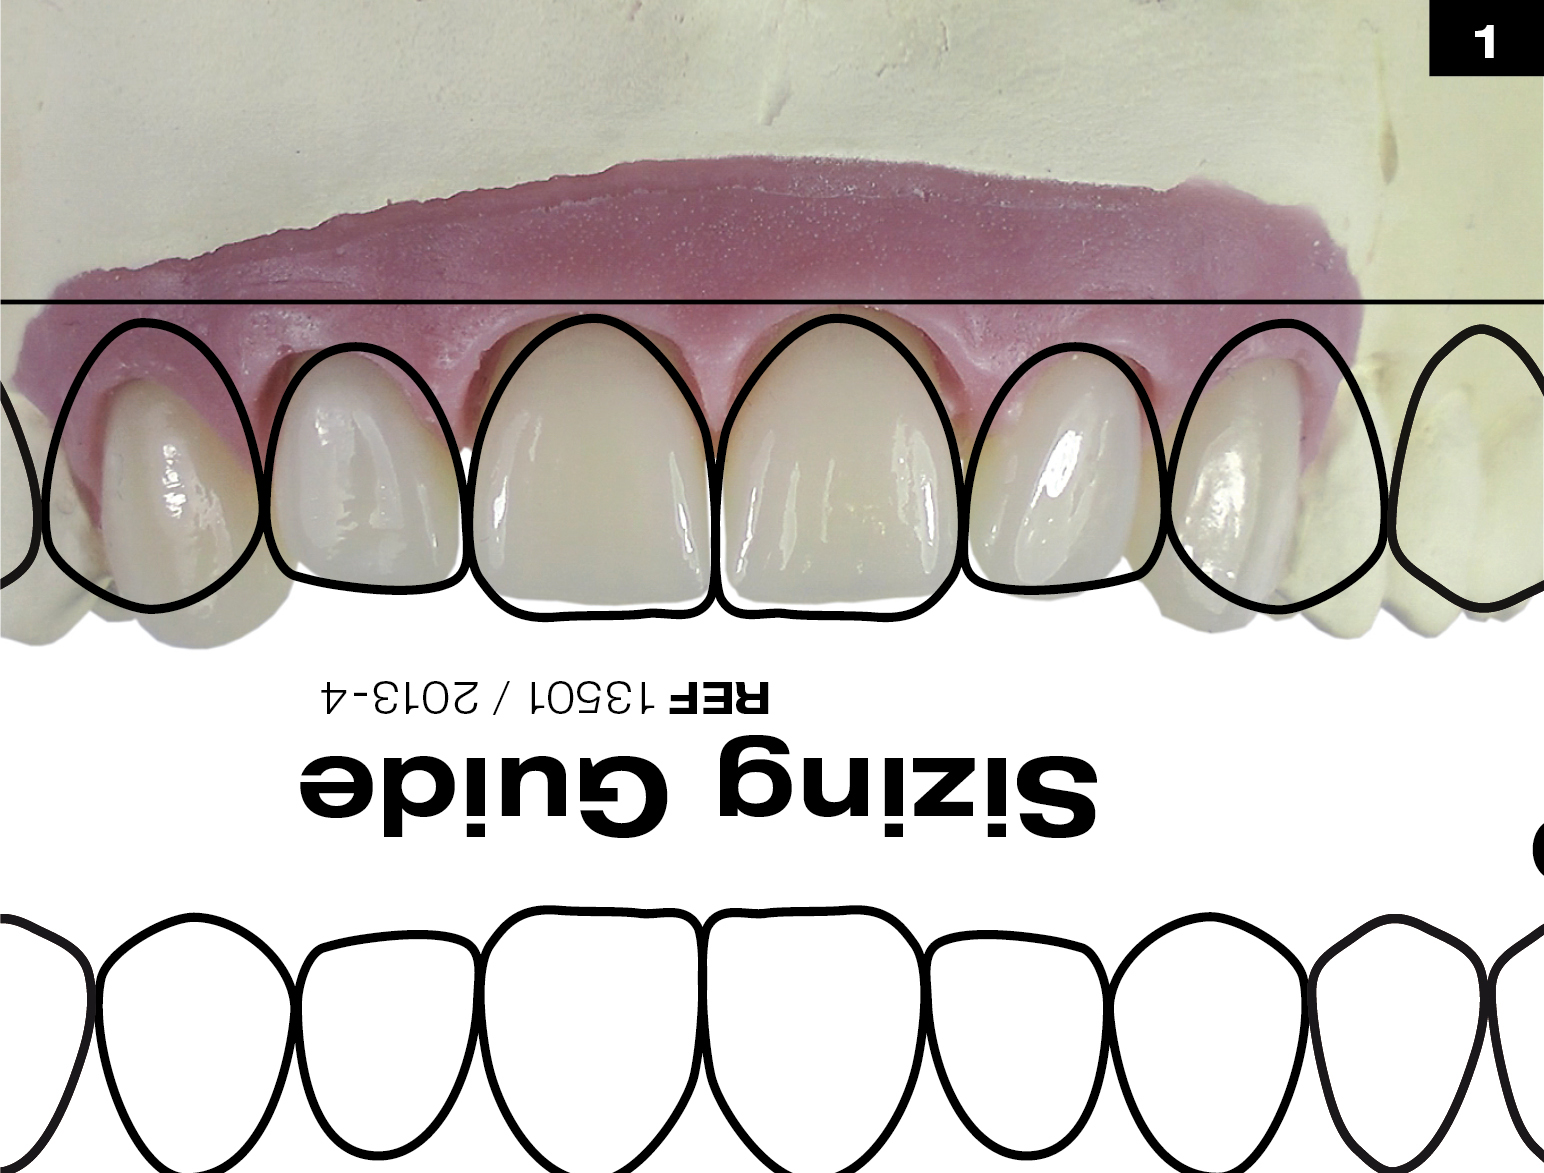
The choice of the tooth shape is performed with the available Sizing Guide (edelweiss VENEER Sizing Guide).
The Sizing Guide is positioned over the teeth to be restored, in which the visible profile allows for proper selection of the best fitting edelweiss VENEER. Adjustments can be illustrated directly on the template.
Sizing Guides
SIZING GUIDE UPPER JAW
Small / Medium
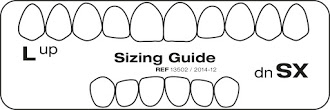
SIZING GUIDE UPPER JAW
Large / XS
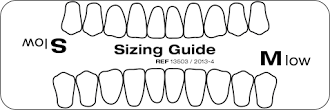
SIZING GUIDE LOWER JAW
Small / Medium
Shade Range
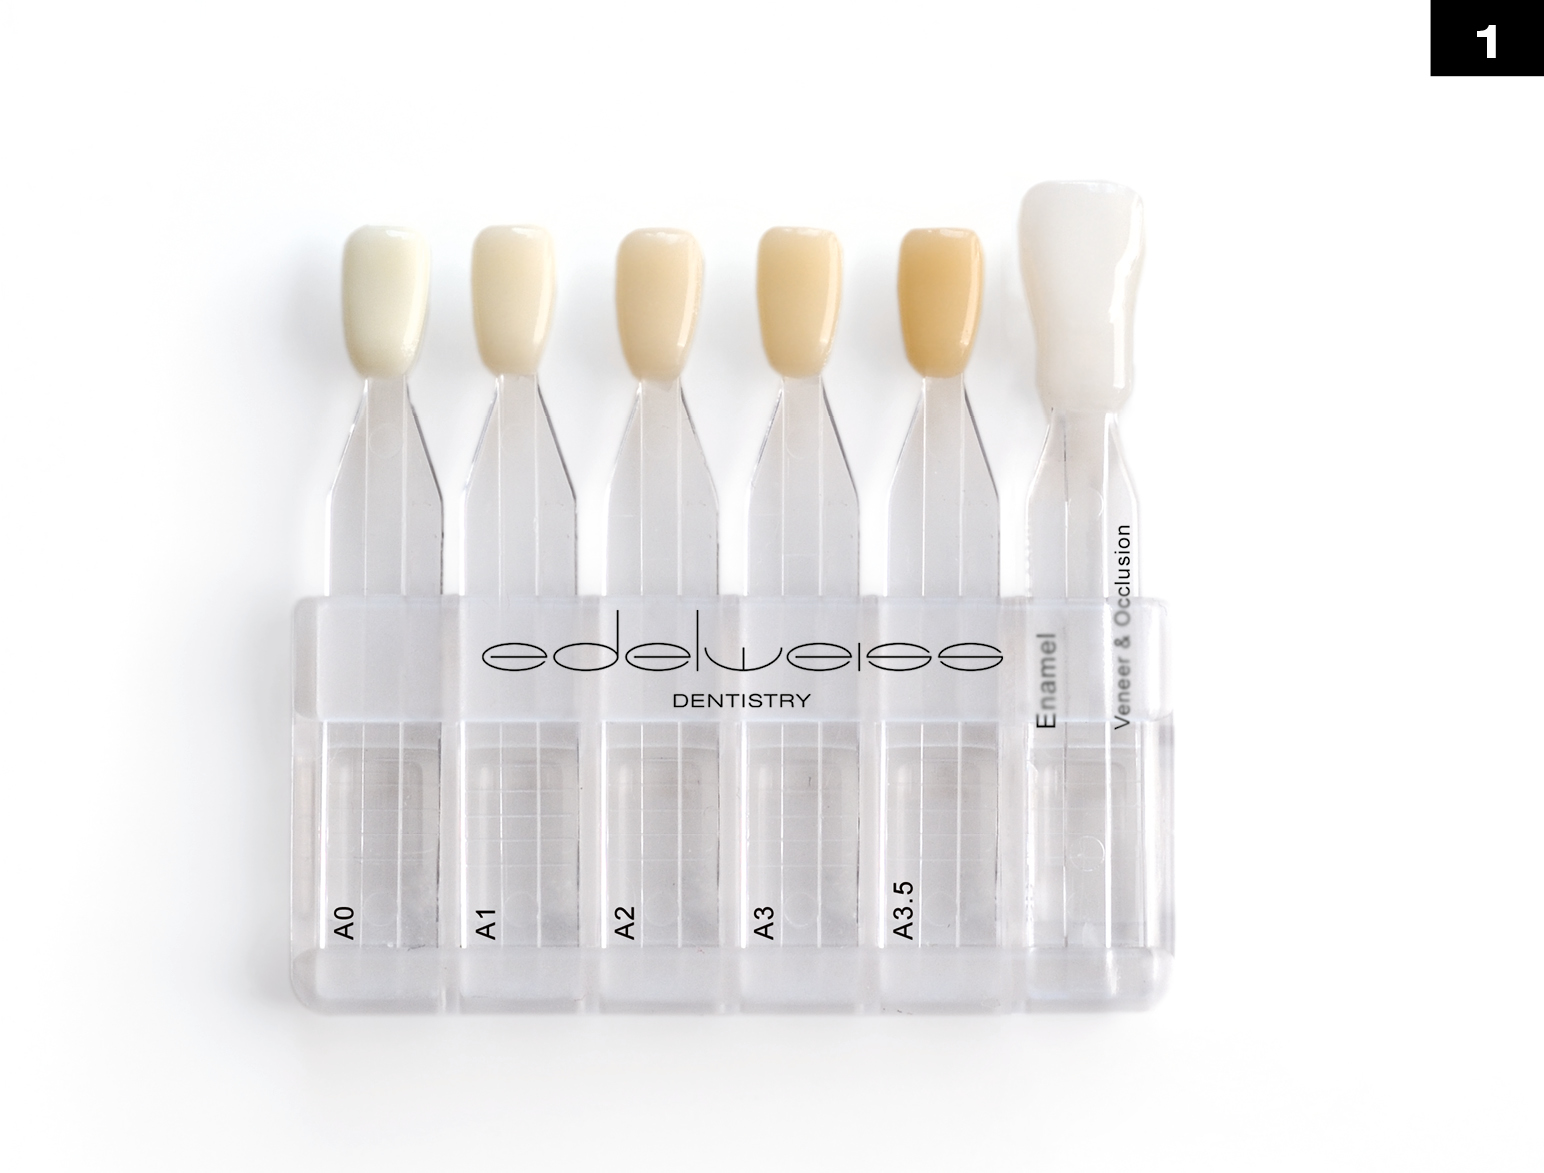
Edelweiss Shade Guide
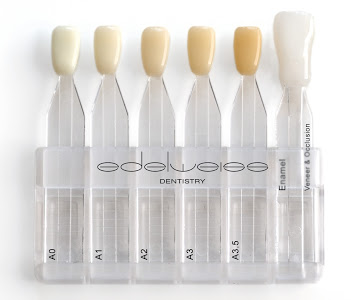
edelweiss dentin and enamel shades based on the natural layering technique.
EDELWEISS SHADE SELECTION
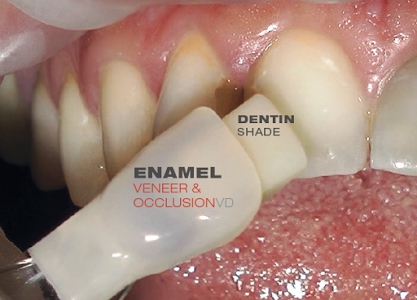
Placing the enamel VENEER shell over the dentin core.
For light refraction place glycerine within enamel shell first.
NATURAL LAYERING TECHNIQUE
The concept was proposed in 1995 by Prof. Dr. D. Dietschi and was published for the first time in 1997.
It is based on the idea of creating a synthesis between light, materialand color in order to mimic the natural tooth structure.
edelweiss COMPOSITE restructures teeth using two toothlike masses that are comparable to the vita dentin and enamel…
Shades
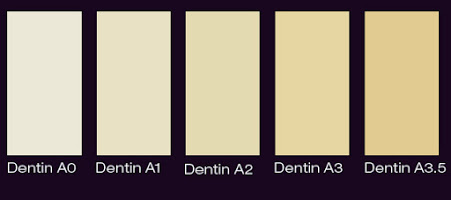
5 Dentin Shades
Single opacity - same hue, but different chroma levels - fluorescence. From Dentin A0, for the restoration of bleached teeth to Dentin A3.5, for cervical restorations of darker teeth for elderly patients. Dentin Body shades exhibit high opacity and fluorescence which correspond to natural shades of dentin.

1 ENAMEL SHADE
Enamel shade intensifies the translucency, which increase the true opalescence for all optical variations found in natural dentition. Basic Tint: Enamel
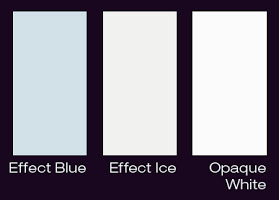
3 EFFECT SHADES
Effect Blue serves to enhance blue-opalescent effects of the incisal edge. Effect Ice helps to simulate widespread enamel opacities. Opaque White is mainly used in combination with other shades to produce “opaquers” of desired shade to cover either severely discolored tissues or metals. Tint: Effect Blue, Effect Ice, Opaque White
Edelweiss Shade System
edelweiss VENEERs consist of the shade Enamel – Vita Enamel AO.
The respective dentin and enamel shades used to cement the VENEER will determine the final shade tone of the restoration.
Example:
edelweiss VENEER (Vita Enamel Shade AO) cemented with Dentin Shade A3 (Vita Dentin Shade A3) will result in the Vita Dentin Shade A3.

Step By Step
Veneer on Stone Model
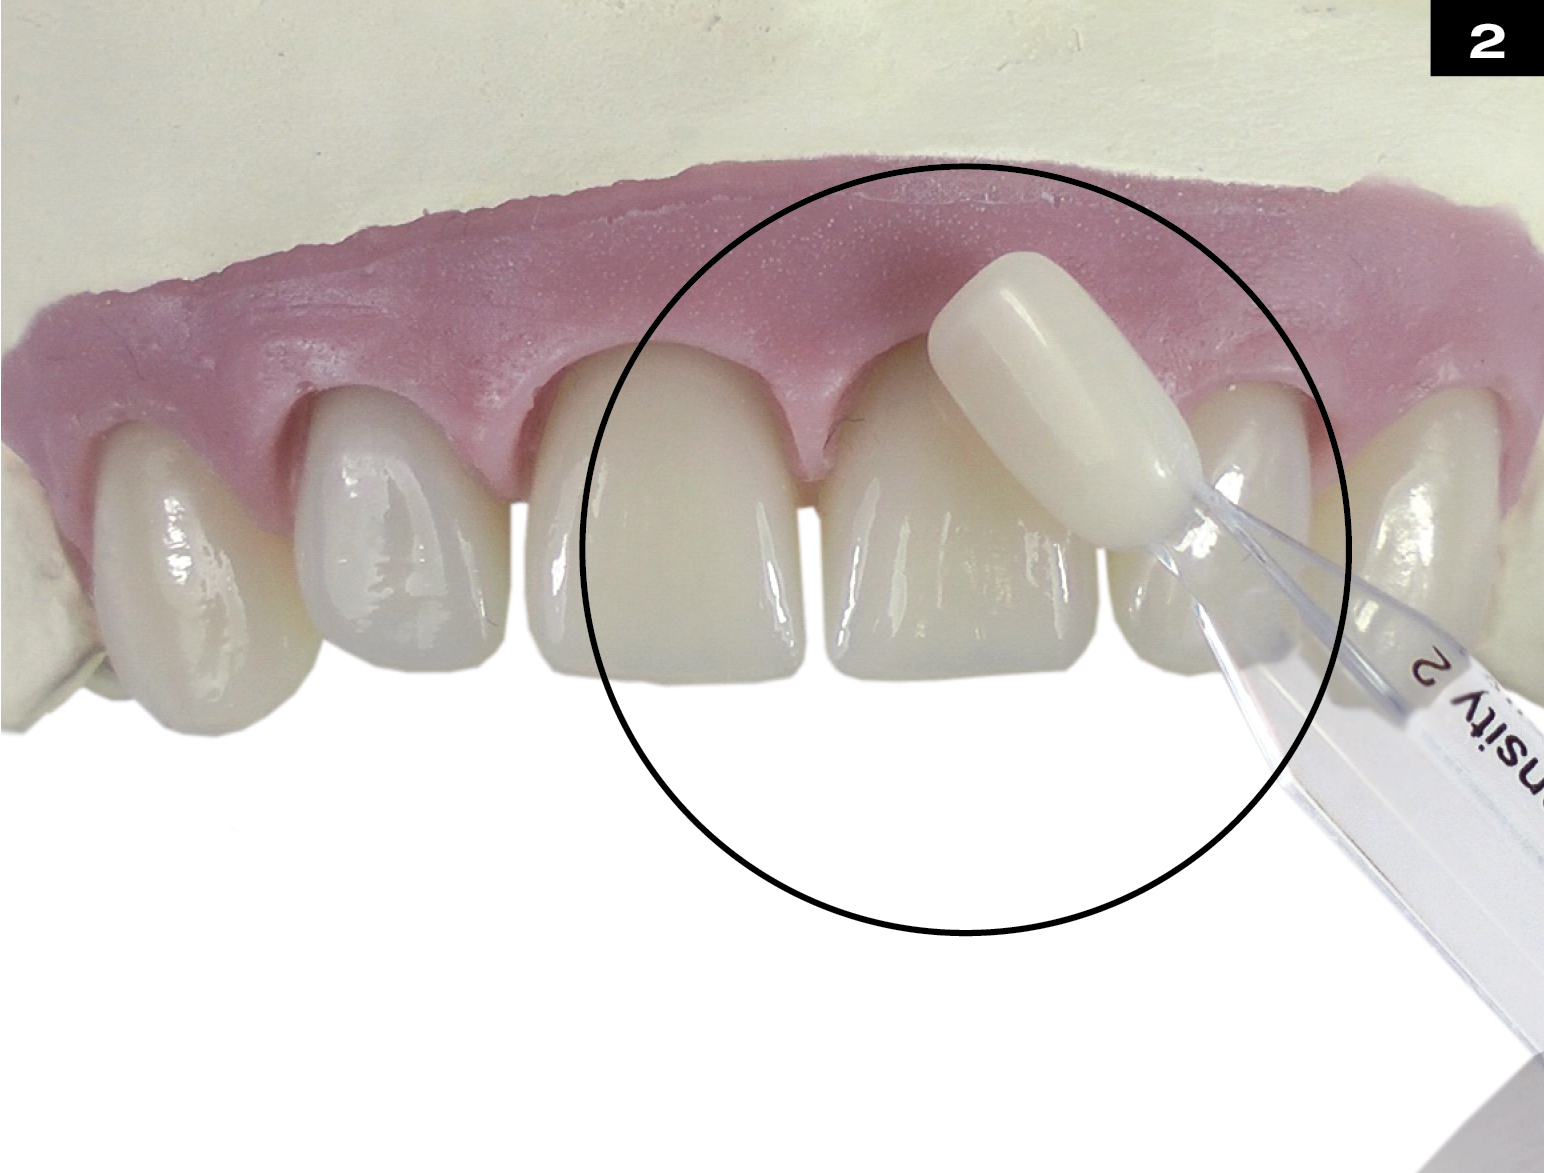
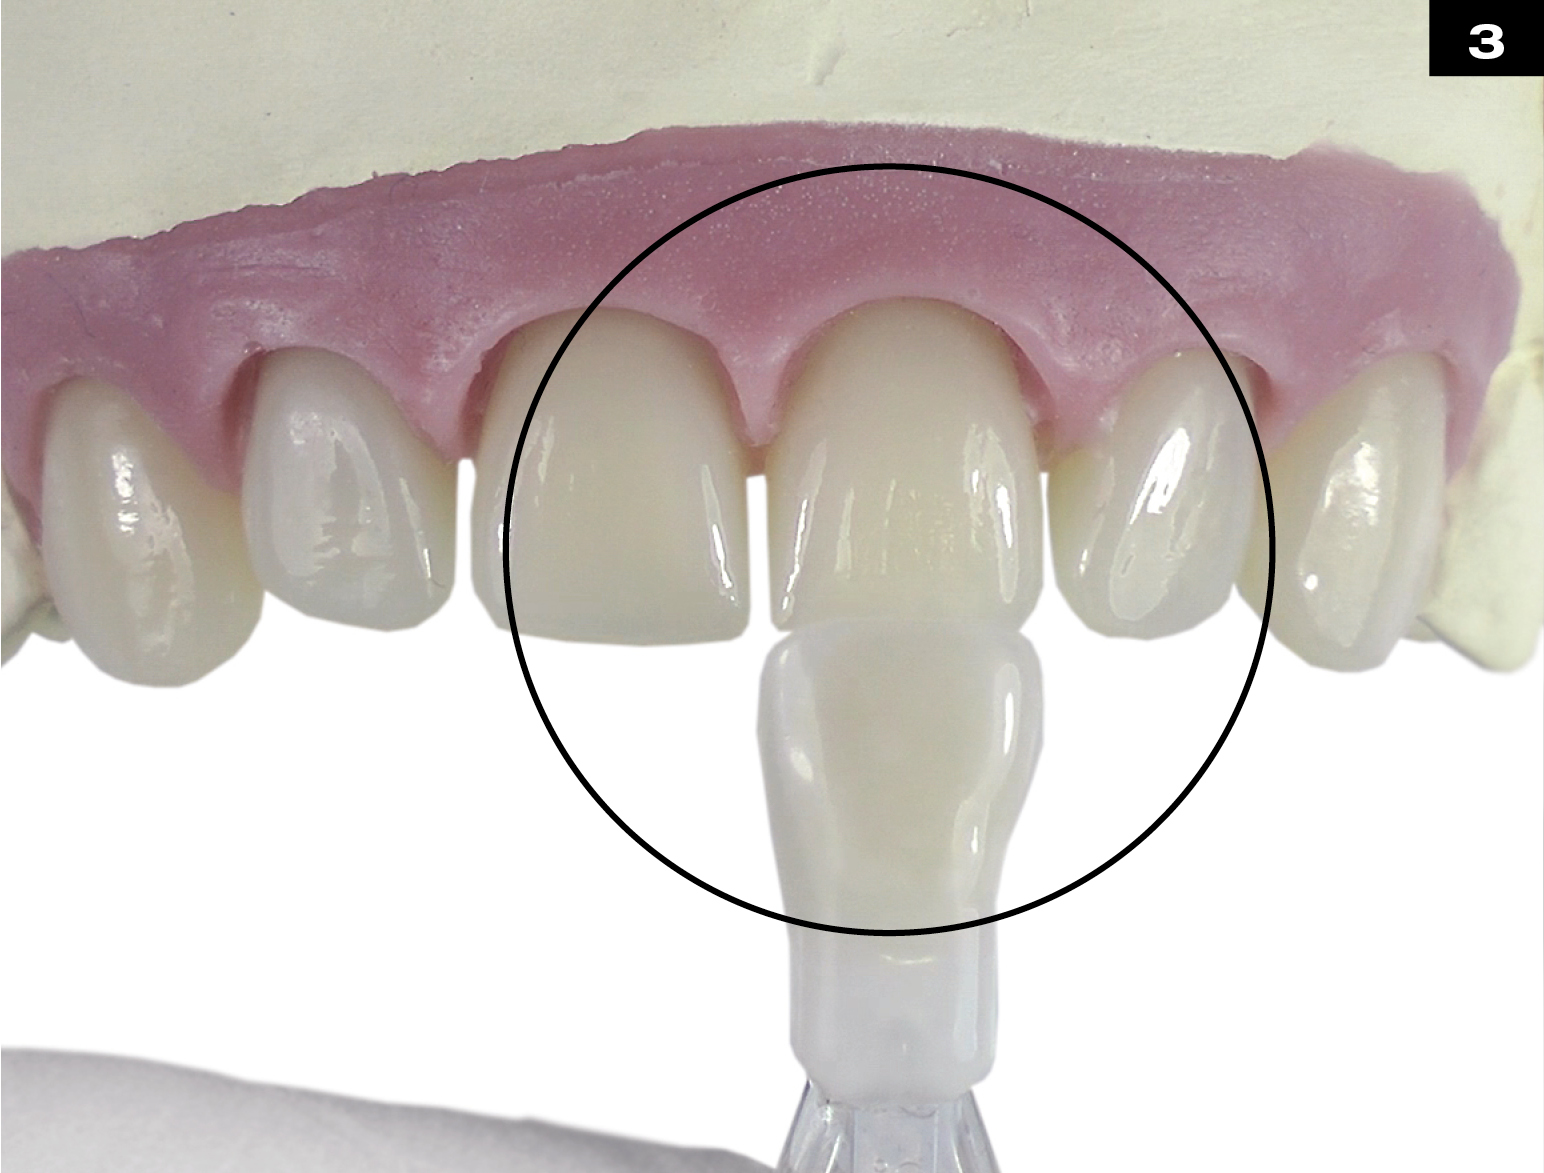
SELECT SIZE FOR VENEER USING EDELWEISS SIZING GUIDE.
Single or combined VENEER Sizes.
SELECT THE DENTIN SHADE AT CERVICAL AREA WITH SHADE GUIDE.
PLACING THE ENAMEL VENEER SHELL OVER THE DENTIN CORE.
For light refraction place glycerine within enamel shell first.
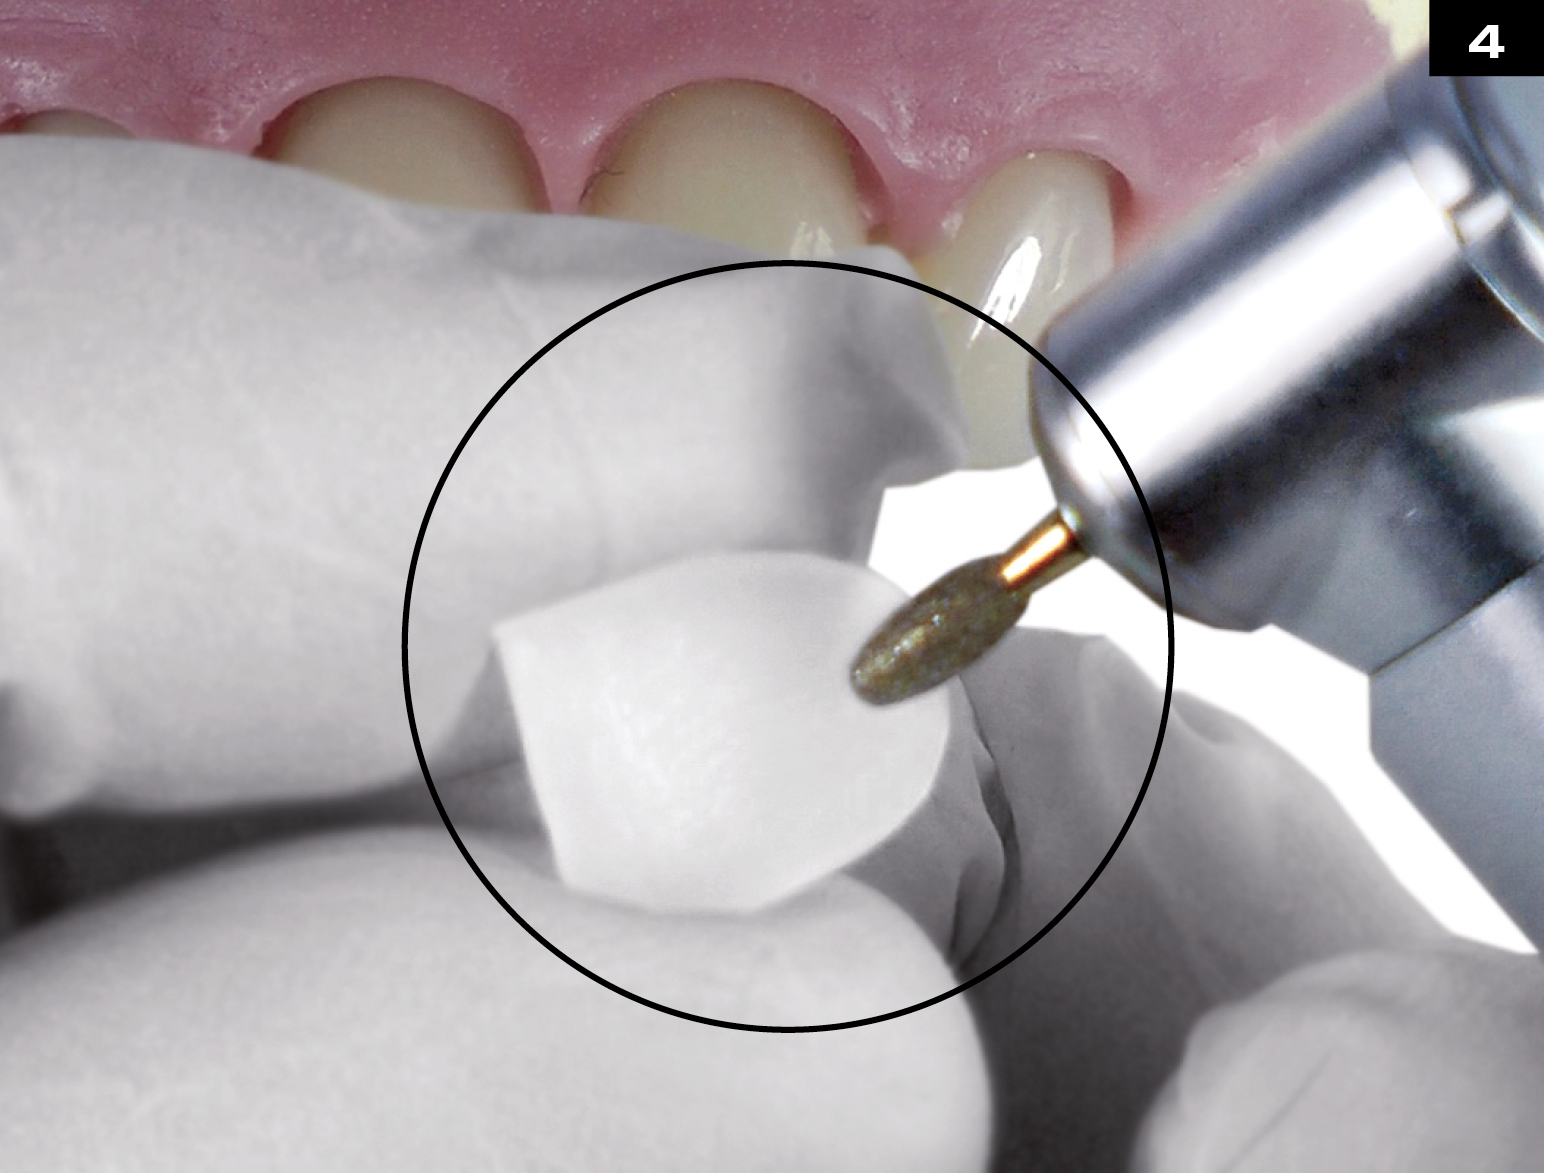
SHARPEN THE MARGINAL EDGES AND ROUGHEN INNER SURFACE OF THE EDELWEISS VENEER.
ADAPT THE FIT AND SHAPE ALONG THE GINGIVAL MARGIN.
MINIMALLY INVASIVE TOOTH PREPARATION.

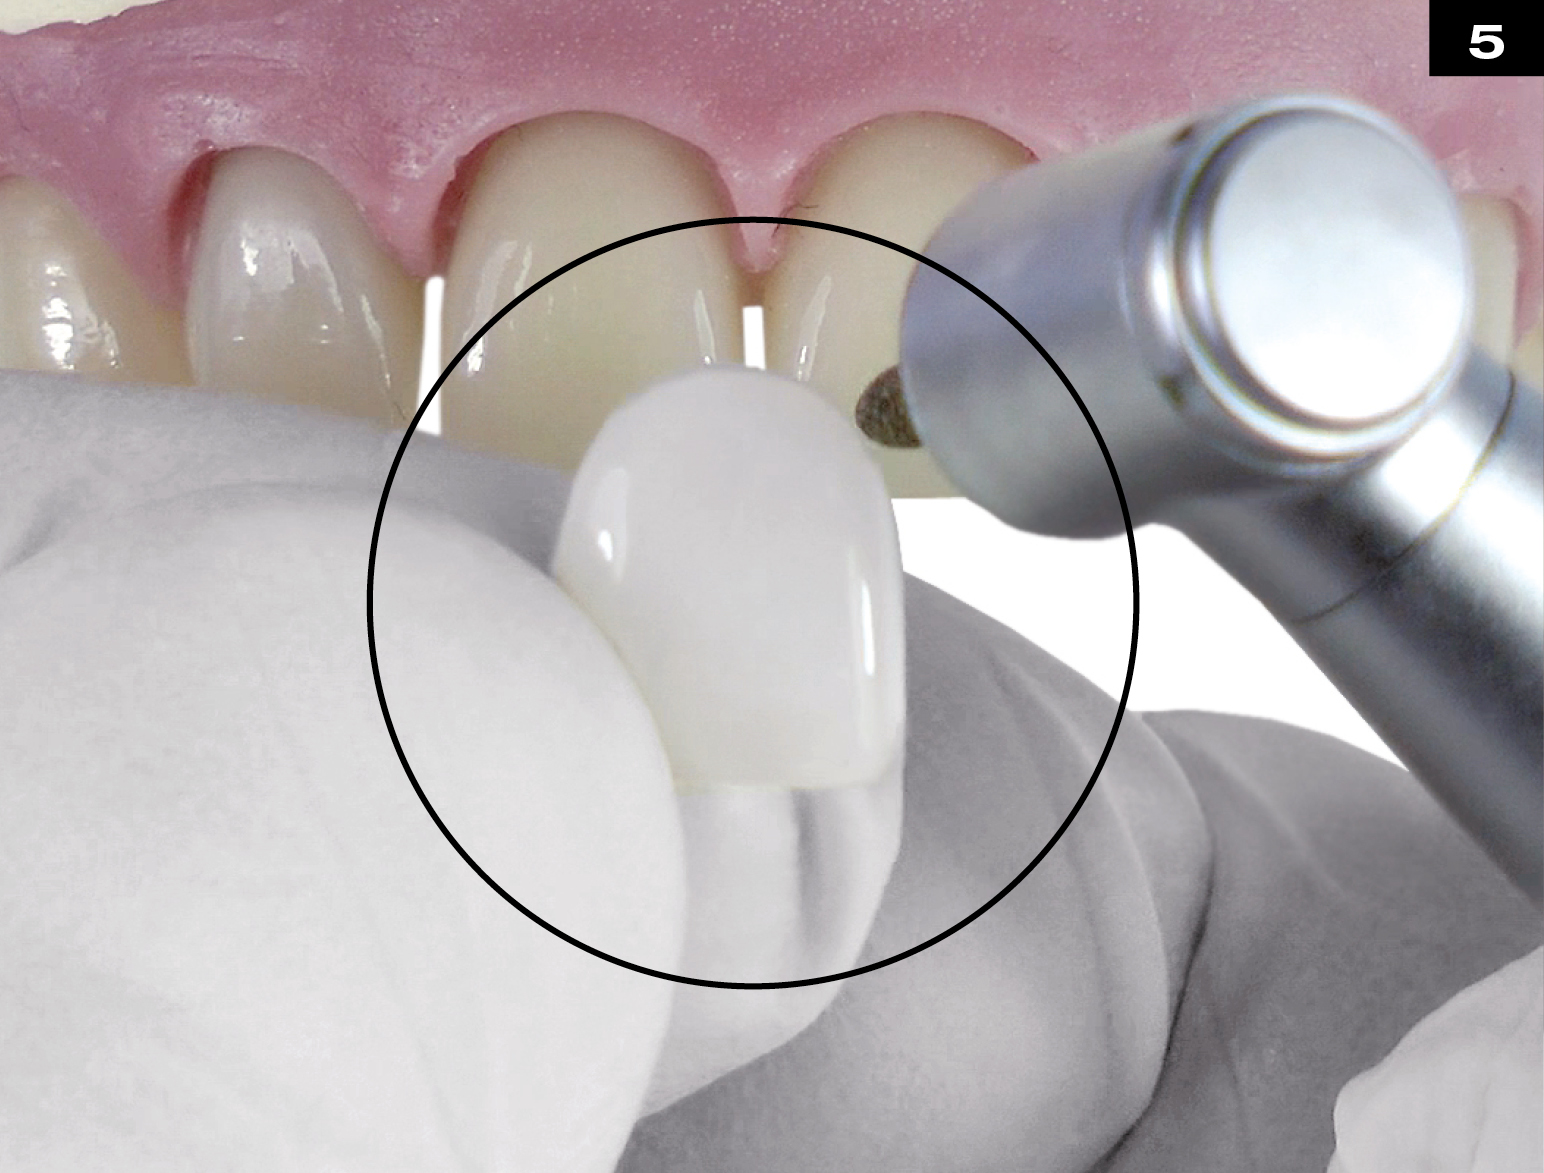
TRIAL FIT VISUALIZATION OF EDELWEISS VENEERS.
Facial view.

APPLY ULTRA-ETCH (UPI) FOR 20 SEC., THEN RINSE AND SLIGHTLY DRY, LEAVING SURFACE SLIGHTLY DAMP.
PLACE A PUDDLE COAT OF PEAK UNIV. BOND (UPI) ON TOOTH AND GENTLY AGIGATE FOR 10 SEC.
Blow air using half pressure to thin and remove solvents. Surface will appear shiny.
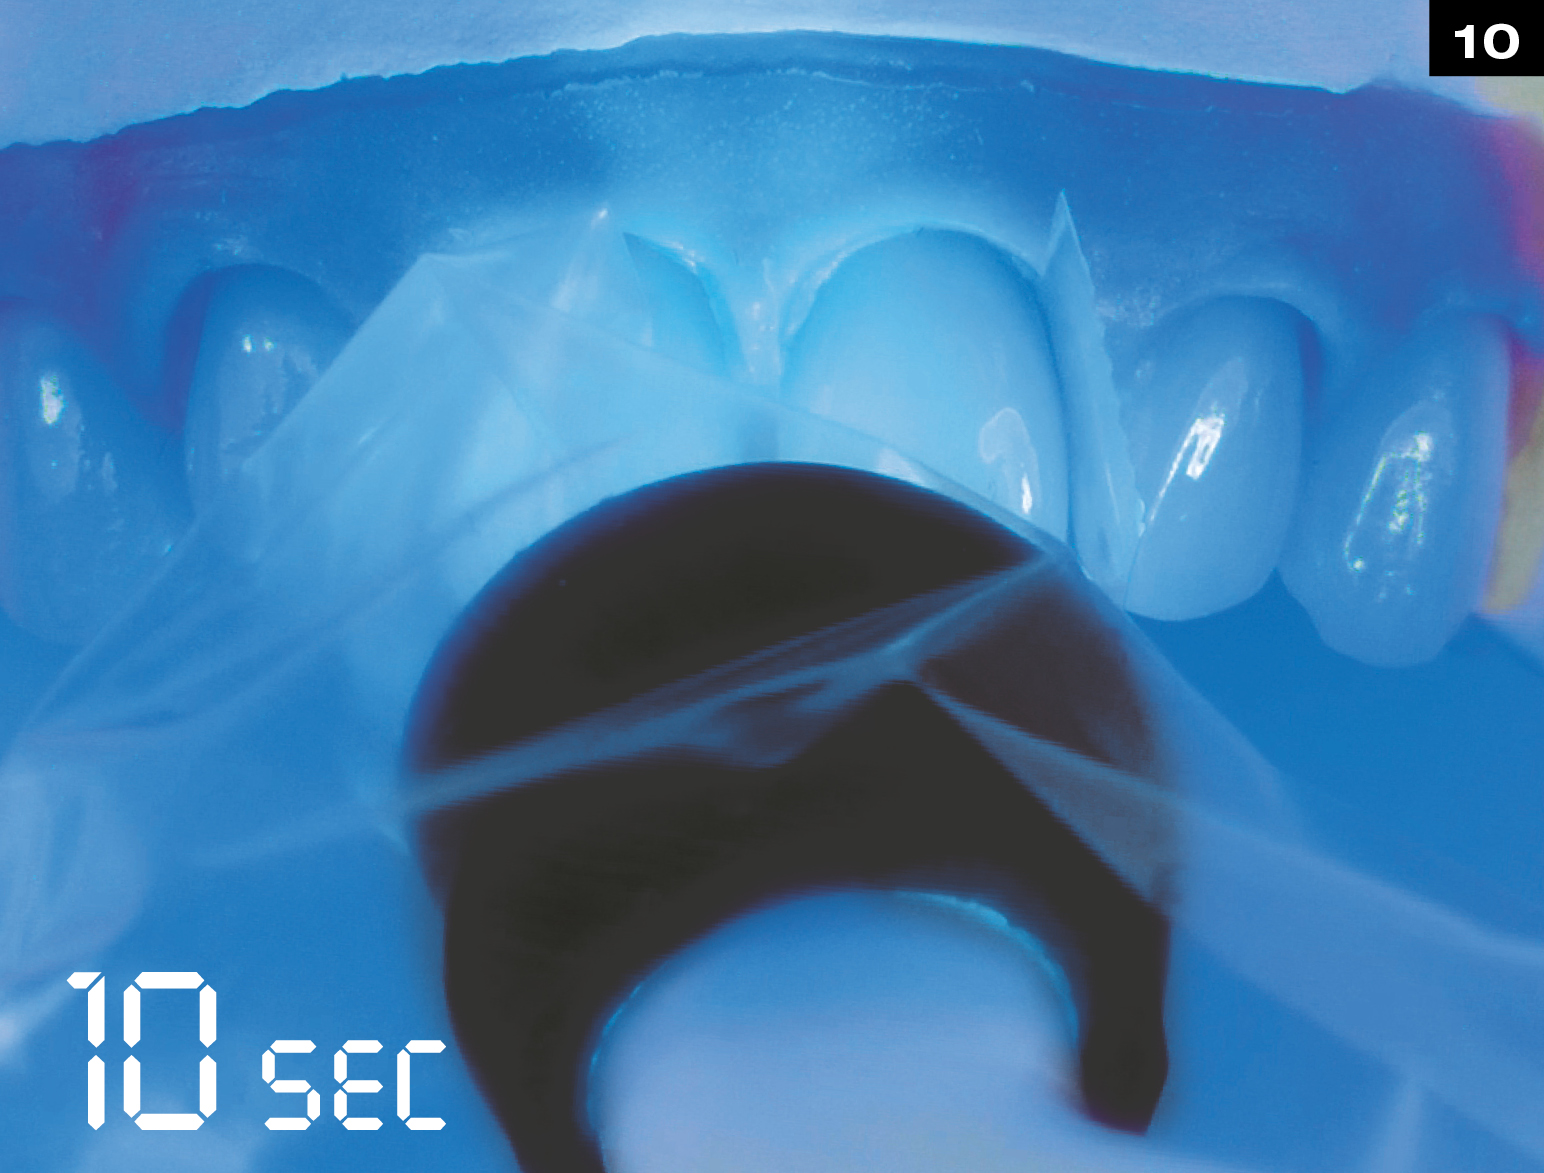
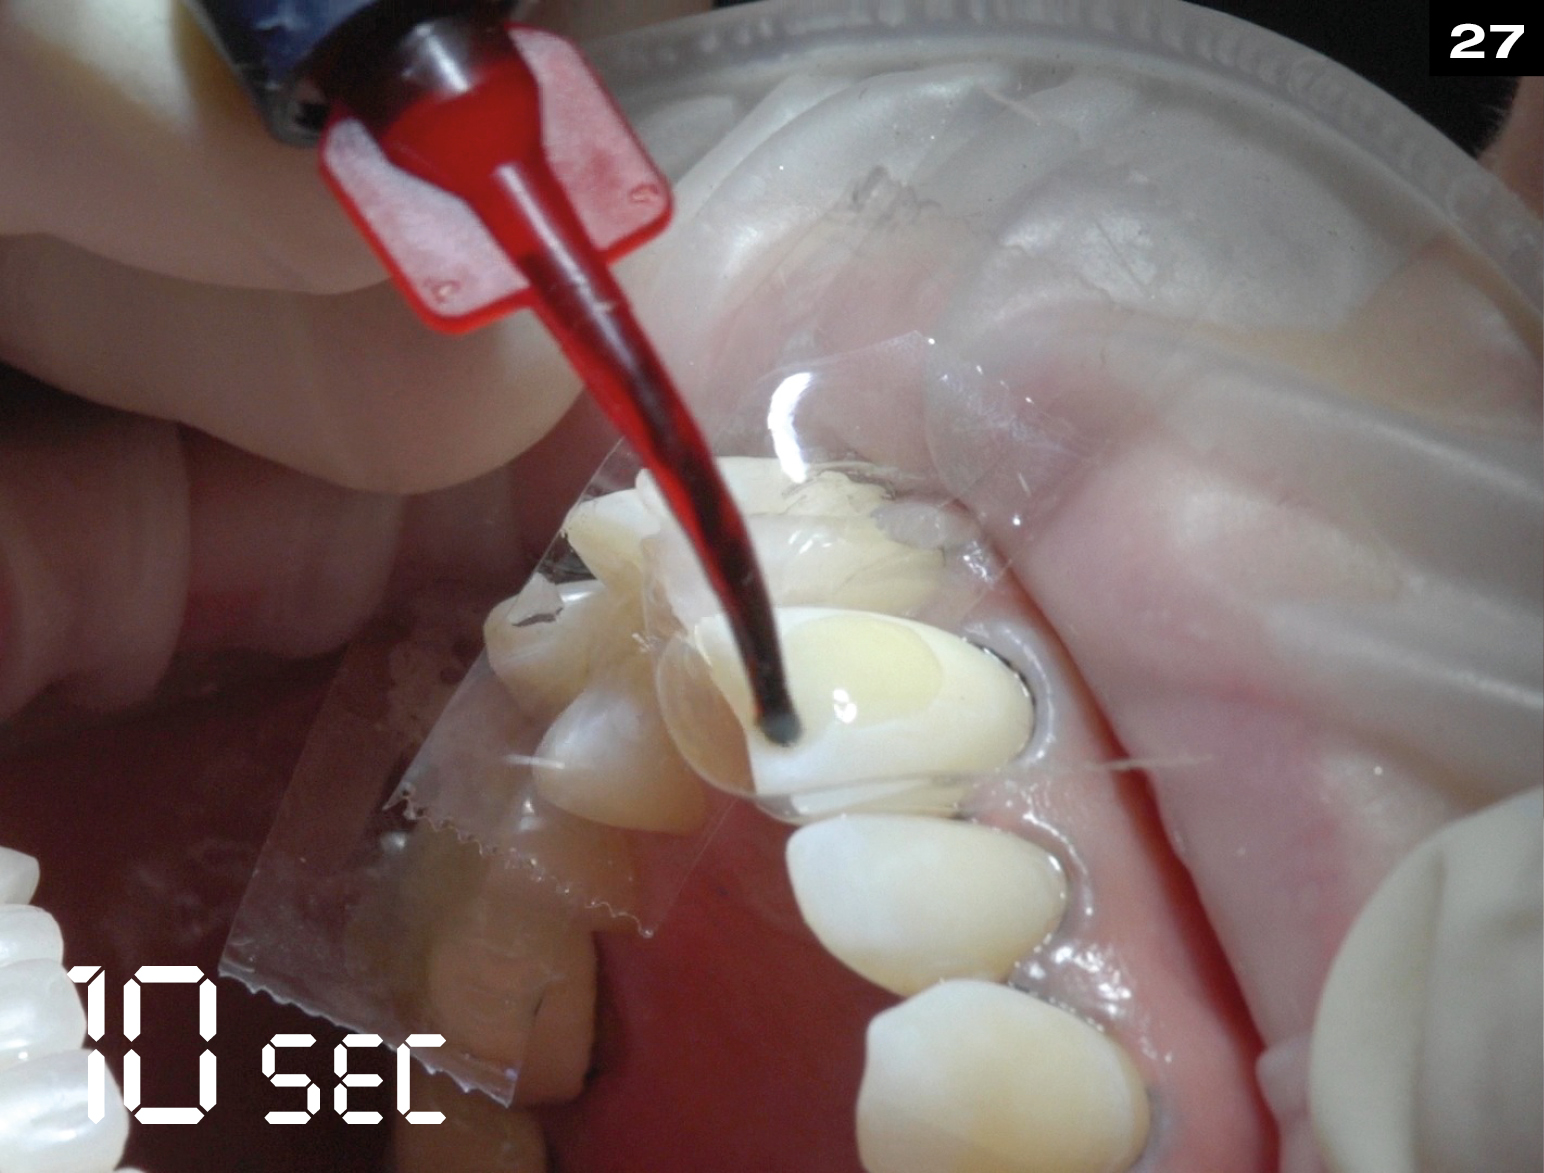
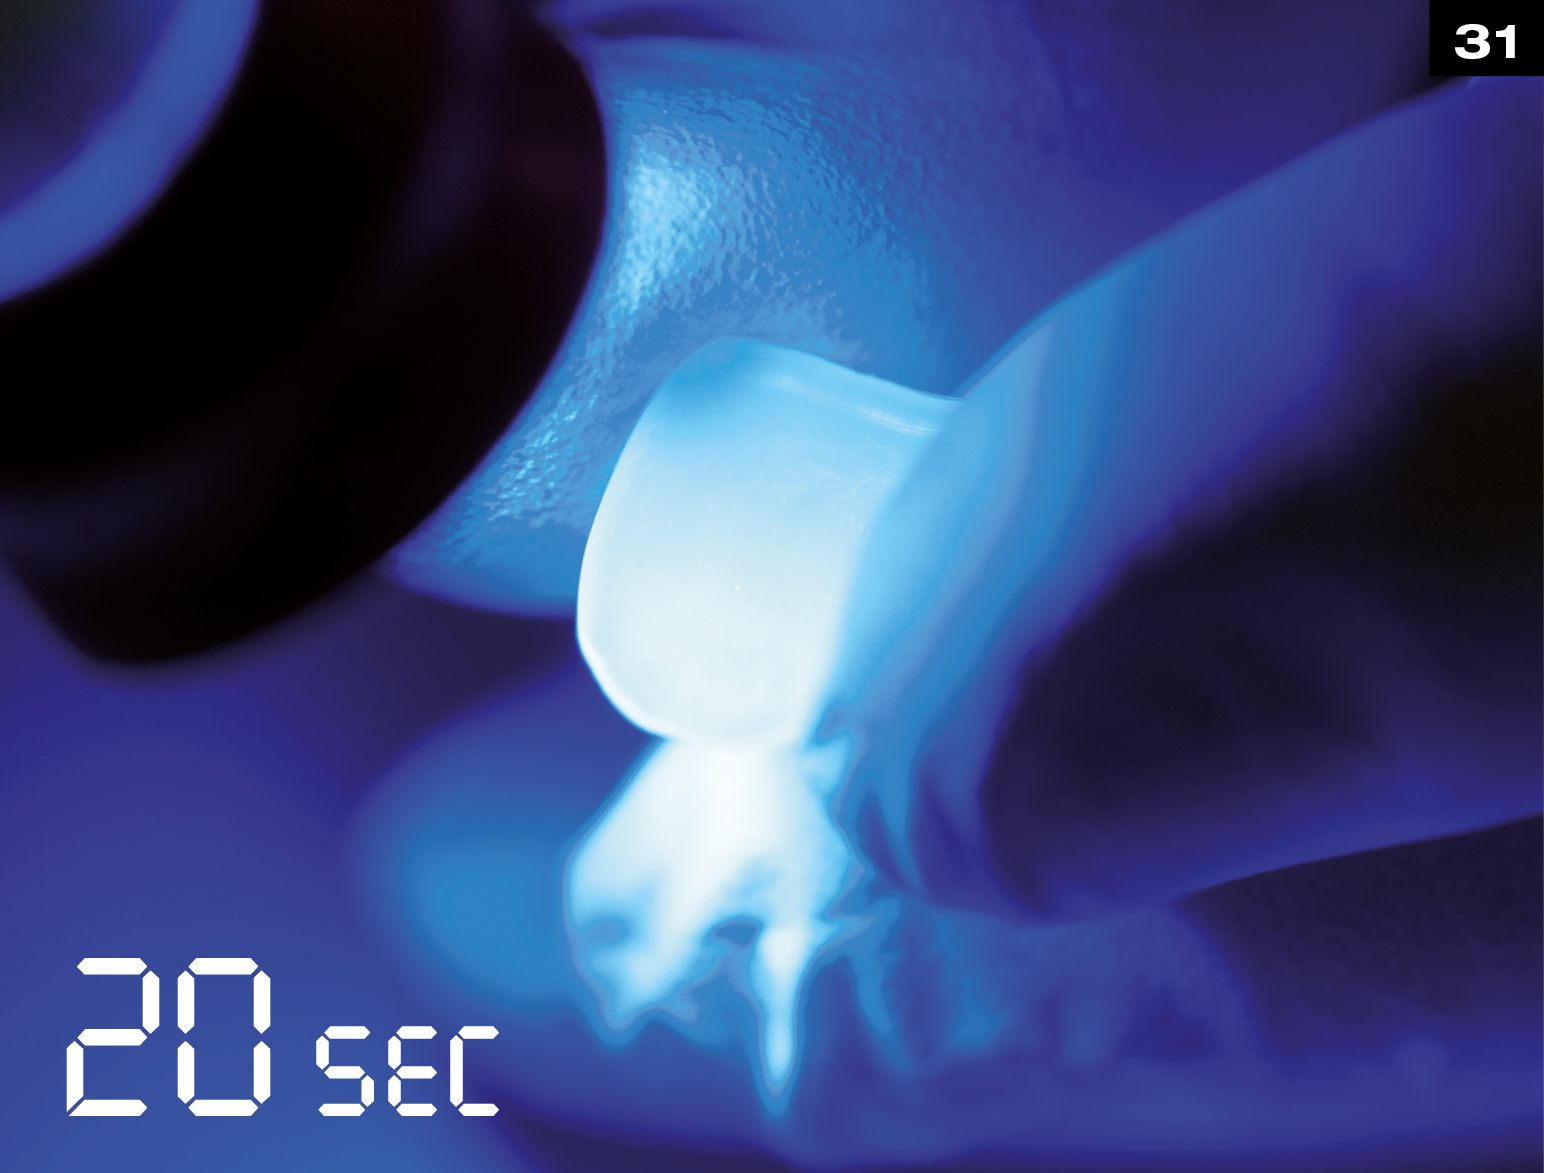
WITH VALO (UPI) CURE FOR 10 SEC. AT STANDARD POWER.
With other Light cure for 20 sec.
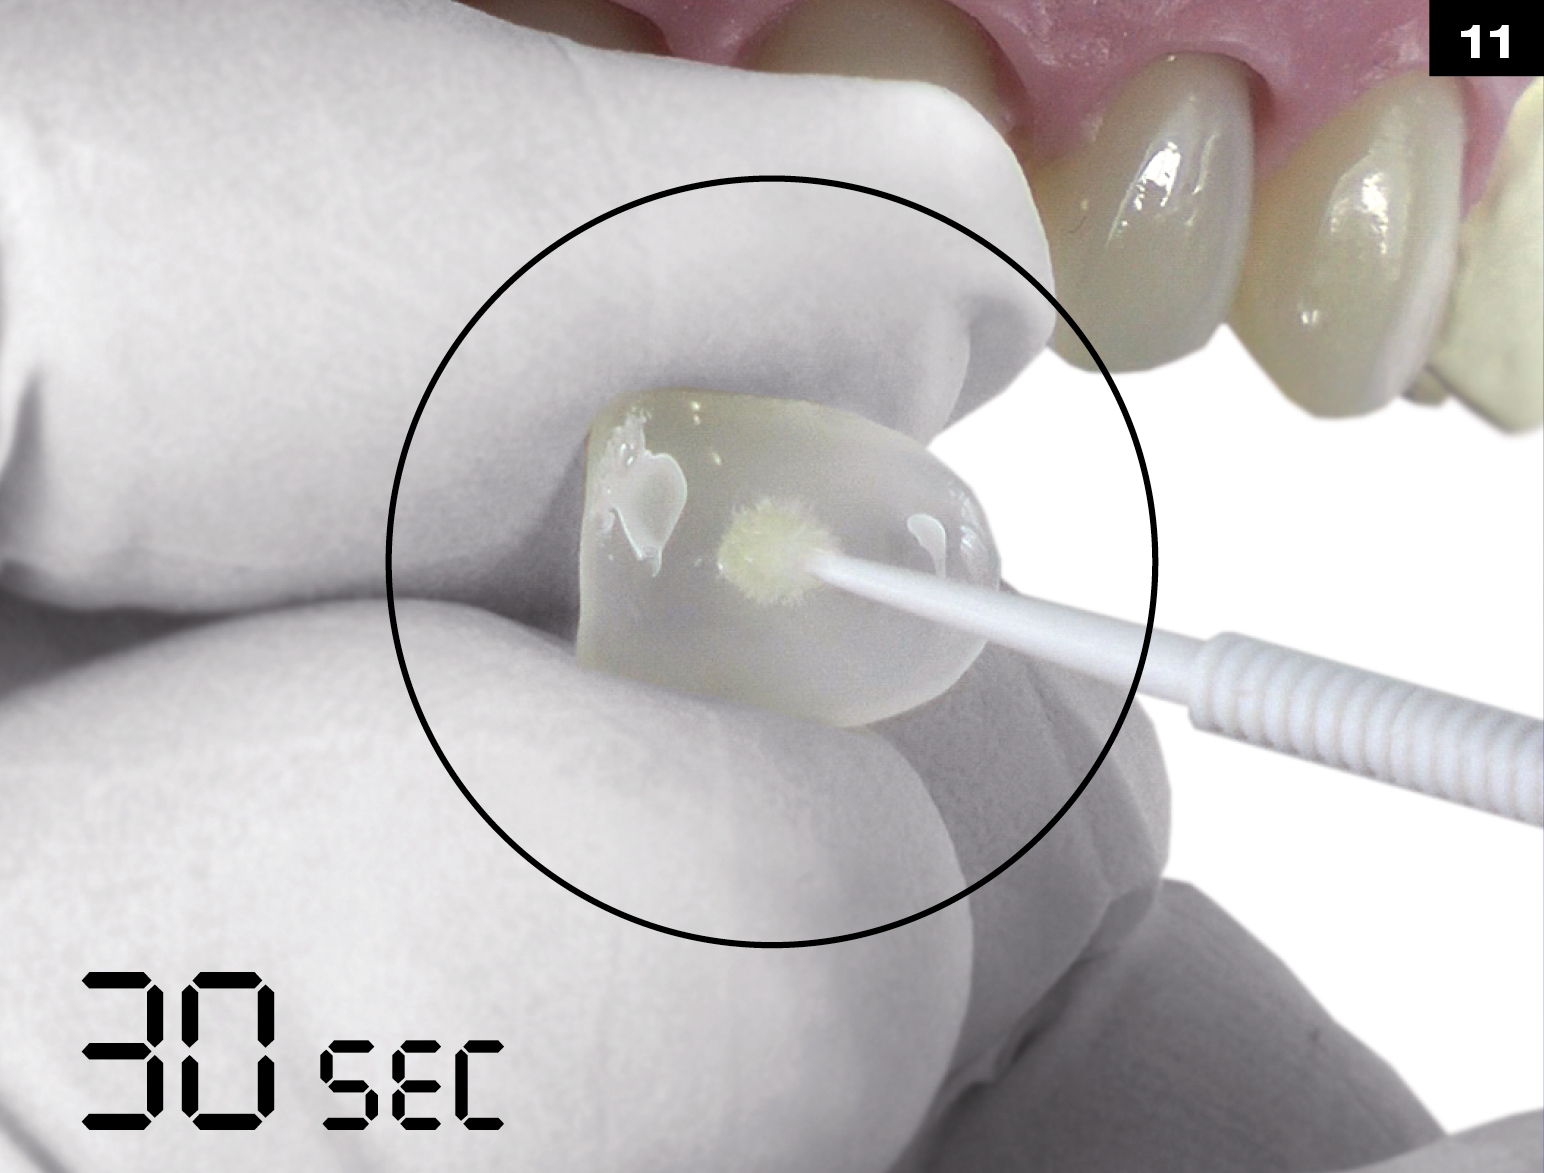
APPLY DIRECT VENEER BOND ONTO INNER SURFACE OF EDELWEISS VENEER - 30 SEC.
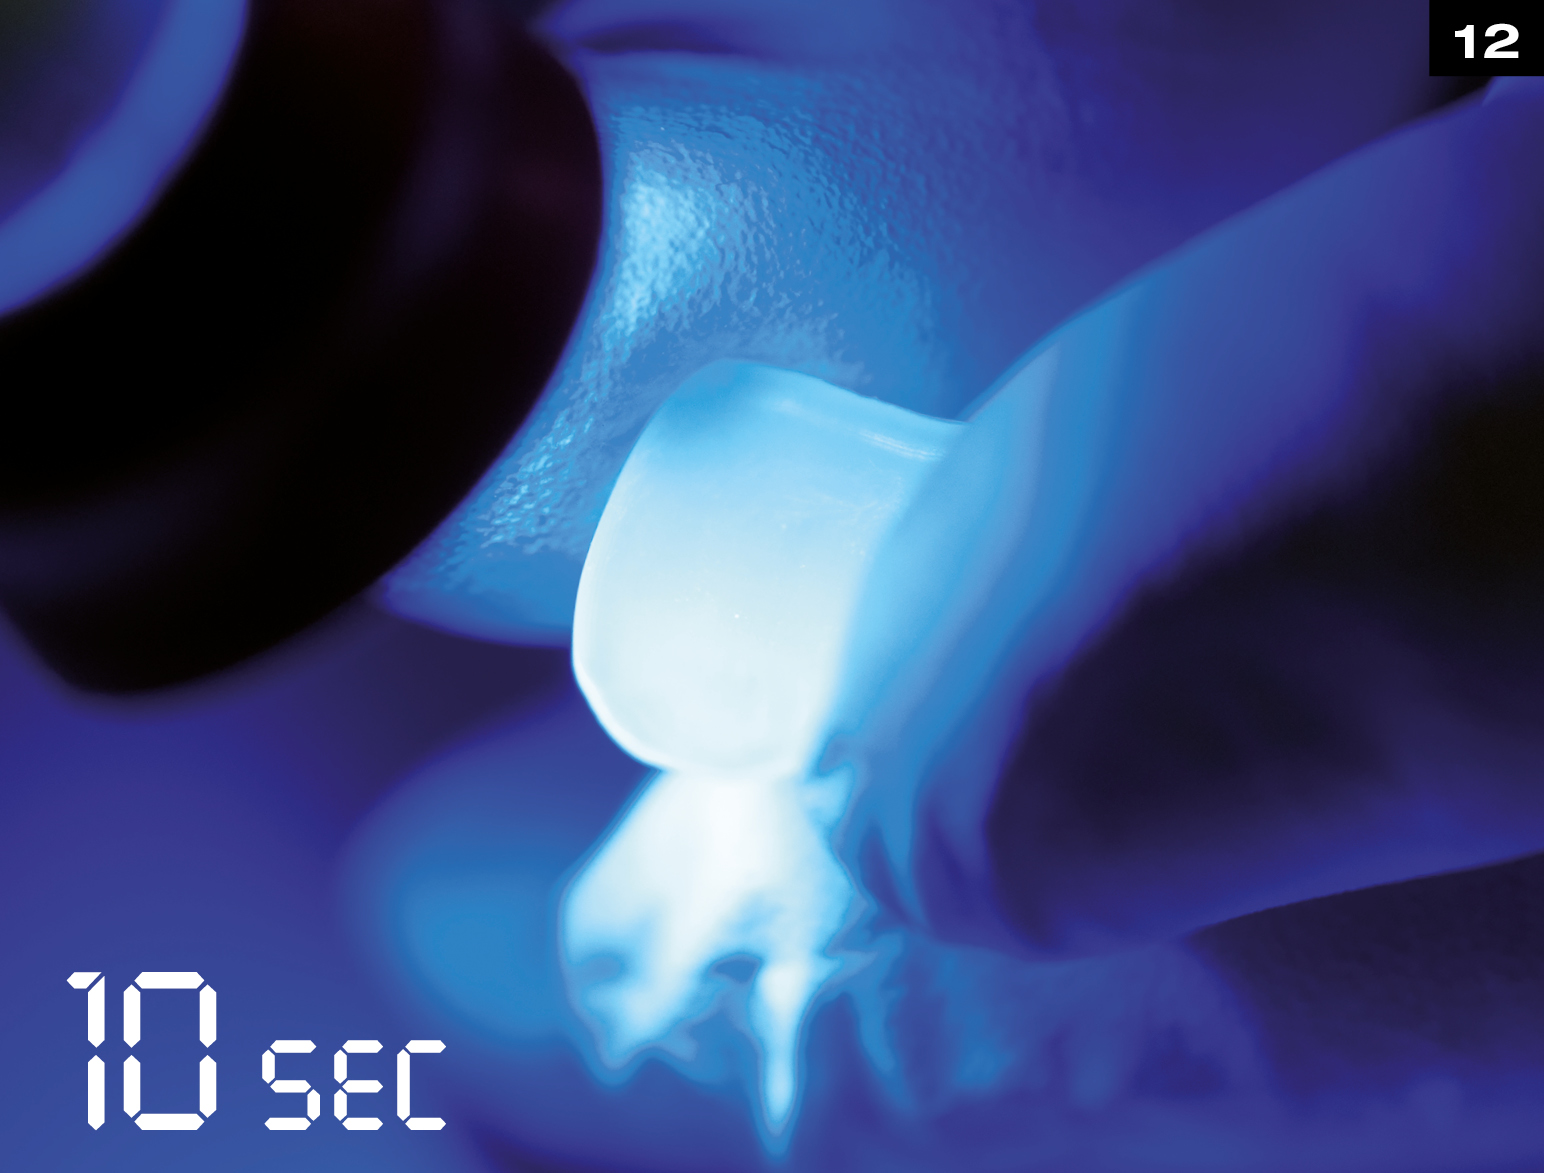
WITH VALO (UPI) CURE FOR 10 SEC. AT STANDARD POWER.
With other Light cure for 20 sec.
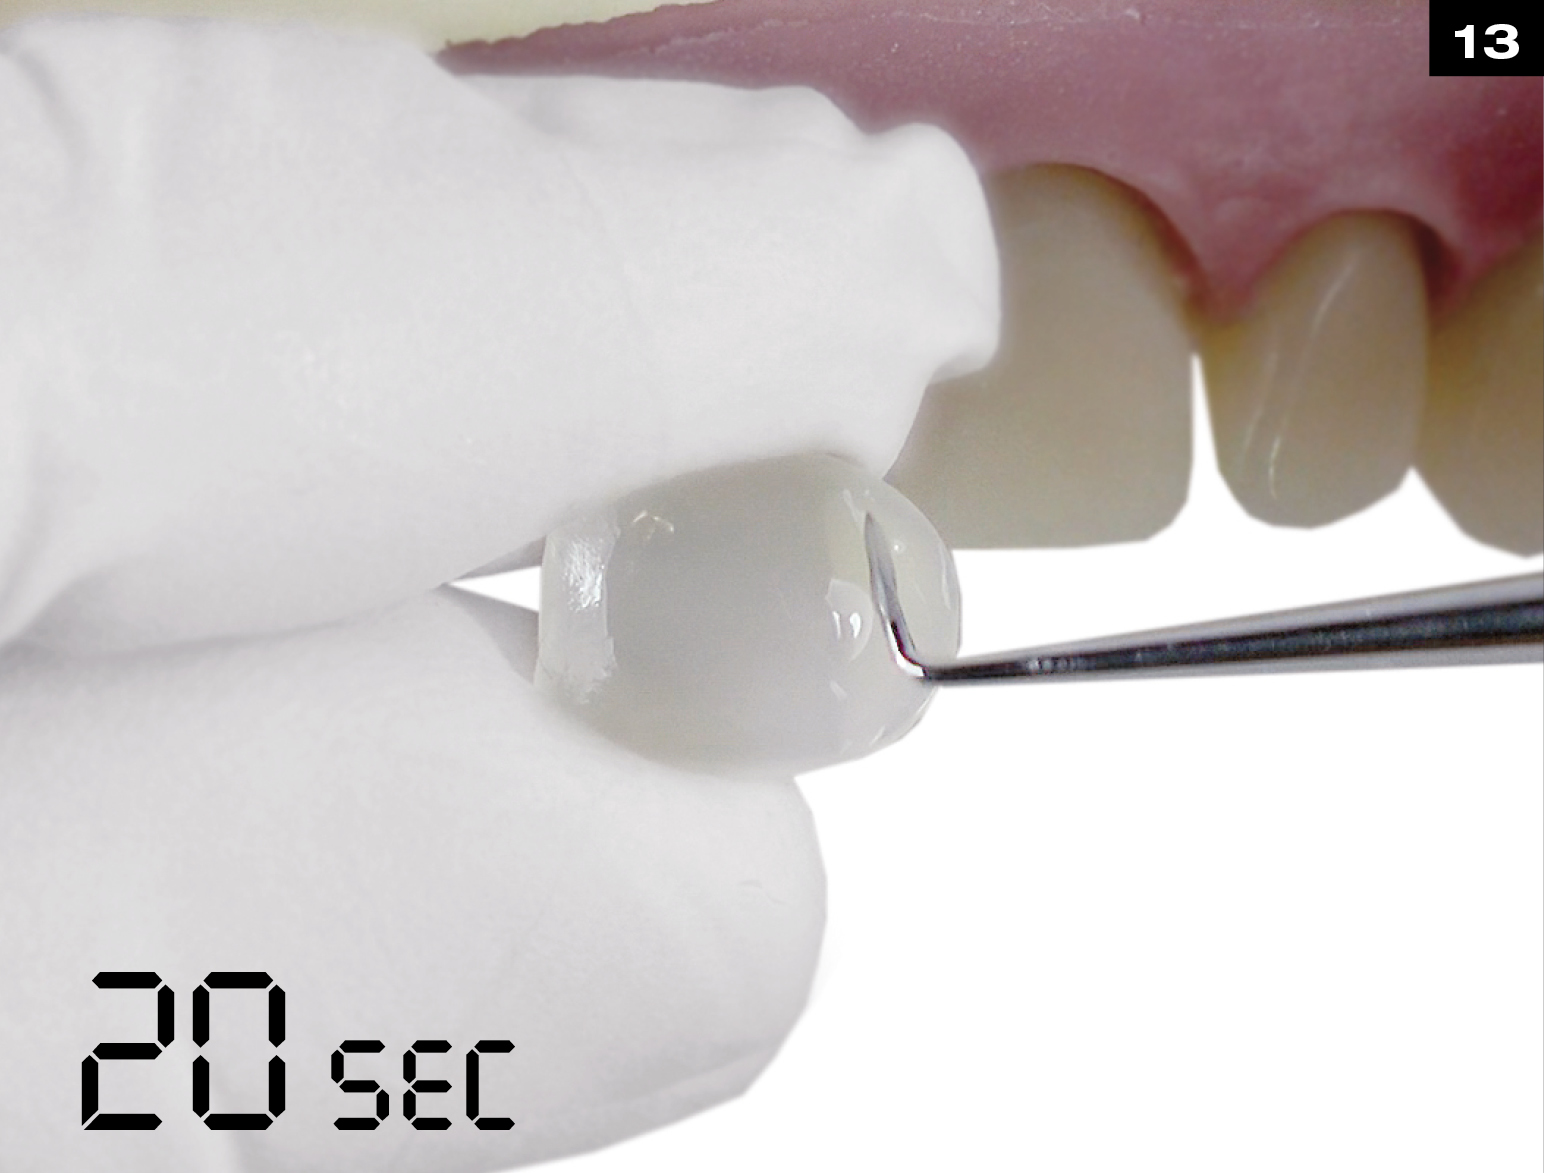
OPTIONAL: CHARACTERIZATION USING EDELWEISS COMPOSITE FLOW OR EFFECT SHADES.
(Mamelon,dark cervical) Light cure for 20 sec.
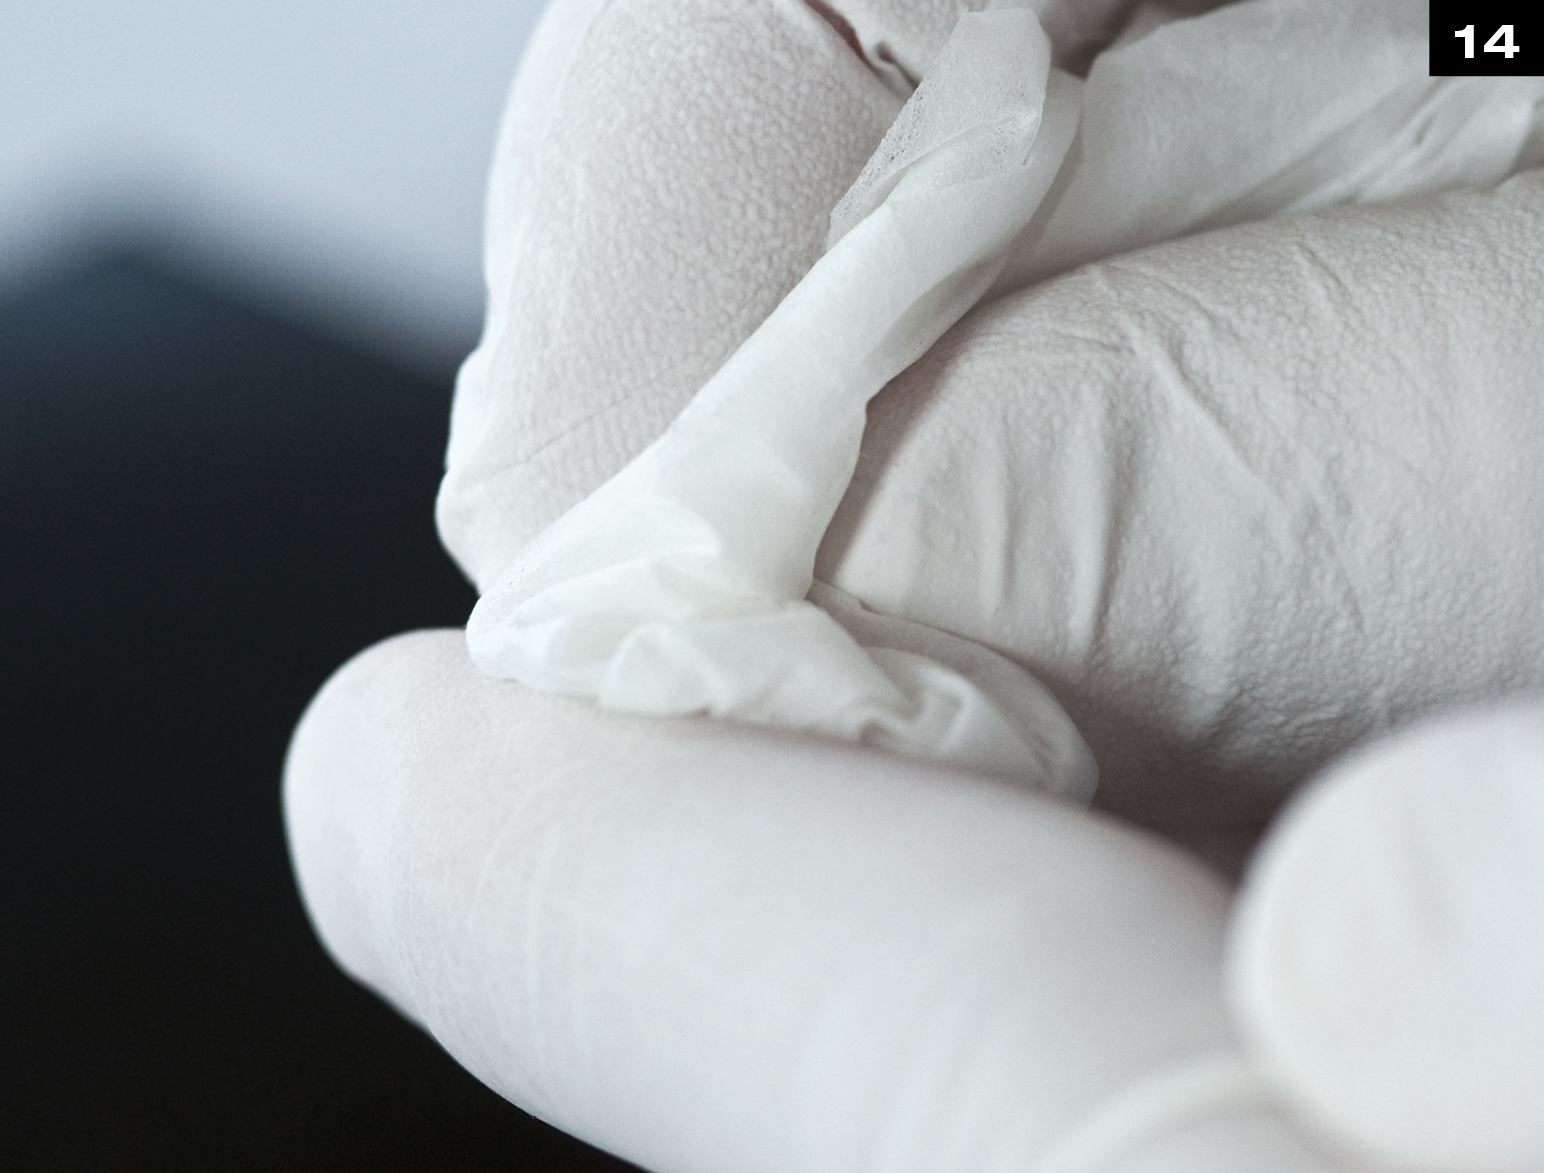
CLEAN FINGER WITH ISOPROPYL ALCOHOL WIPES.
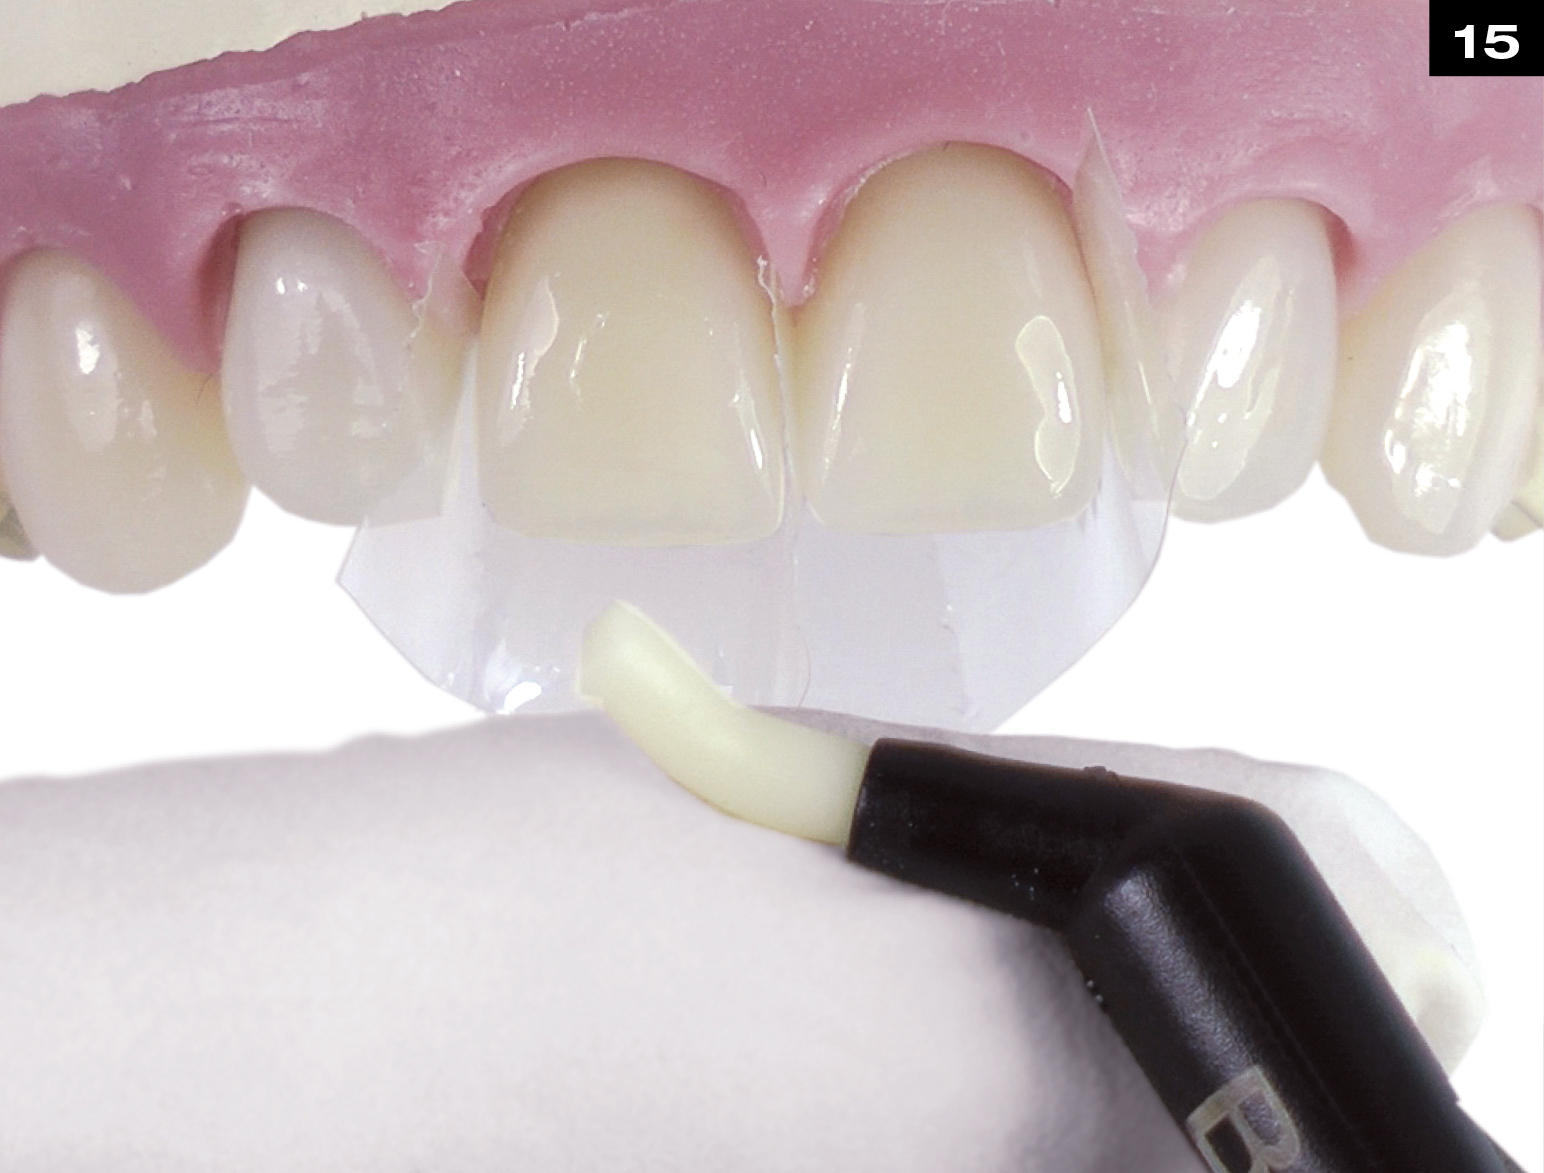
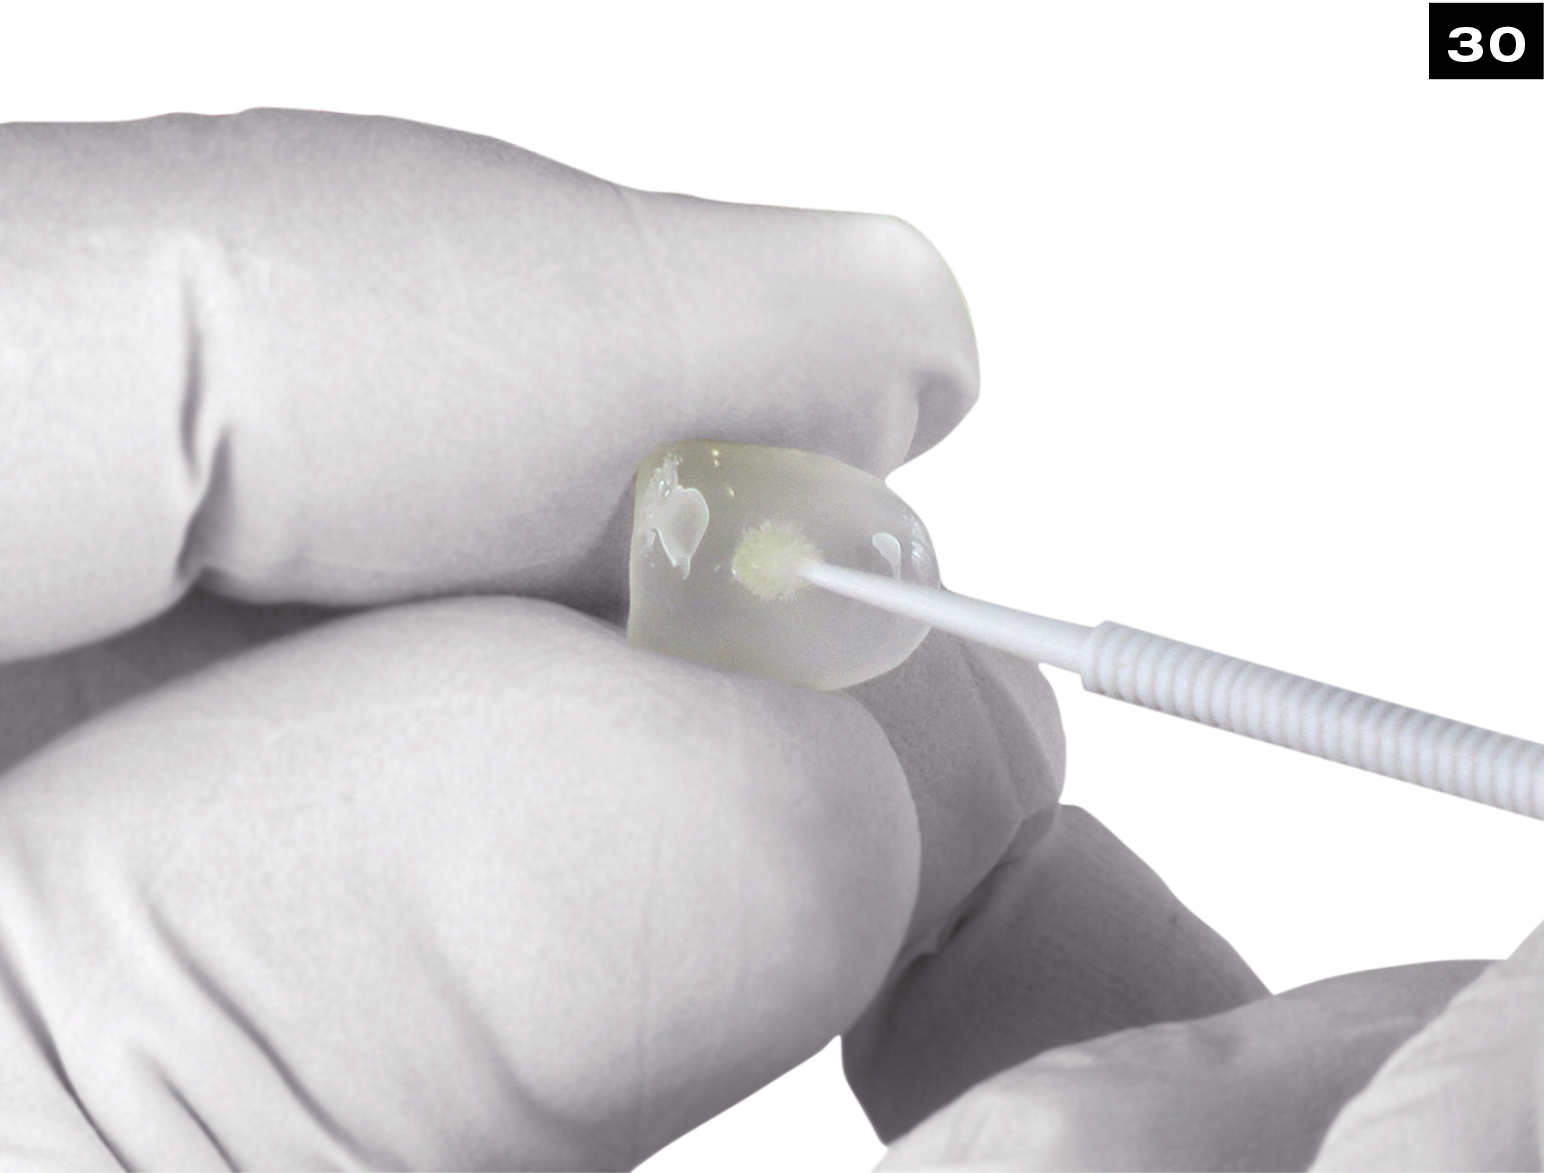
DISPENSE 1 CM STRIP OF NANO-HYBRID COMPOSITE ONTO FINGER TIP.
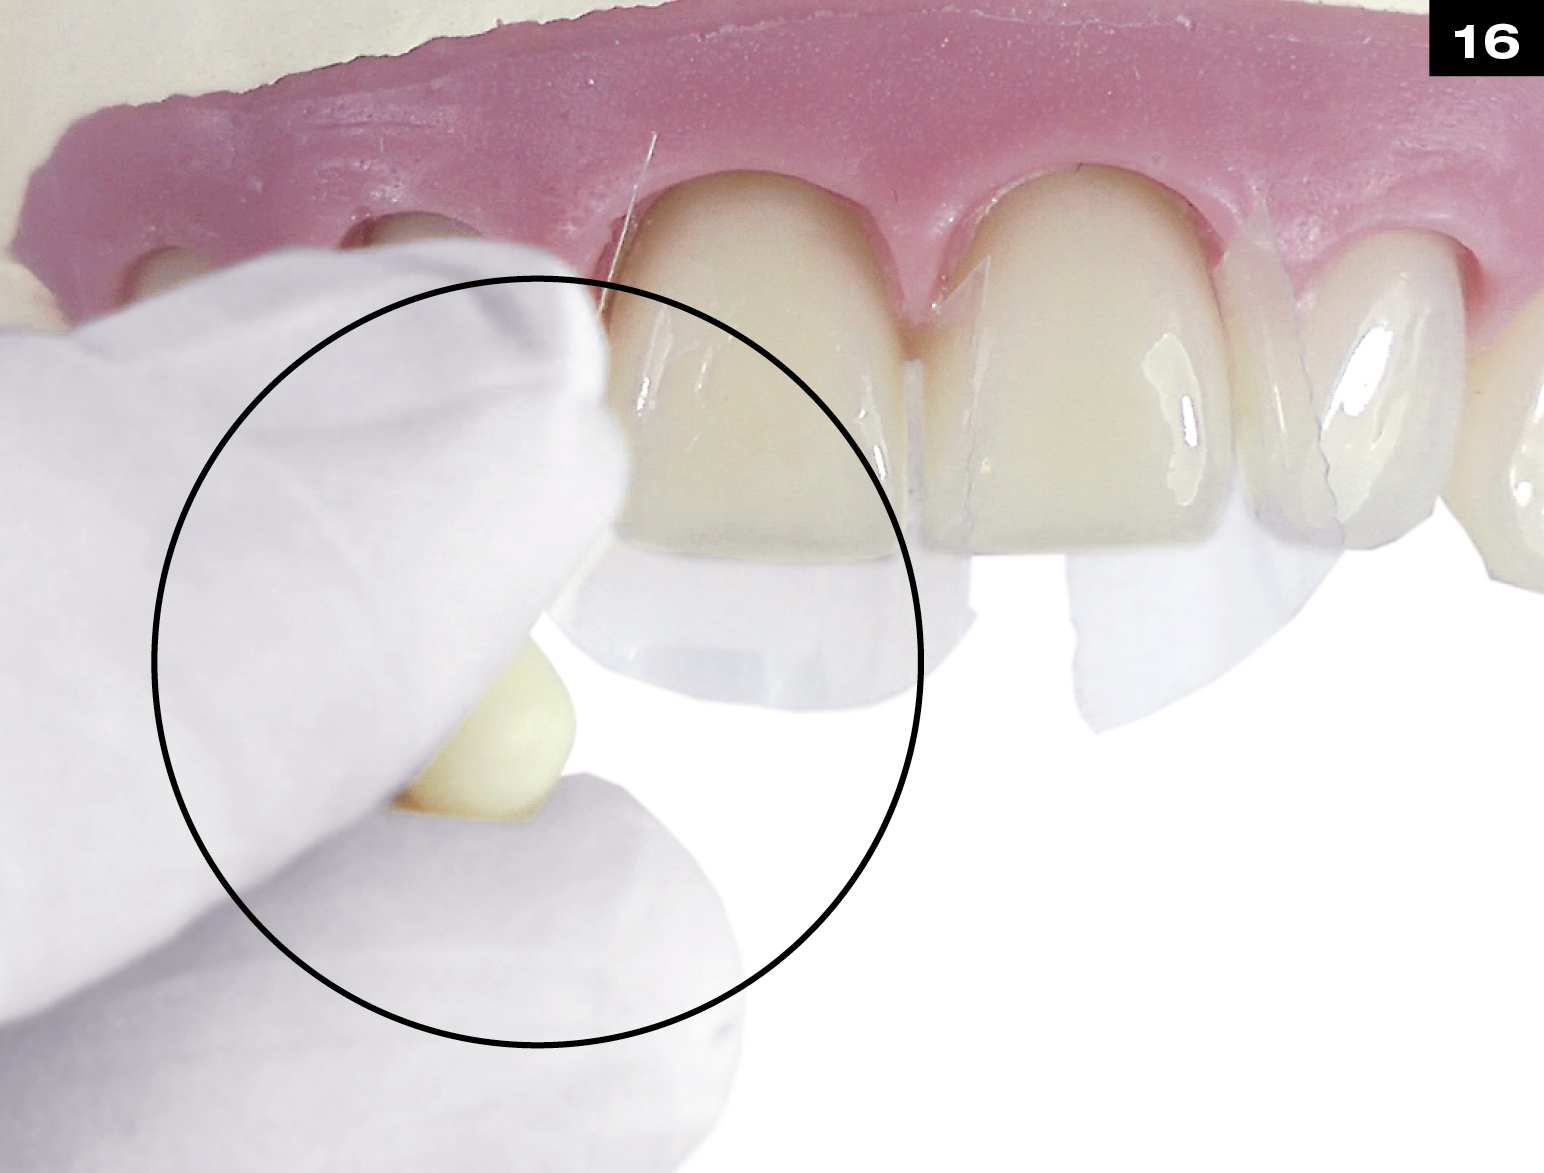
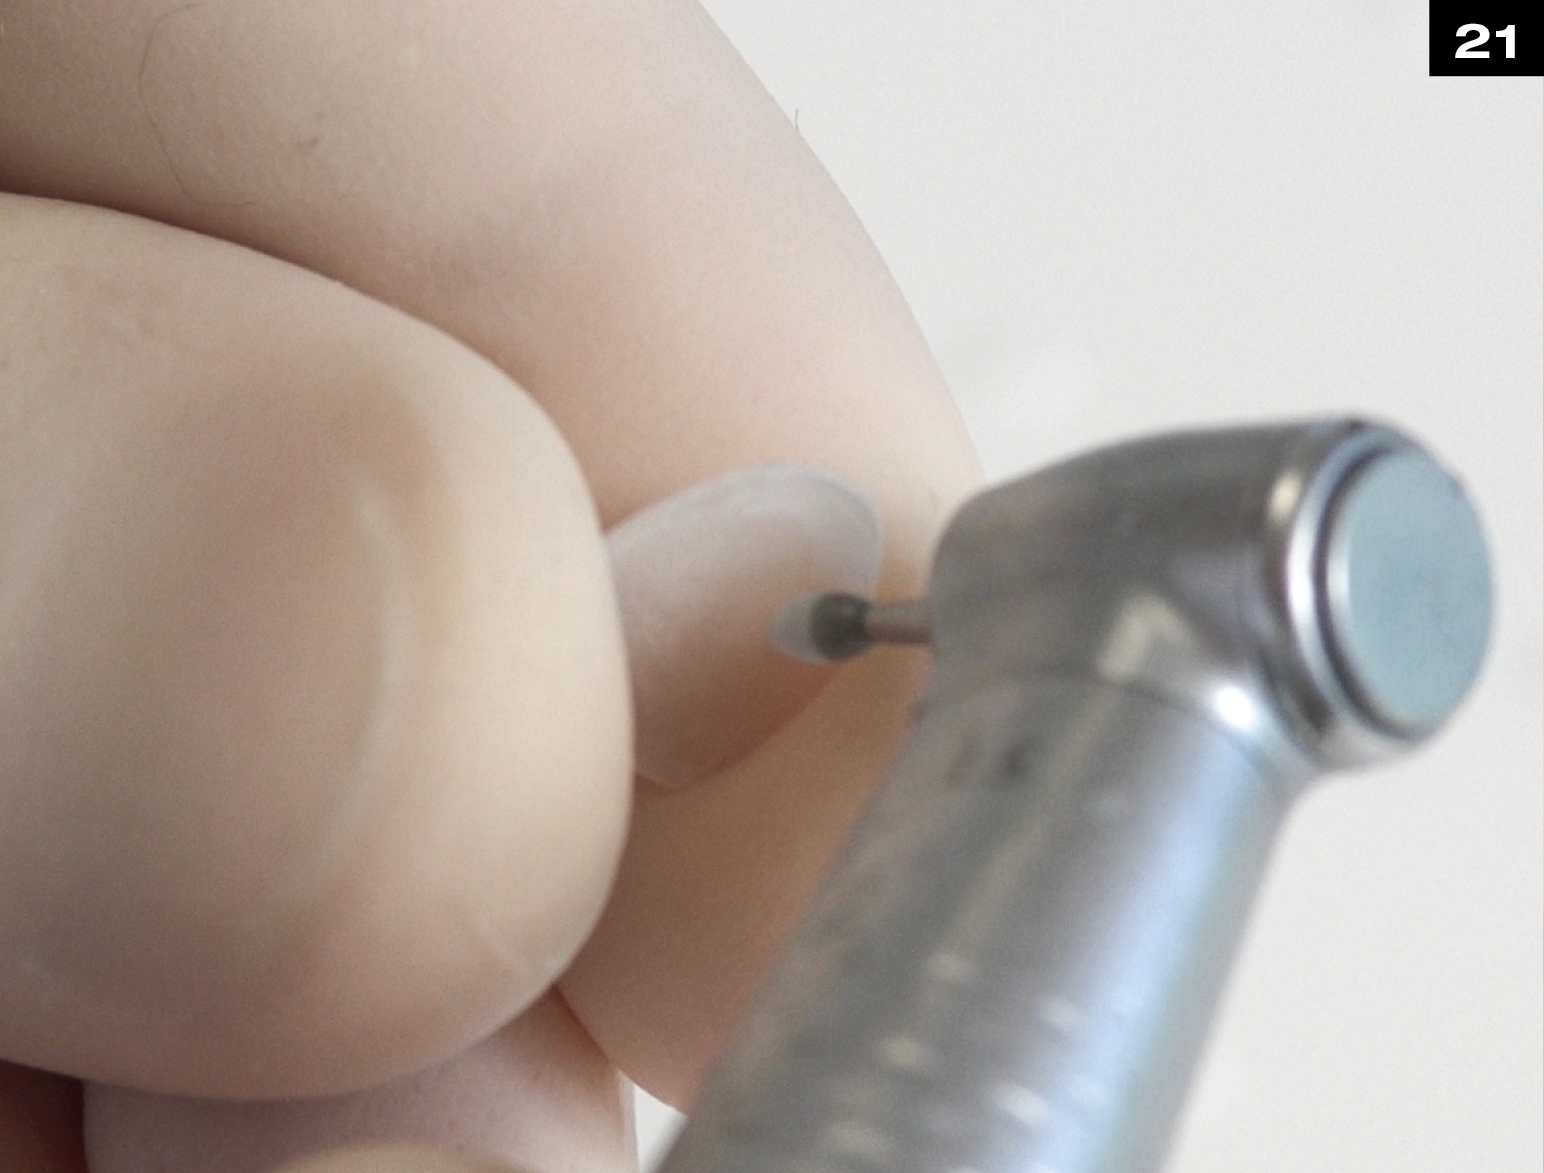
SHAPE NANO-HYBRID COMPOSITE INTO A SMALL, ROUND BALL.
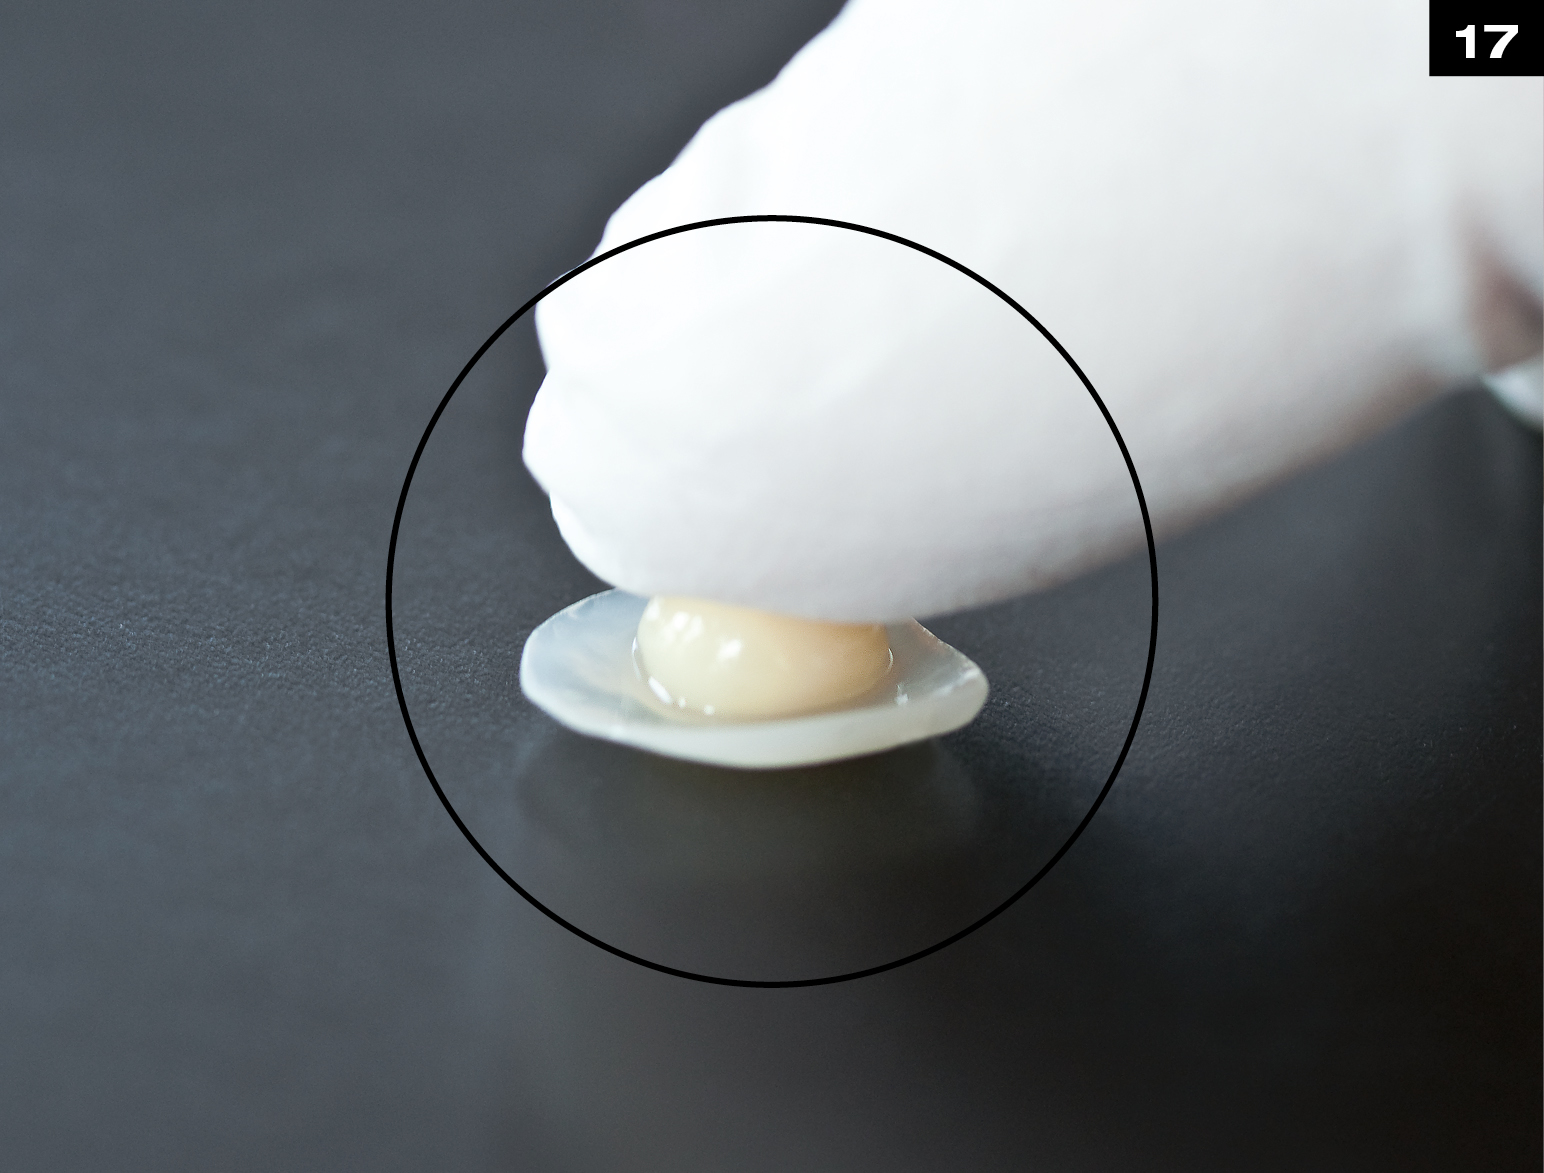
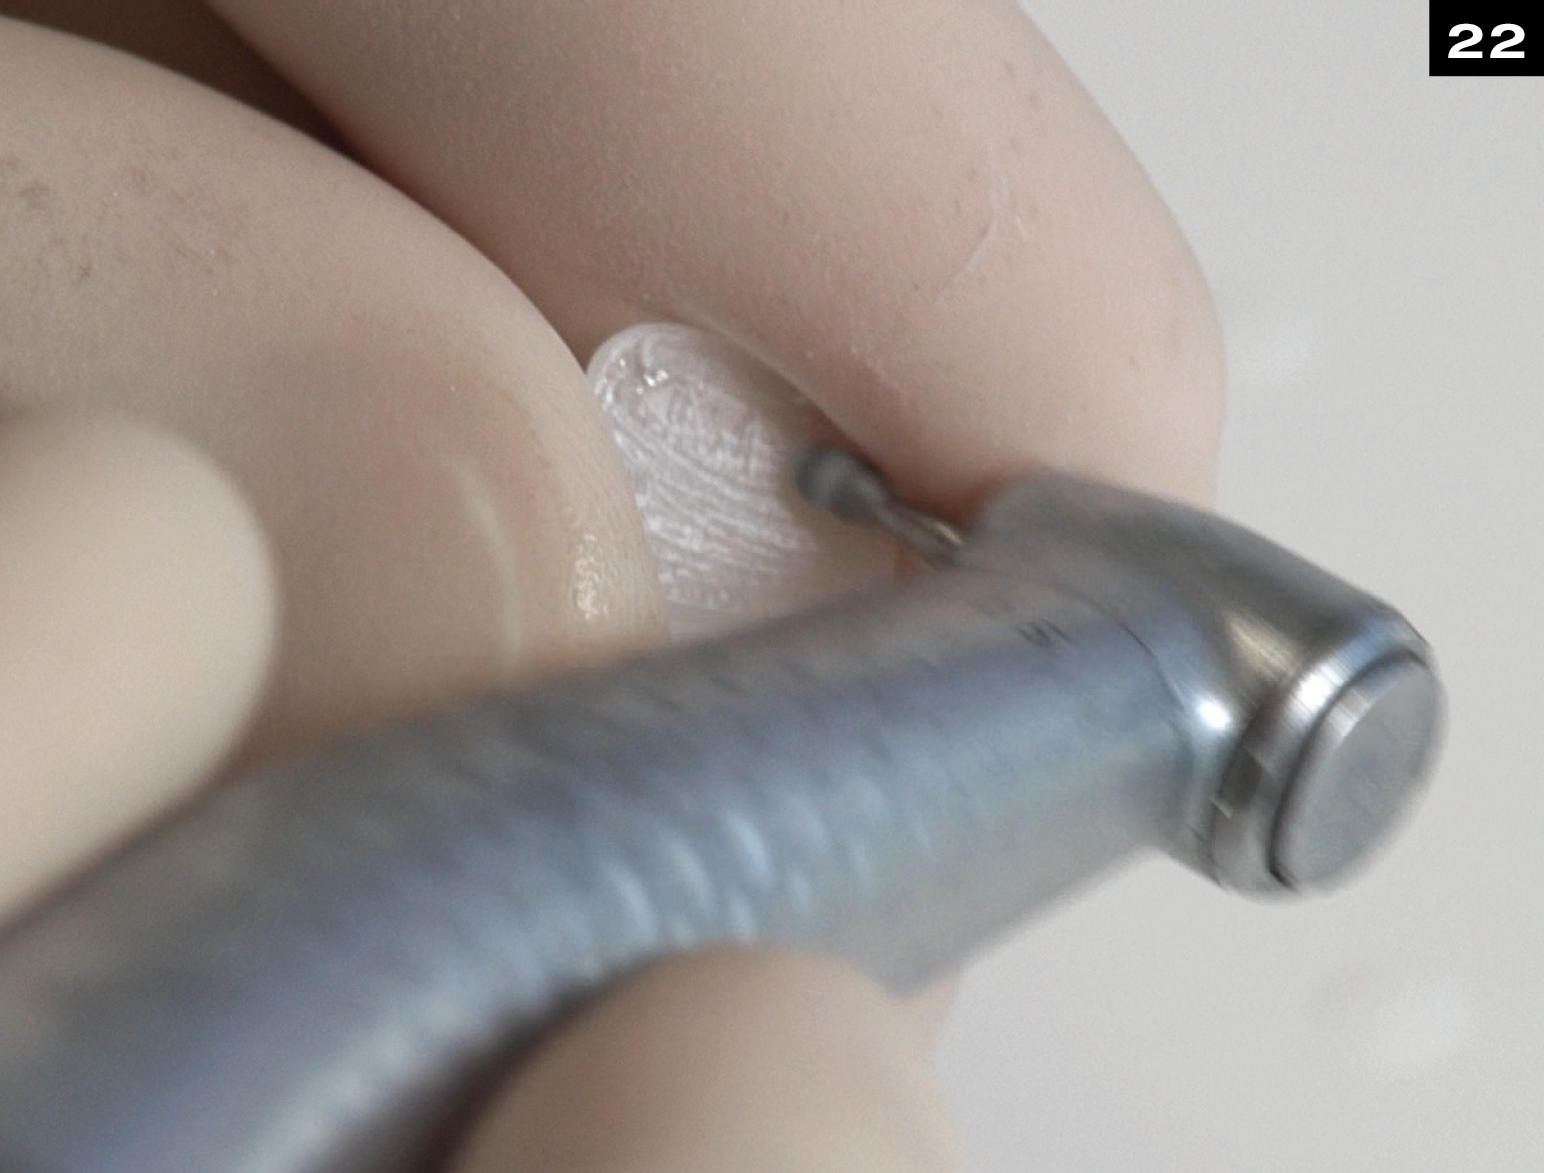
PLACE AND PRESS NANO-HYBRID COMPOSITE INTO CONCAVE SURFACE OF VENEER.
ADAPT N.-H. COMPOSITE INTO EDELWEISS VENEER.
Optional: characterize using flowable Enamel composite or Effect Shades, translucent on incisal area.

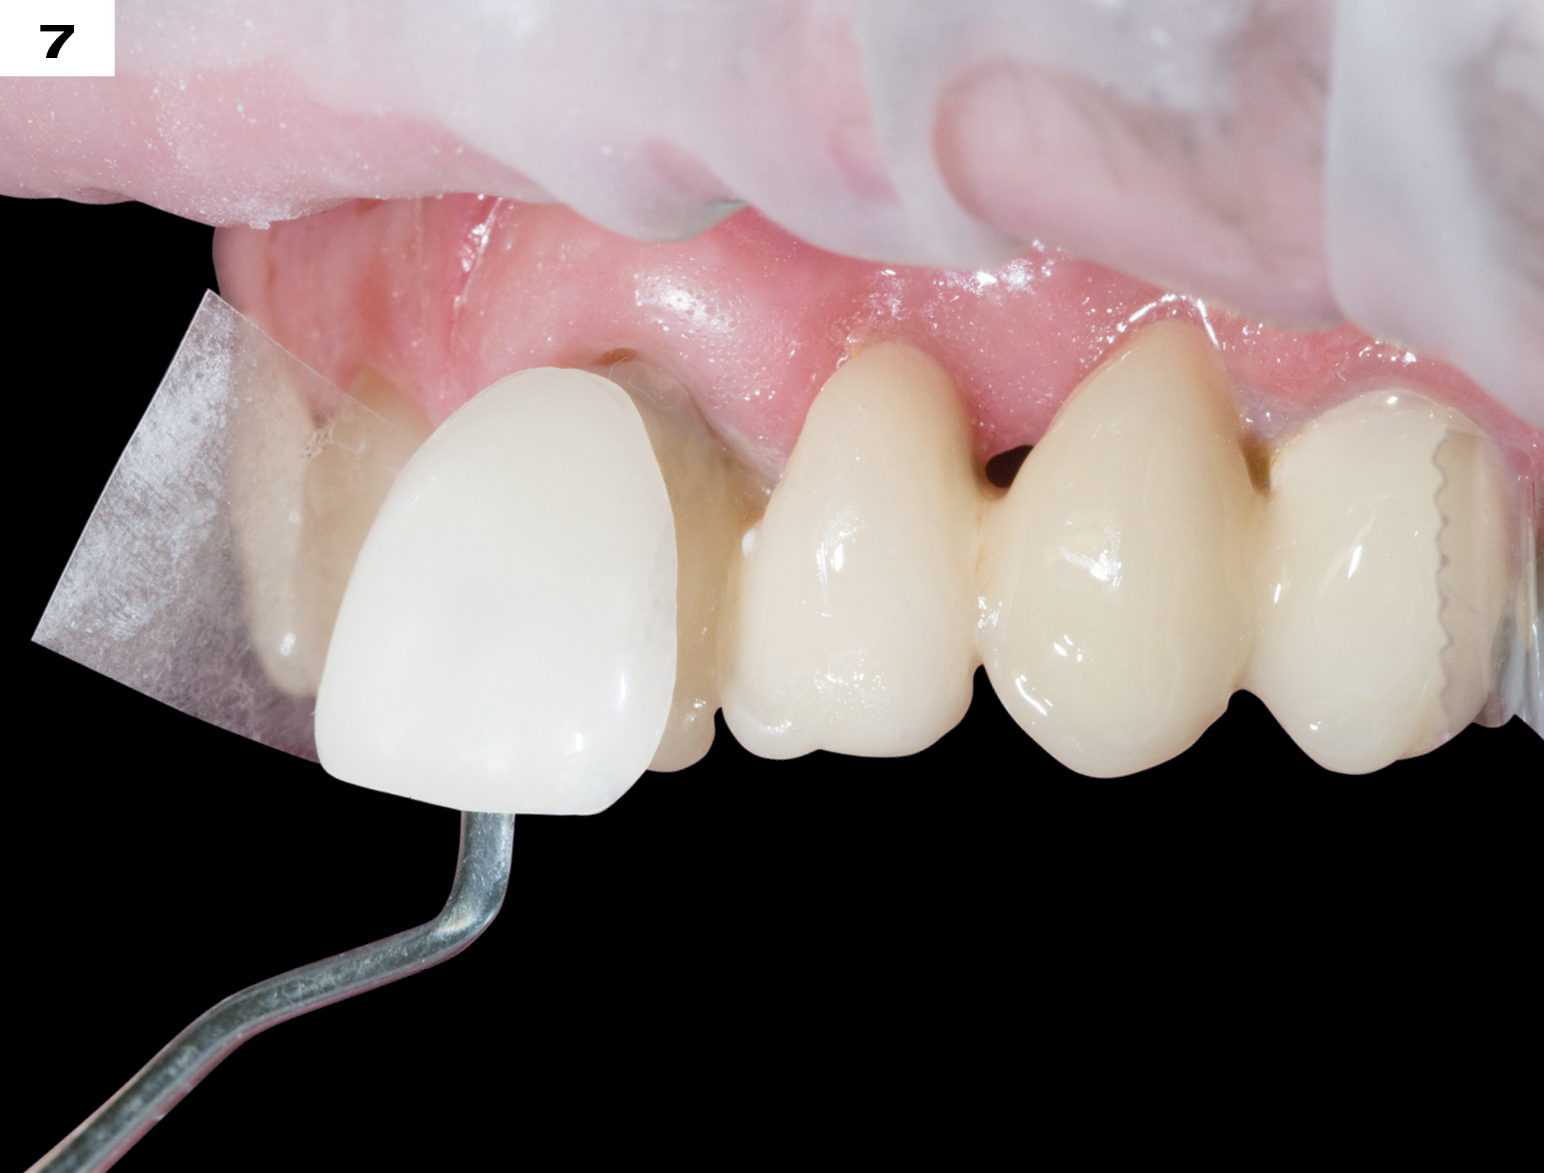
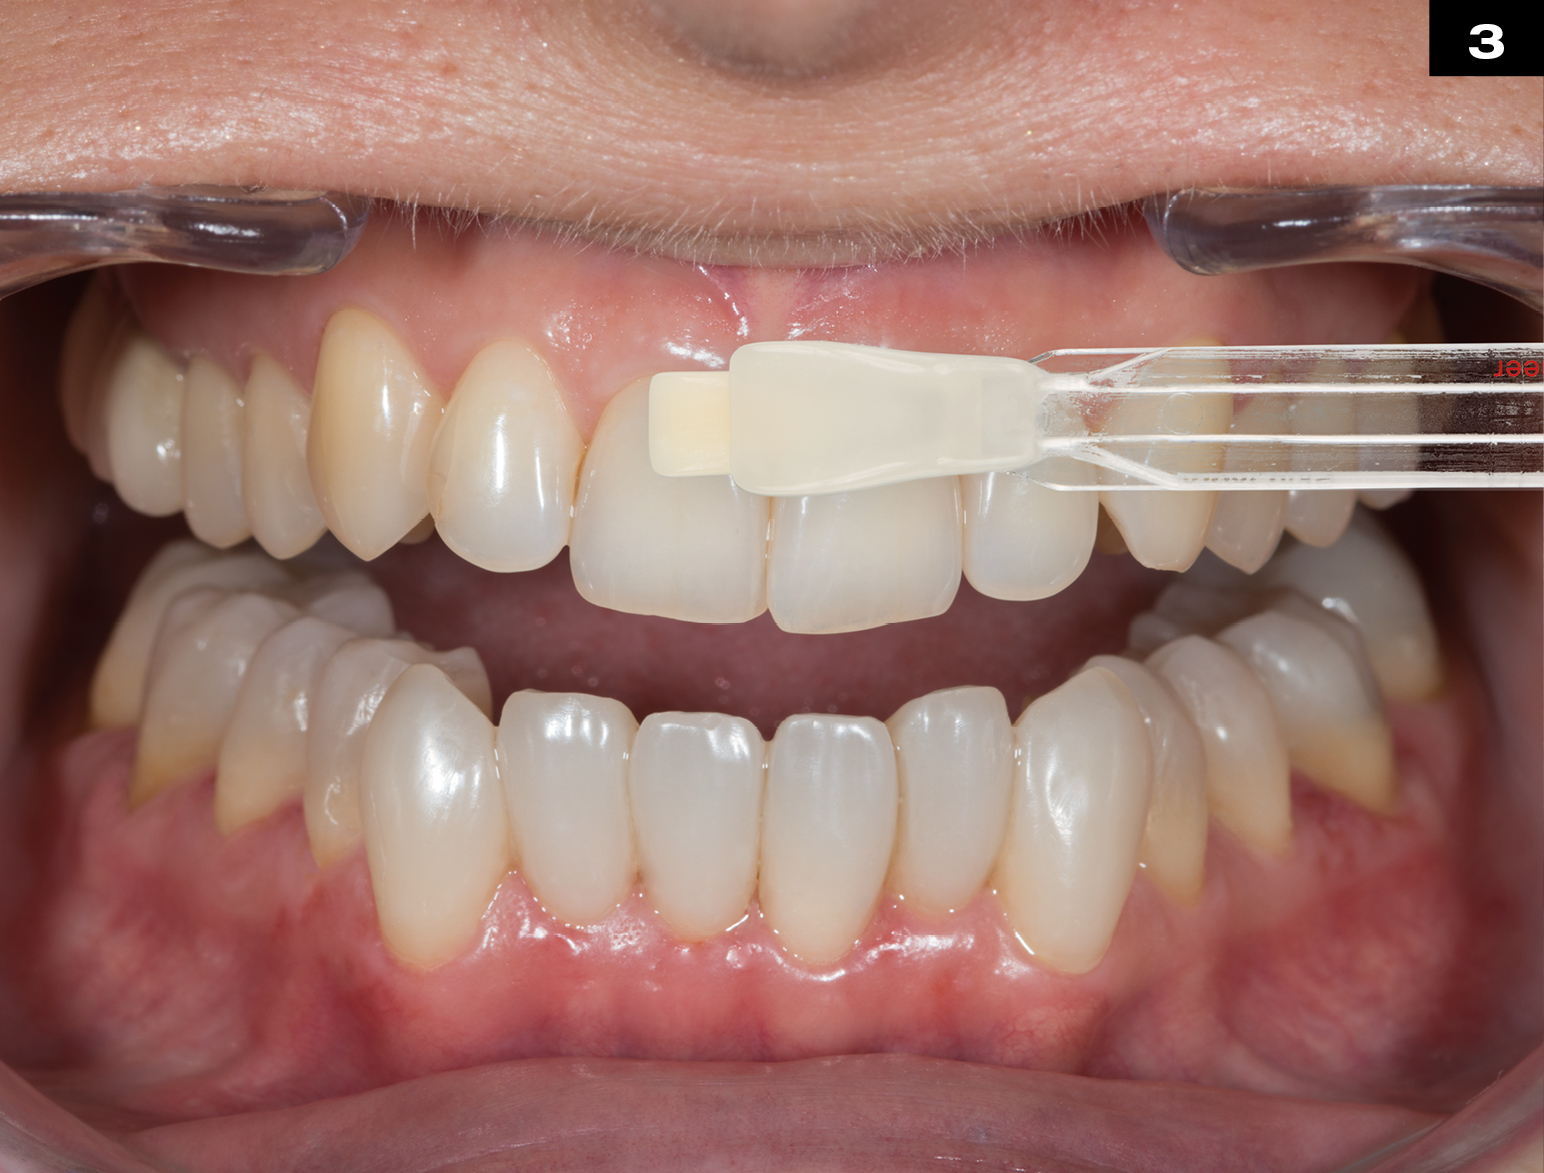
POSITION AND CEMENT EDELWEISS VENEER INTO PLACE.
TIP: Reduce surgical light.
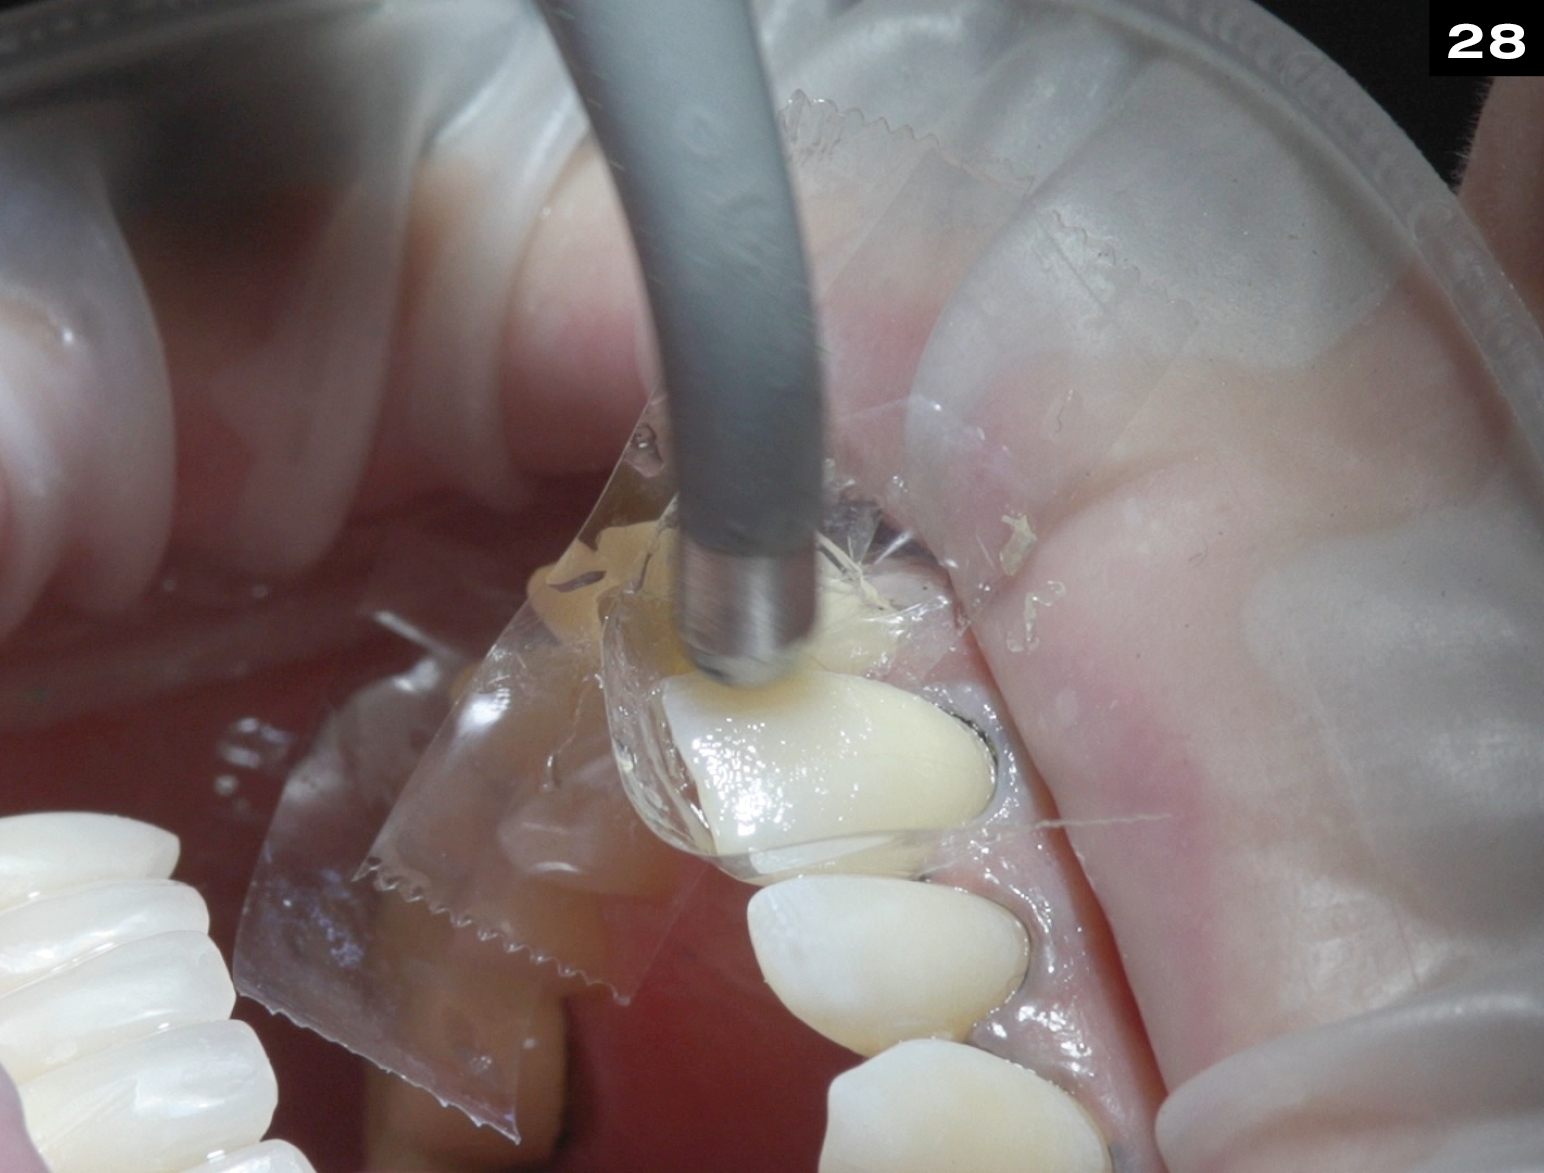
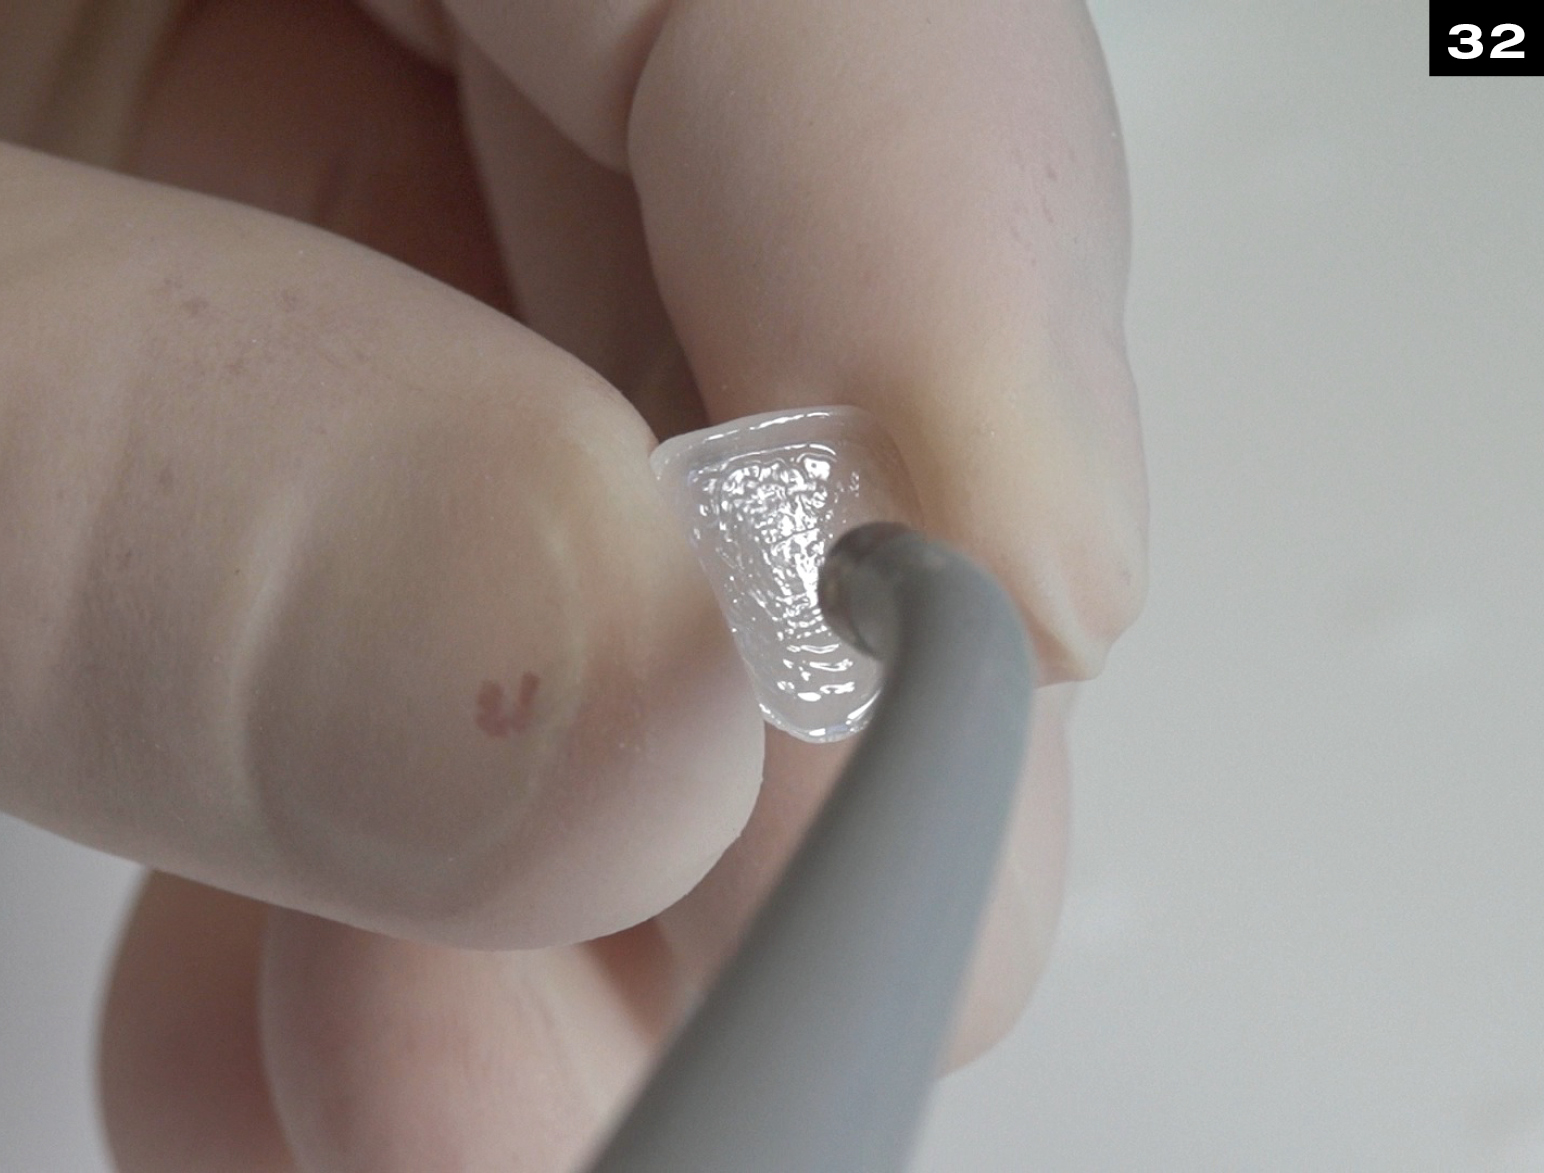
CONTOUR EXCESS EDELWEISS NANO-HYBRID COMPOSITE.
REMOVE EXCESS EDELWEISS NANO-HYBRID COMPOSITE.
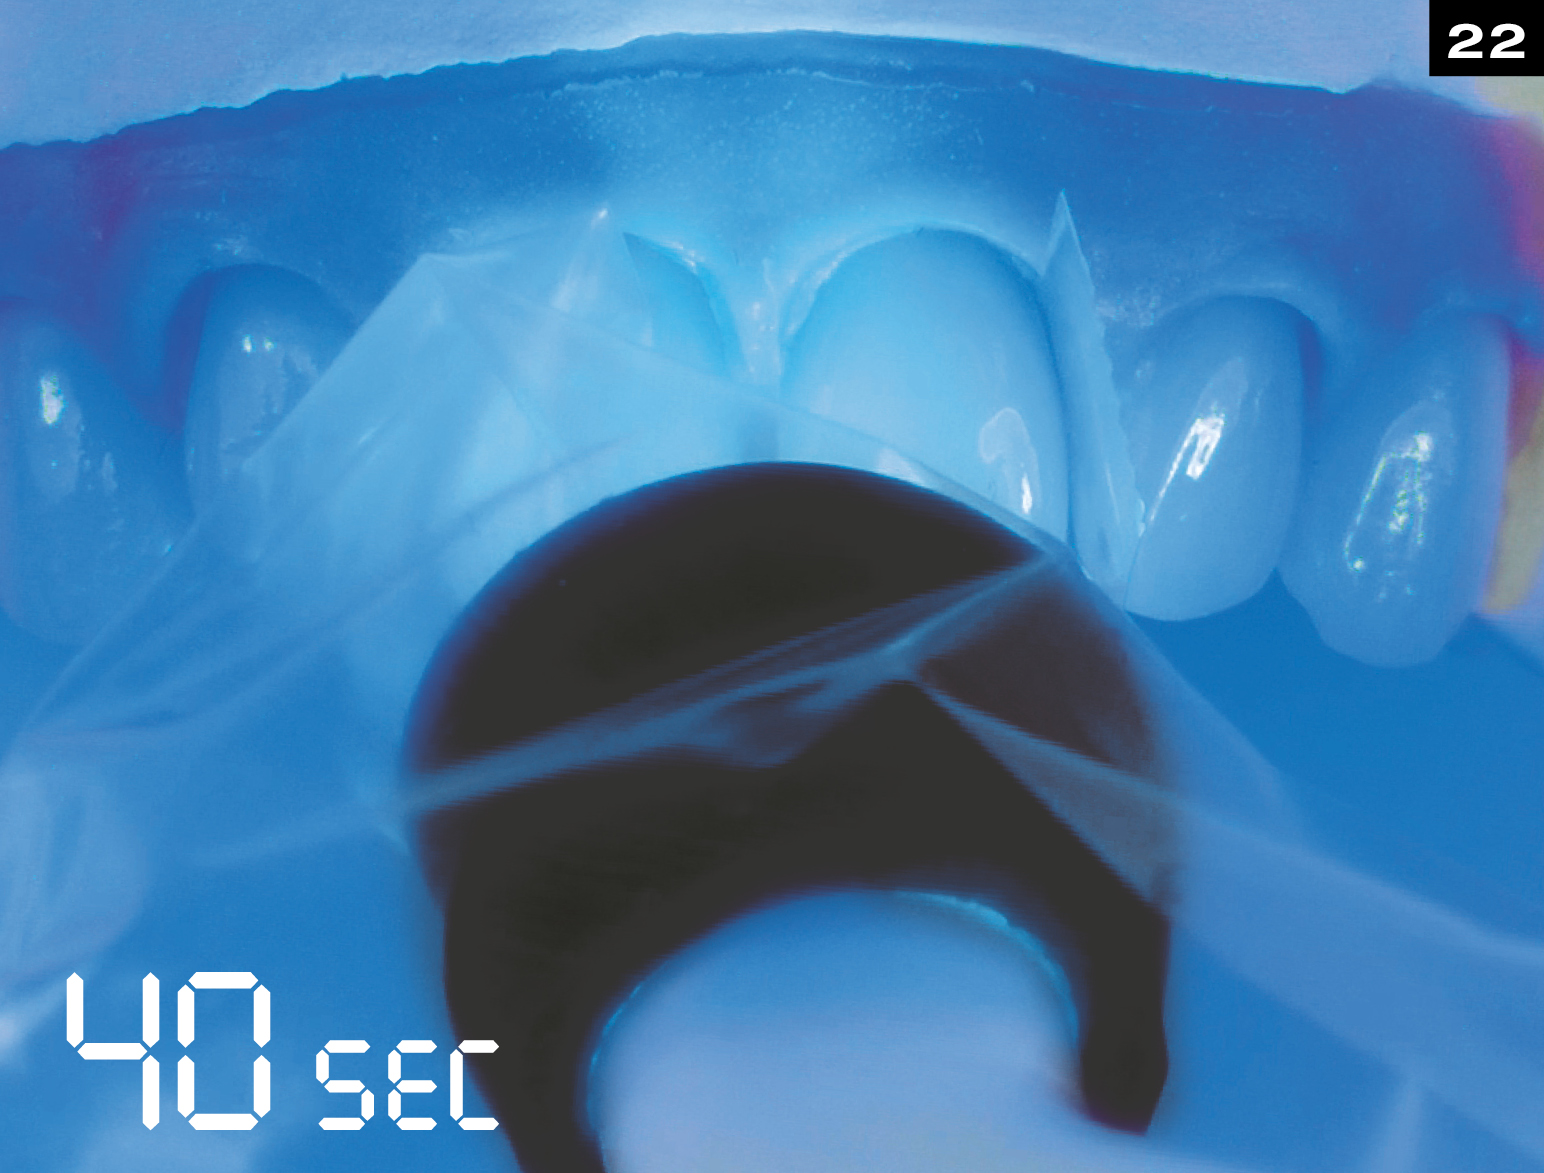
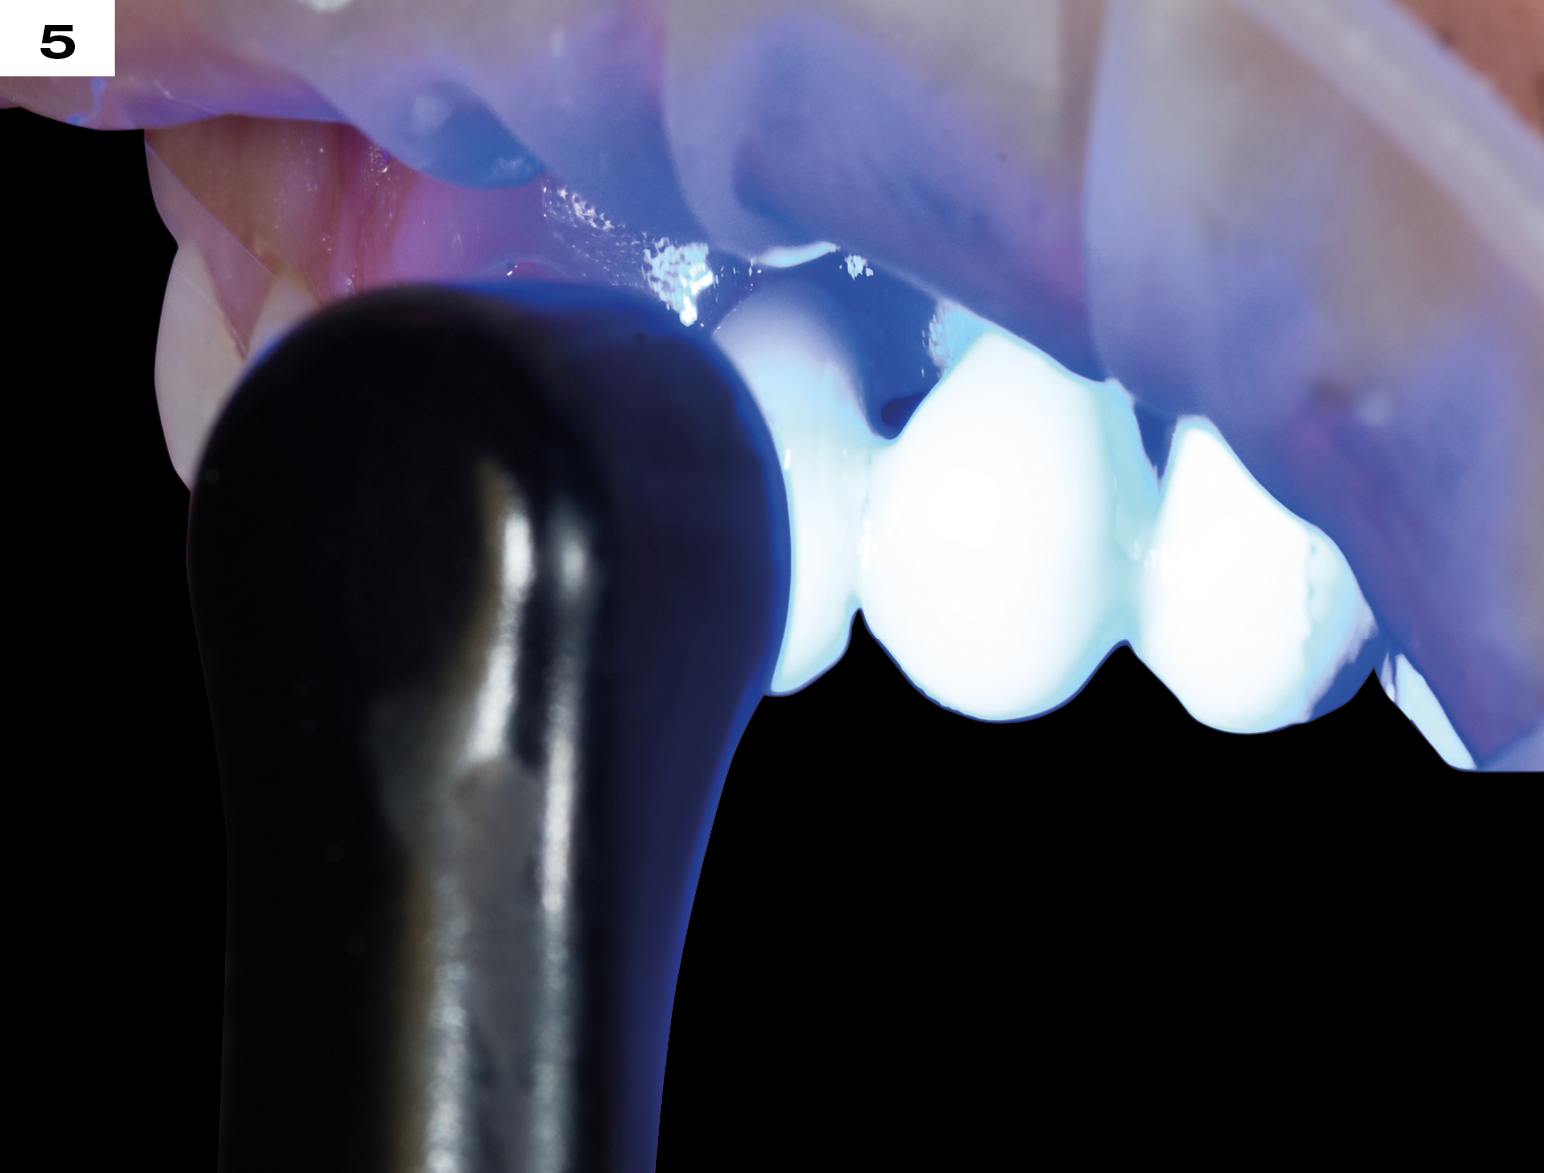
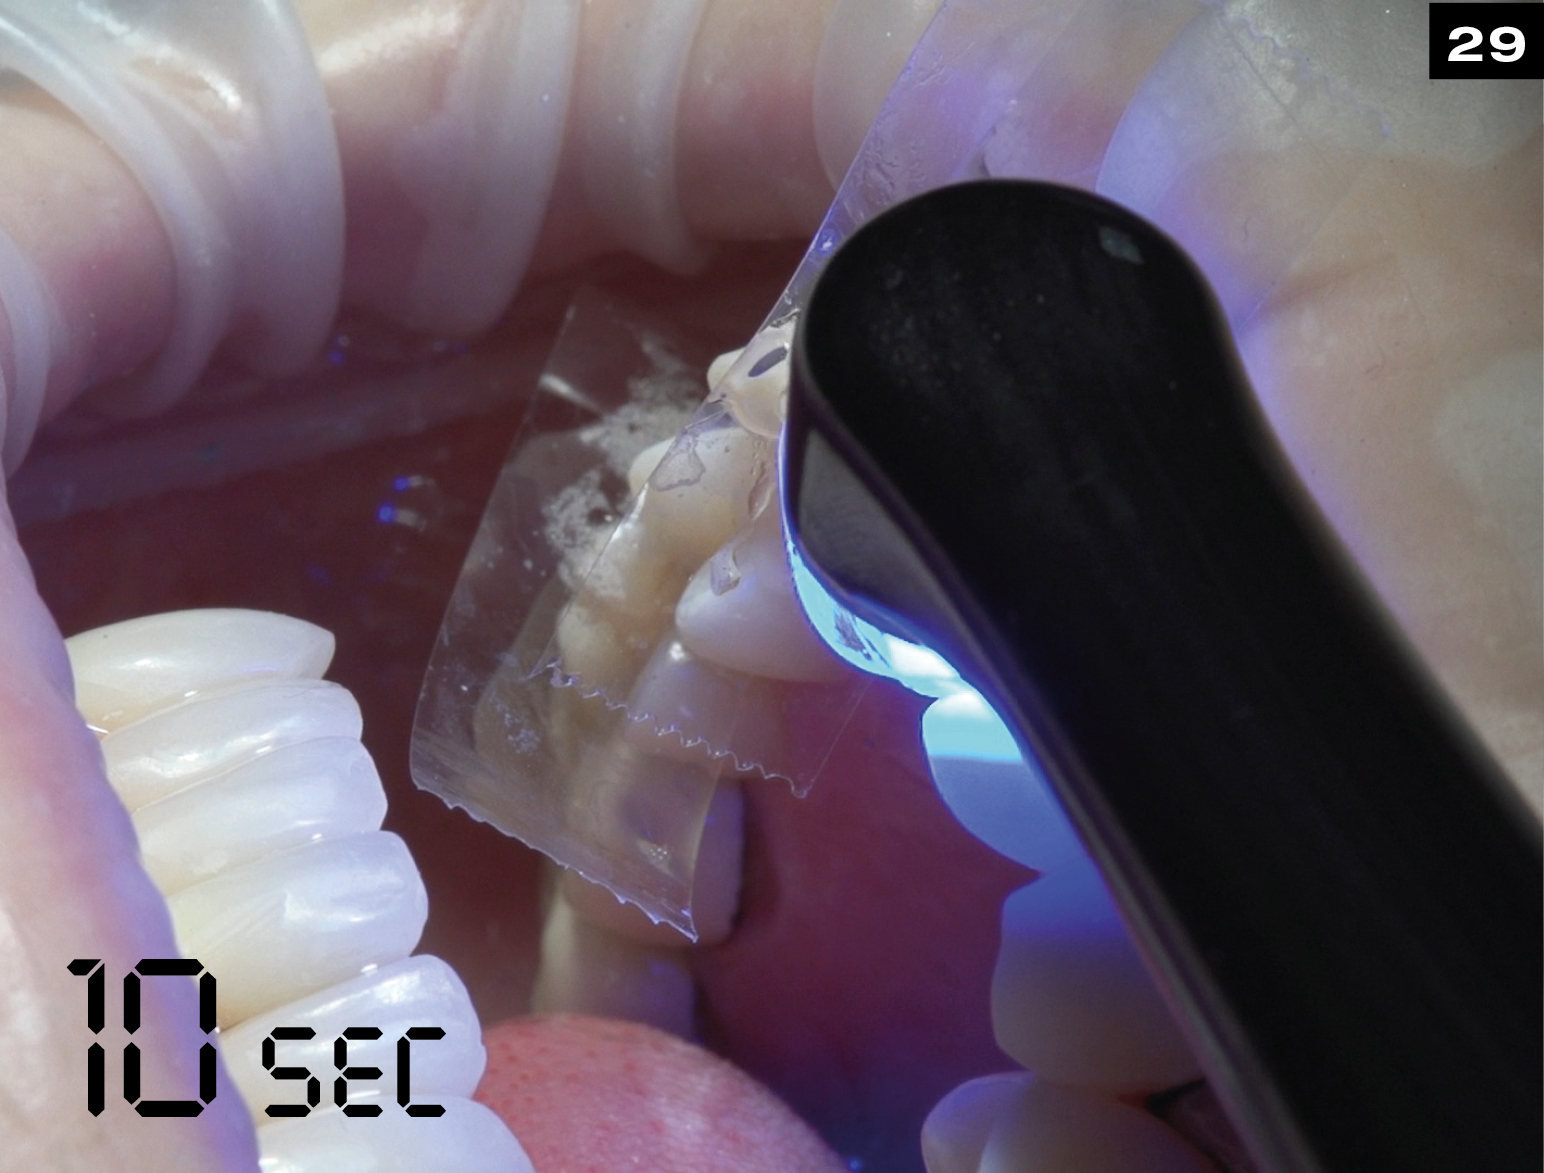
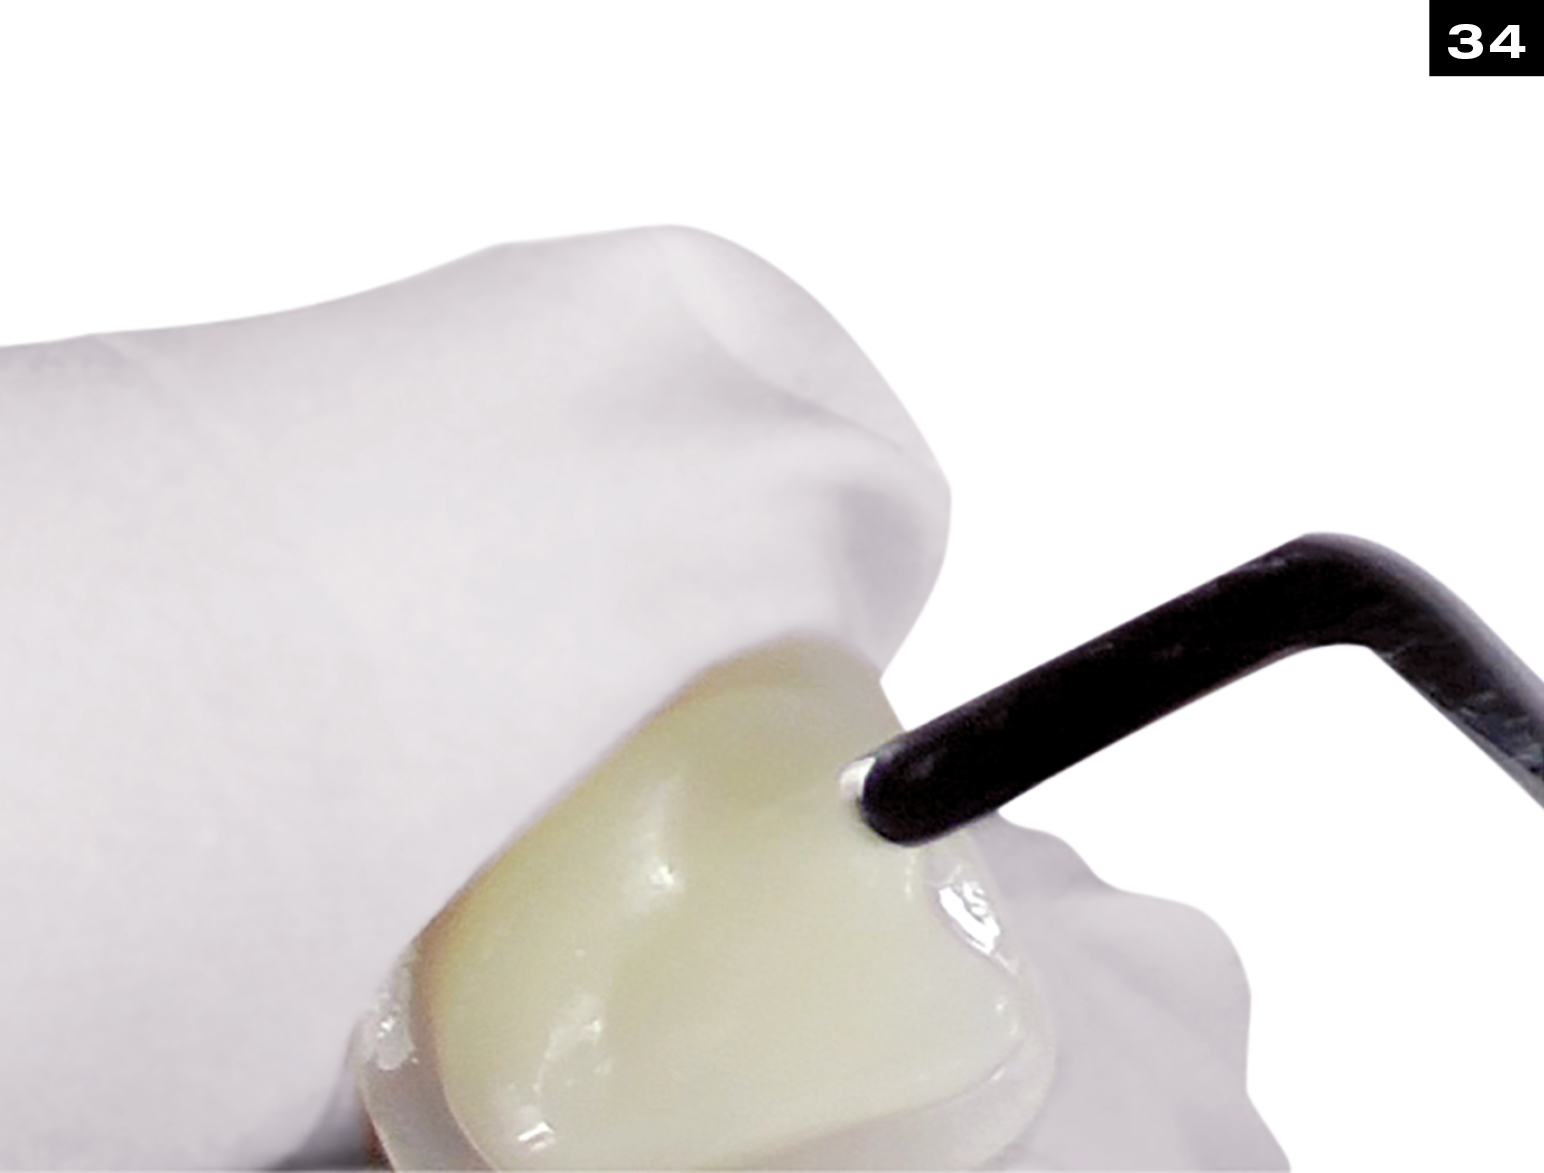
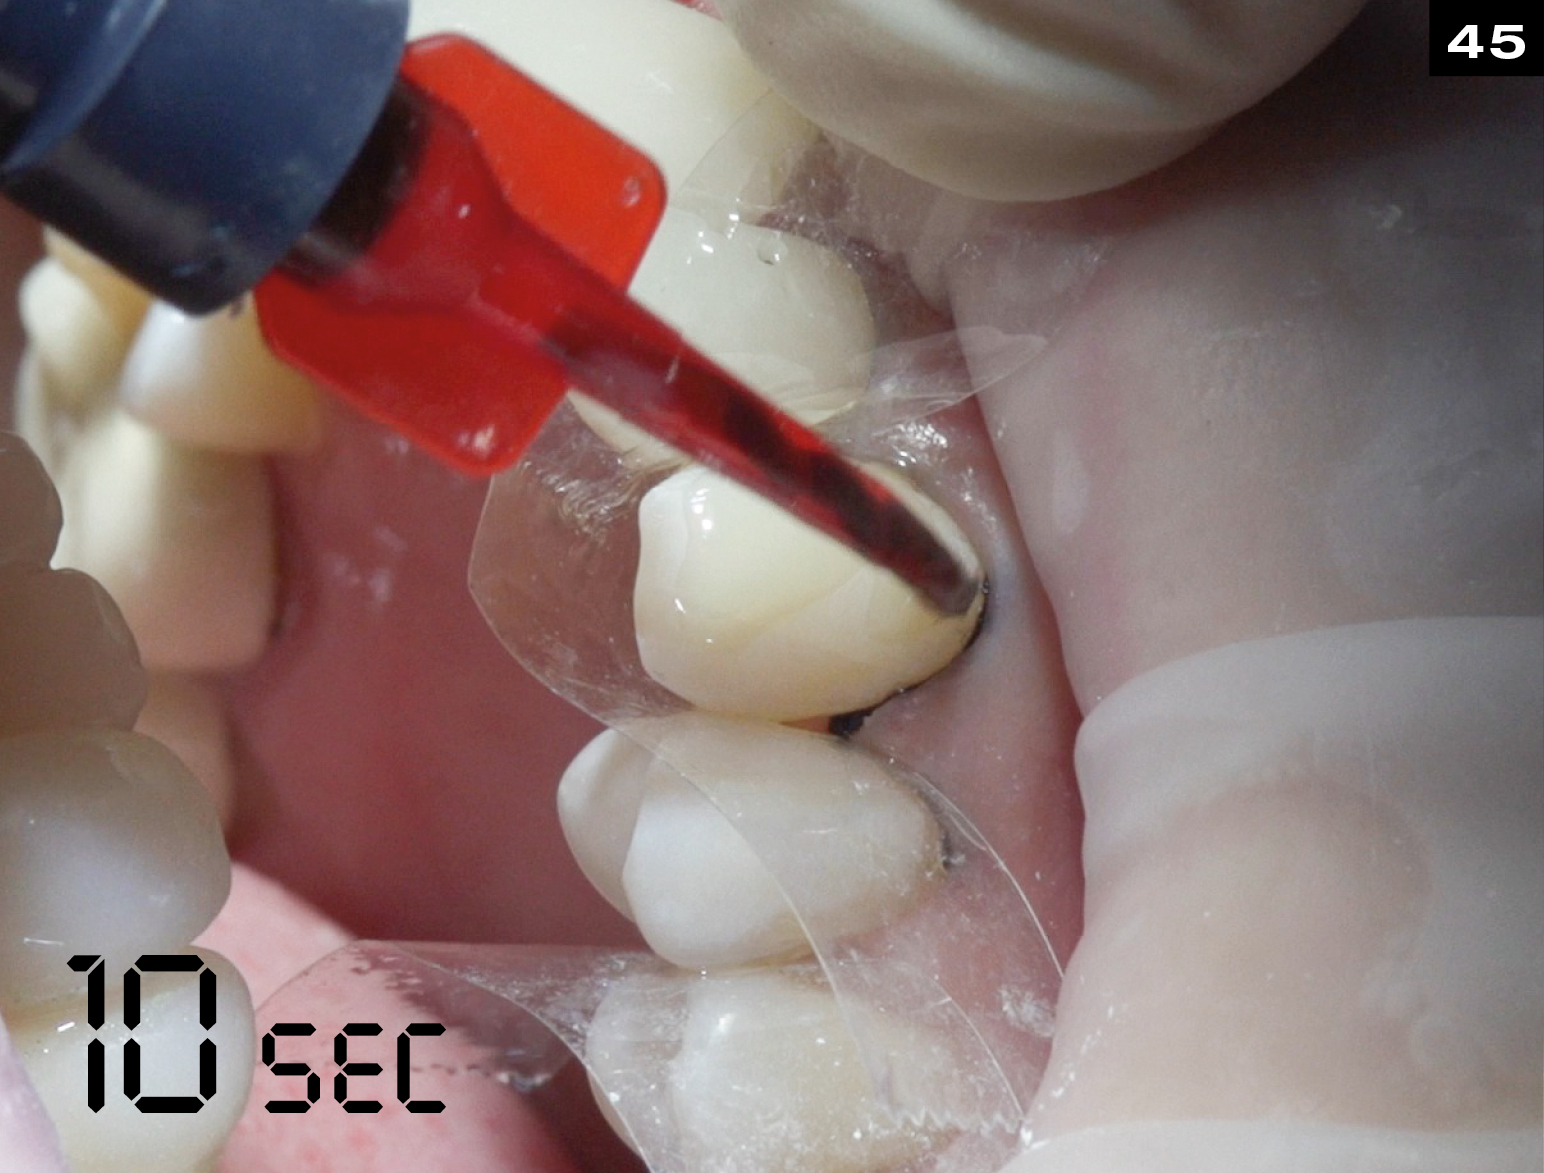
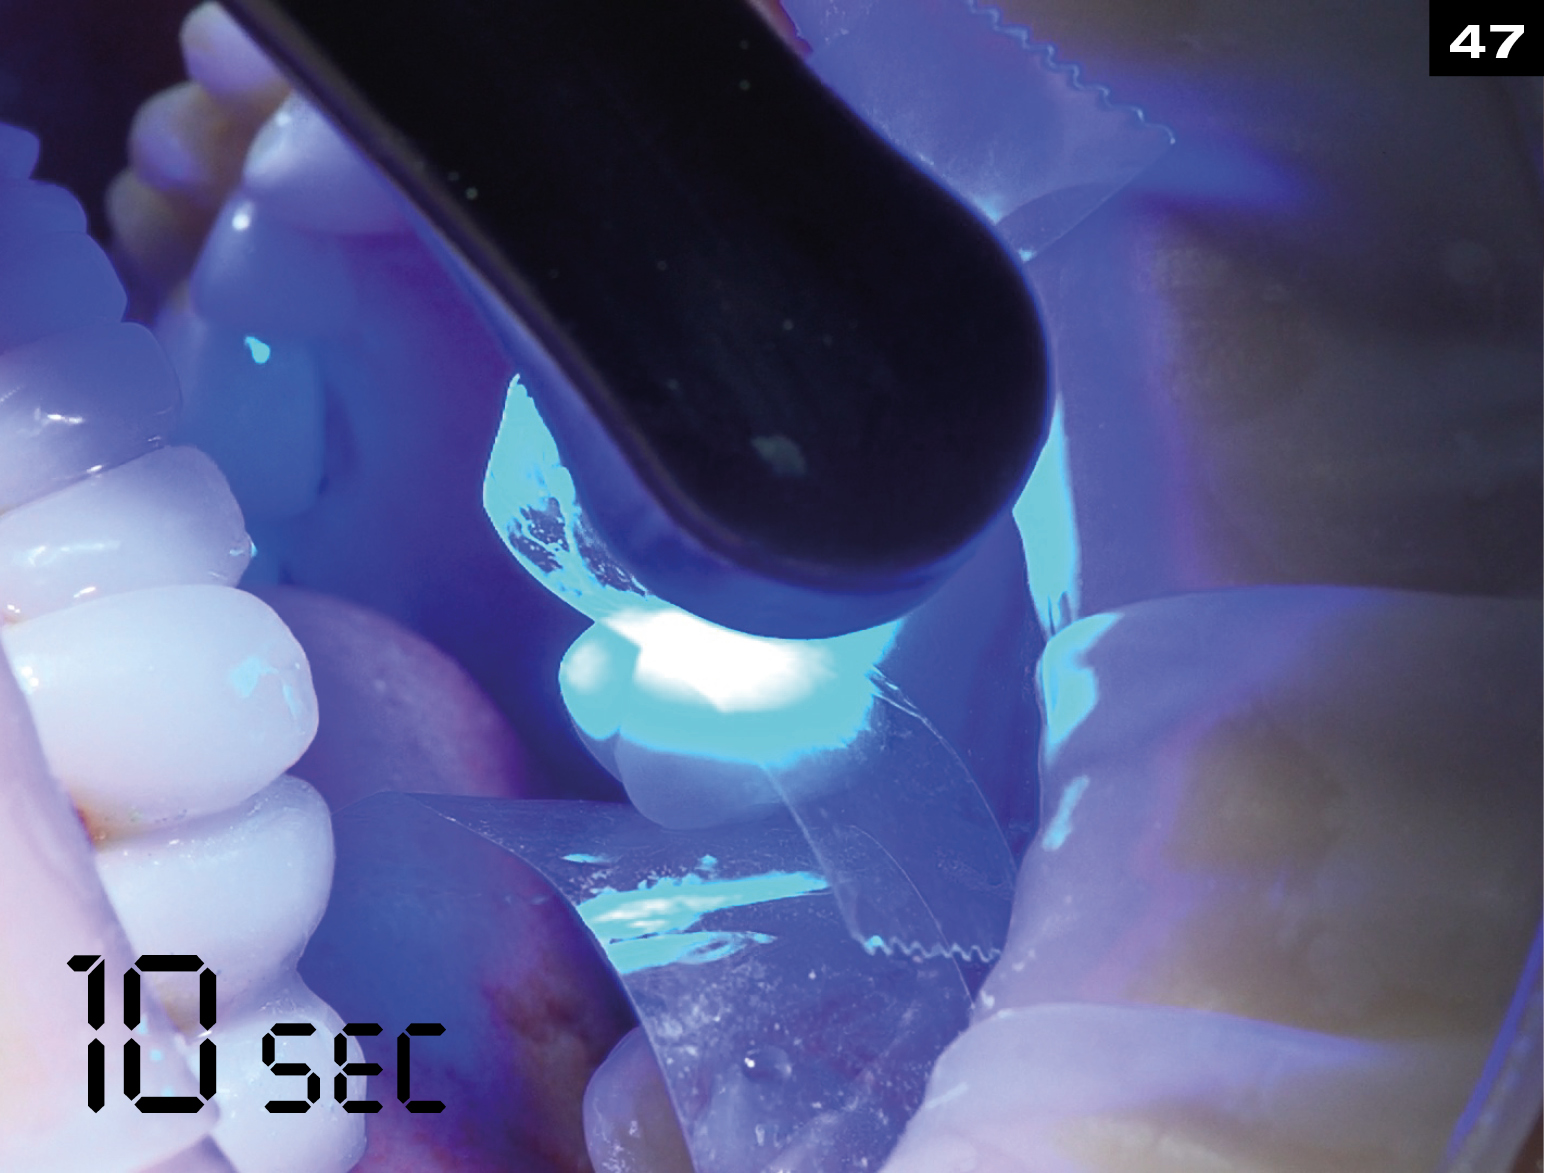
AFTER POSITIONING LIGHT CURE WITH VALO (UPI) PALATAL AND FACIAL SIDE OF EDELWEISS VENEER FOR 40 SEC.

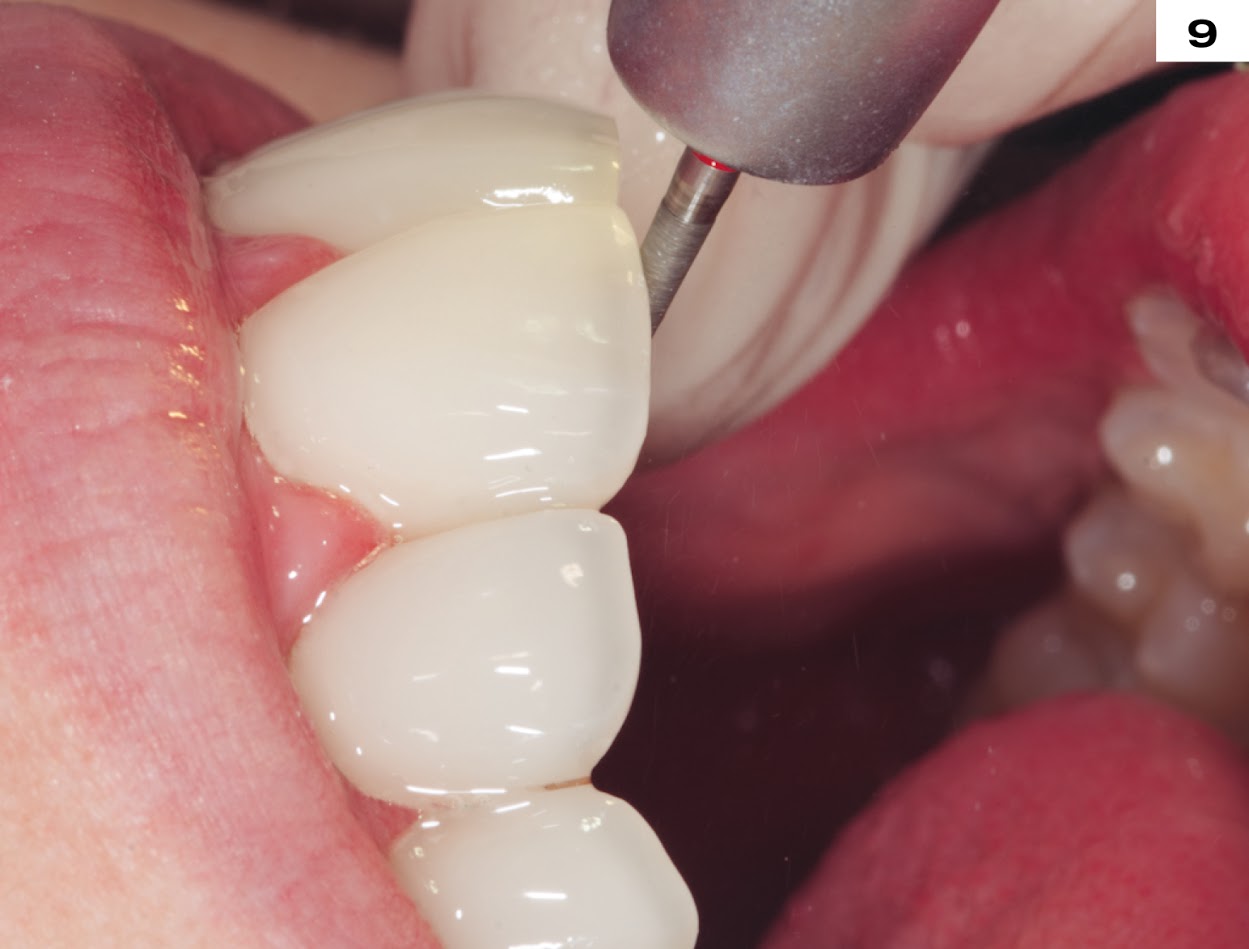
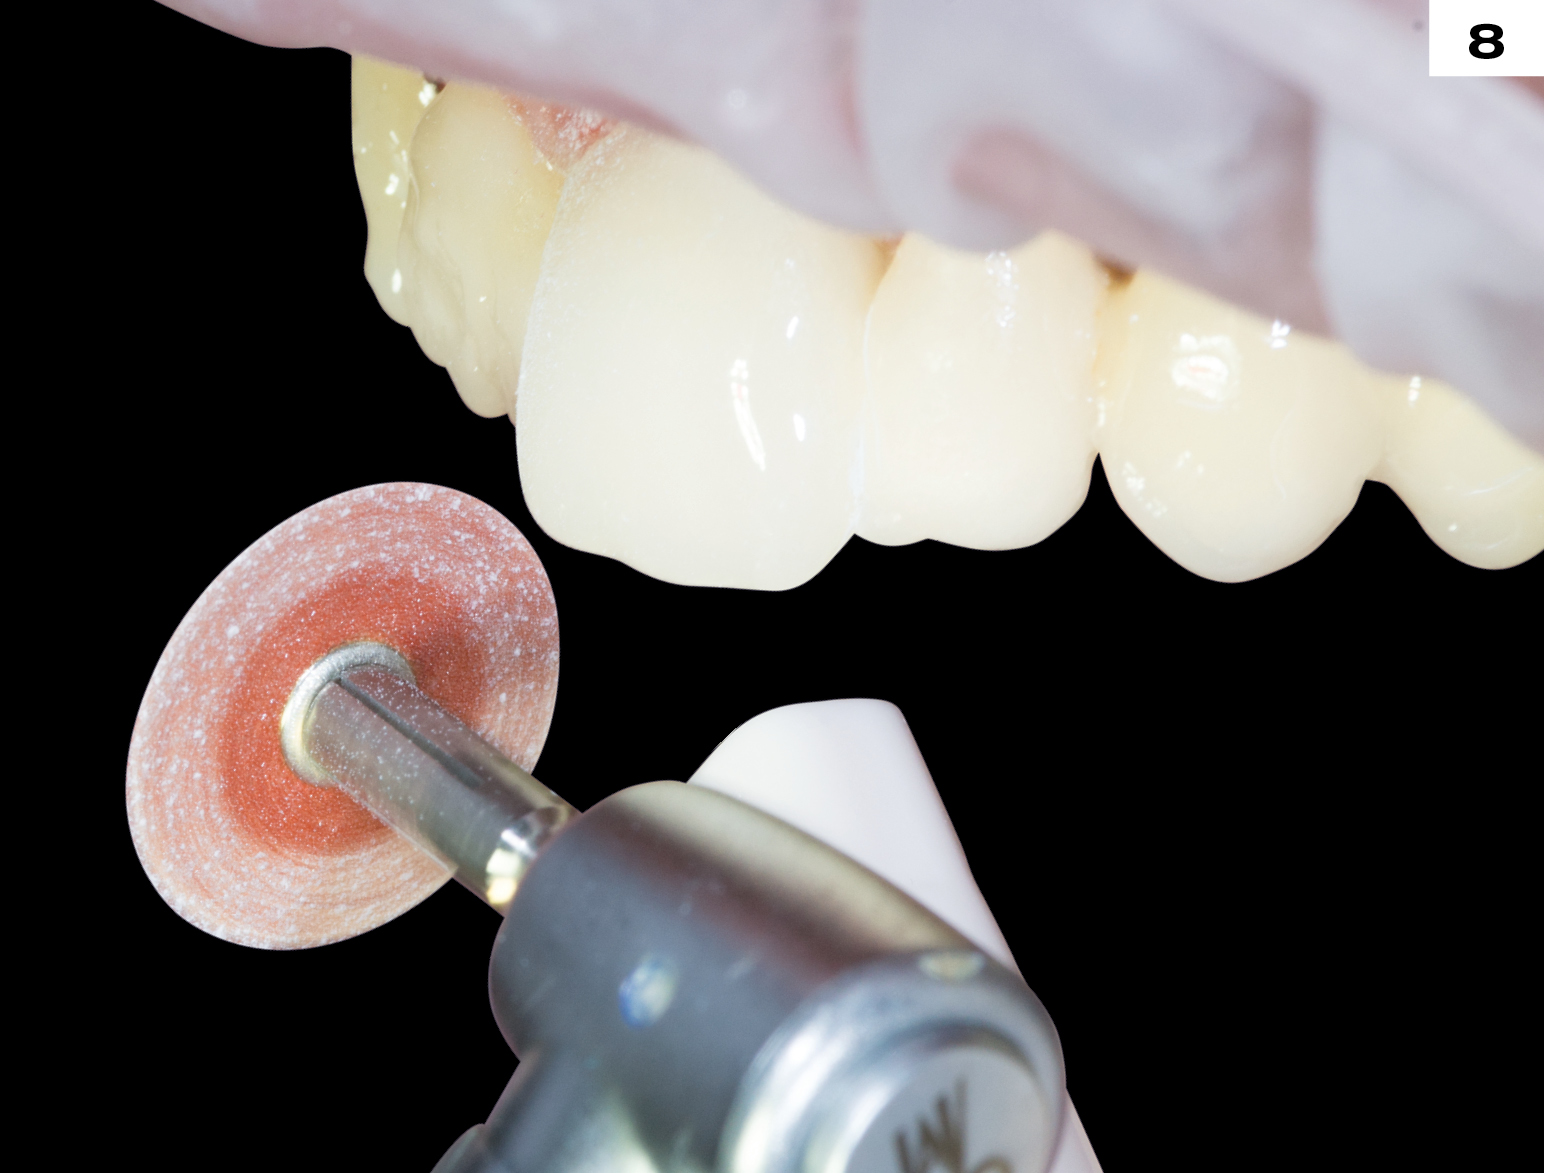
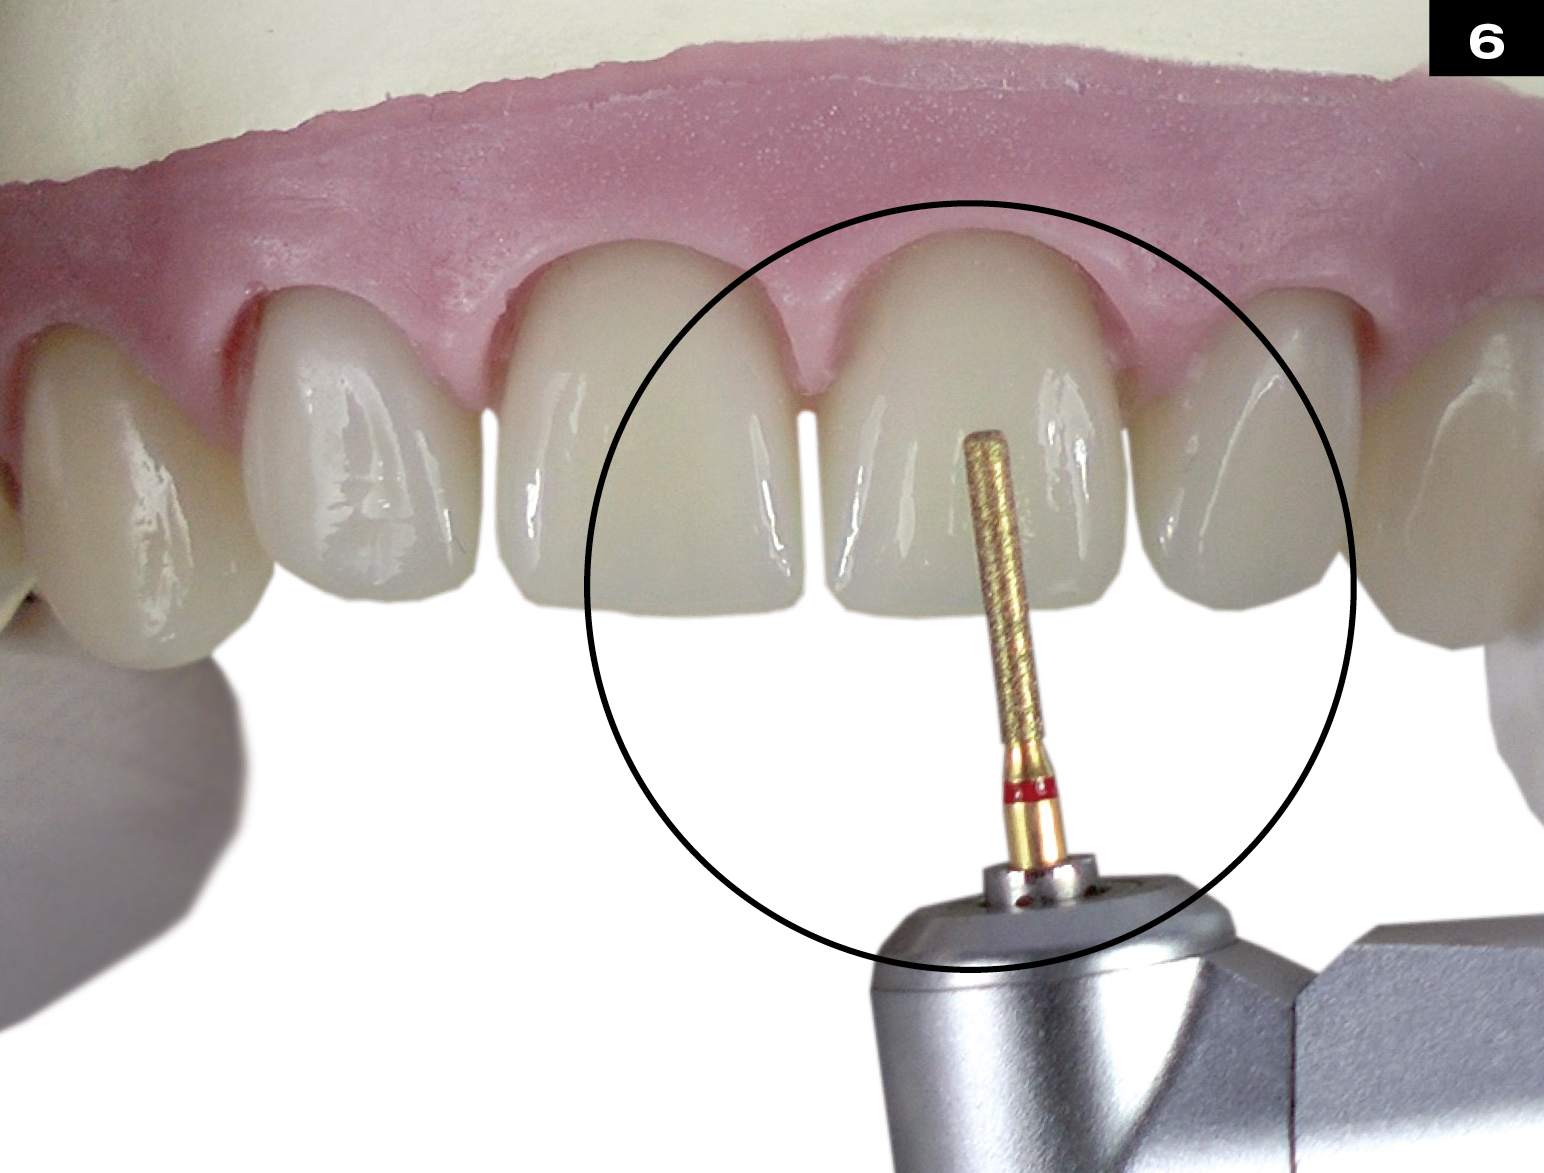
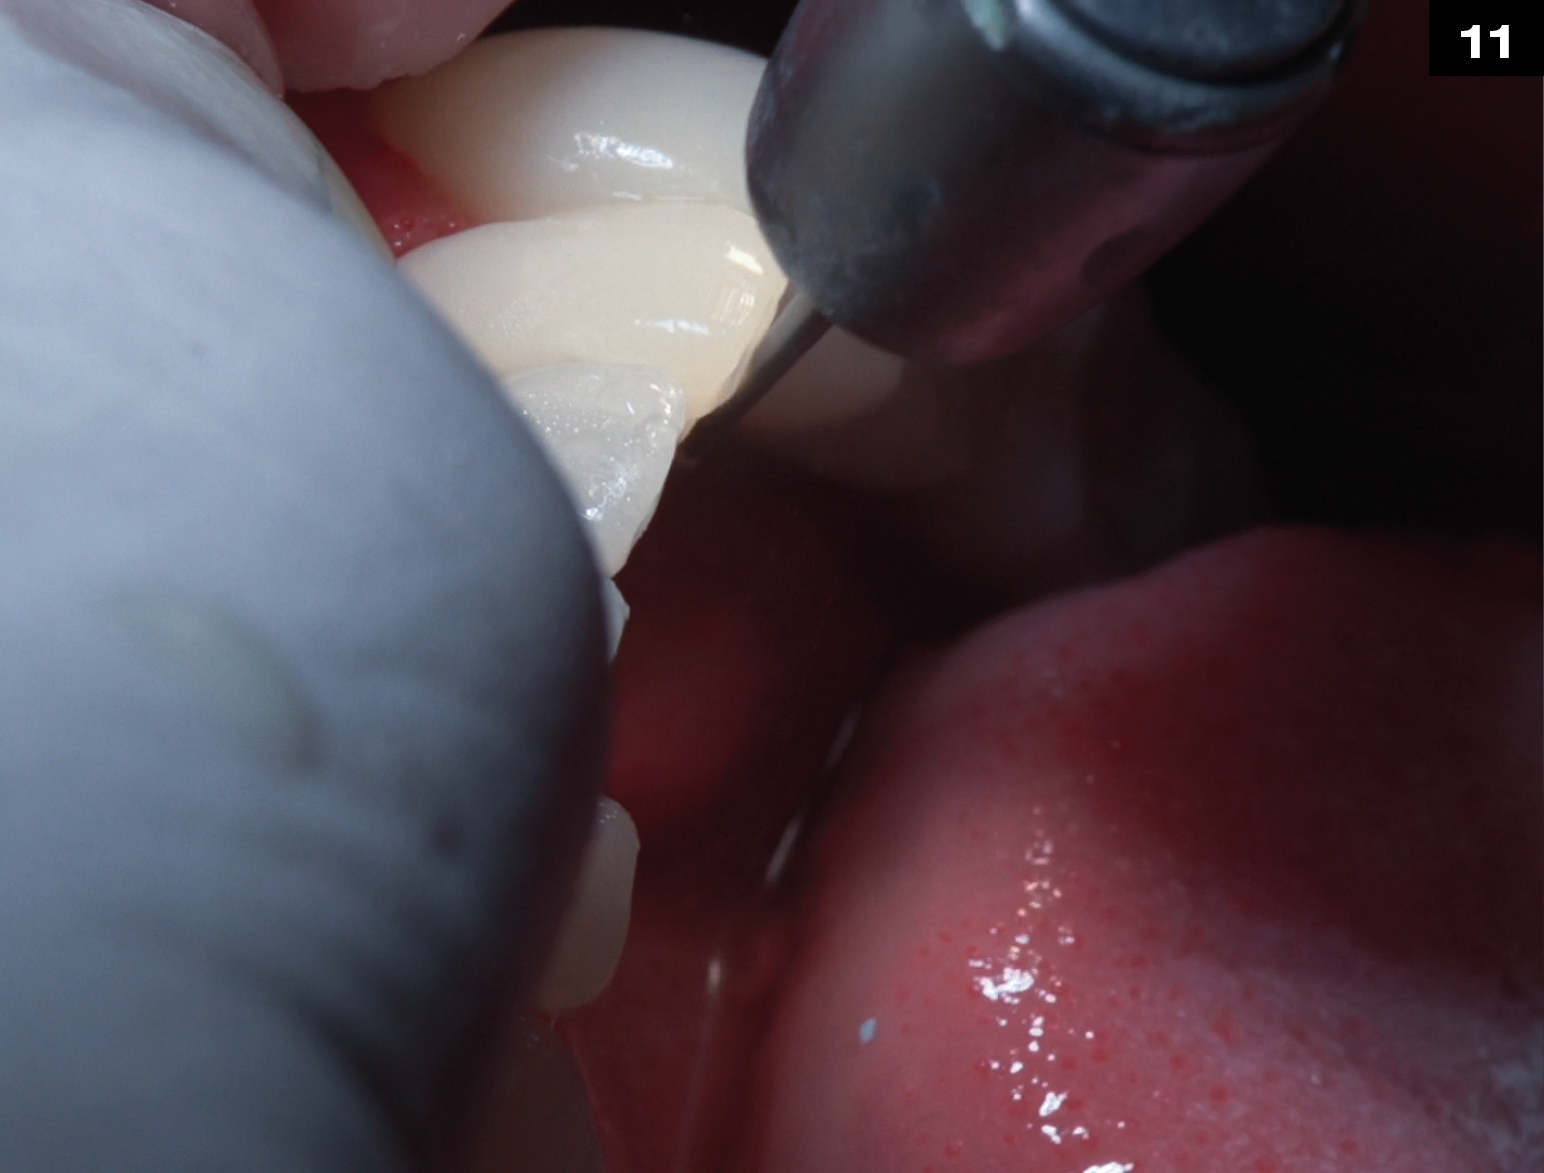
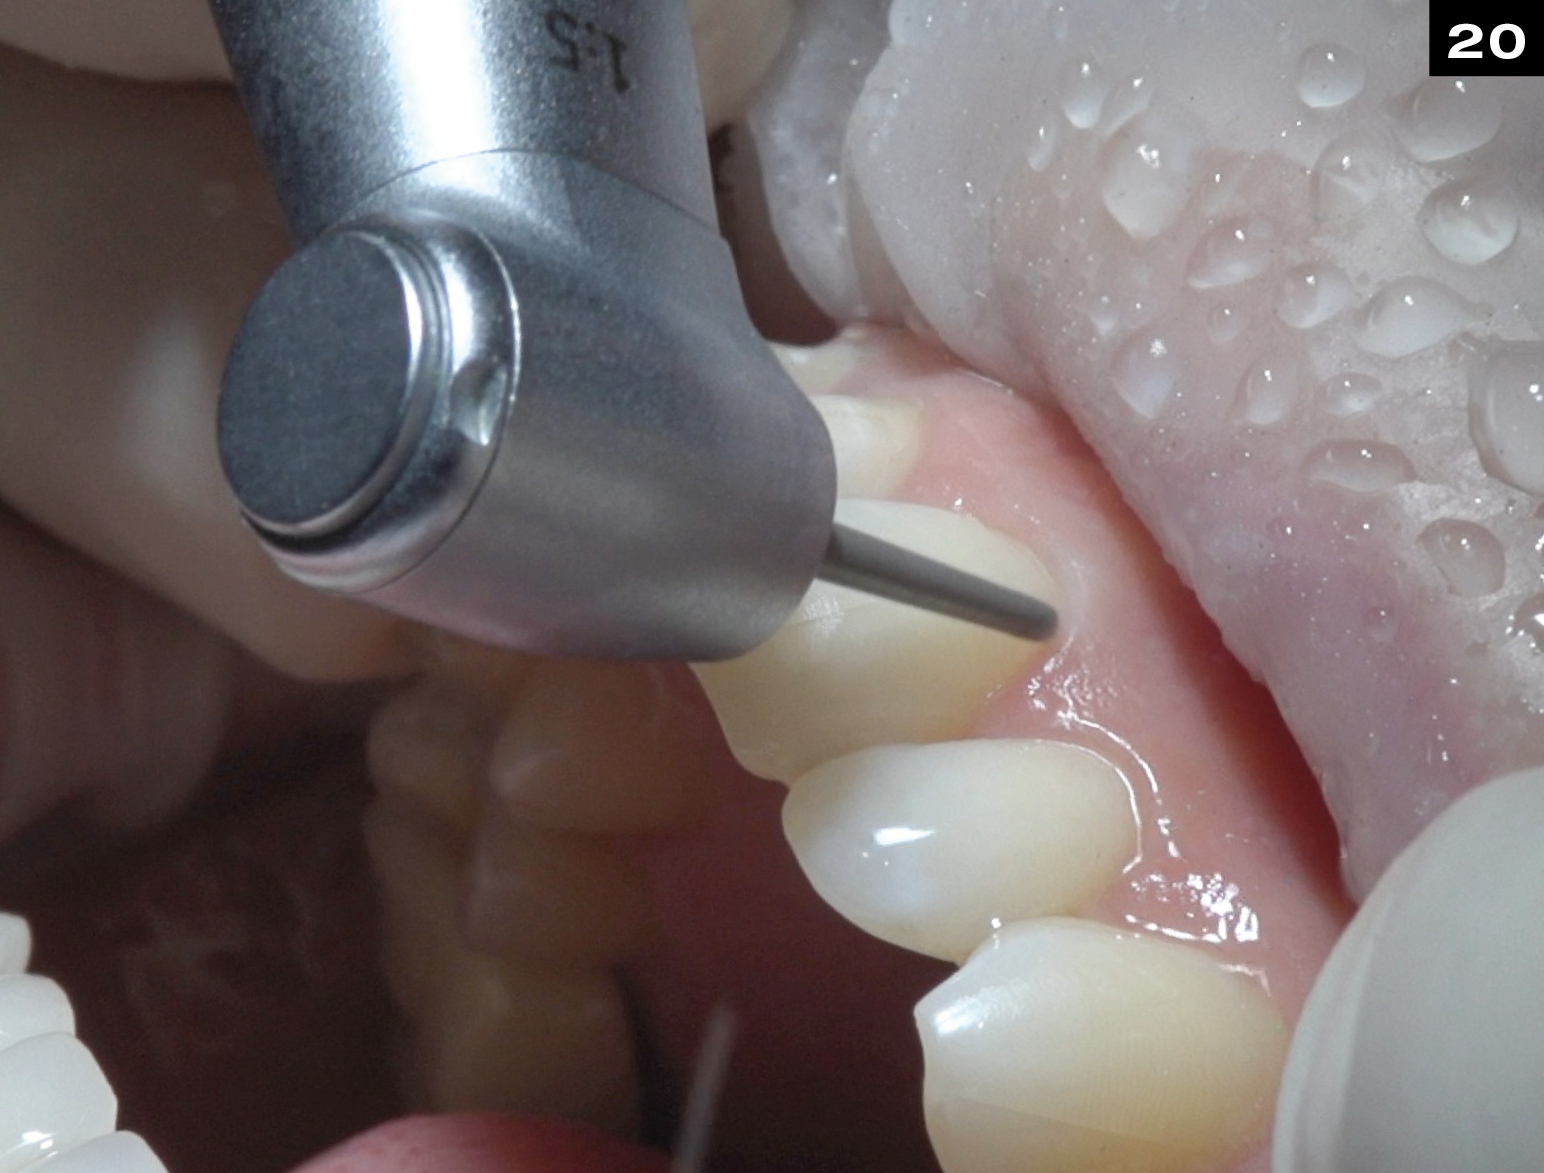
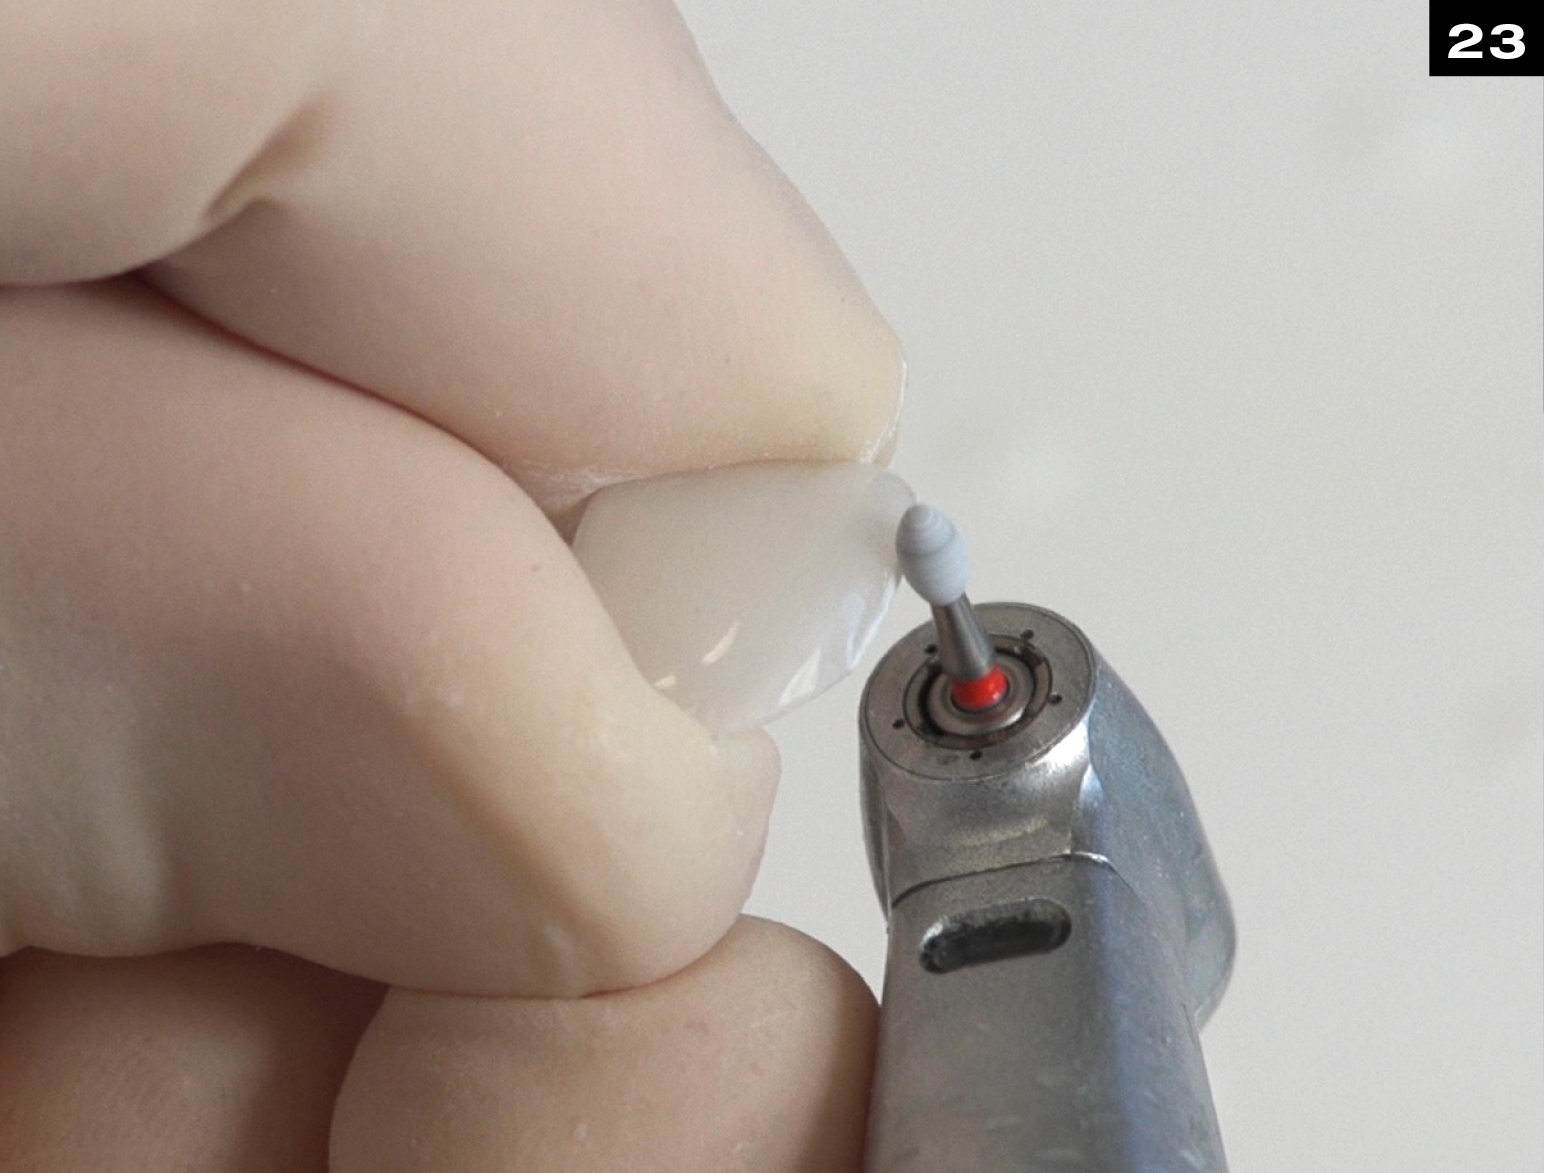
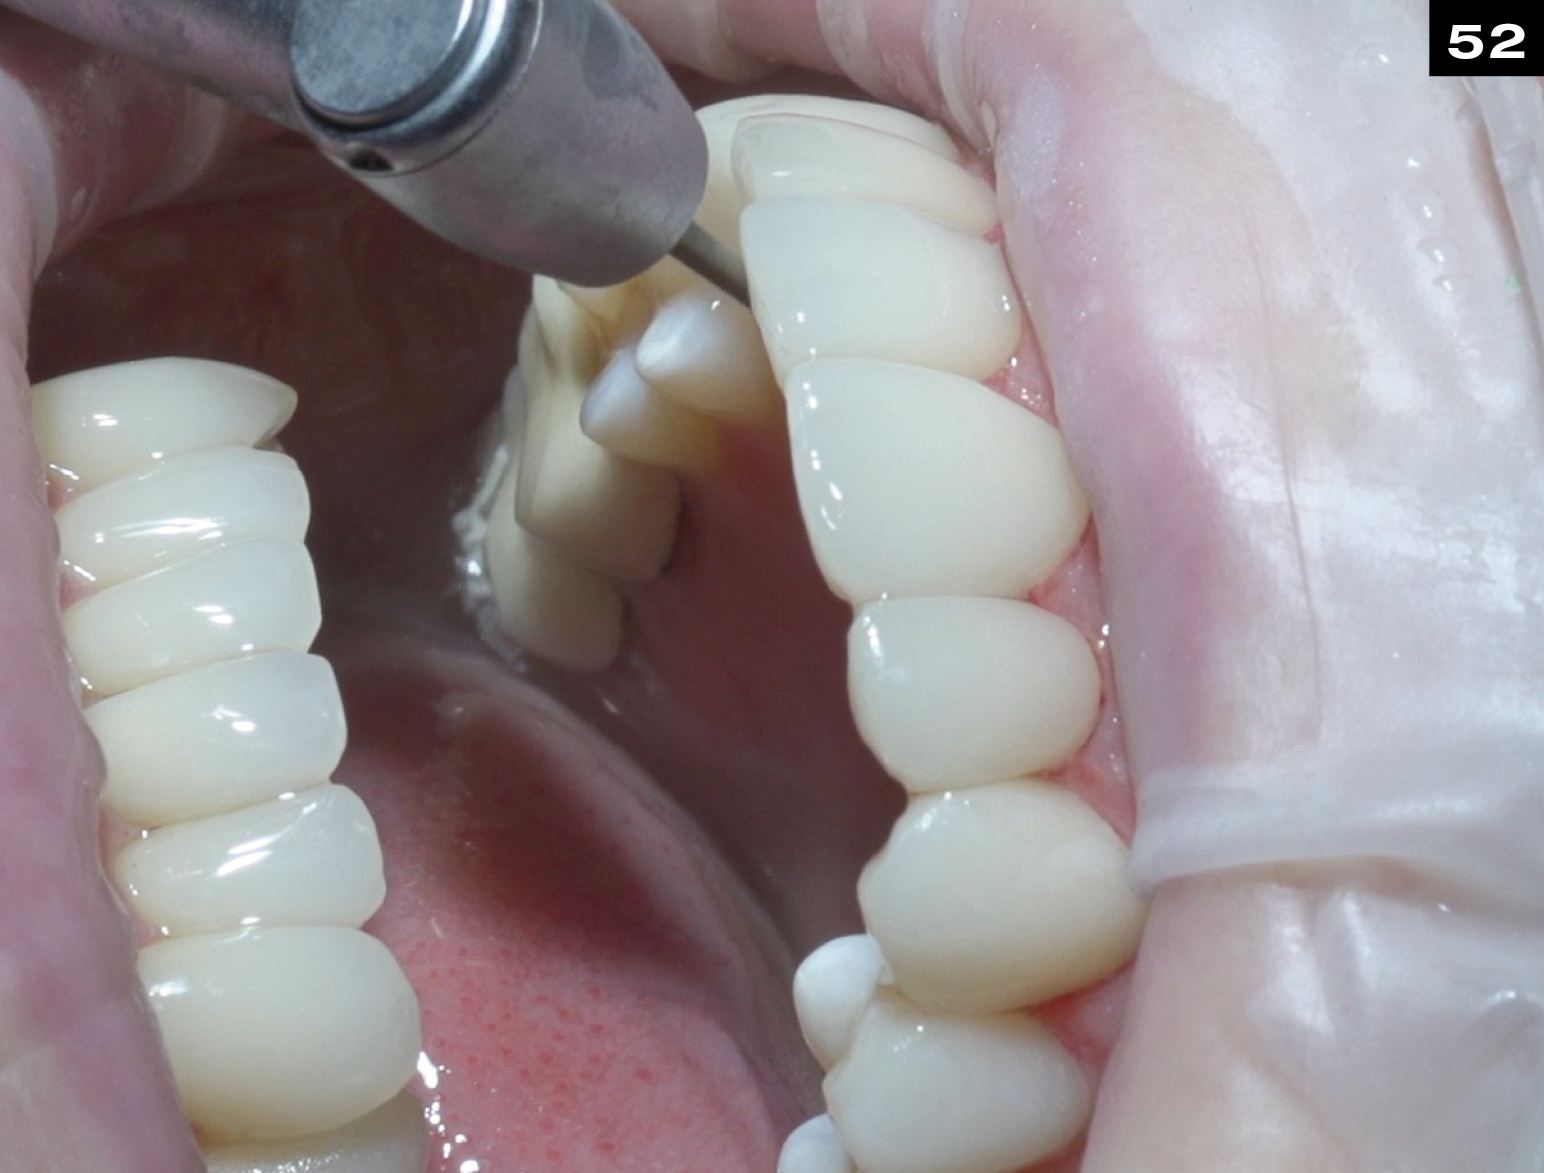
FINISH CERVICAL MARGINS USING FINE FINISHING DIAMONDS.
40 μm / 8 μm
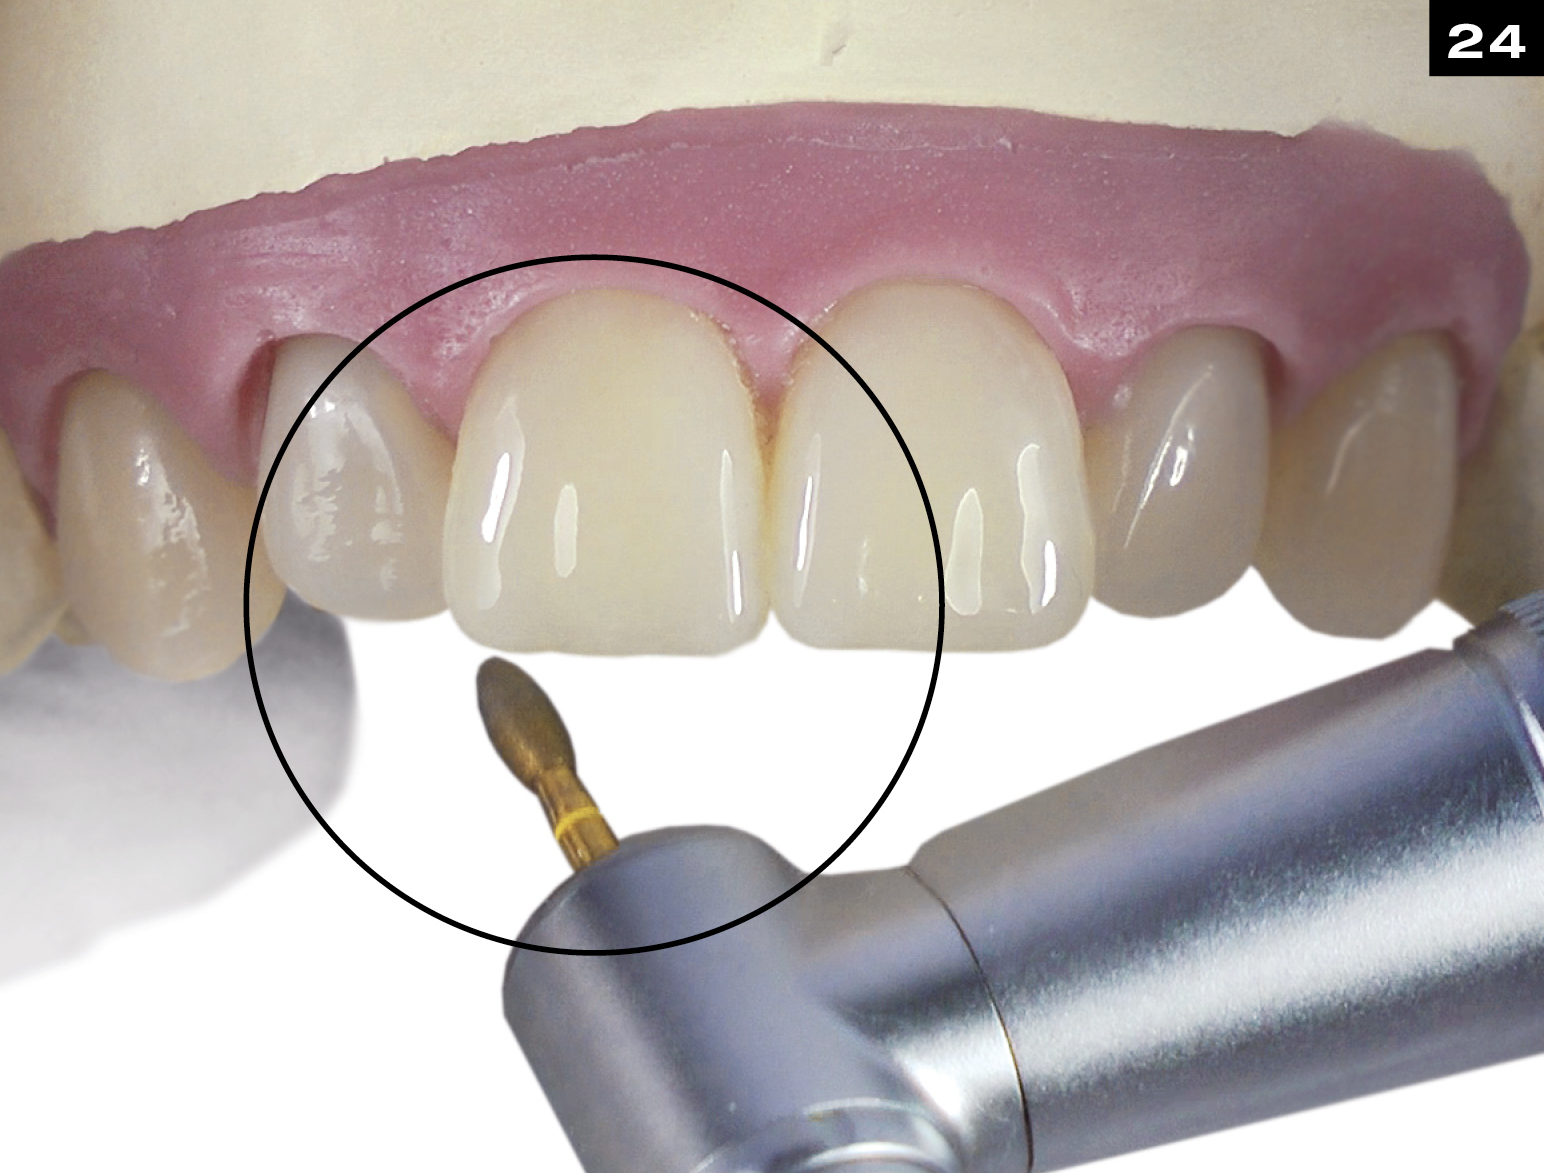
FINISH INCISAL EDGES USING FINE FINISHING DIAMONDS.
40 μm / 8 μm
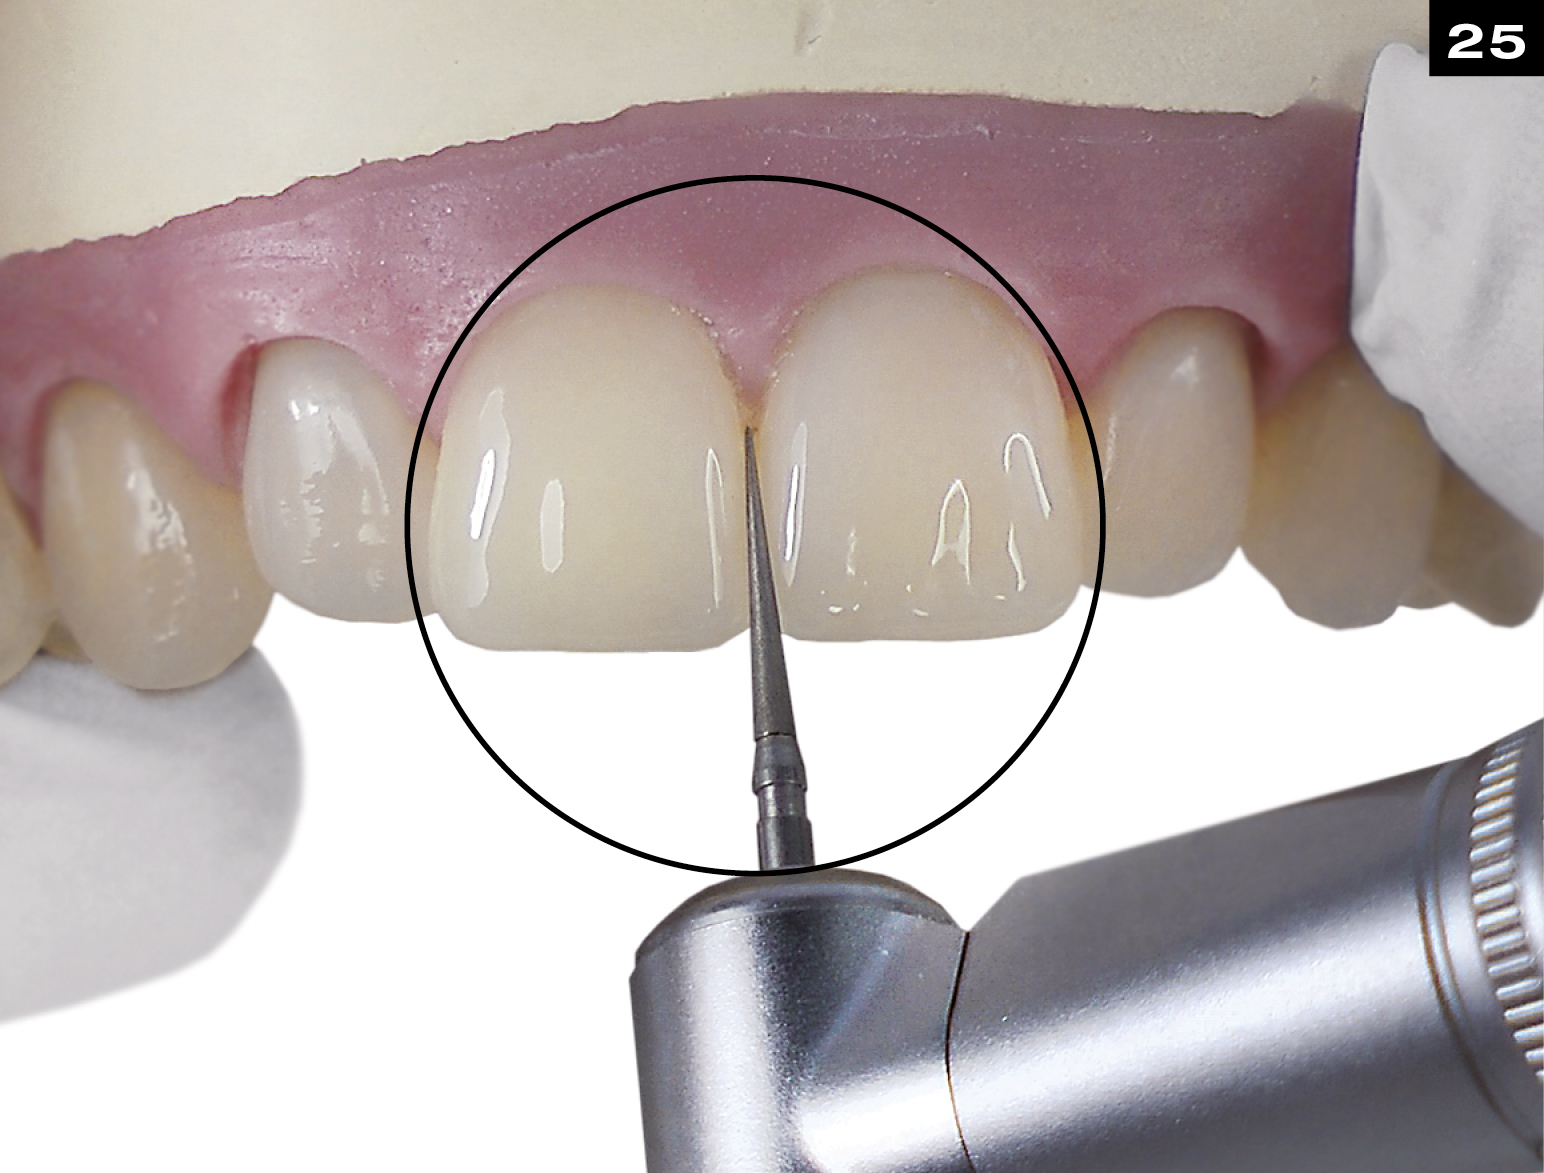
FINISH INTERPROXIMAL MARGINS USING FINE FINISHING DIAMOND.
40 μm / 8 μm
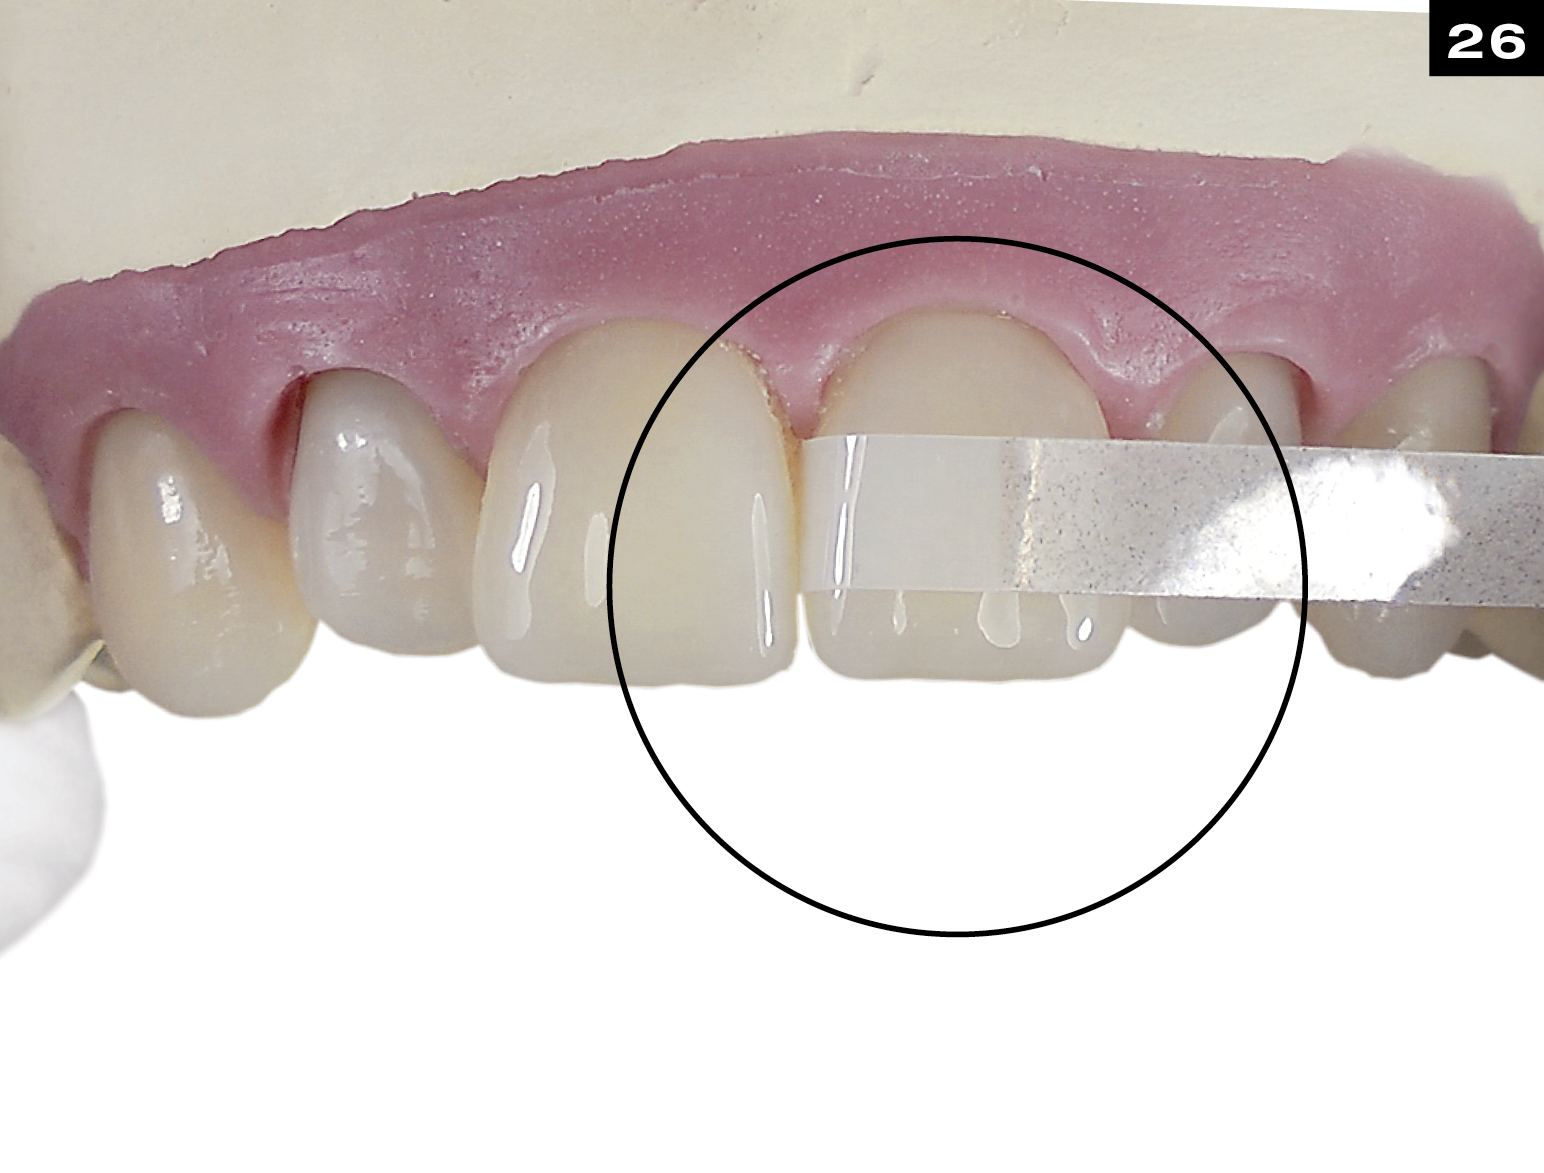
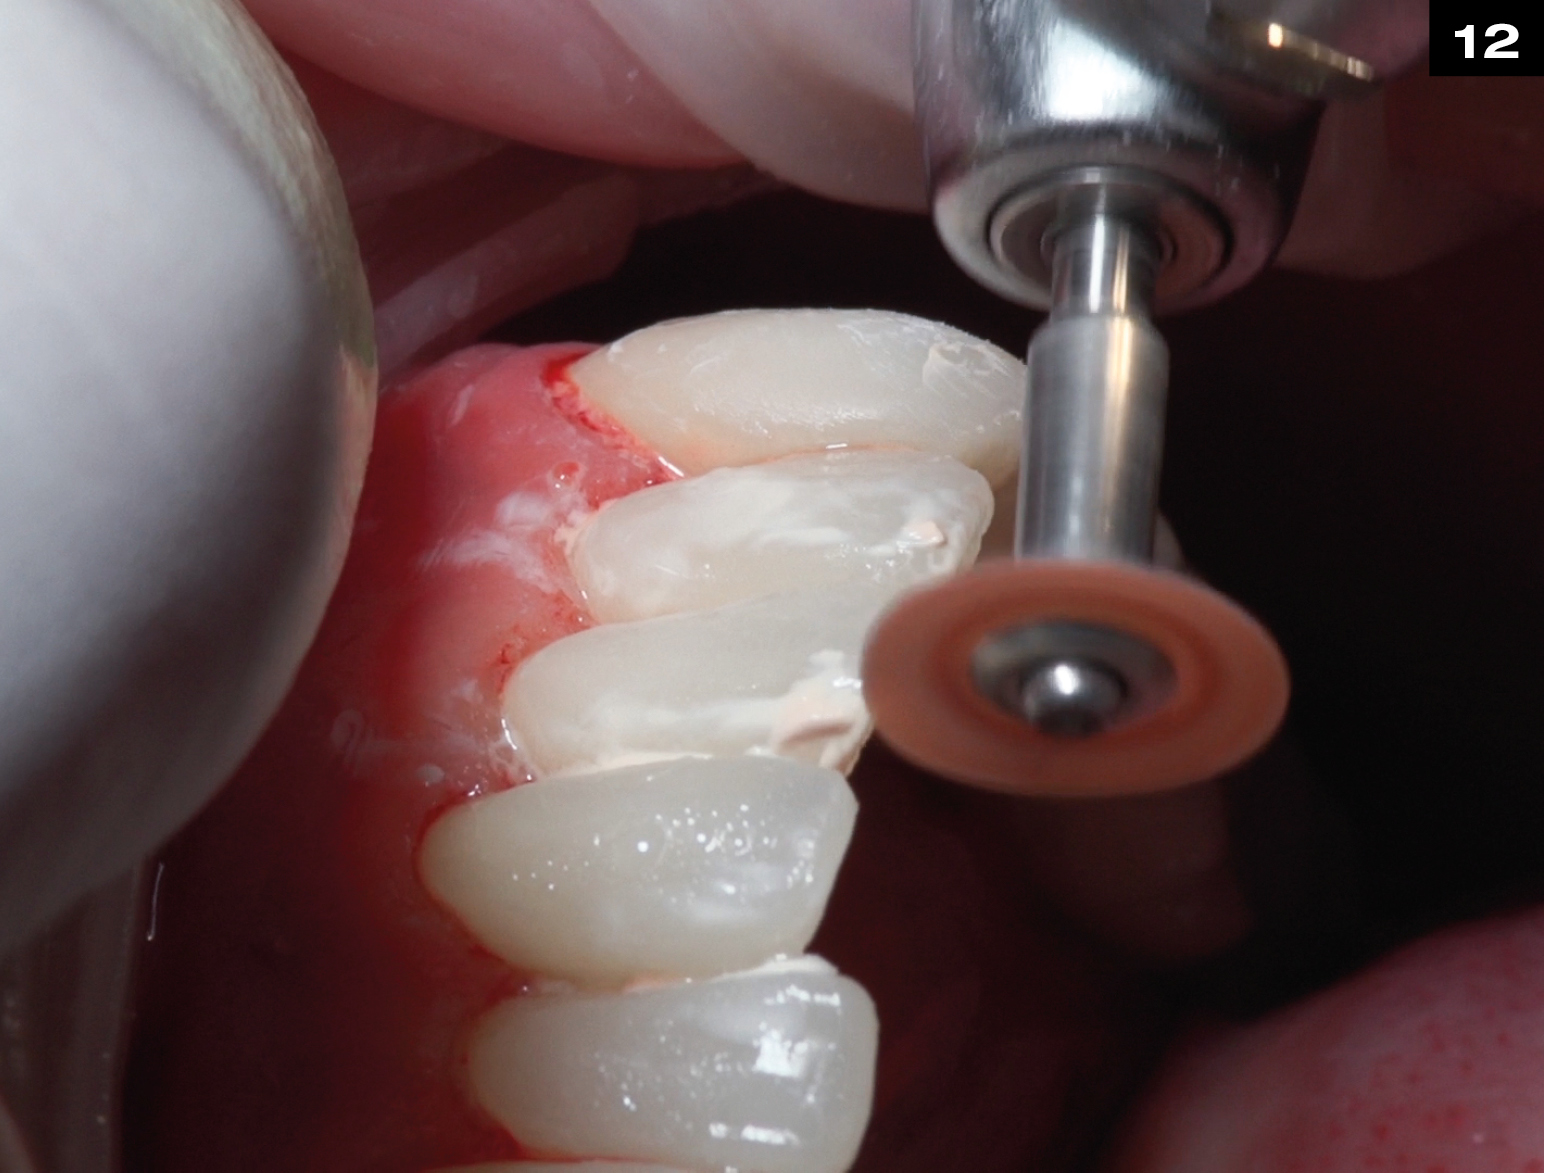
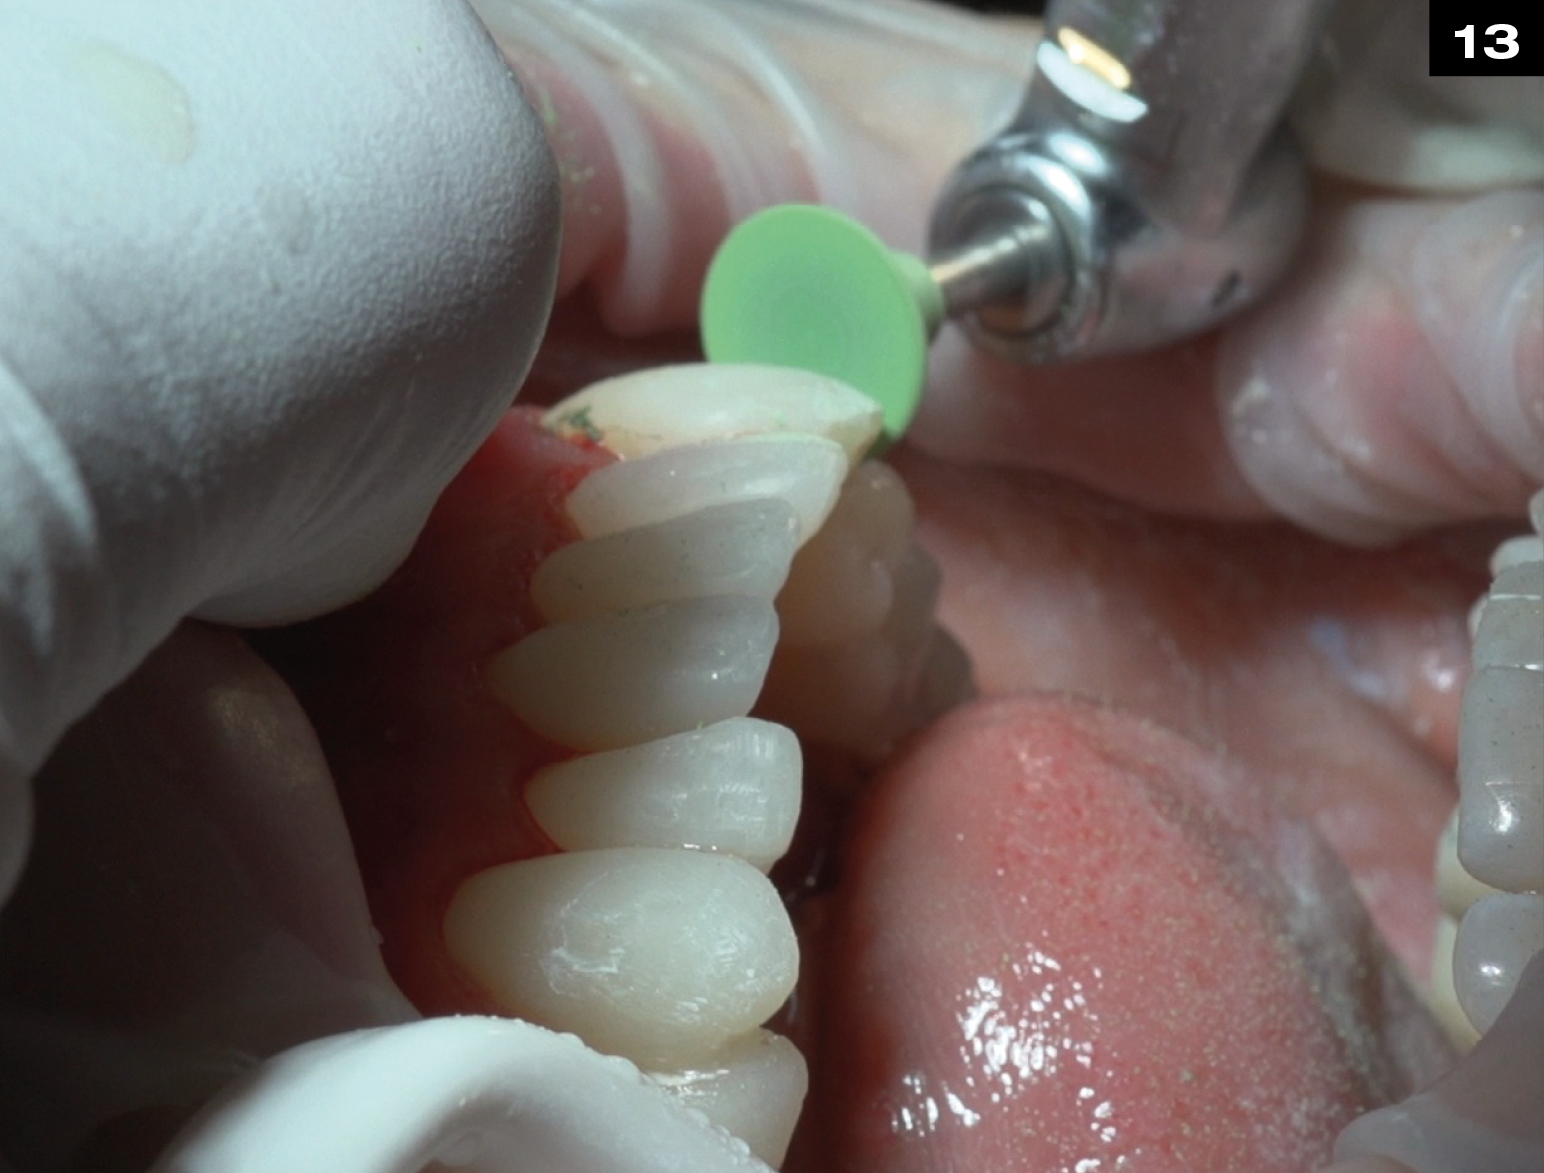
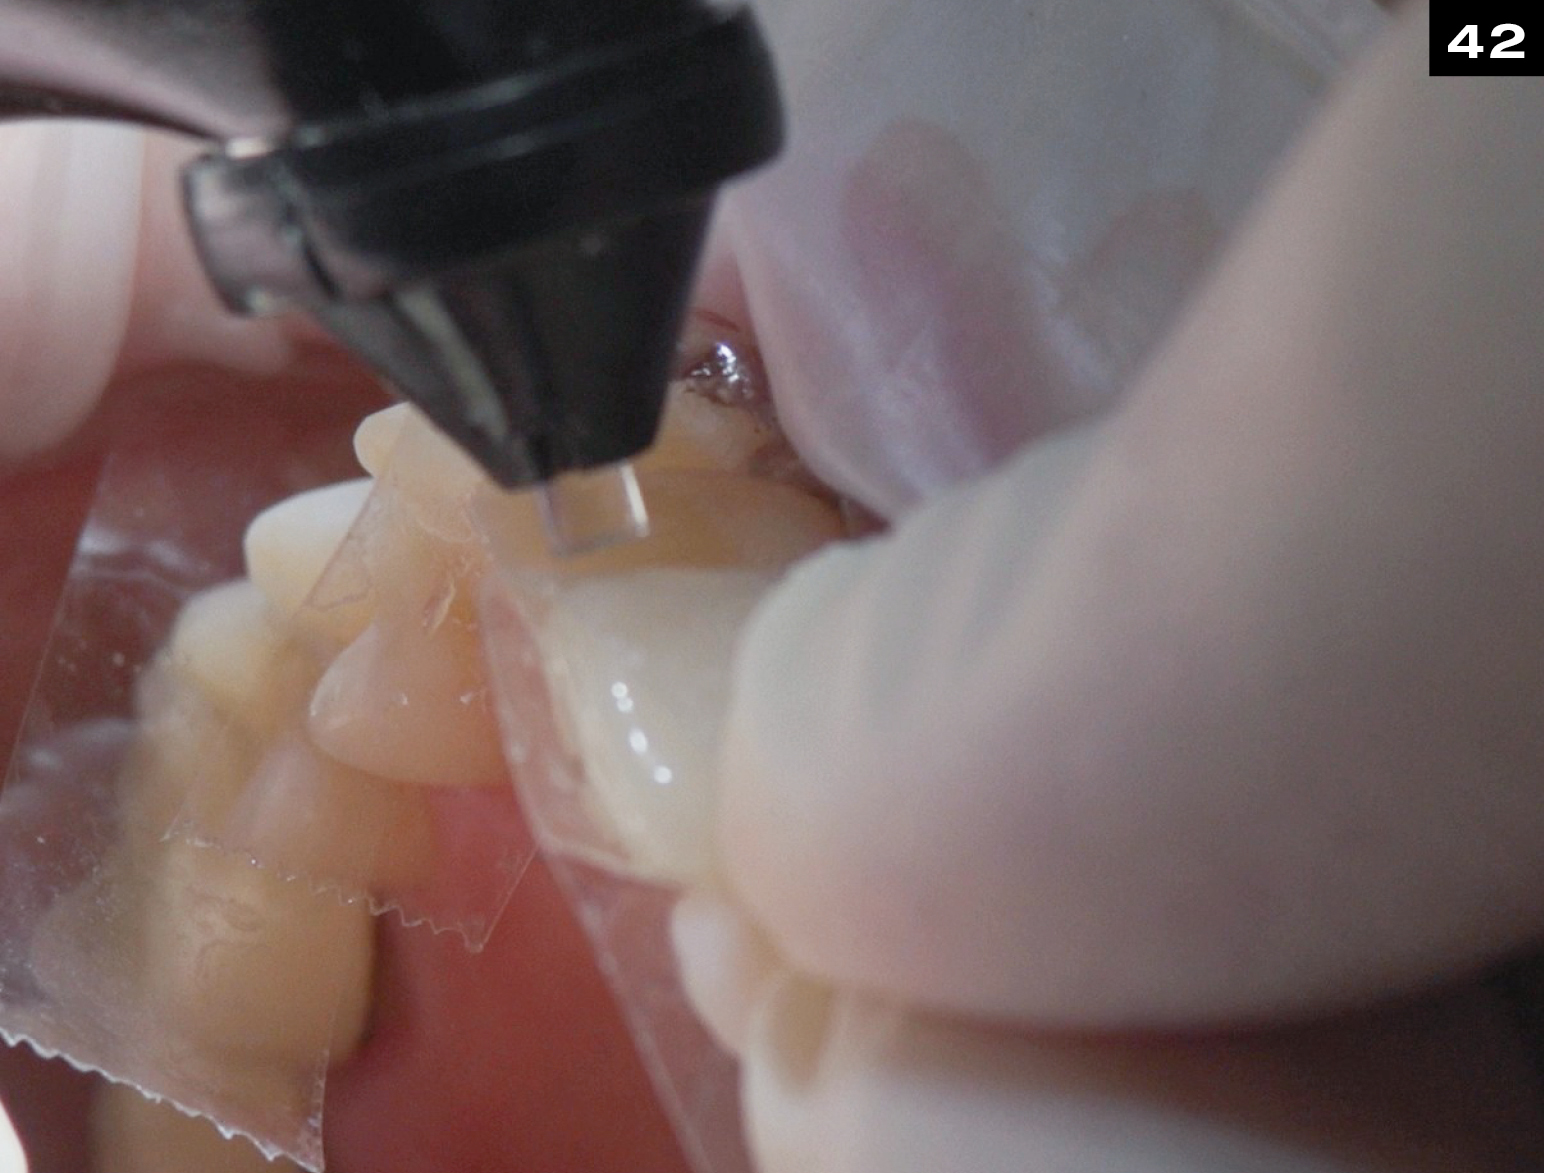
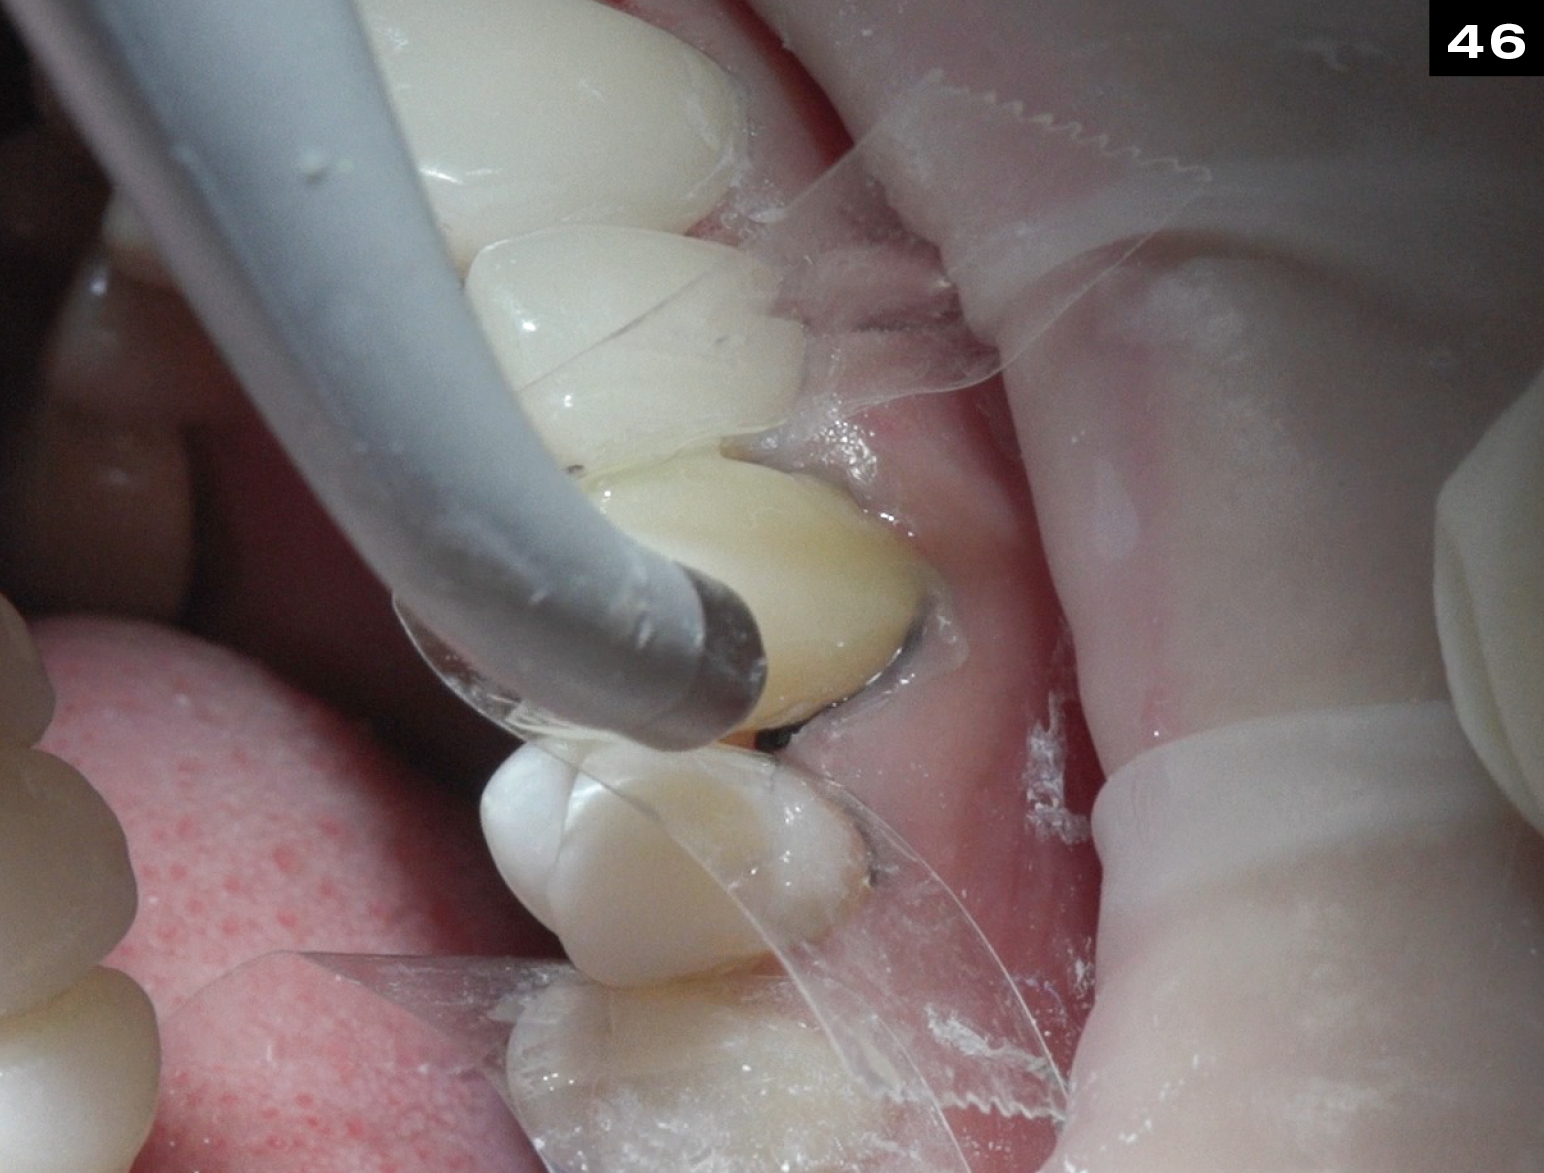
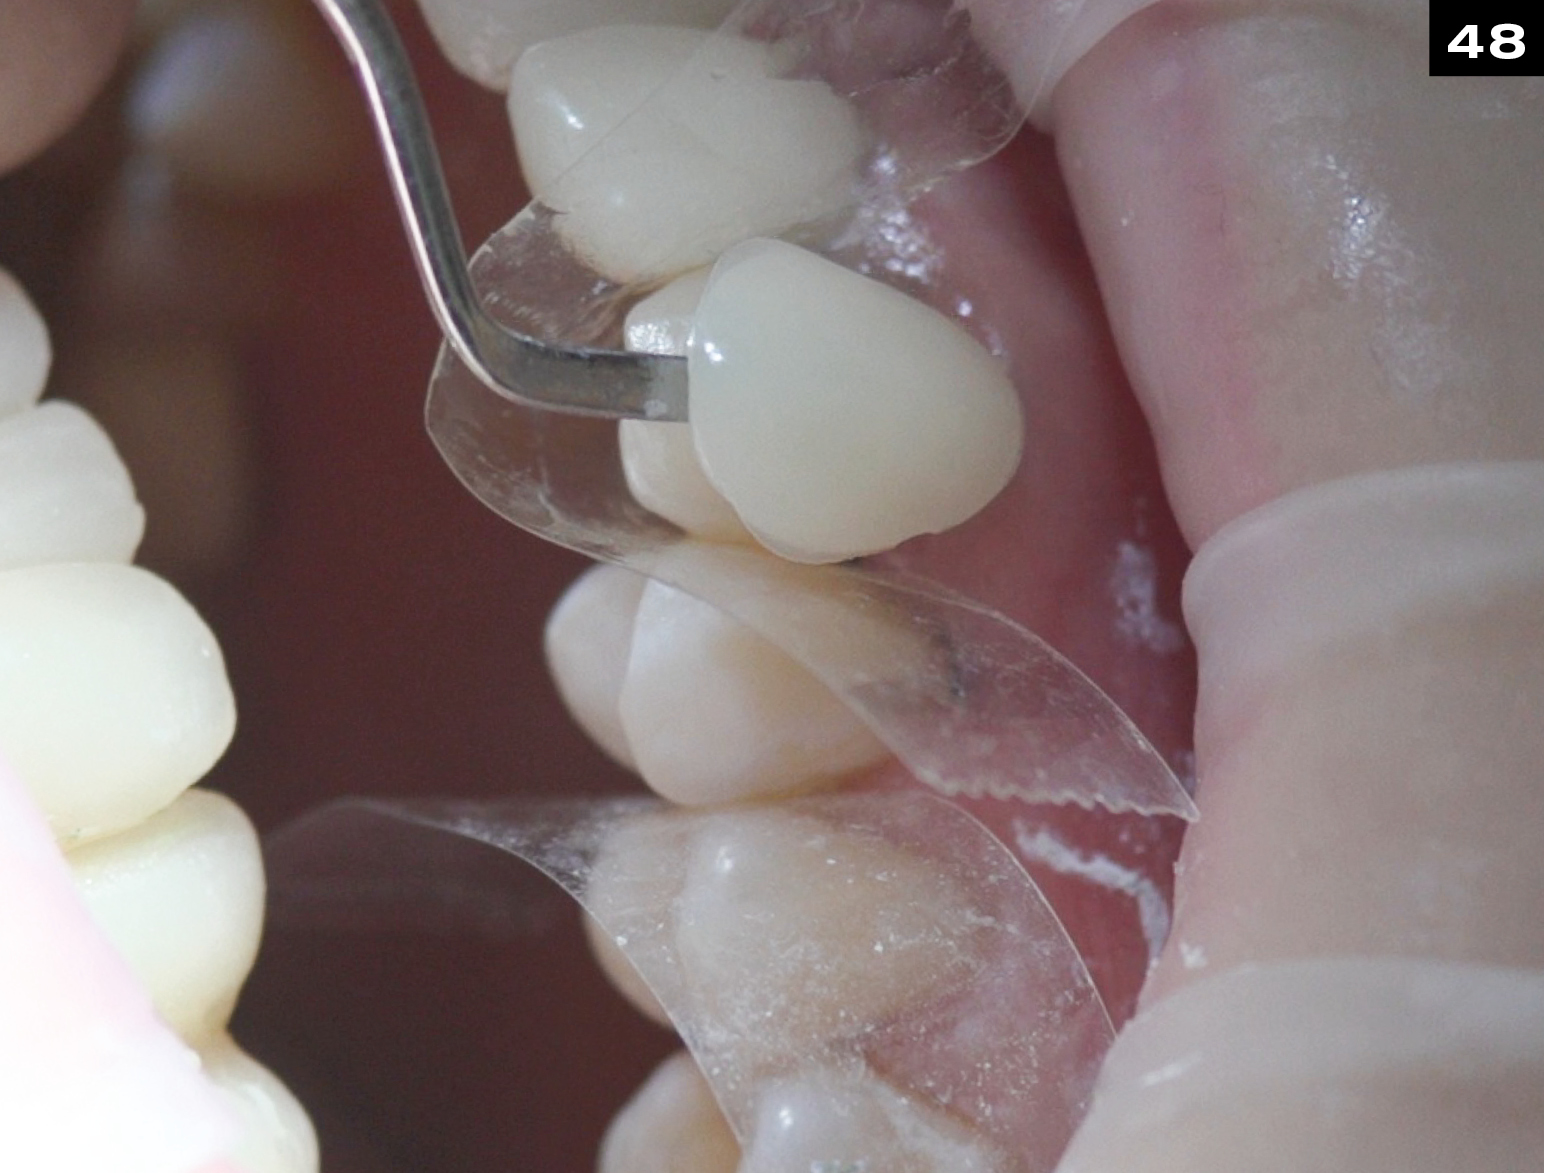
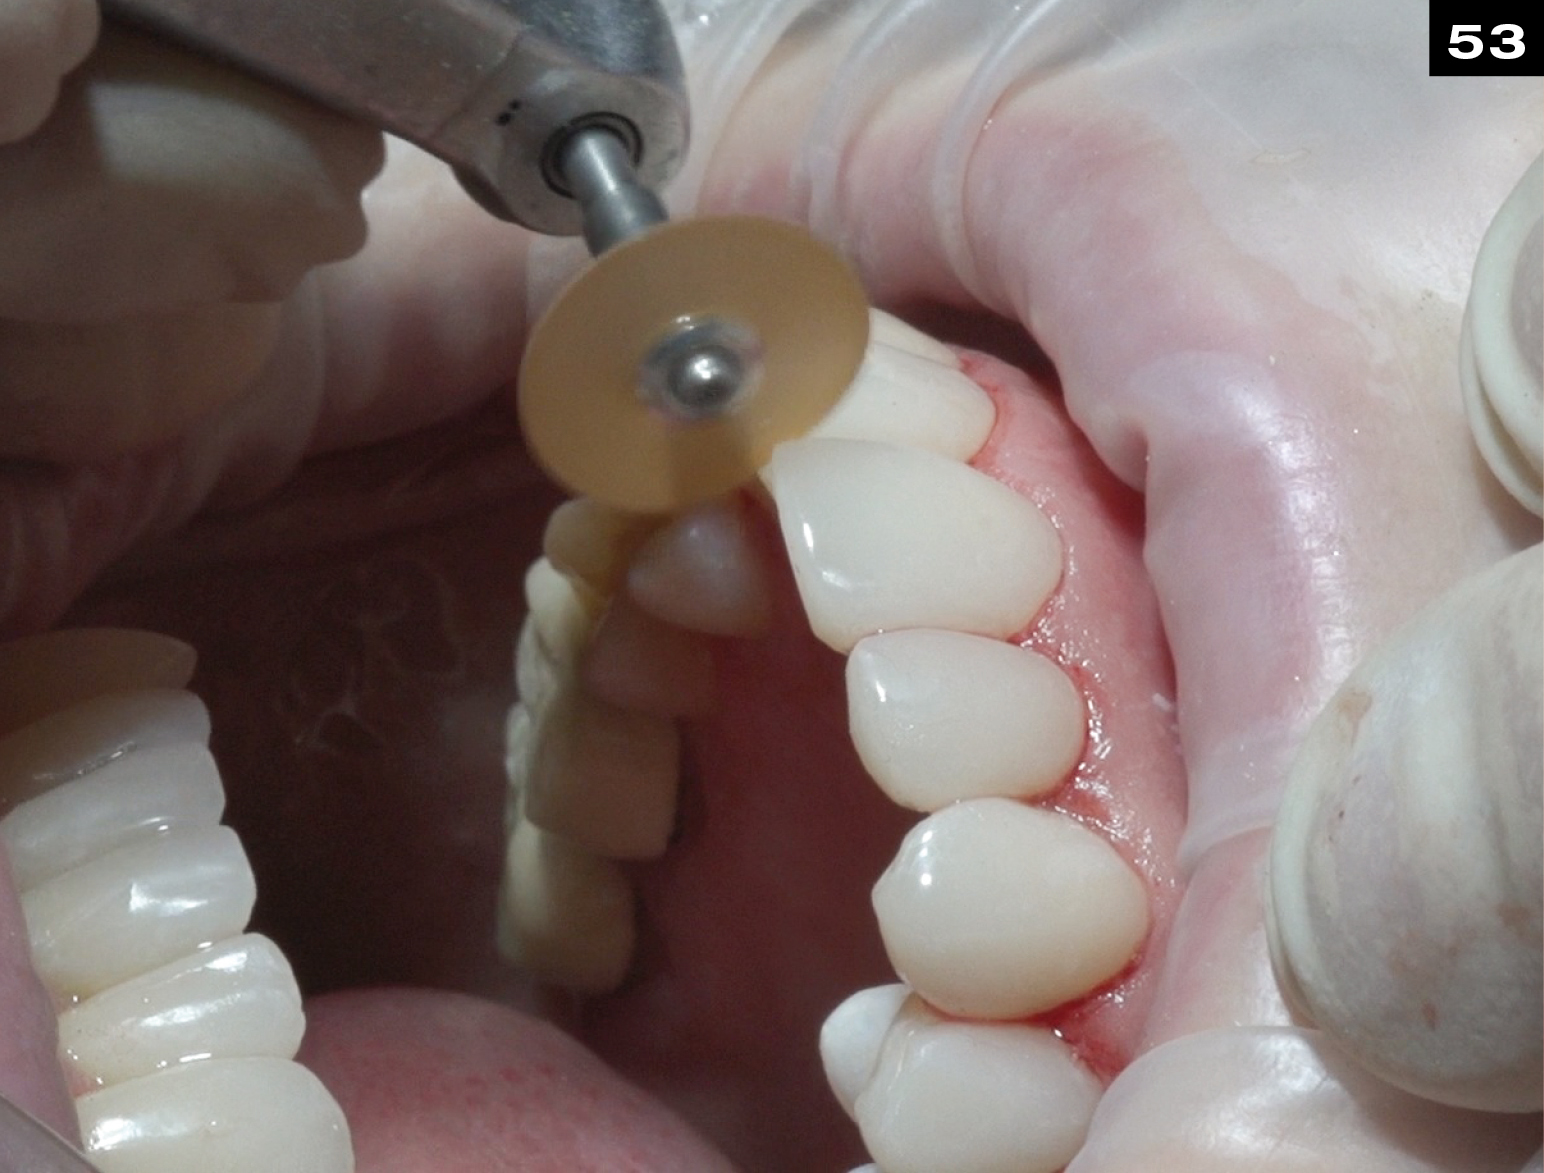
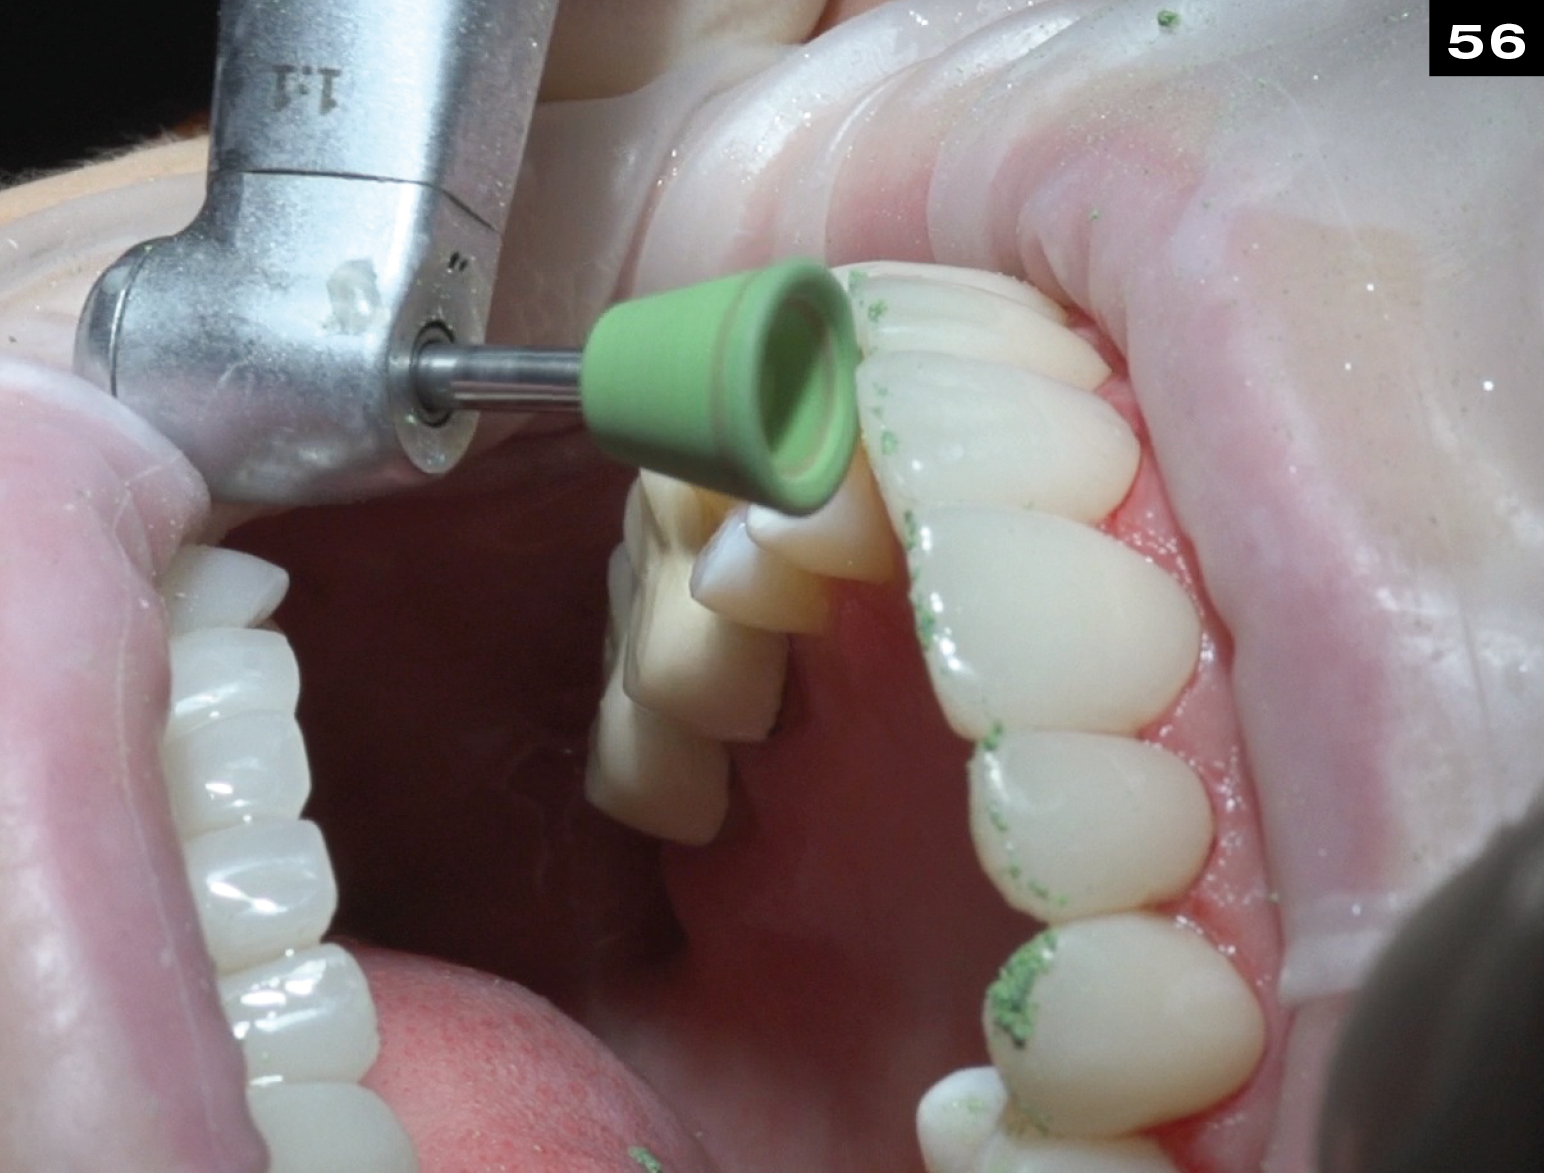
FINISH INTERPROXIMAL AREAS USING FINISHING STRIPS OR SOFLEX DISCS.
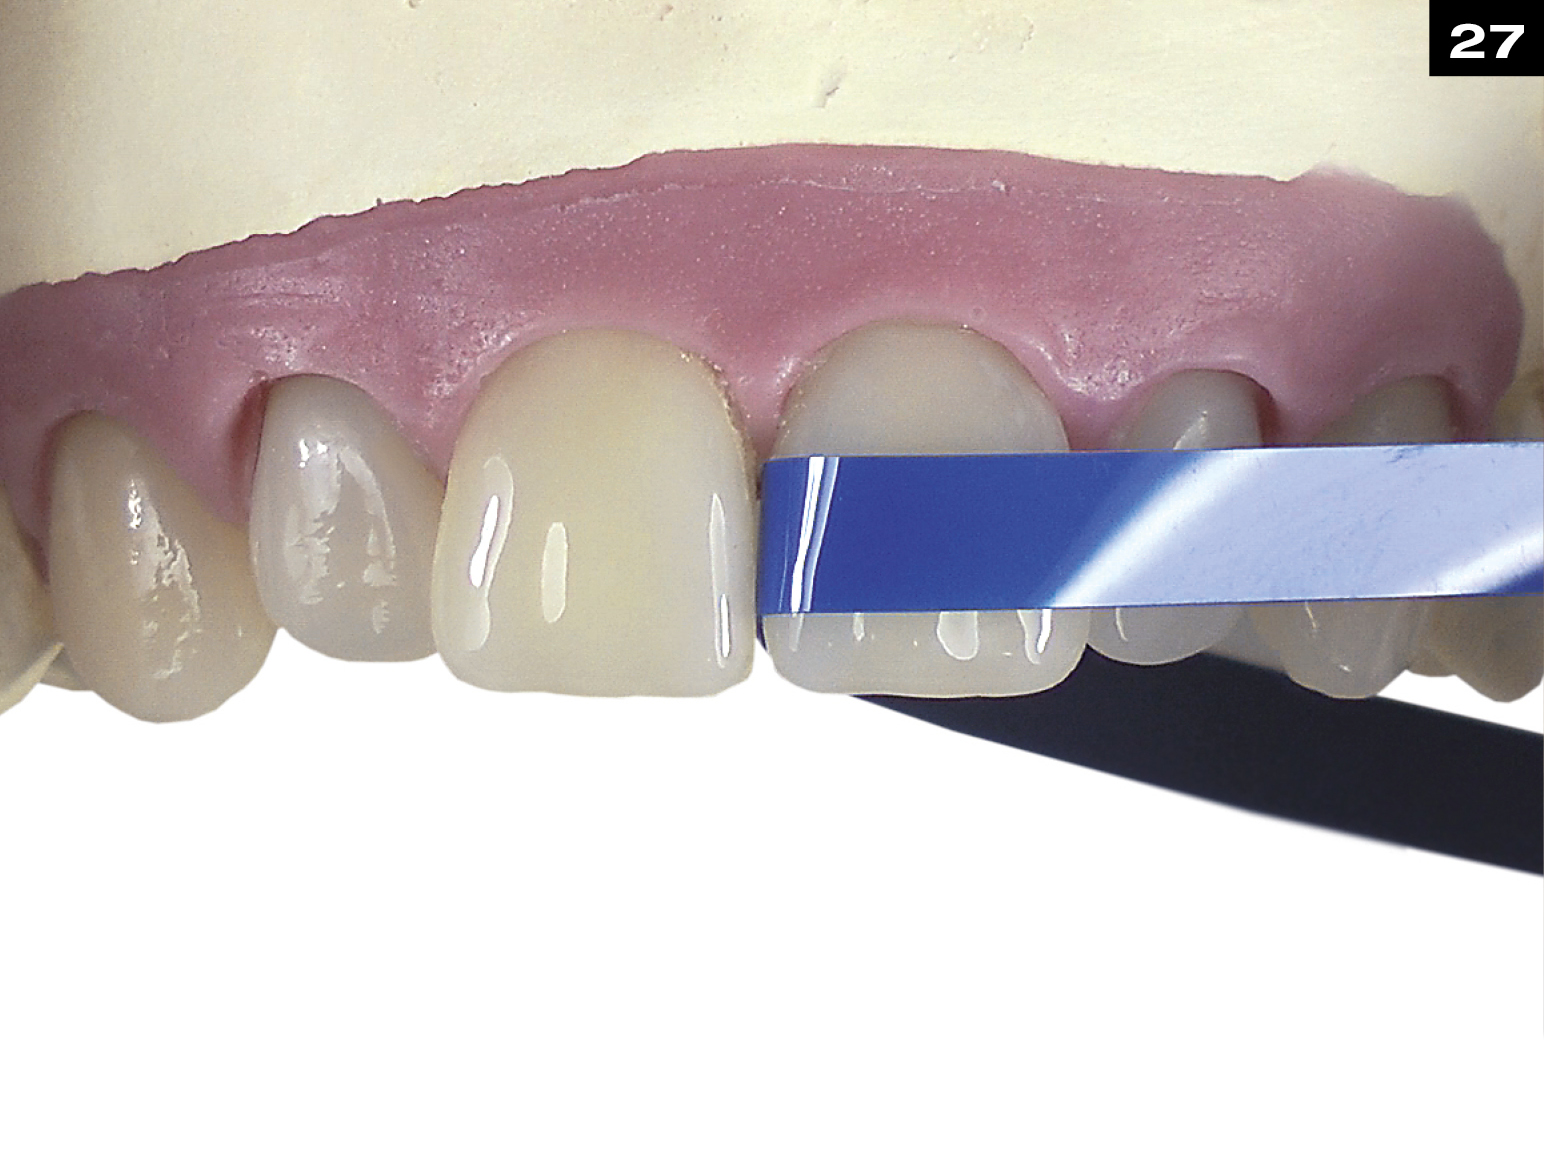
POLISH INTERPROXIMAL AREAS USING INTERPROXIMAL POLISHING STRIPS OR SOFLEX DISCS.
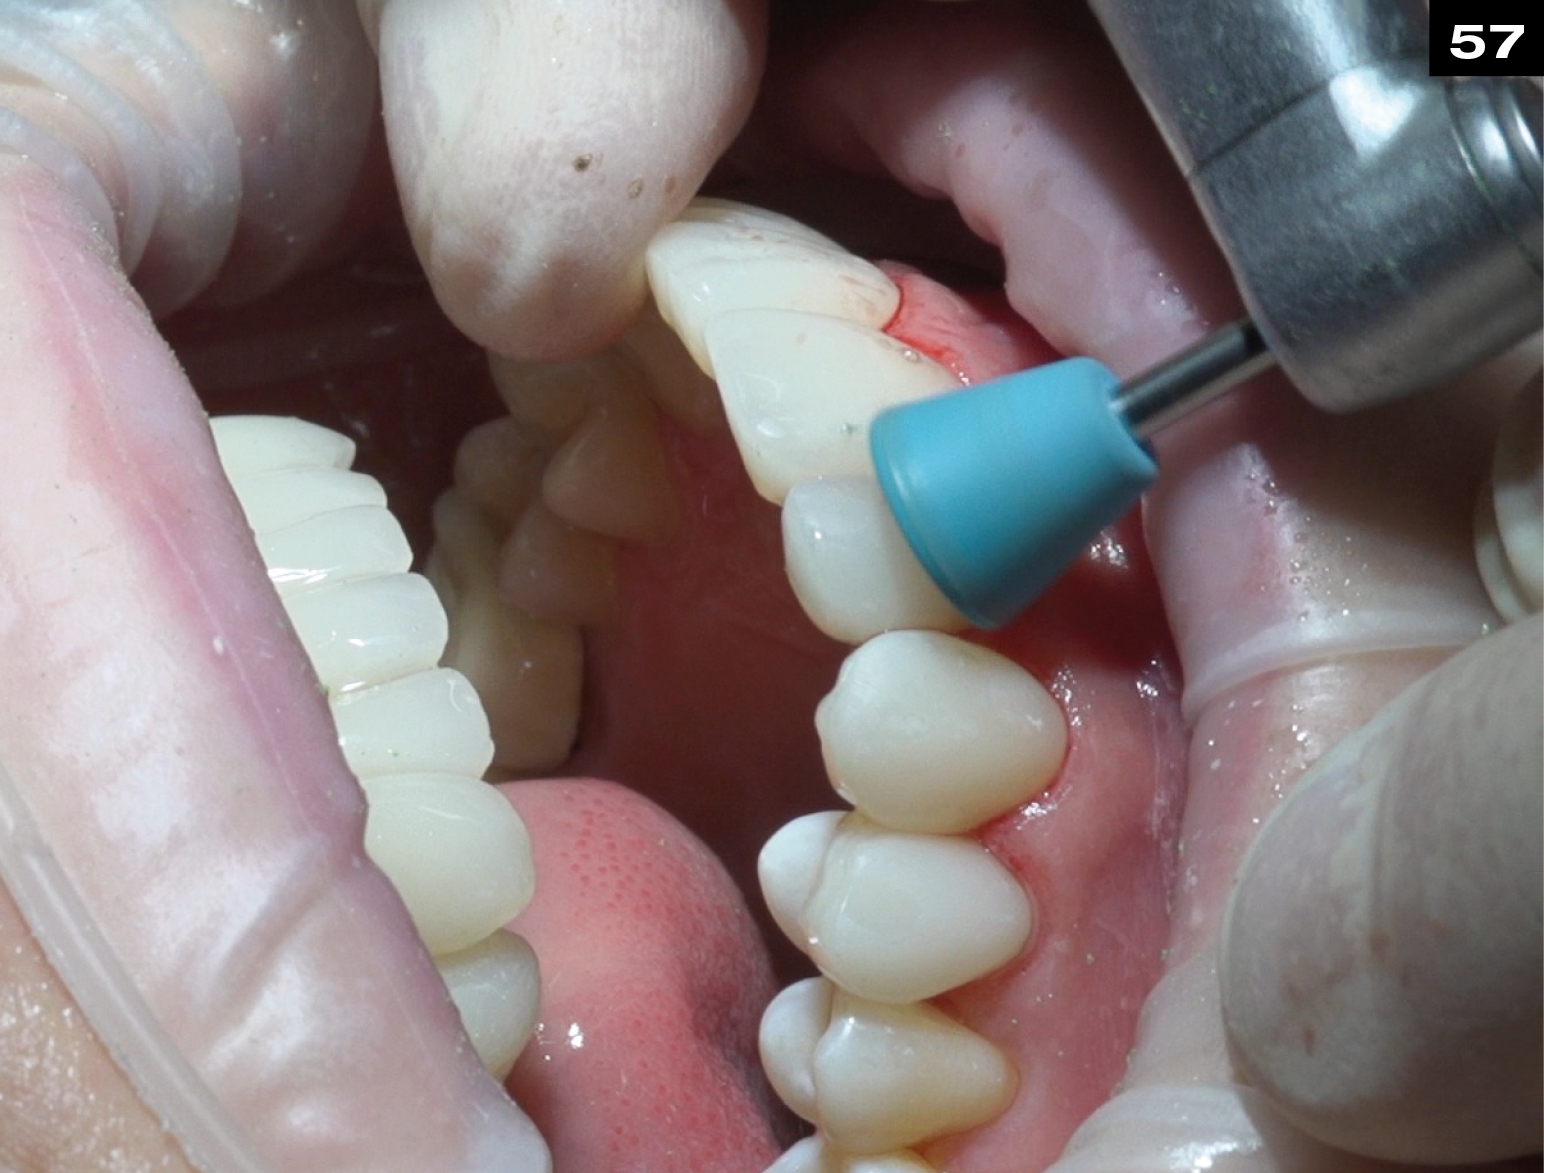
POLISH CERVICAL AREAS USING SILICONE RUBBER POLISHERS (MOISTENED).
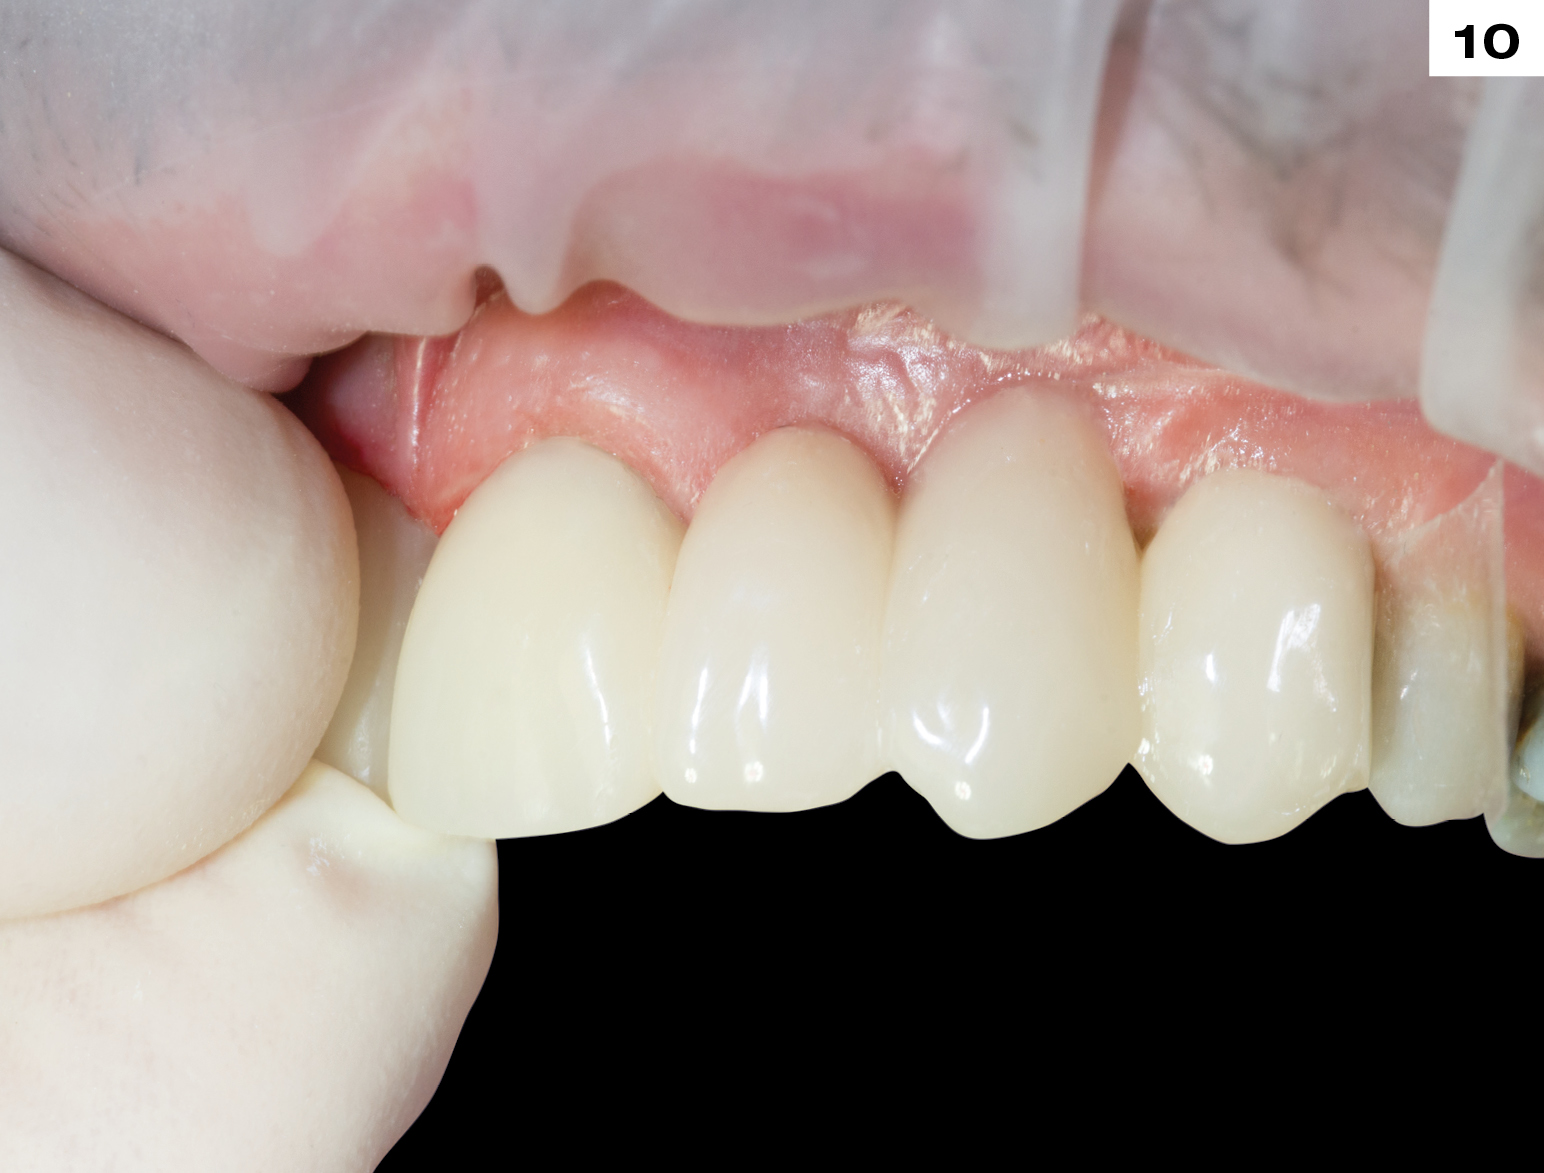
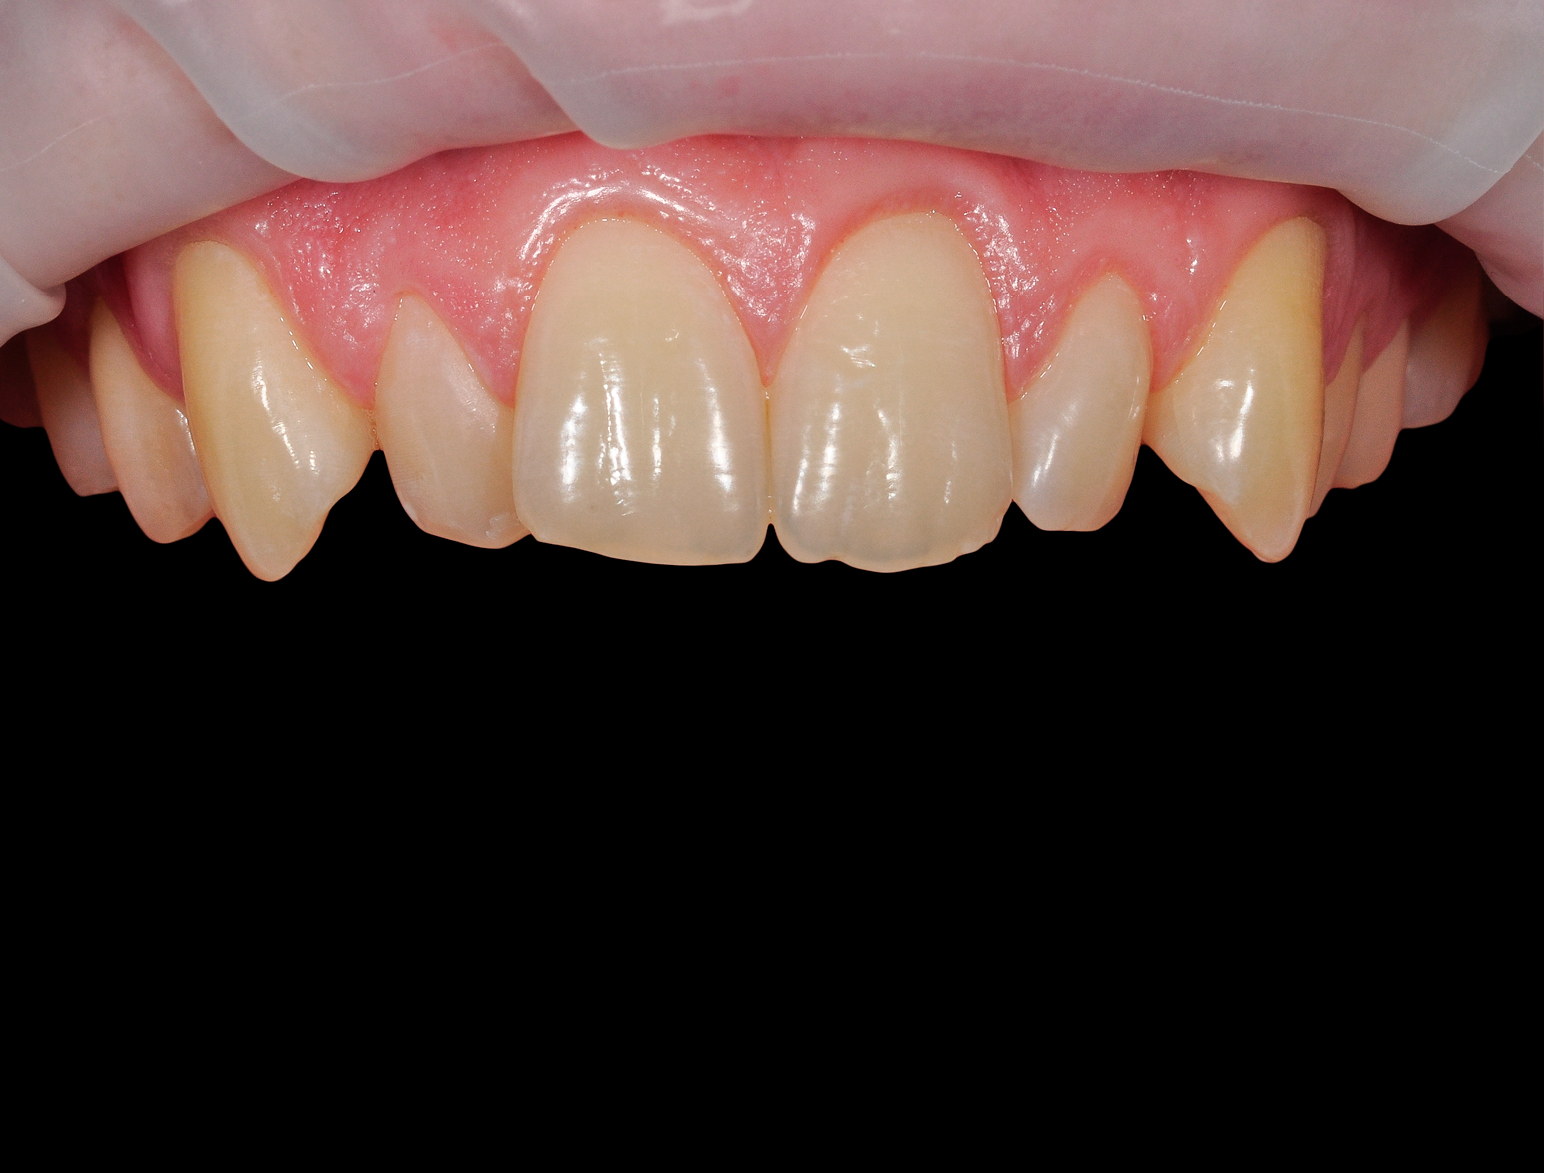
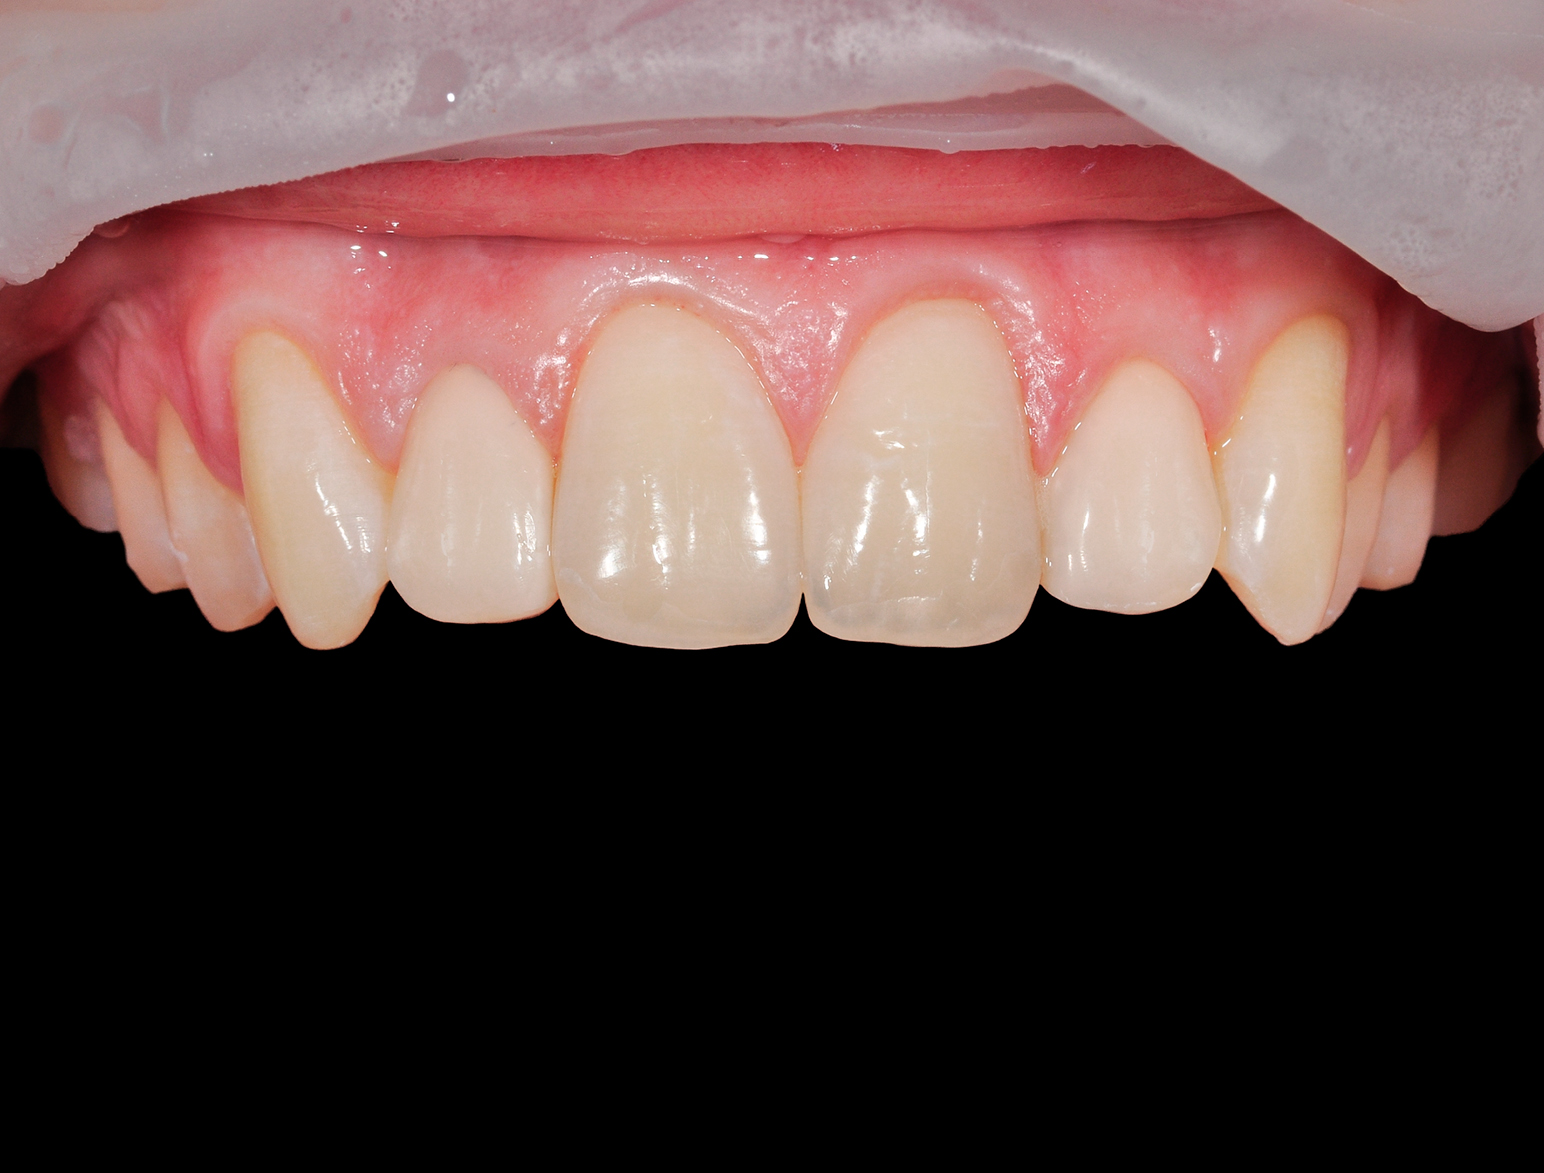
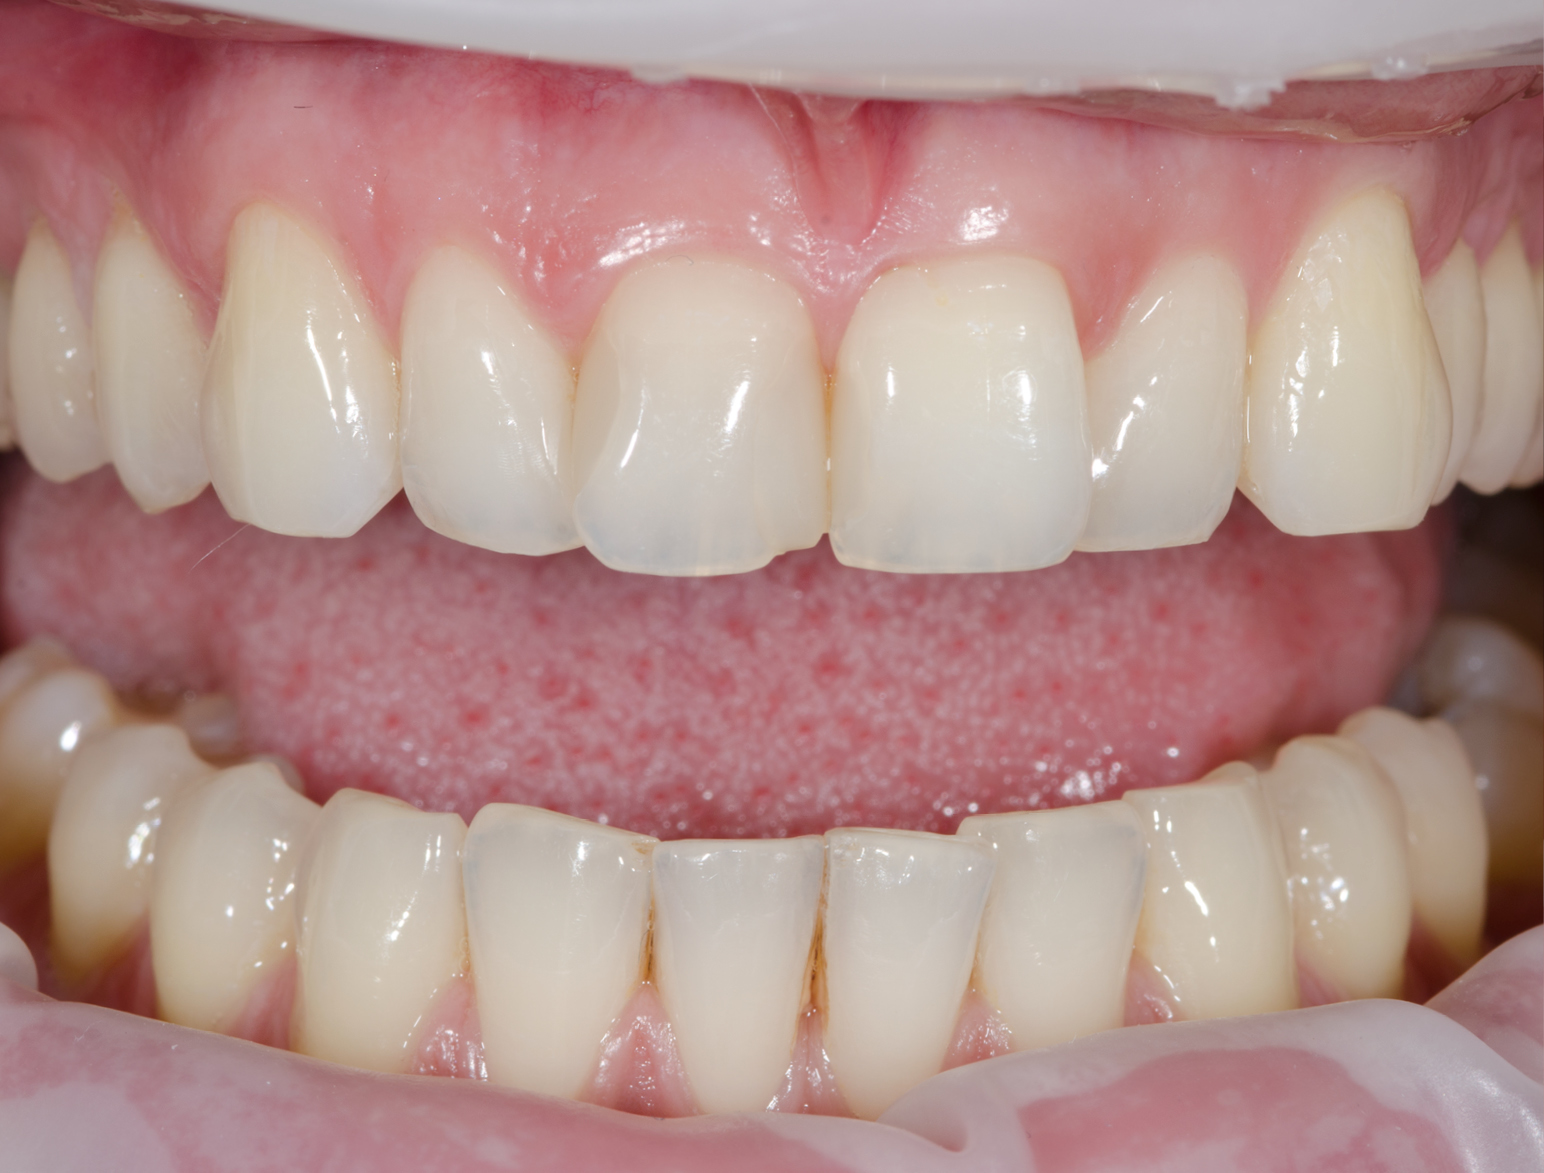
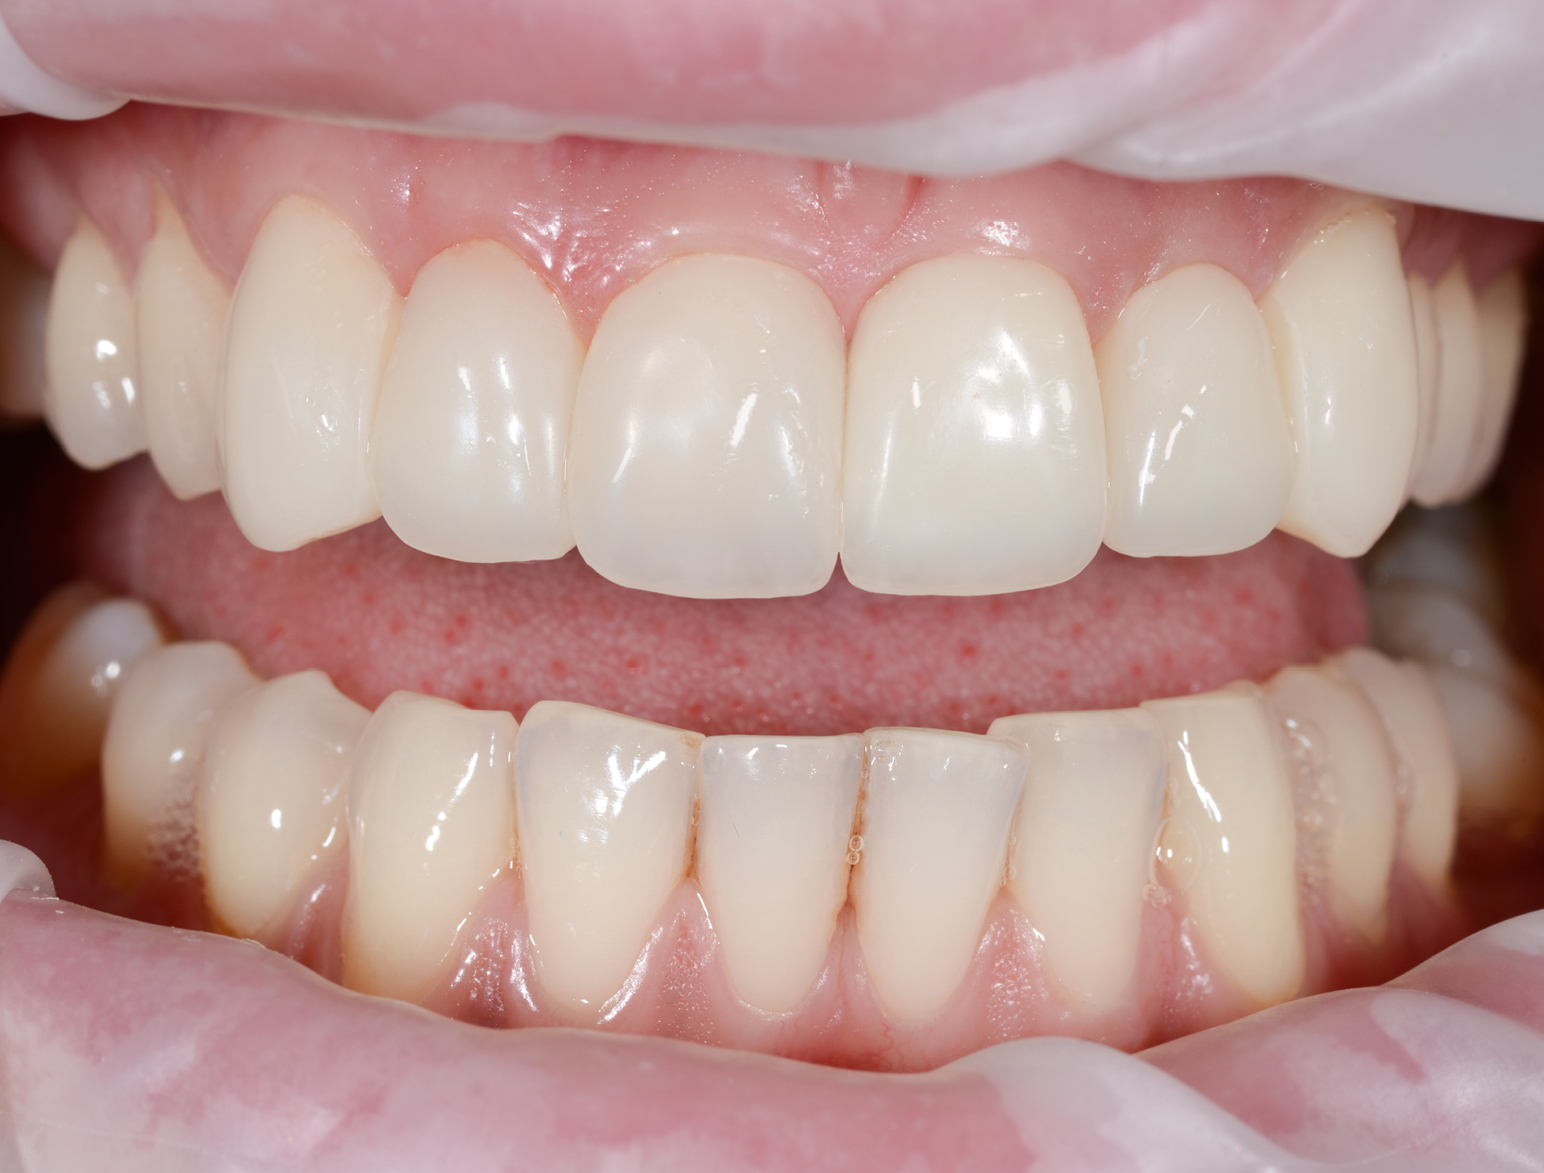
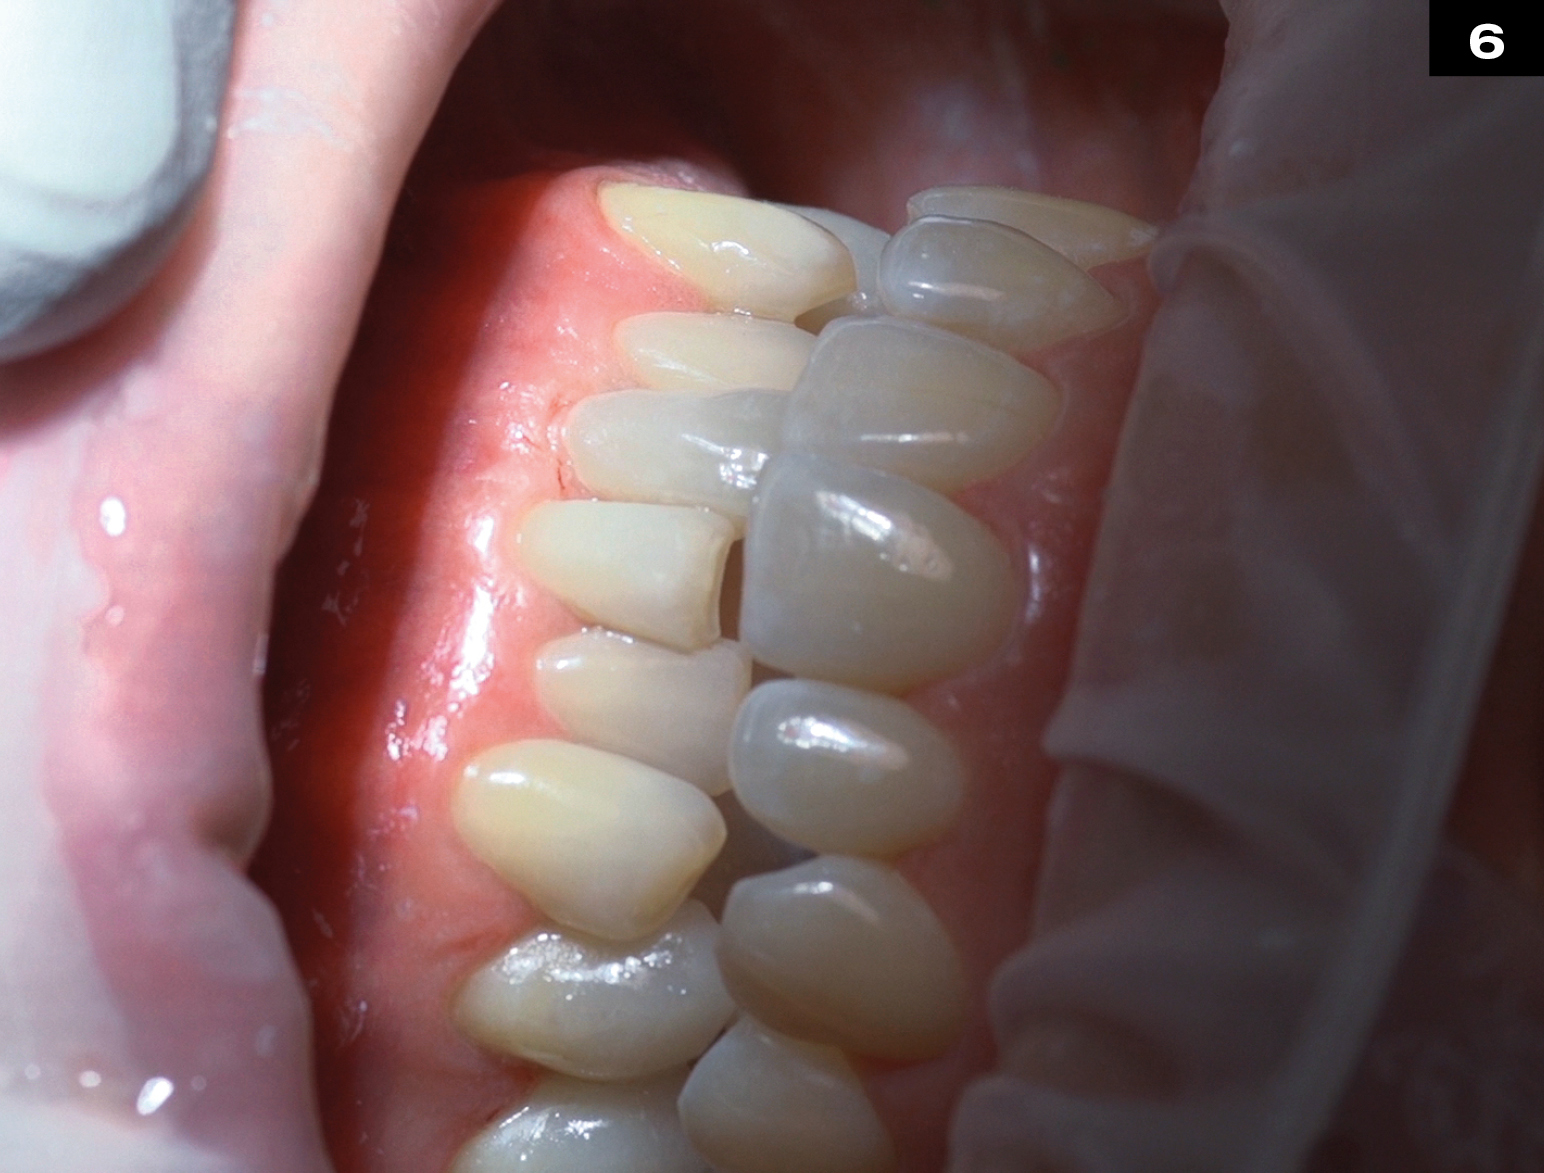
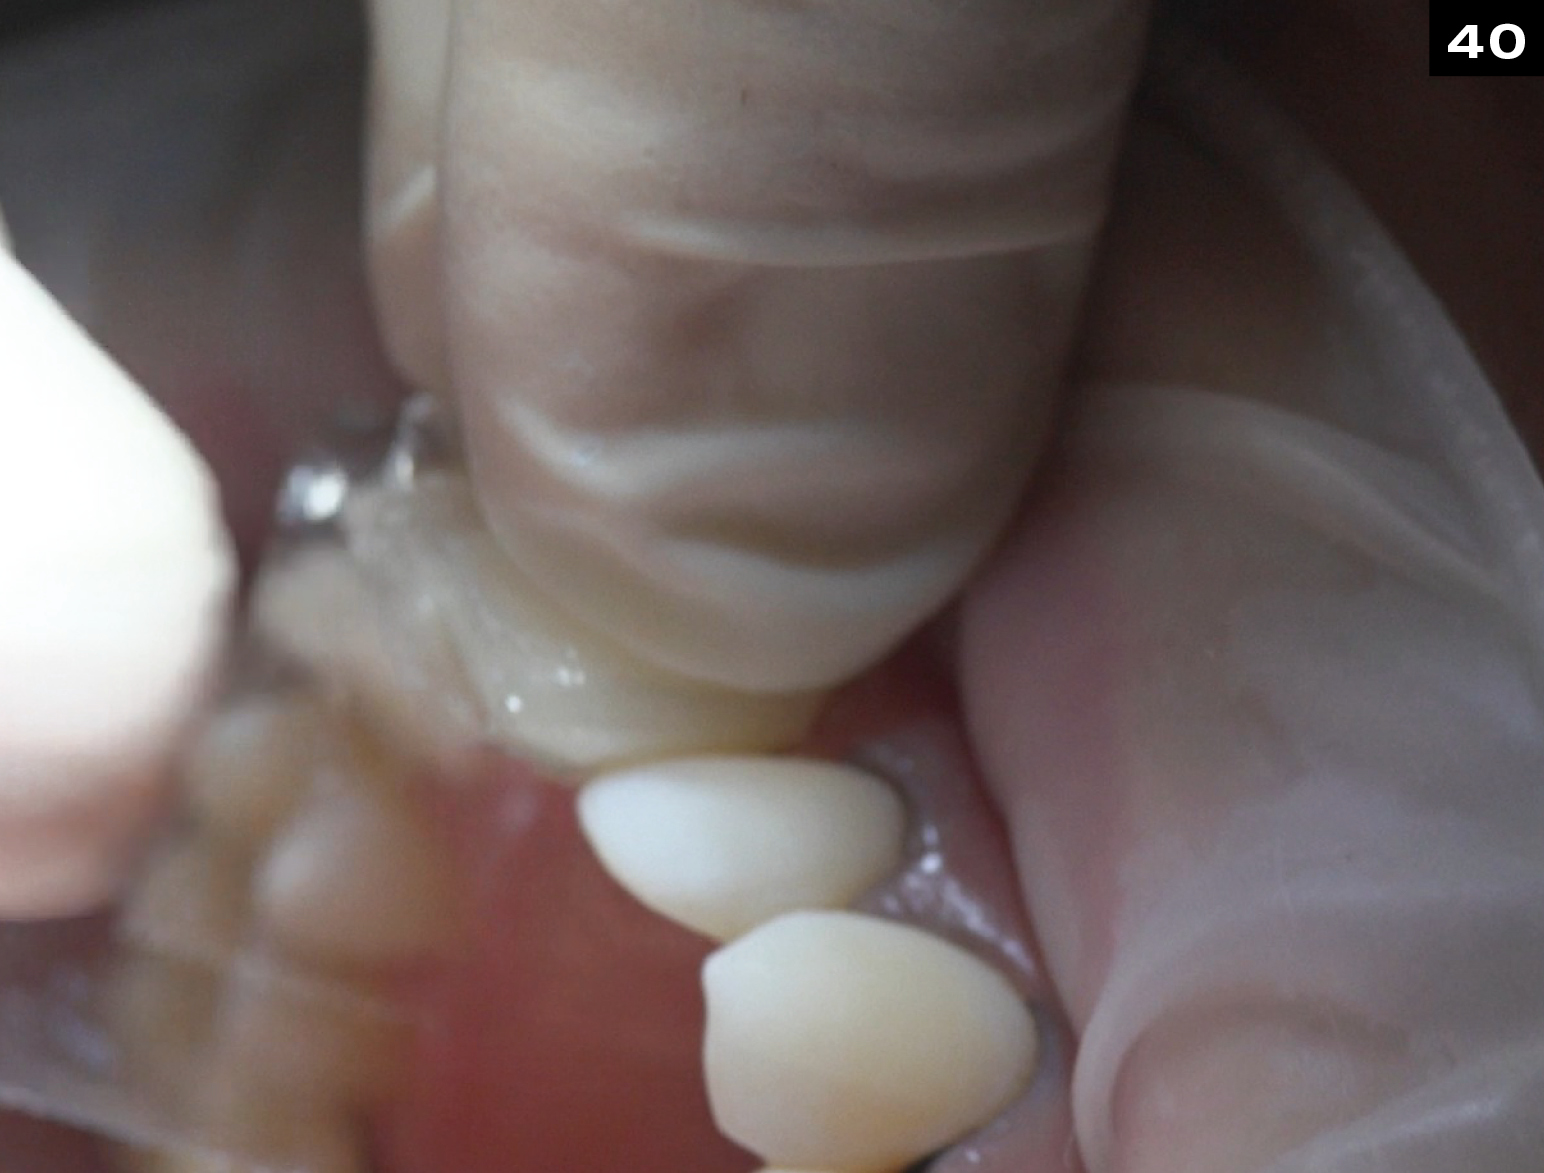
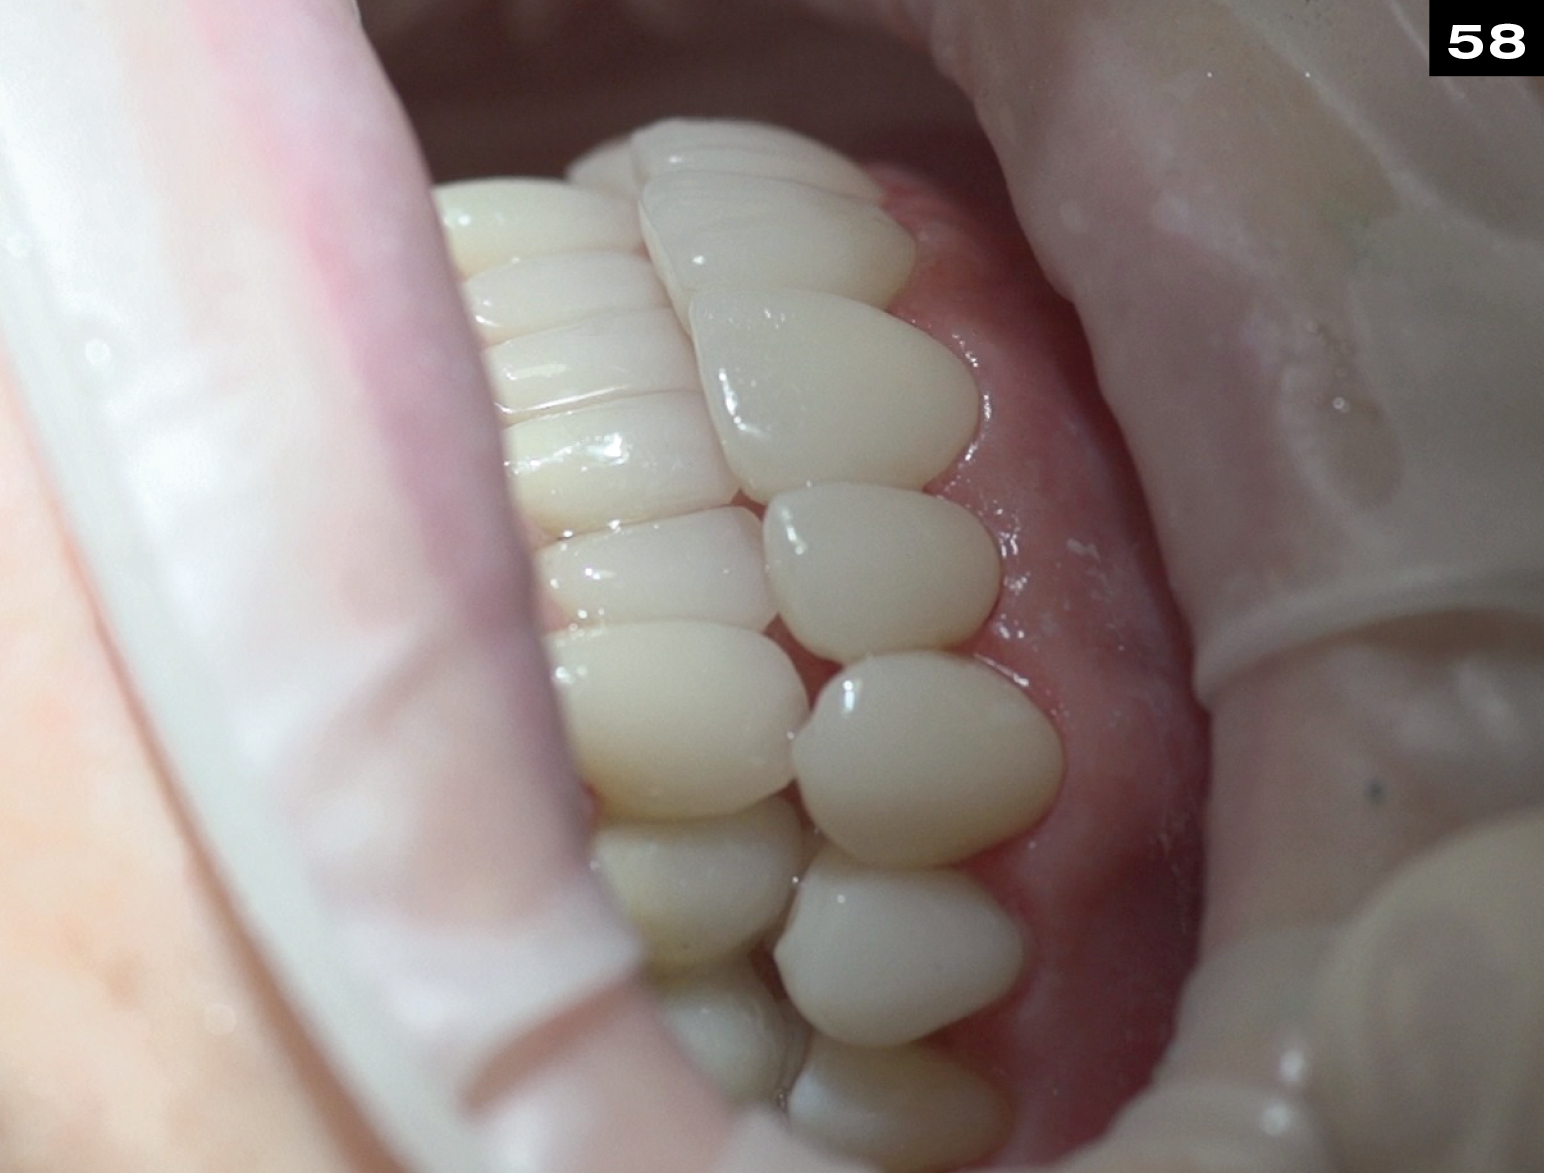
FINAL POSTOPERATIVE SITUATION.
Veneer on Patient
SHADE GUIDE.
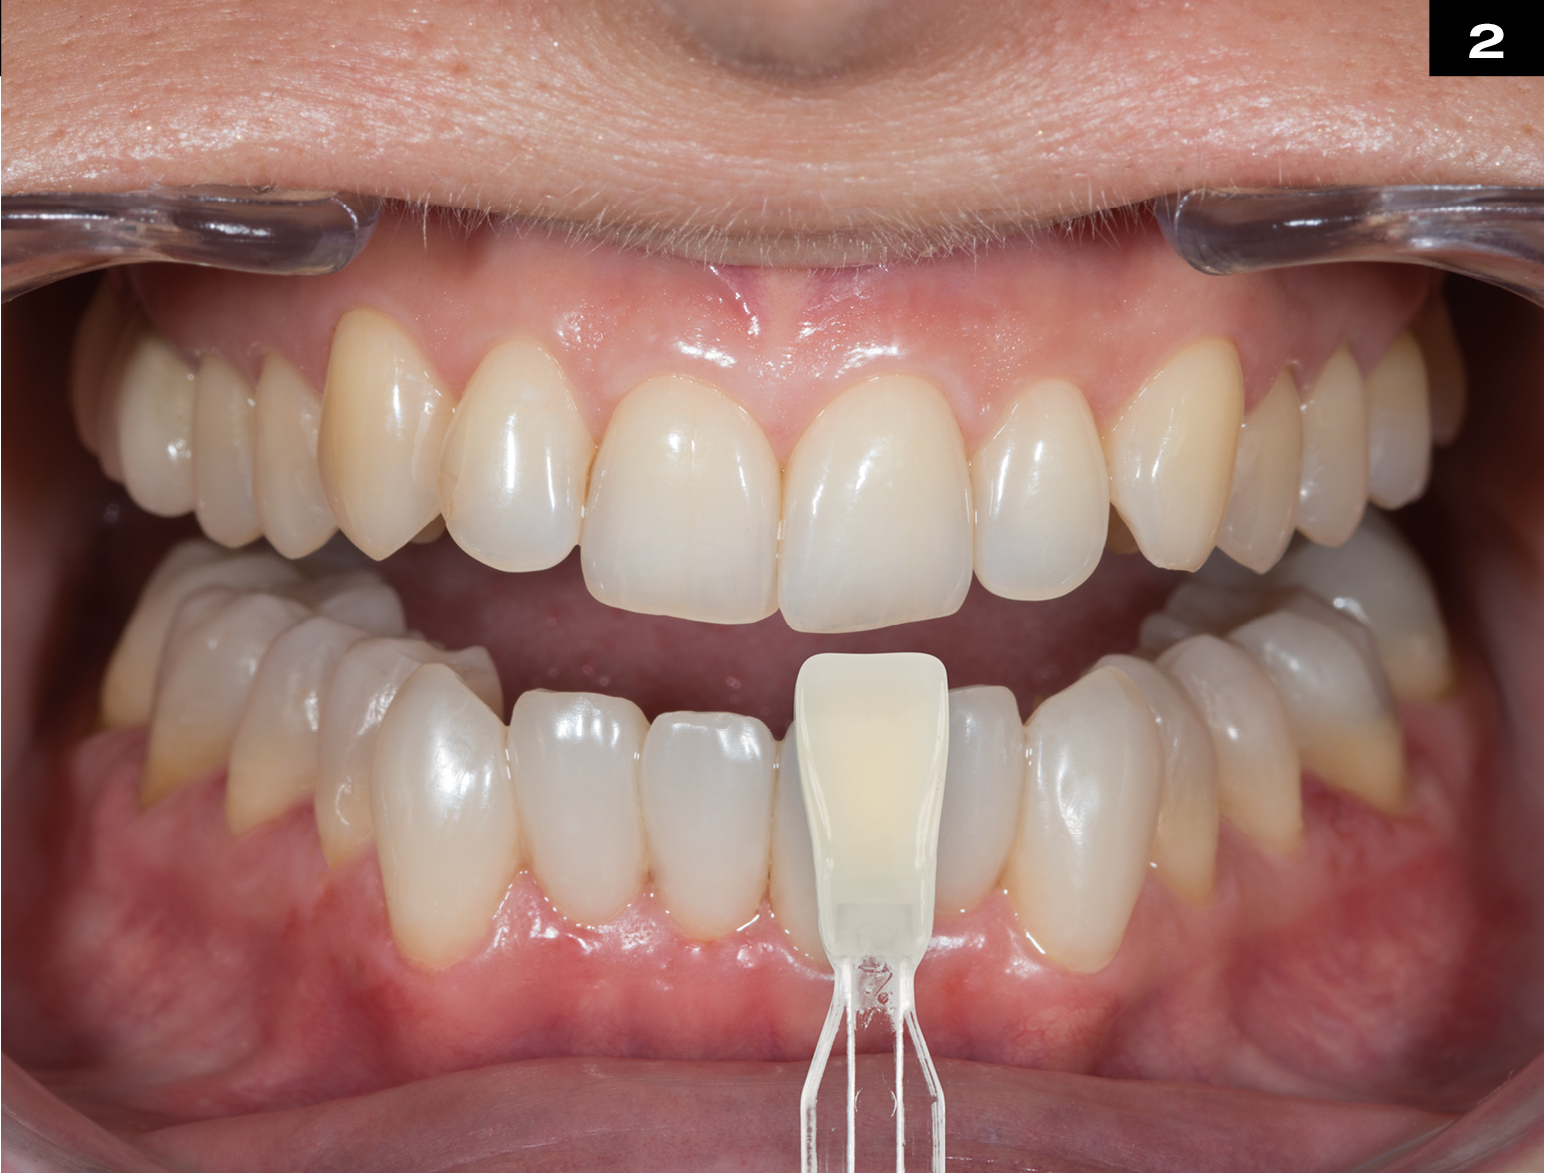
Select the dentin shade at cervical area with dentin Shade Guide.
Placing the enamel VENEER shell over the dentin core
(for light refraction place glycerine within enamel shell first).
Select edelweiss VENEER size using edelweiss Sizing Guide
(single or combined VENEER Sizes may be used).
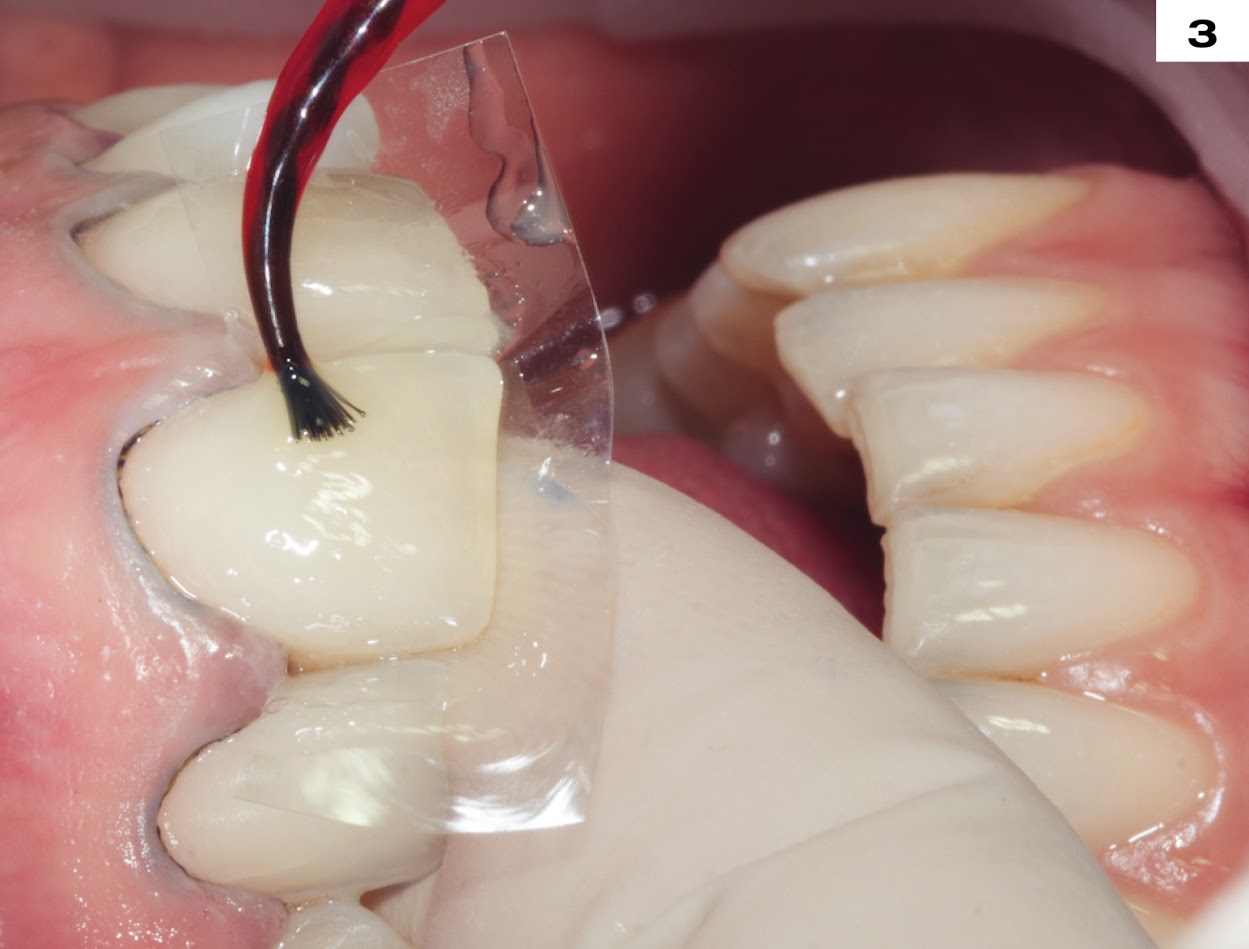
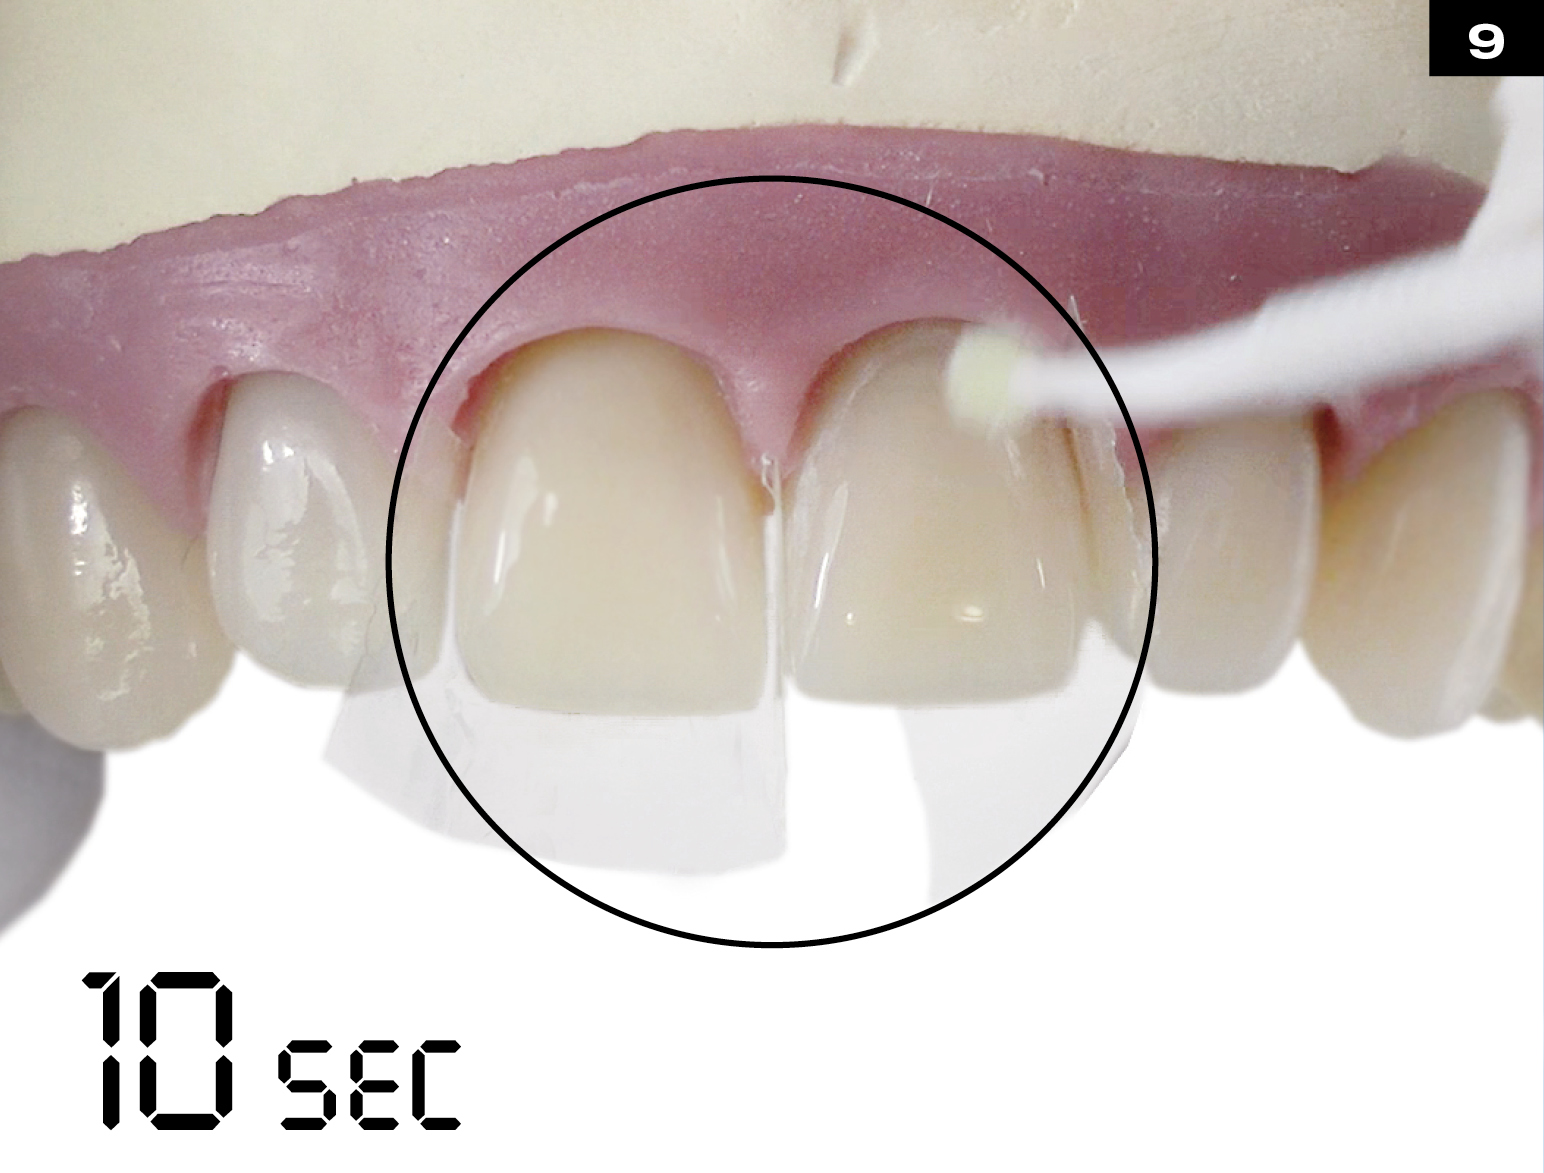
Apply Ultra-Etch for 20 sec., then rinse and slightly dry, leaving surface slightly damp.
First anterior VENEER in position.
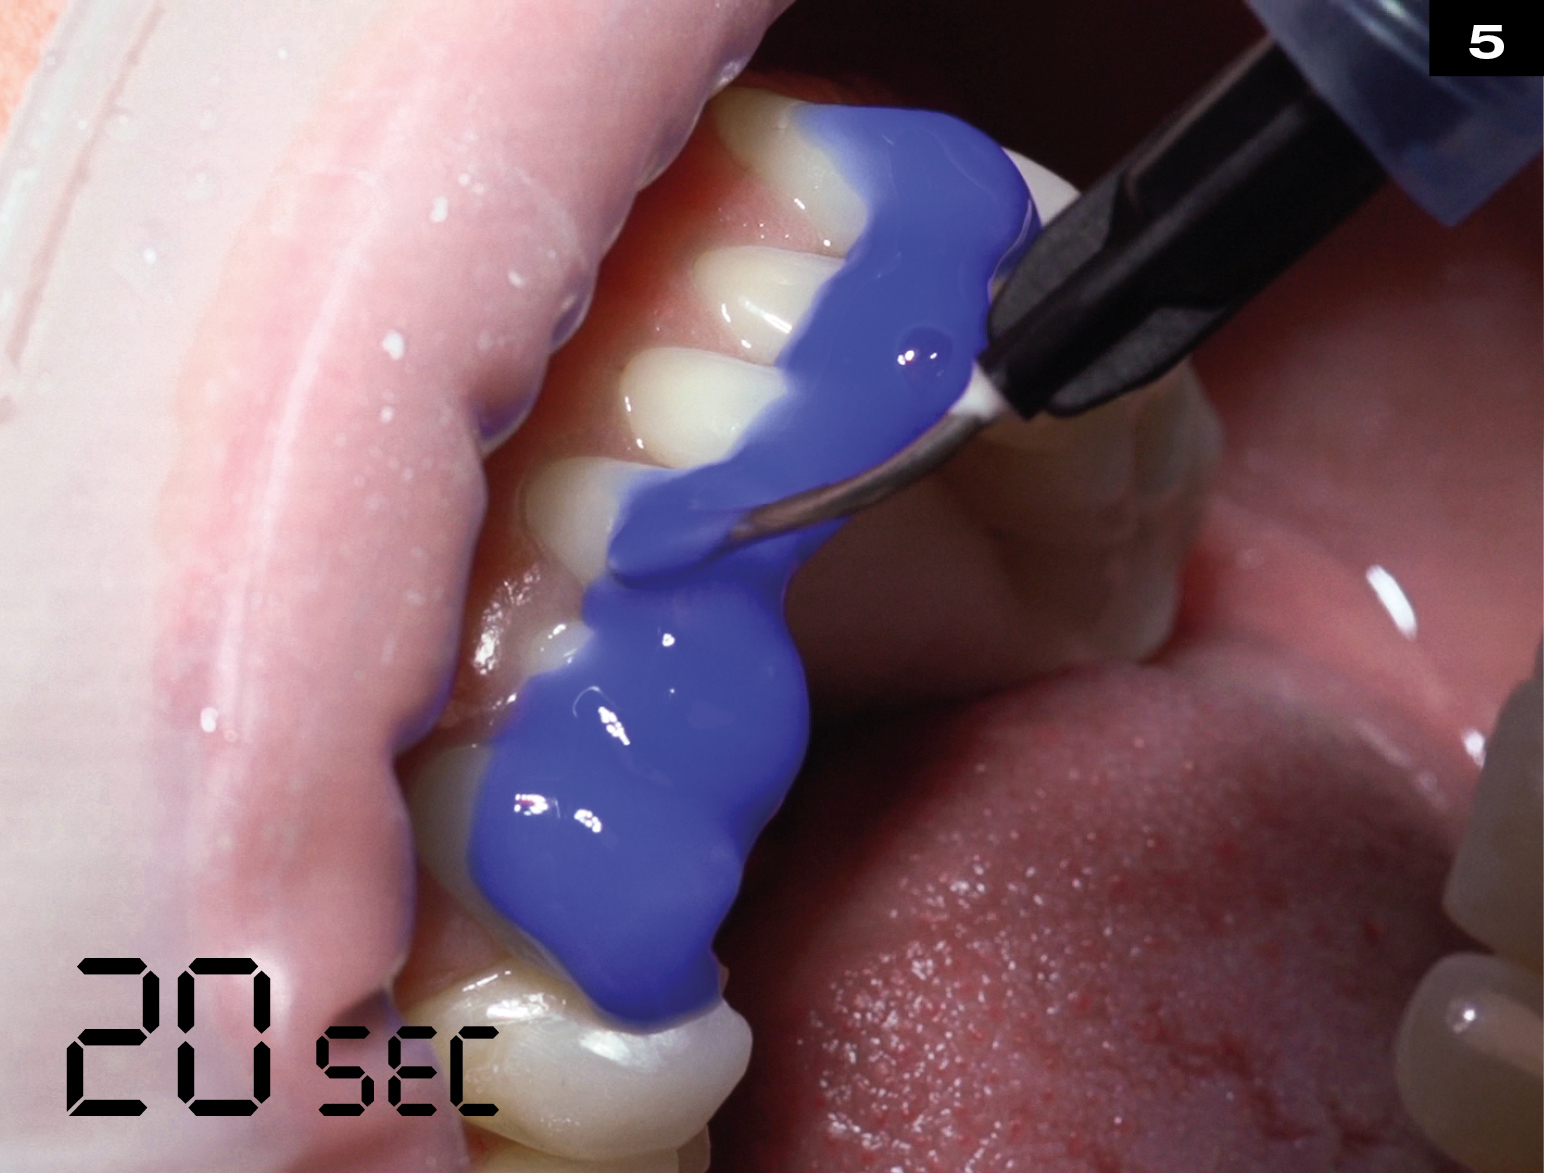
Place Mylar Strips both mesial and distal of all teeth to be treated.
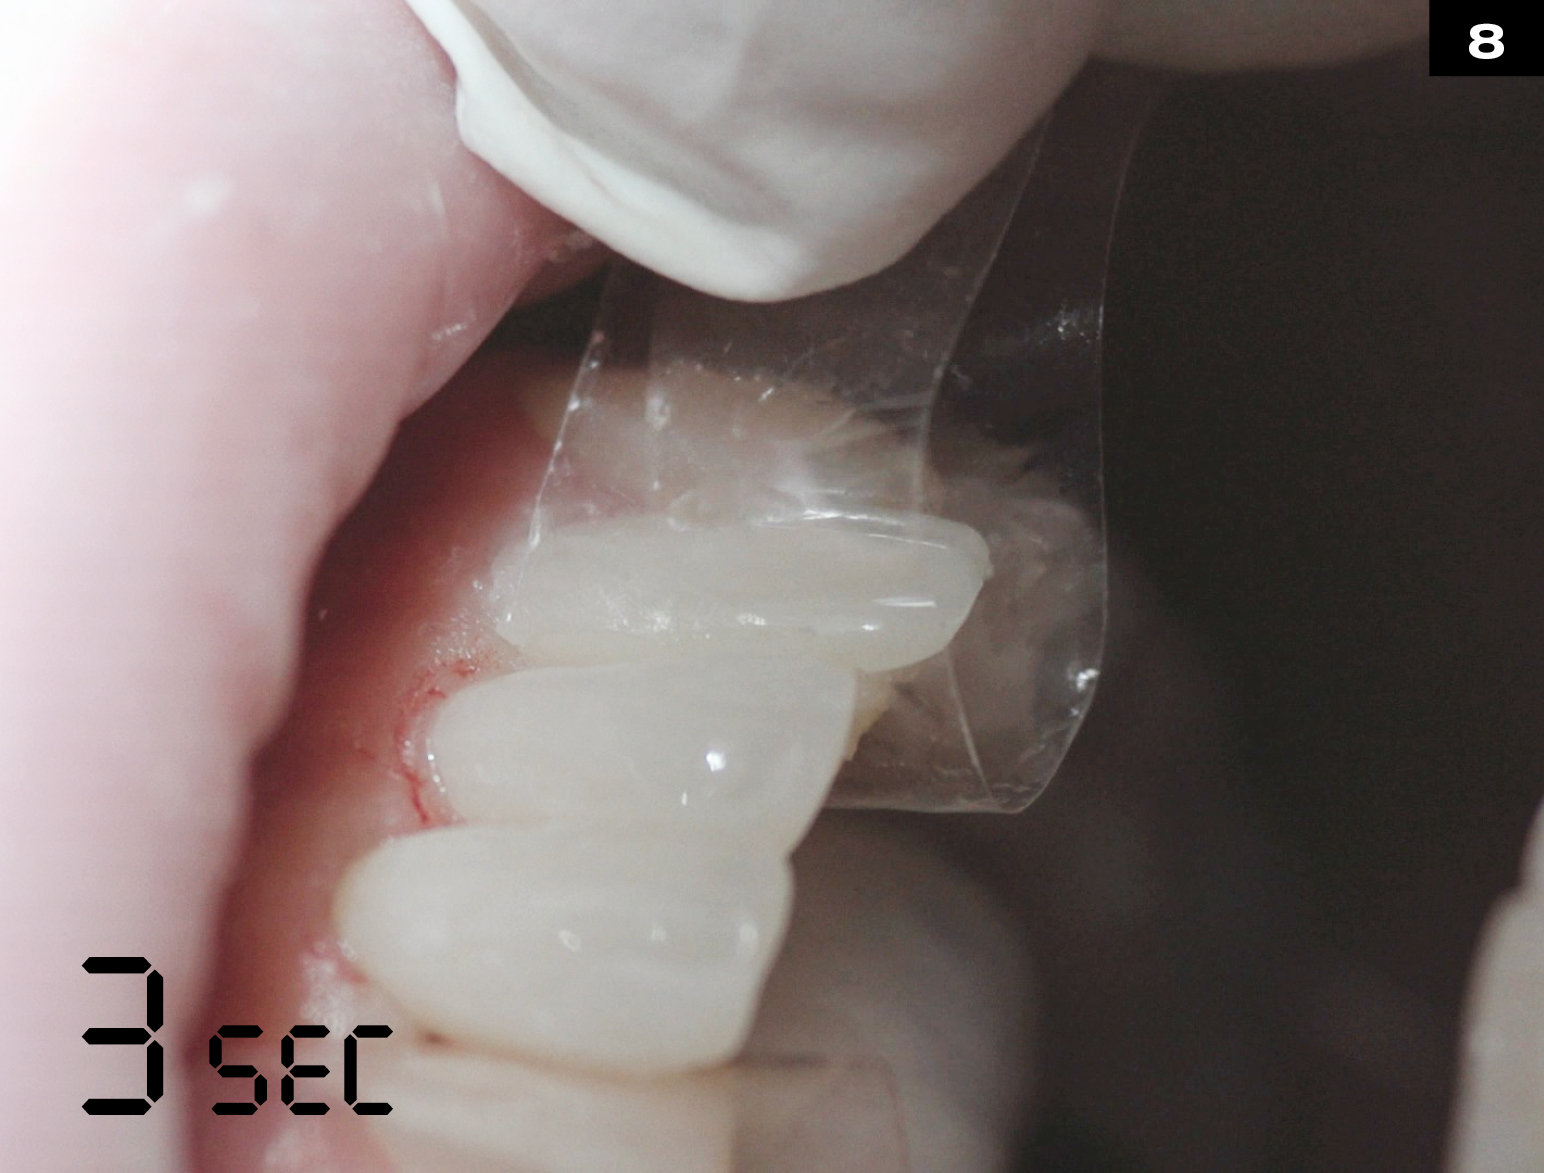
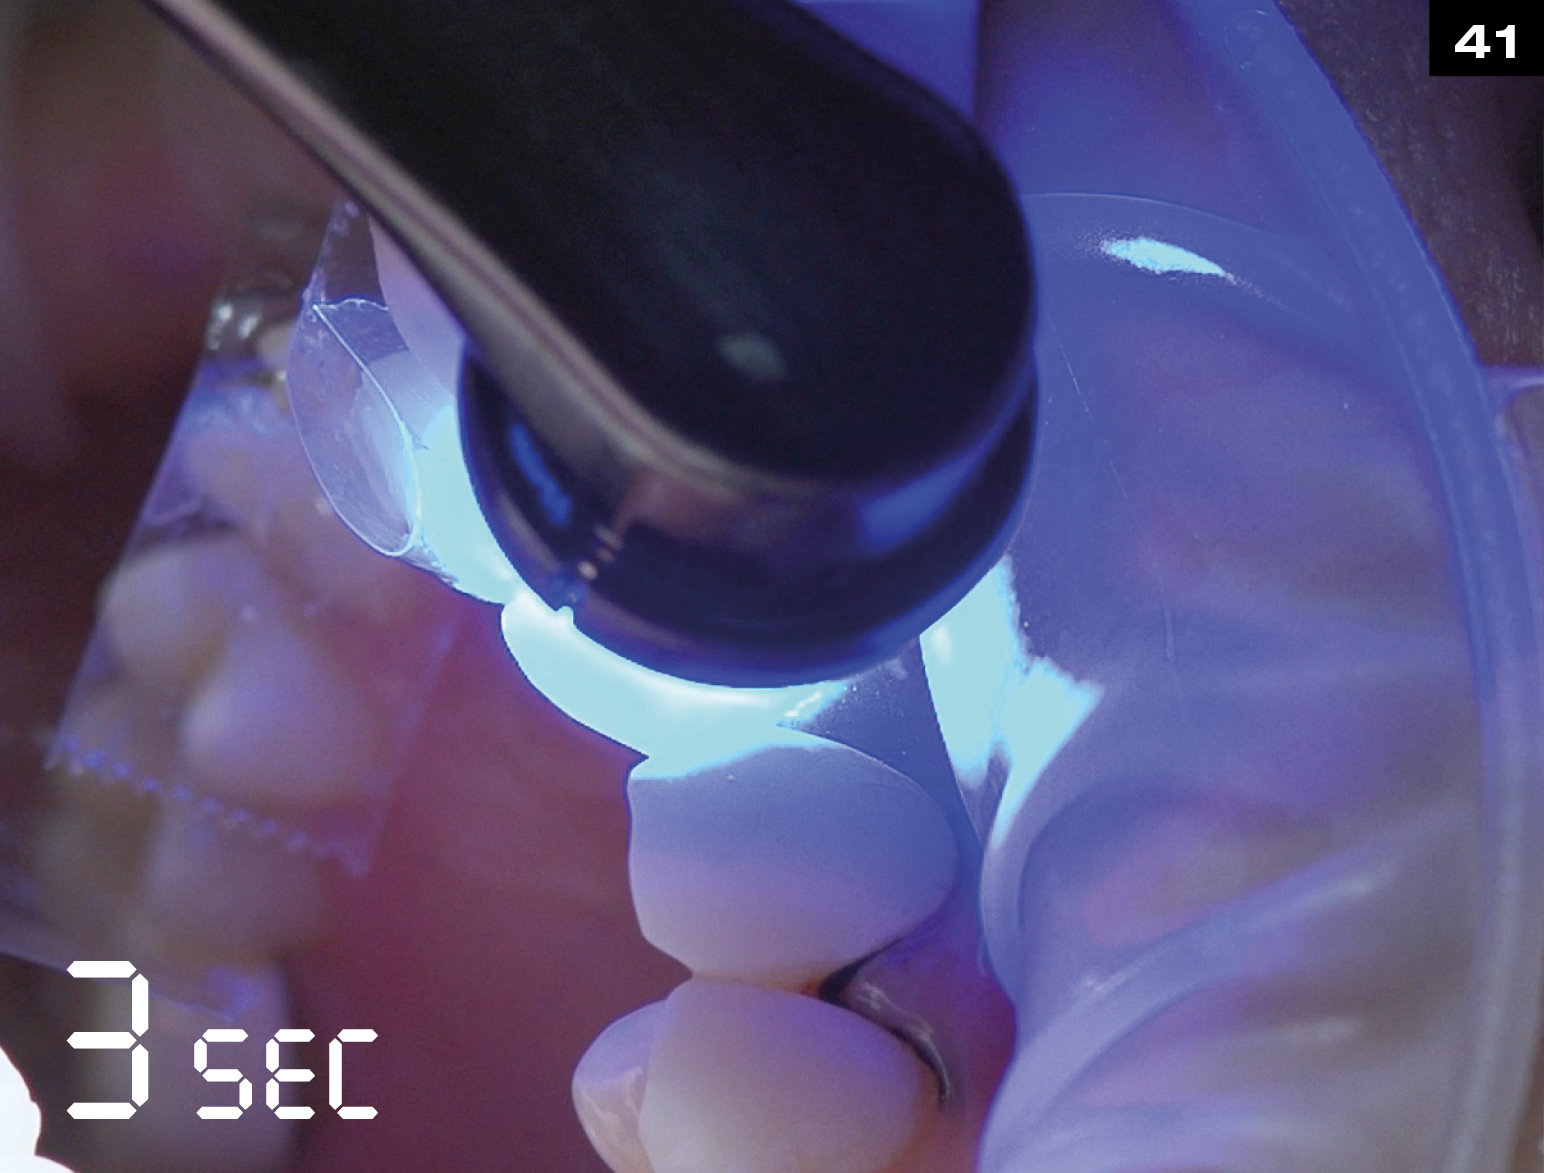
Pull Mylar Strips facially to achieve smooth margins and cure through Mylar Strips for 3 sec. (VALO UPI).
With other Light cure for 6 sec.
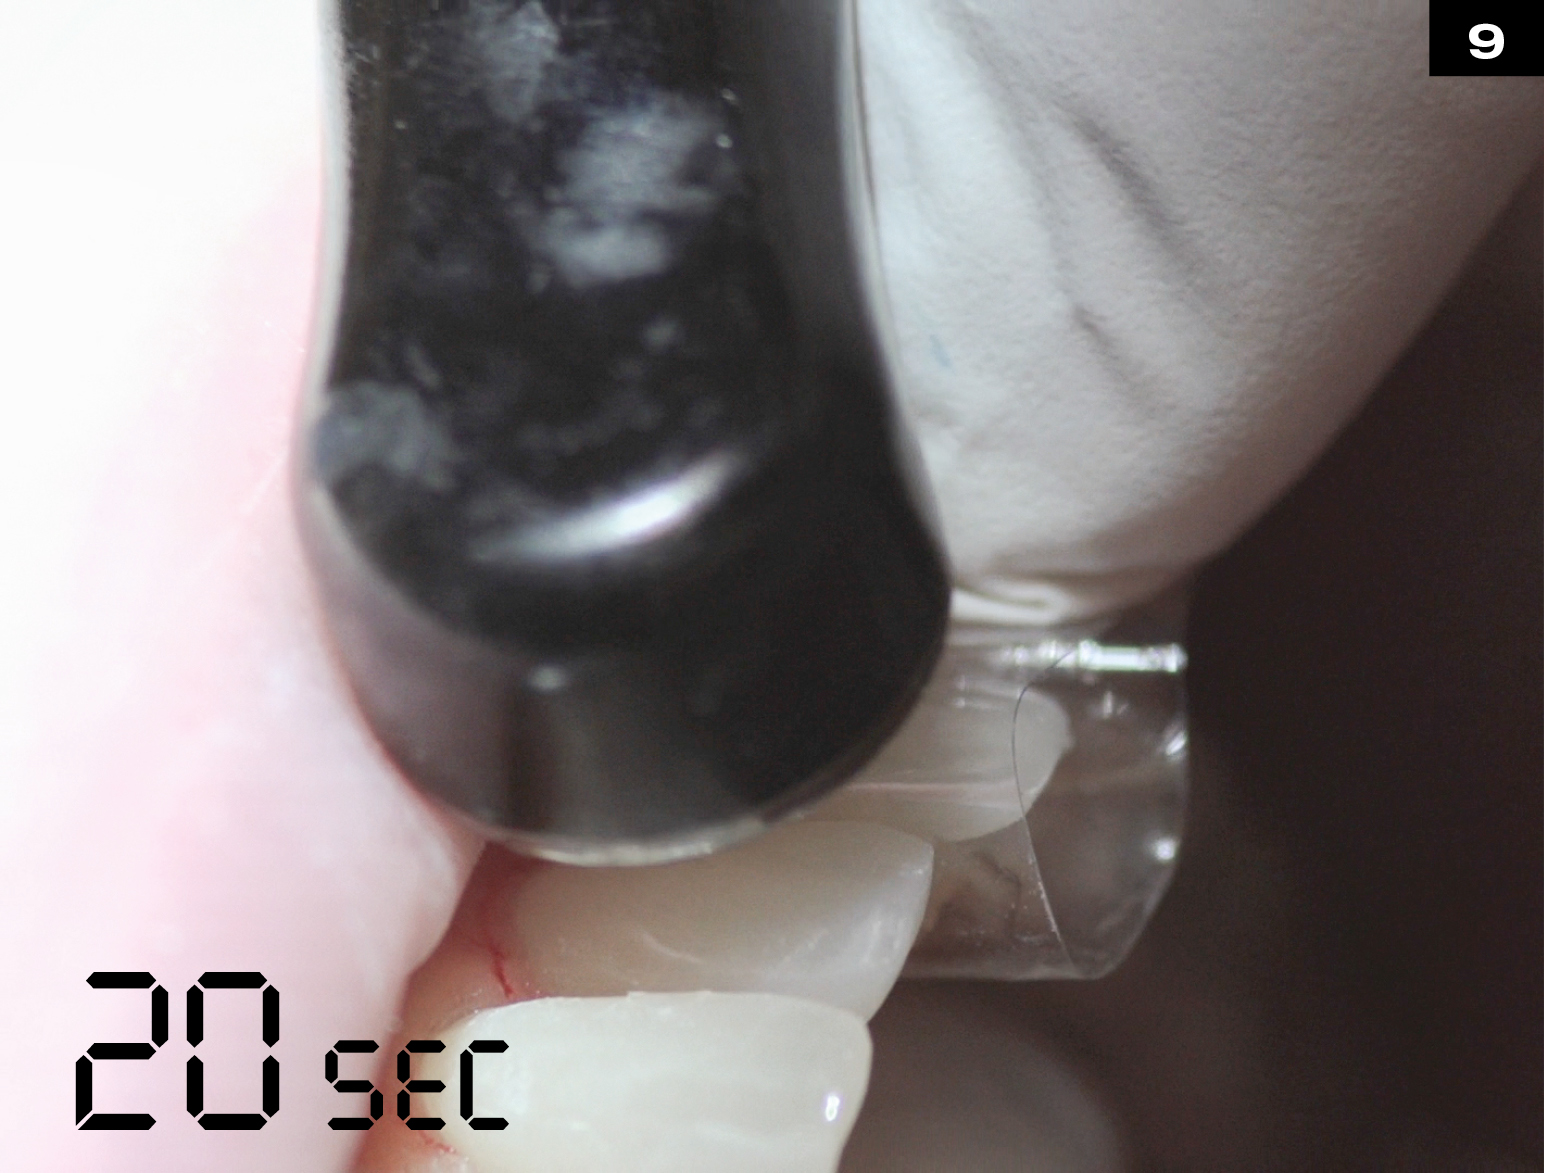
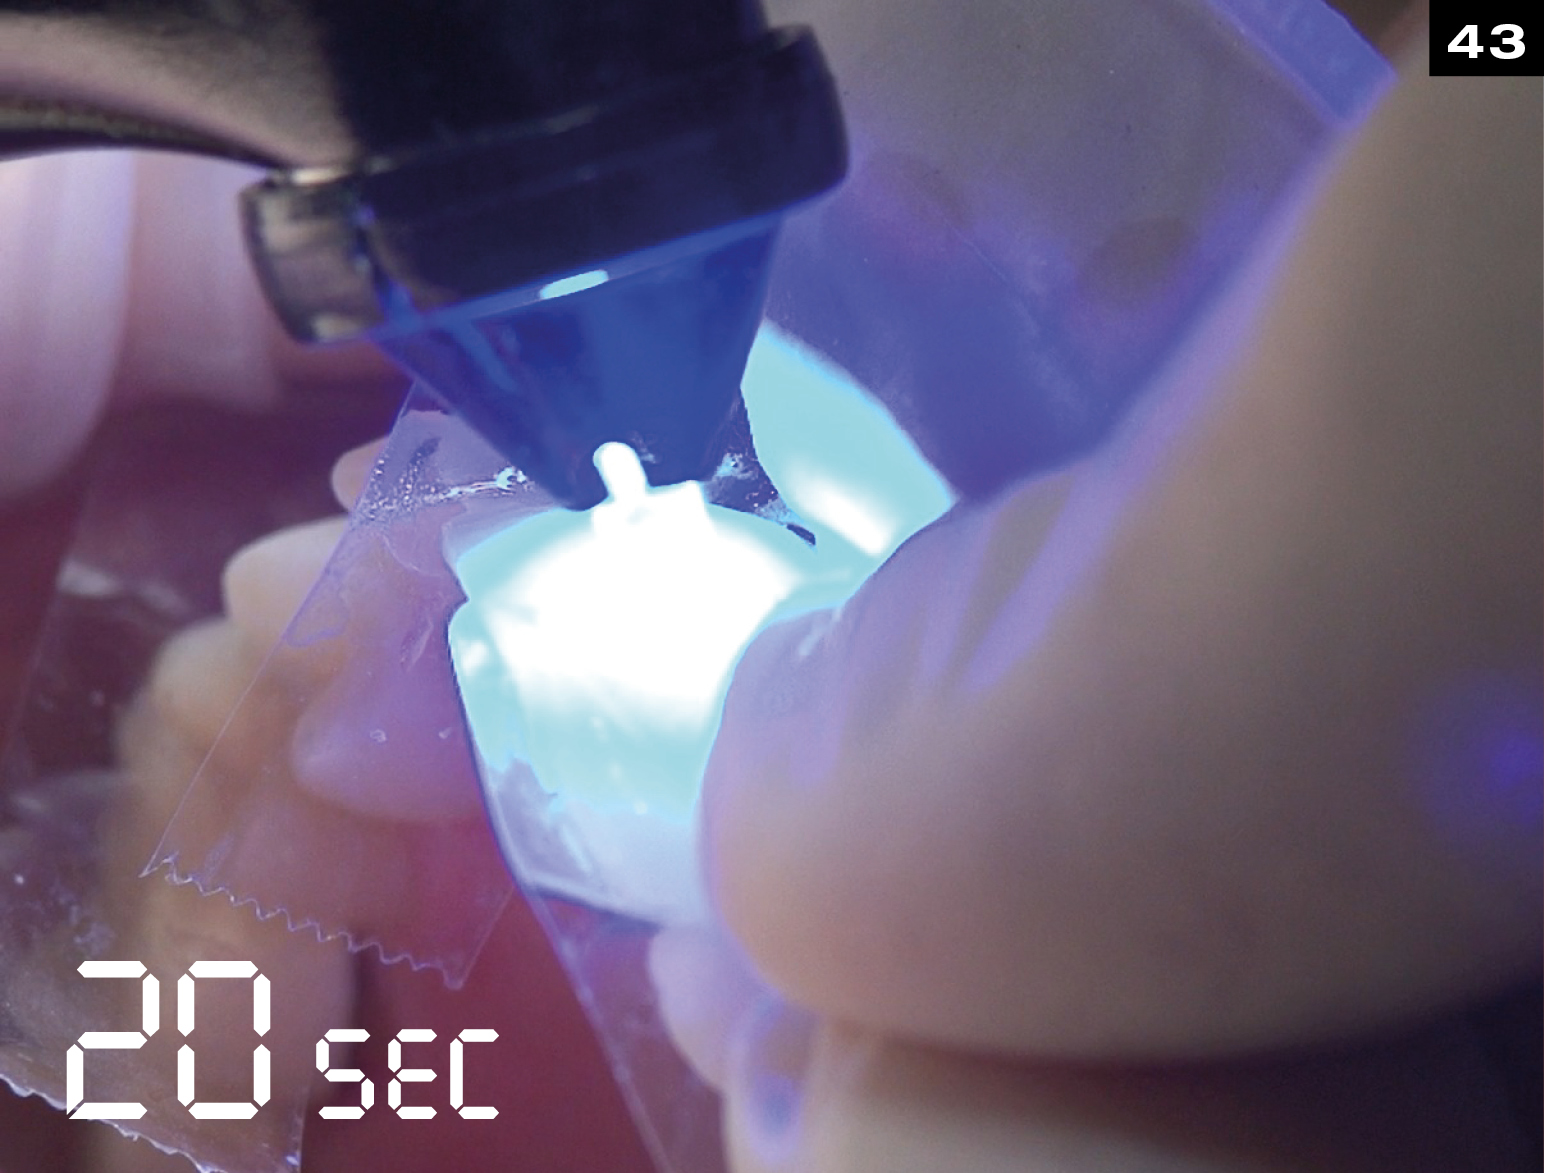
Light cure lingual and facial side of tooth for 20 sec. each (VALO UPI).
With other Light cure for 40 sec.
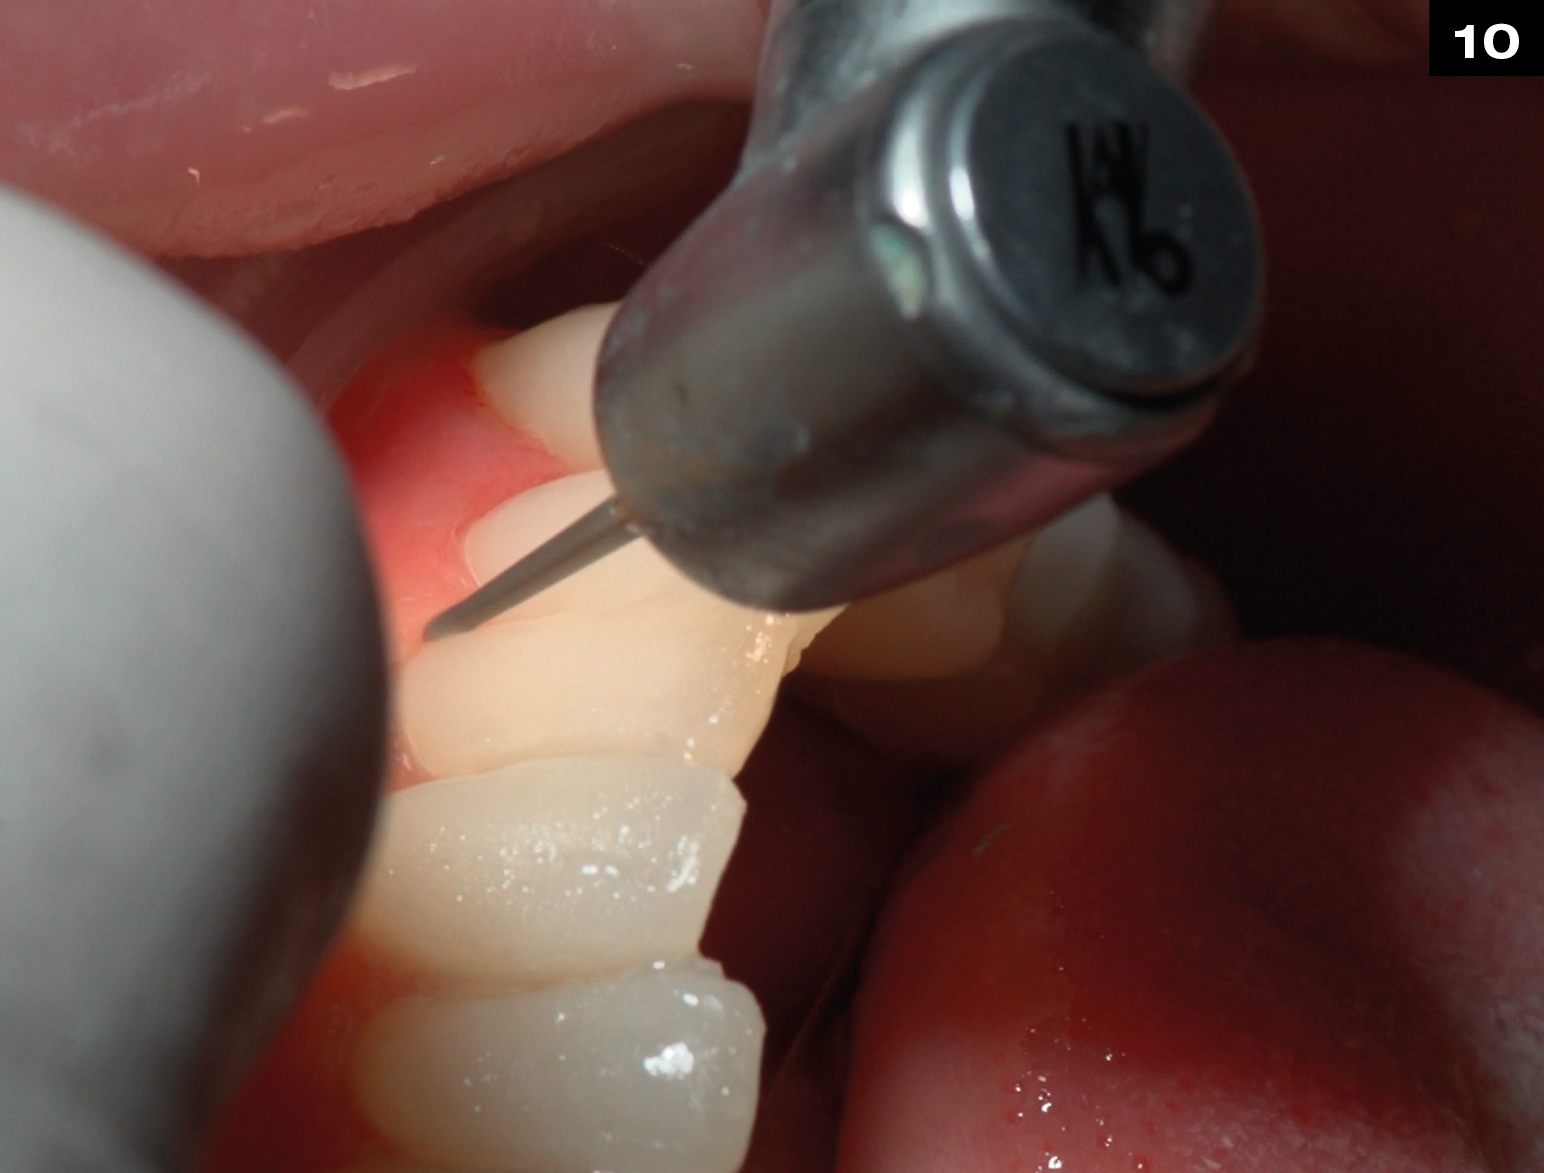
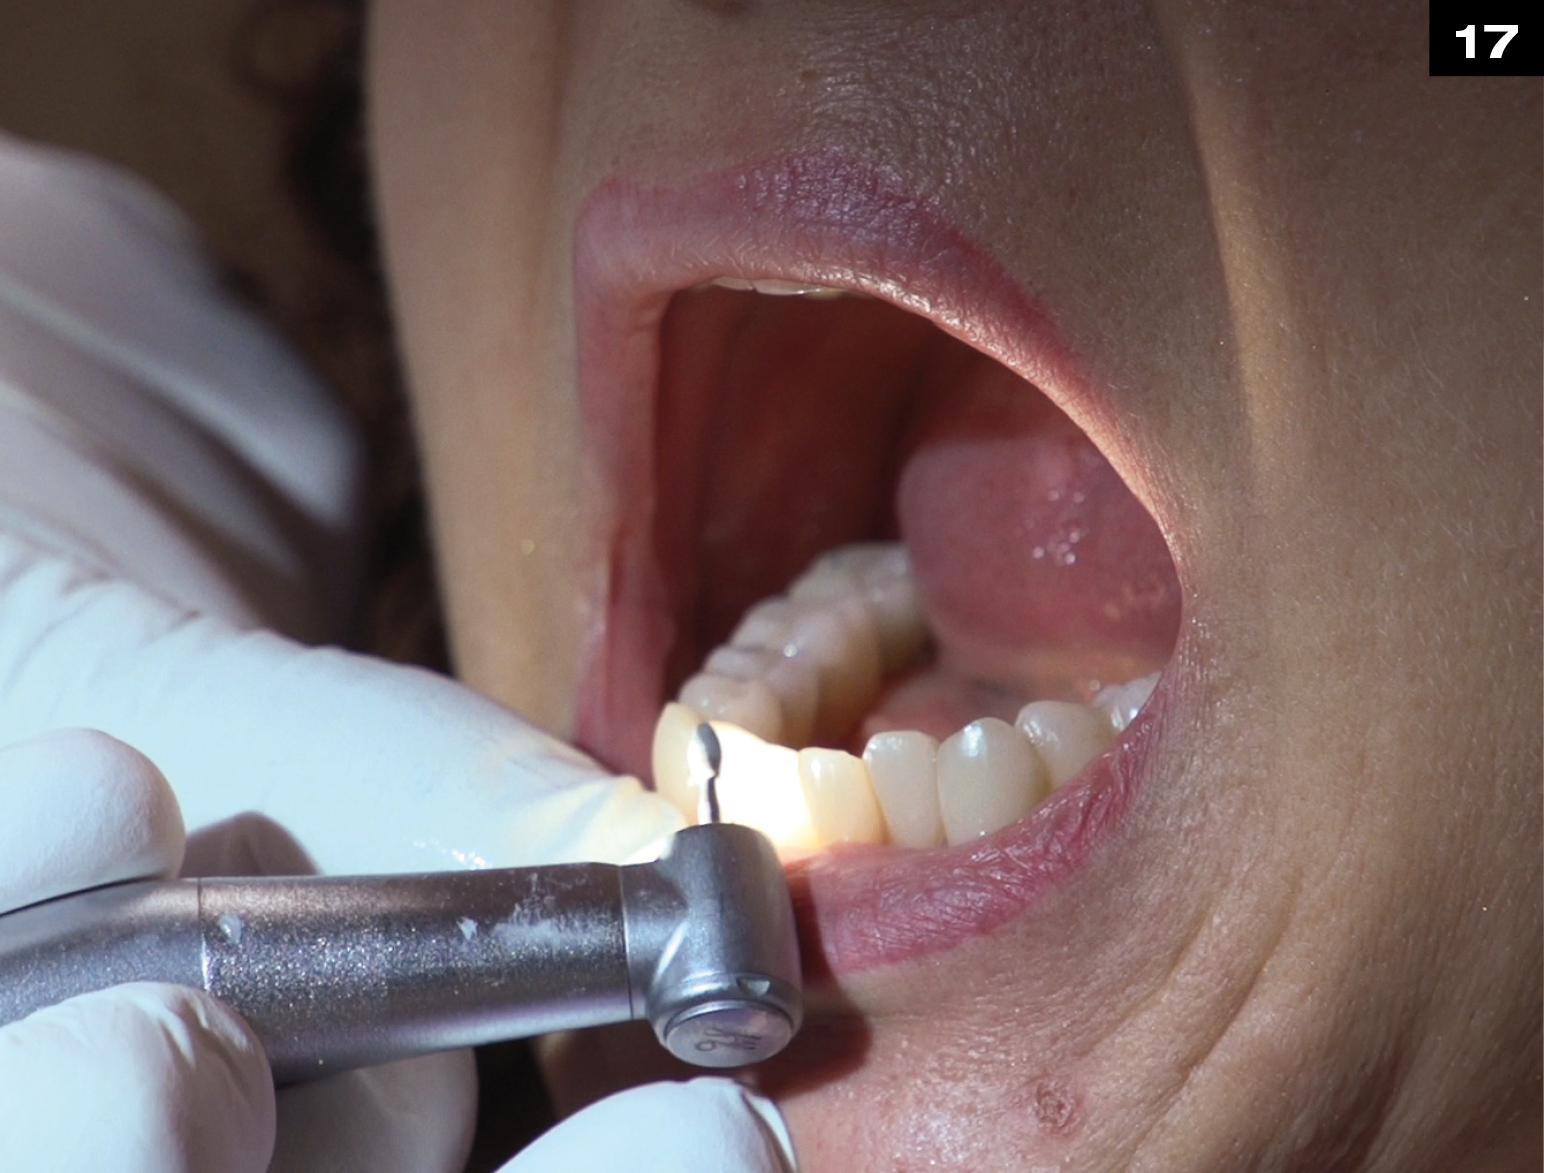
Finish cervical and interproximal margins using fine finishing diamonds.
Finish incisal edge using fine finishing diamonds.
Finish interdental areas using Soflex Discs.
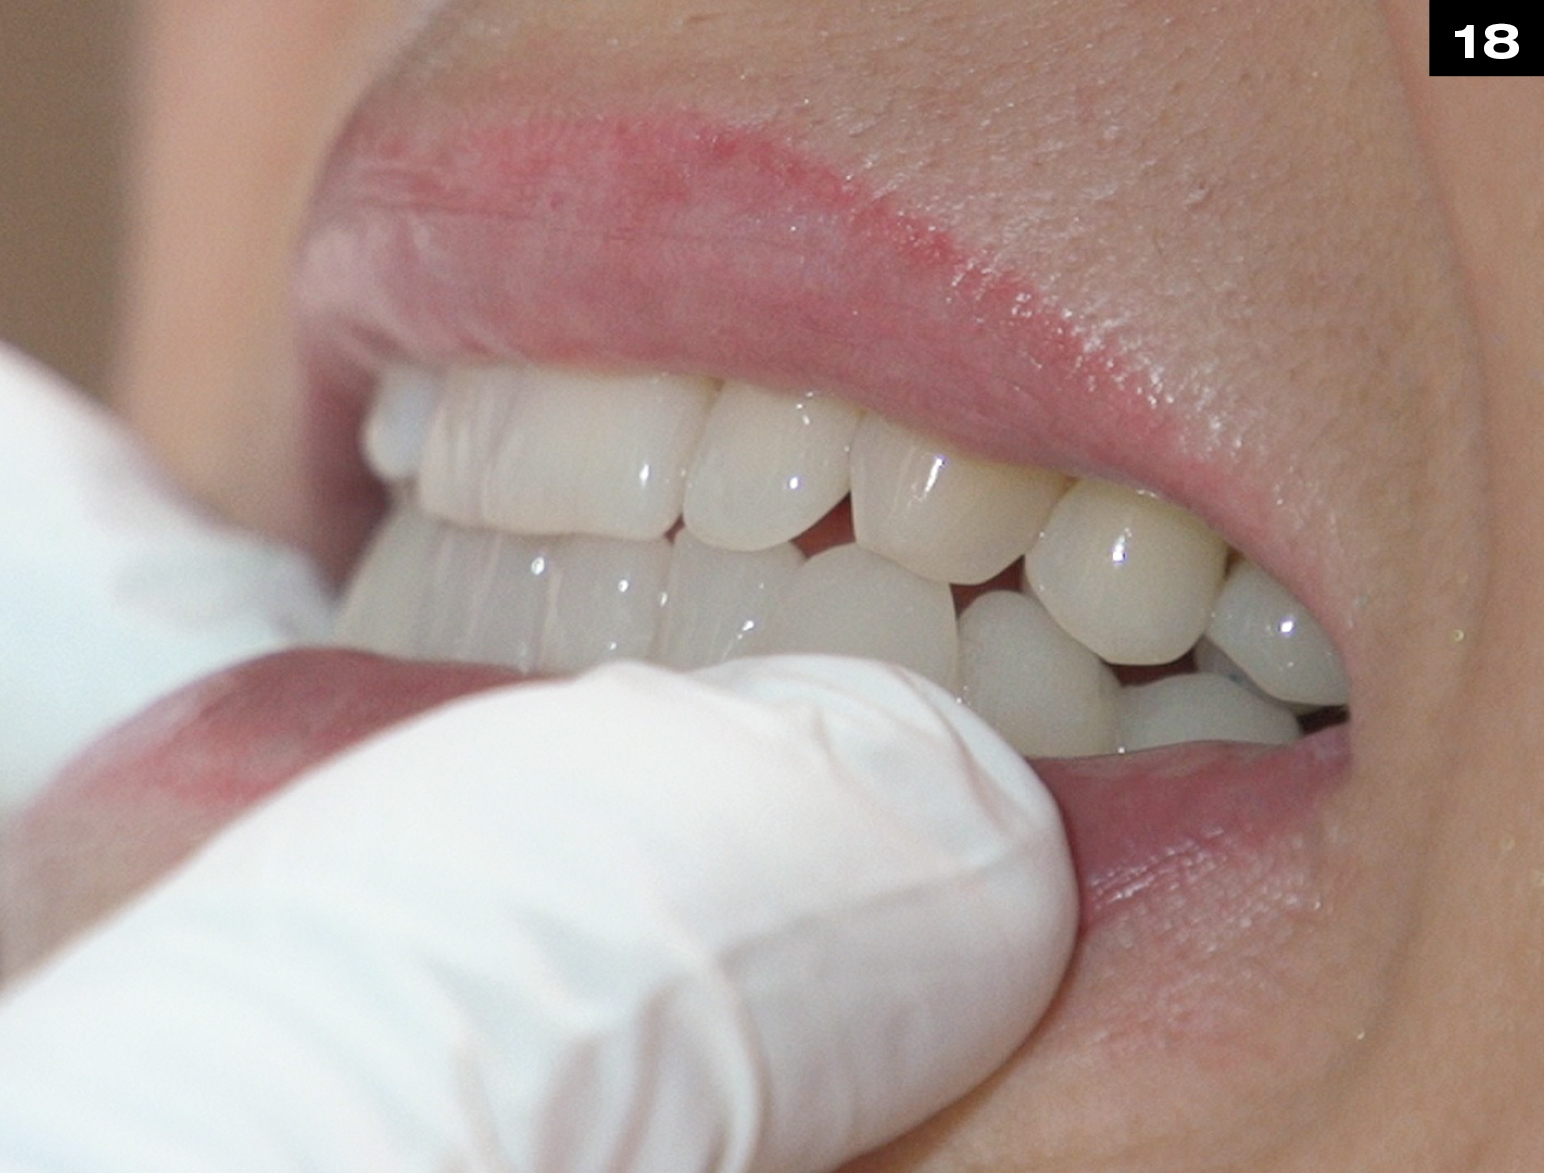
Polish VENEER margins using silicone rubber polisher.
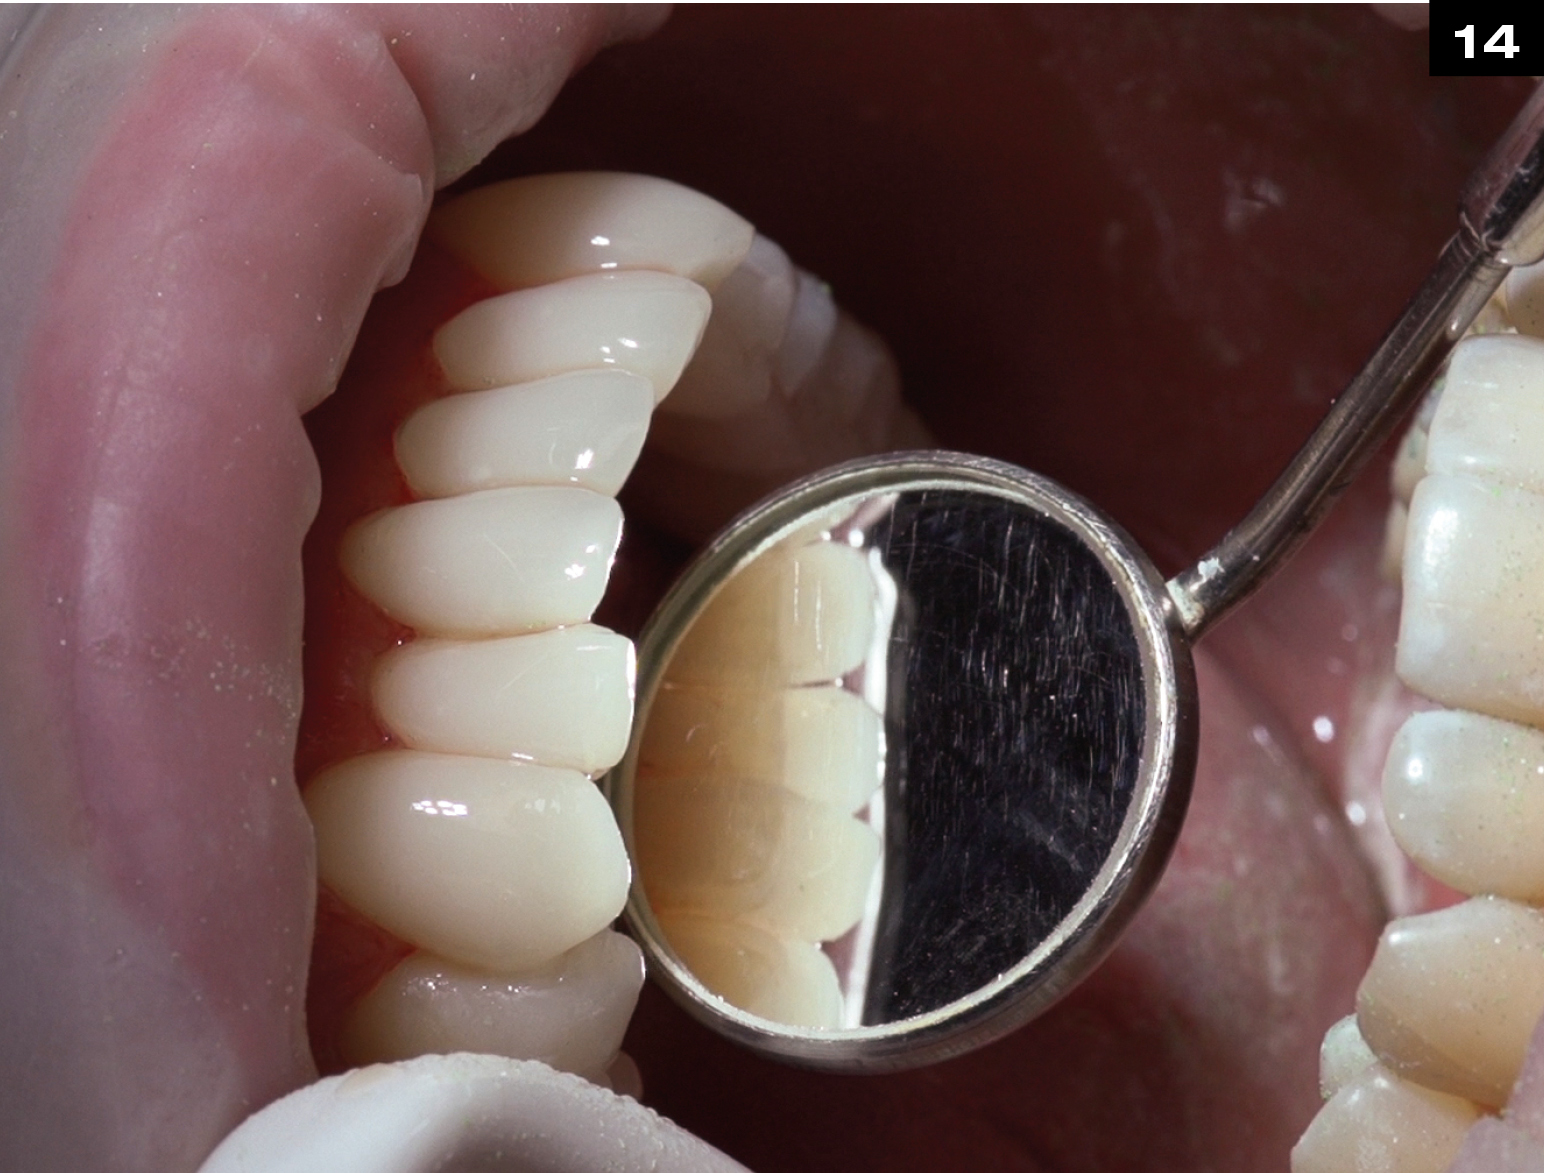
Visual observation.
Visual observation.
Reocclusion.
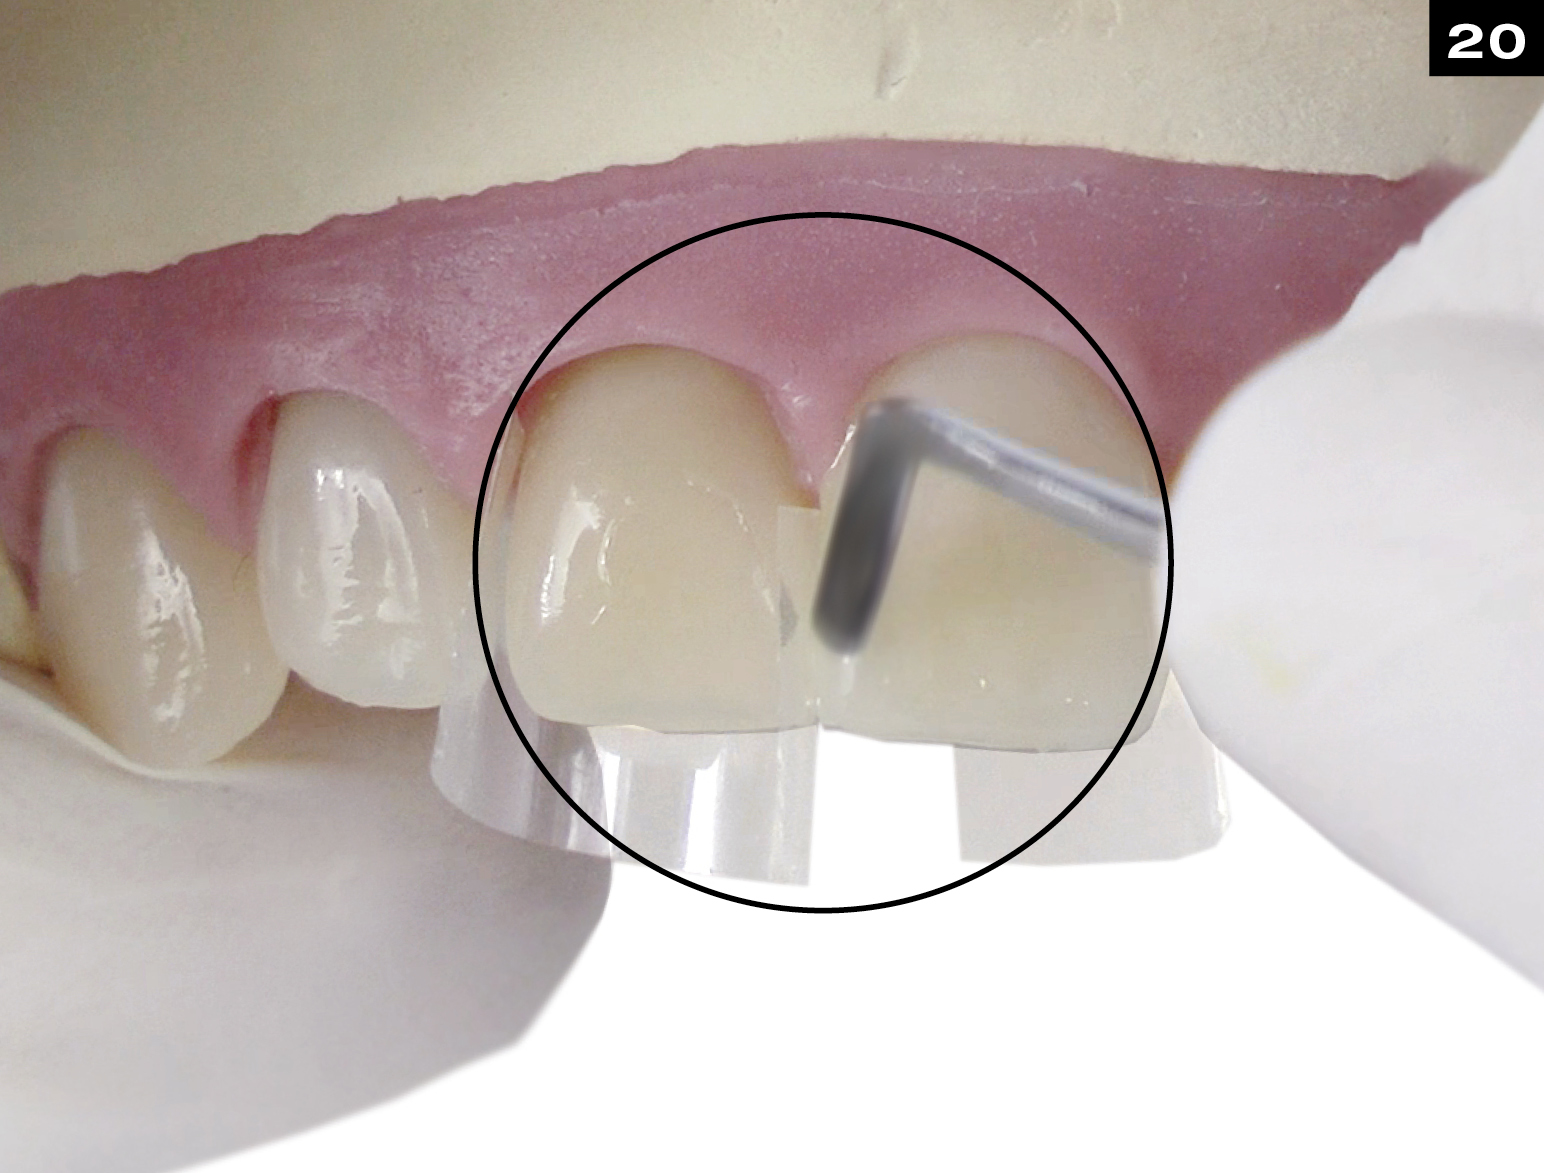
Finish interproximal margins using a fine finishing diamond.
Proof of functional movements.
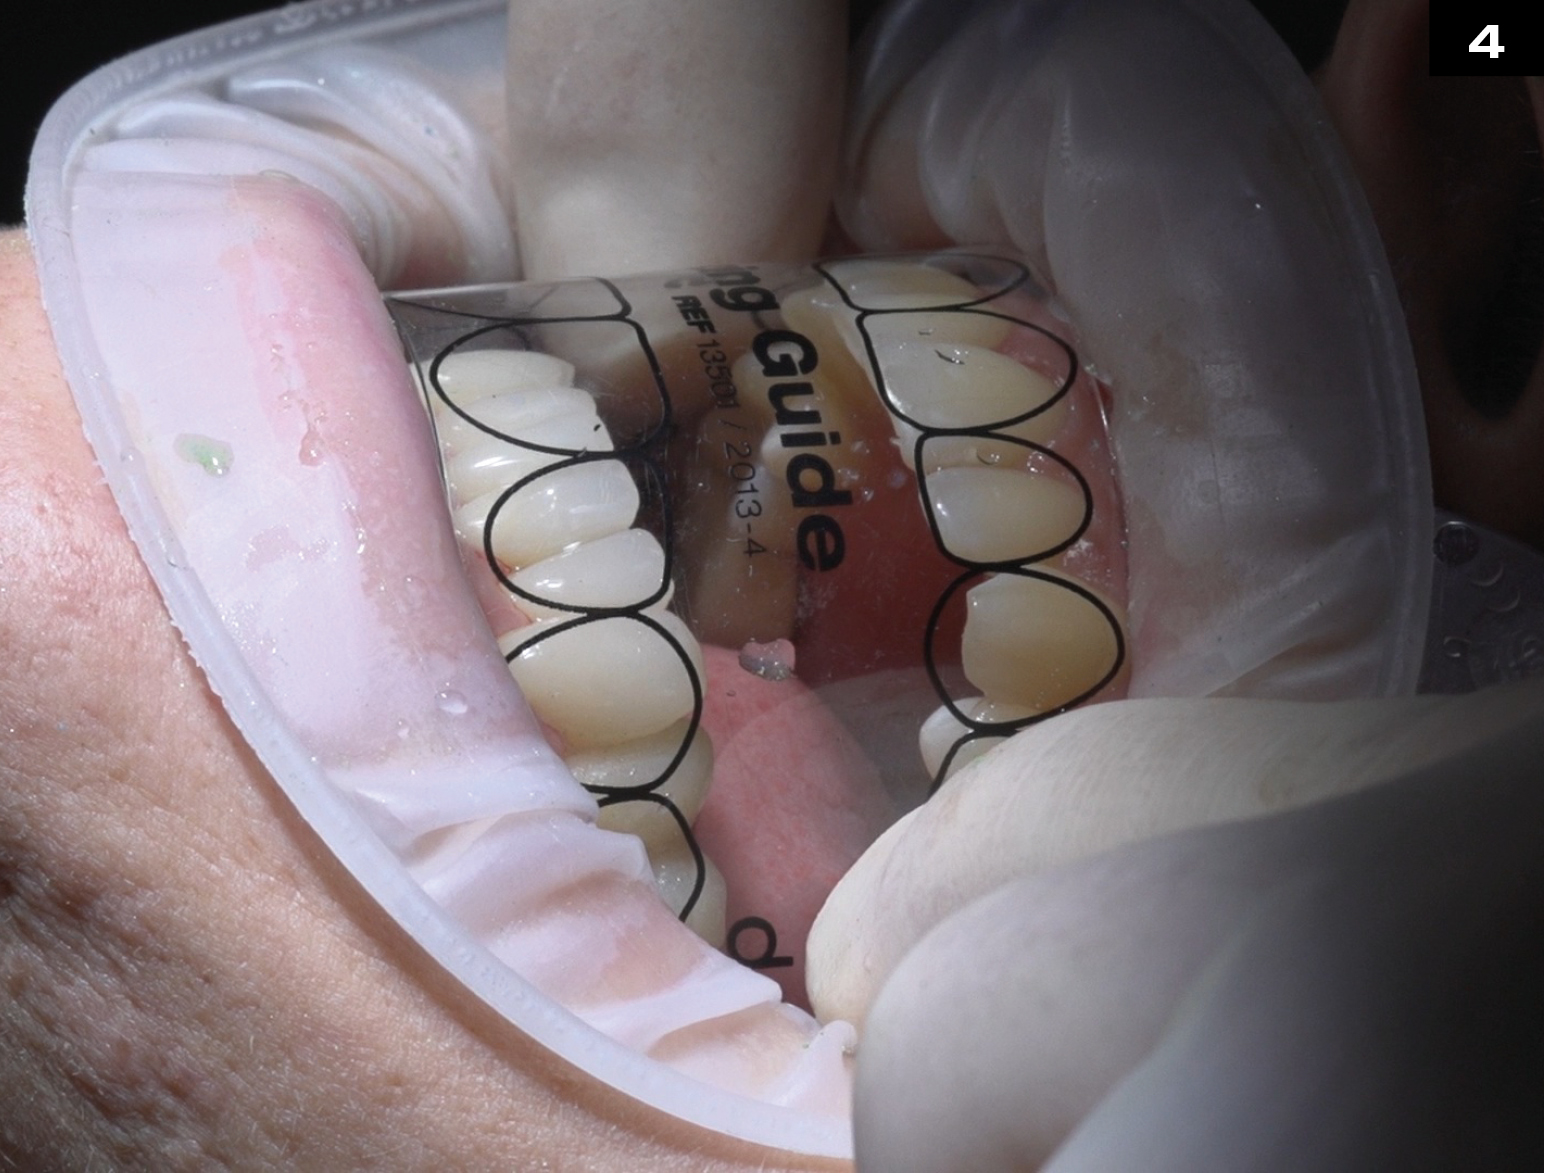
Trial fit visualization of edelweiss VENEERs.
Prepare tooth using minimally invasive techniques.
Fit and adapt the composite edelweiss VENEER using the gingival margin as your guide.
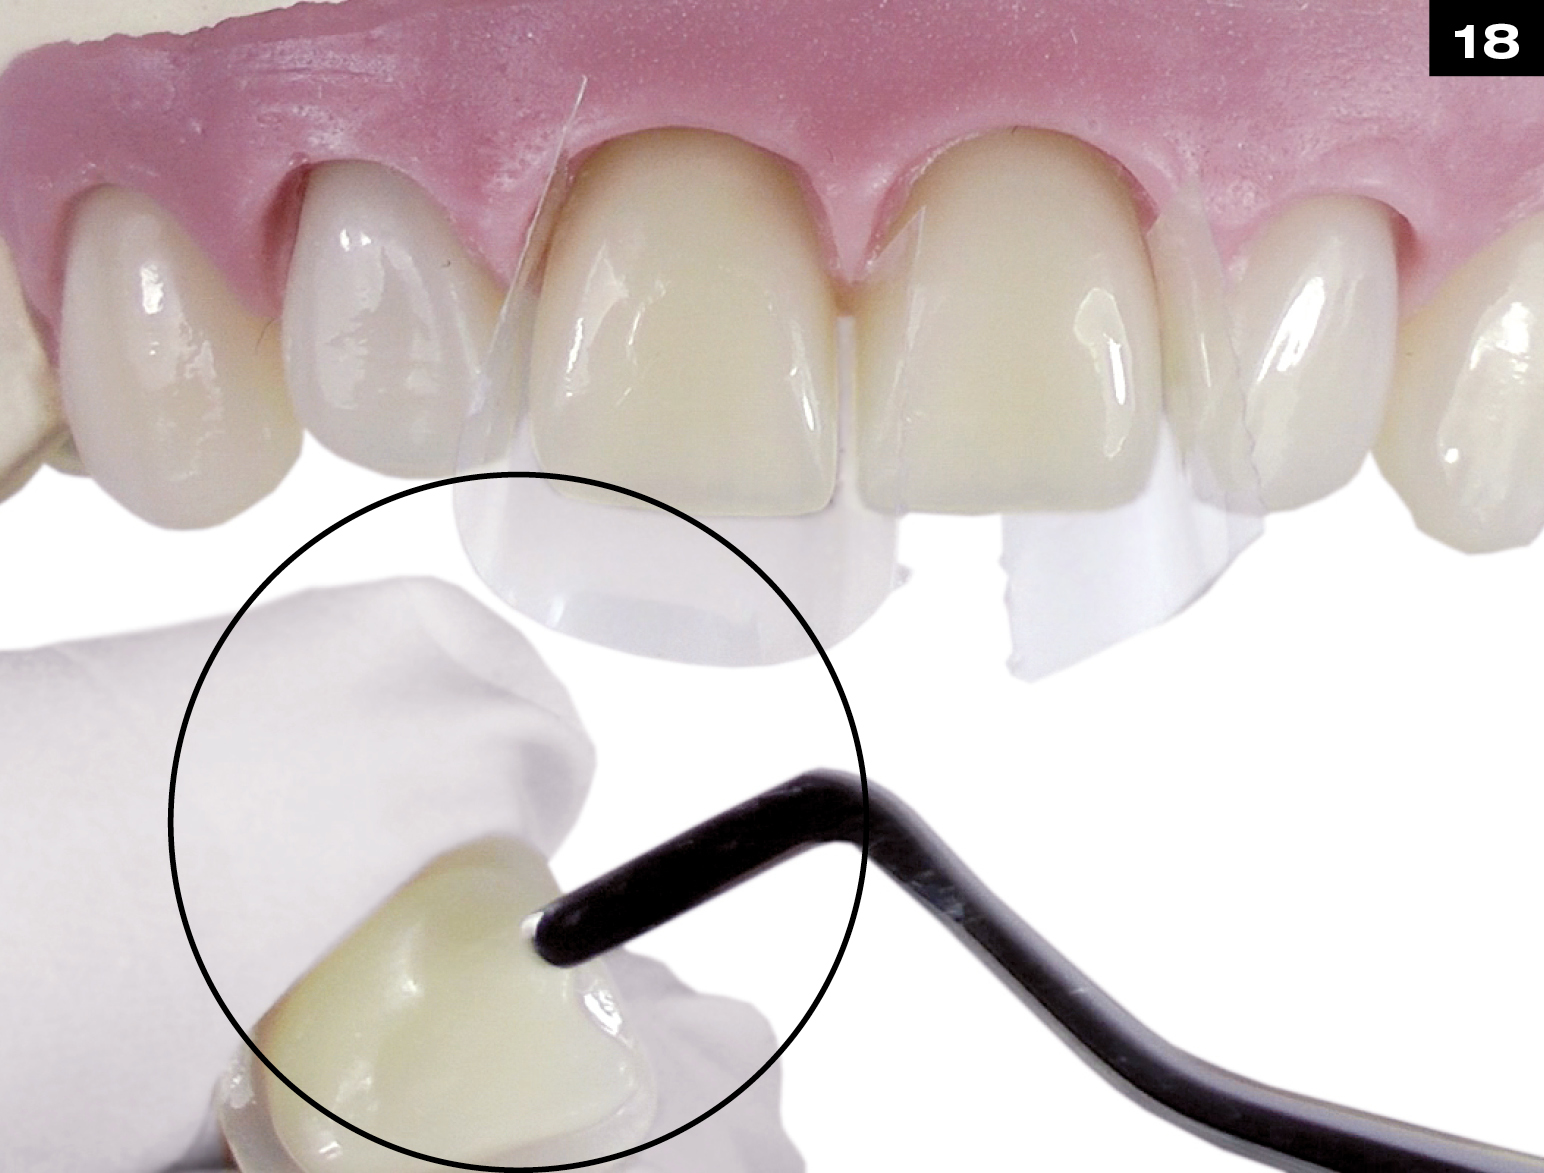
Sharpen the marginal edges and roughen inner surface of the edelweiss VENEER.
Sharpen the marginal edges and roughen inner surface of the edelweiss VENEER.
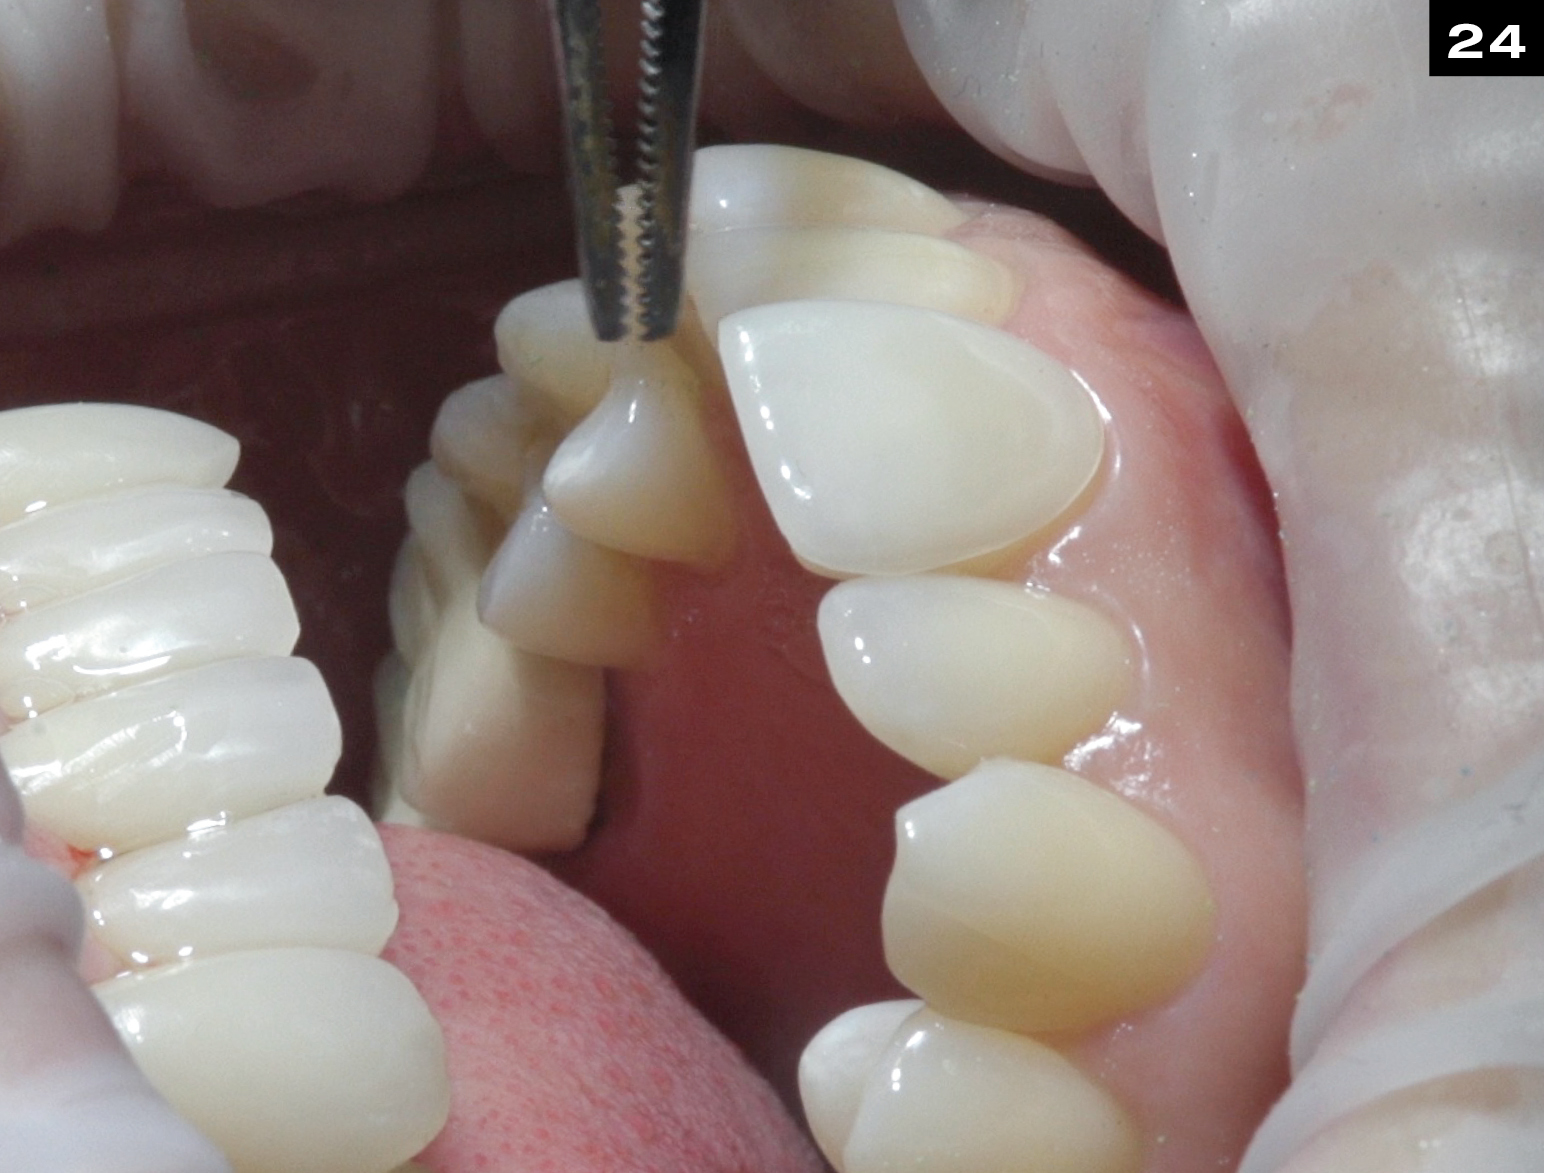
Trial fit visualization of edelweiss VENEERs.
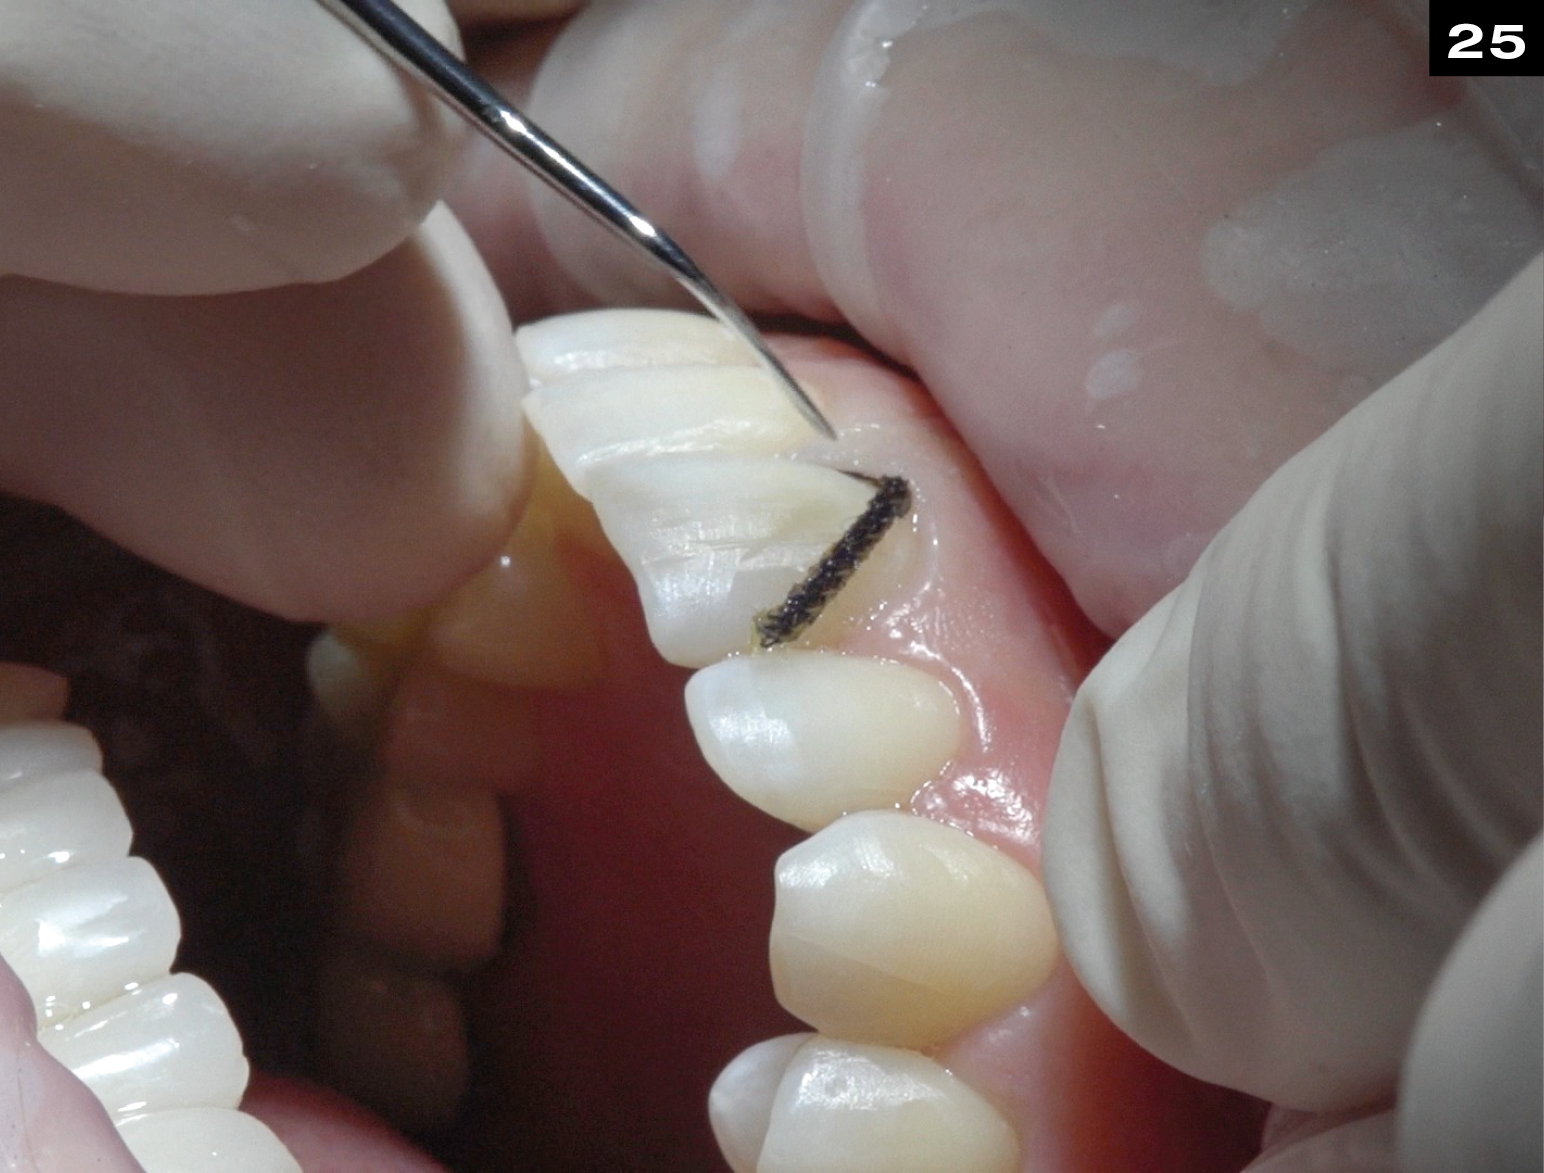
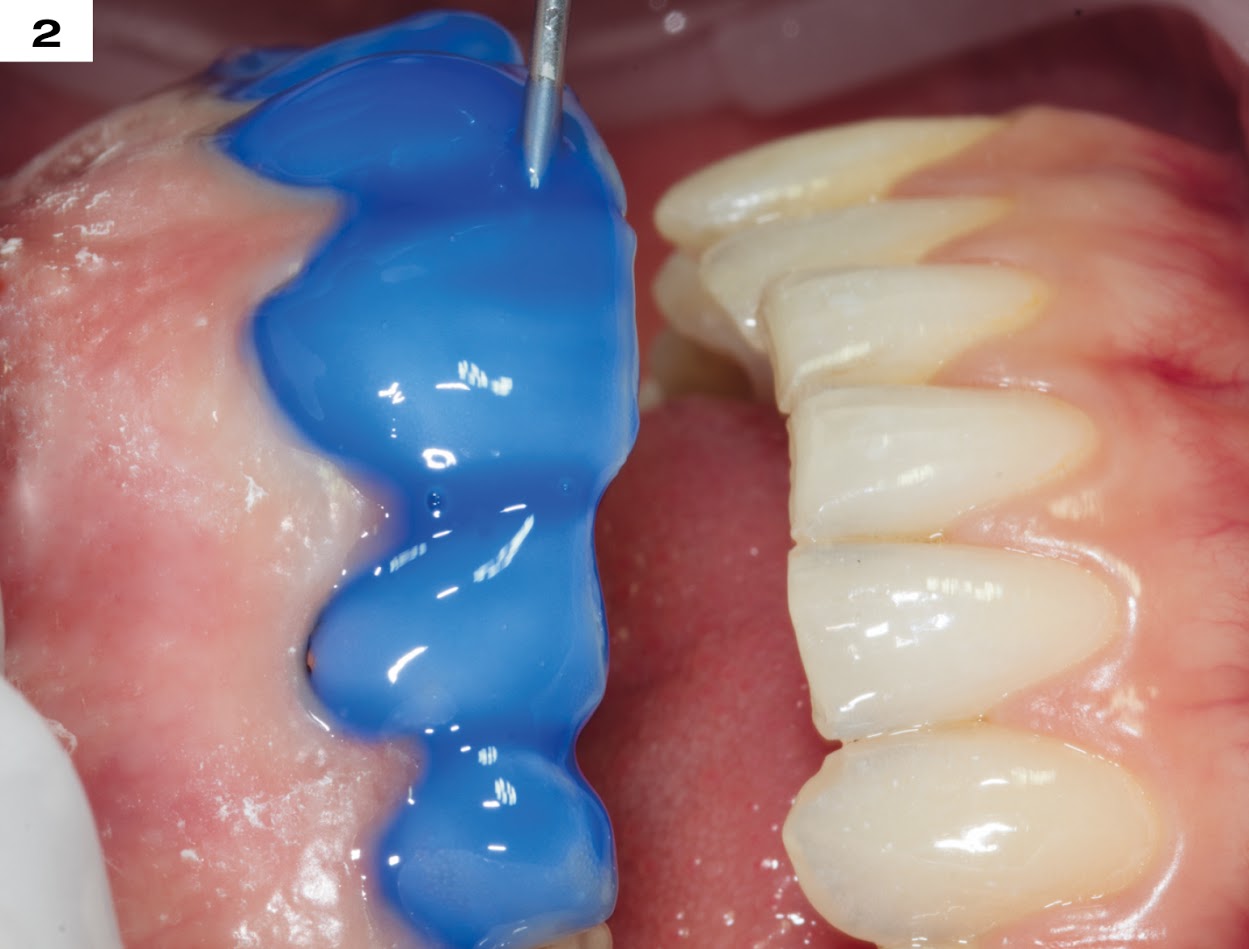
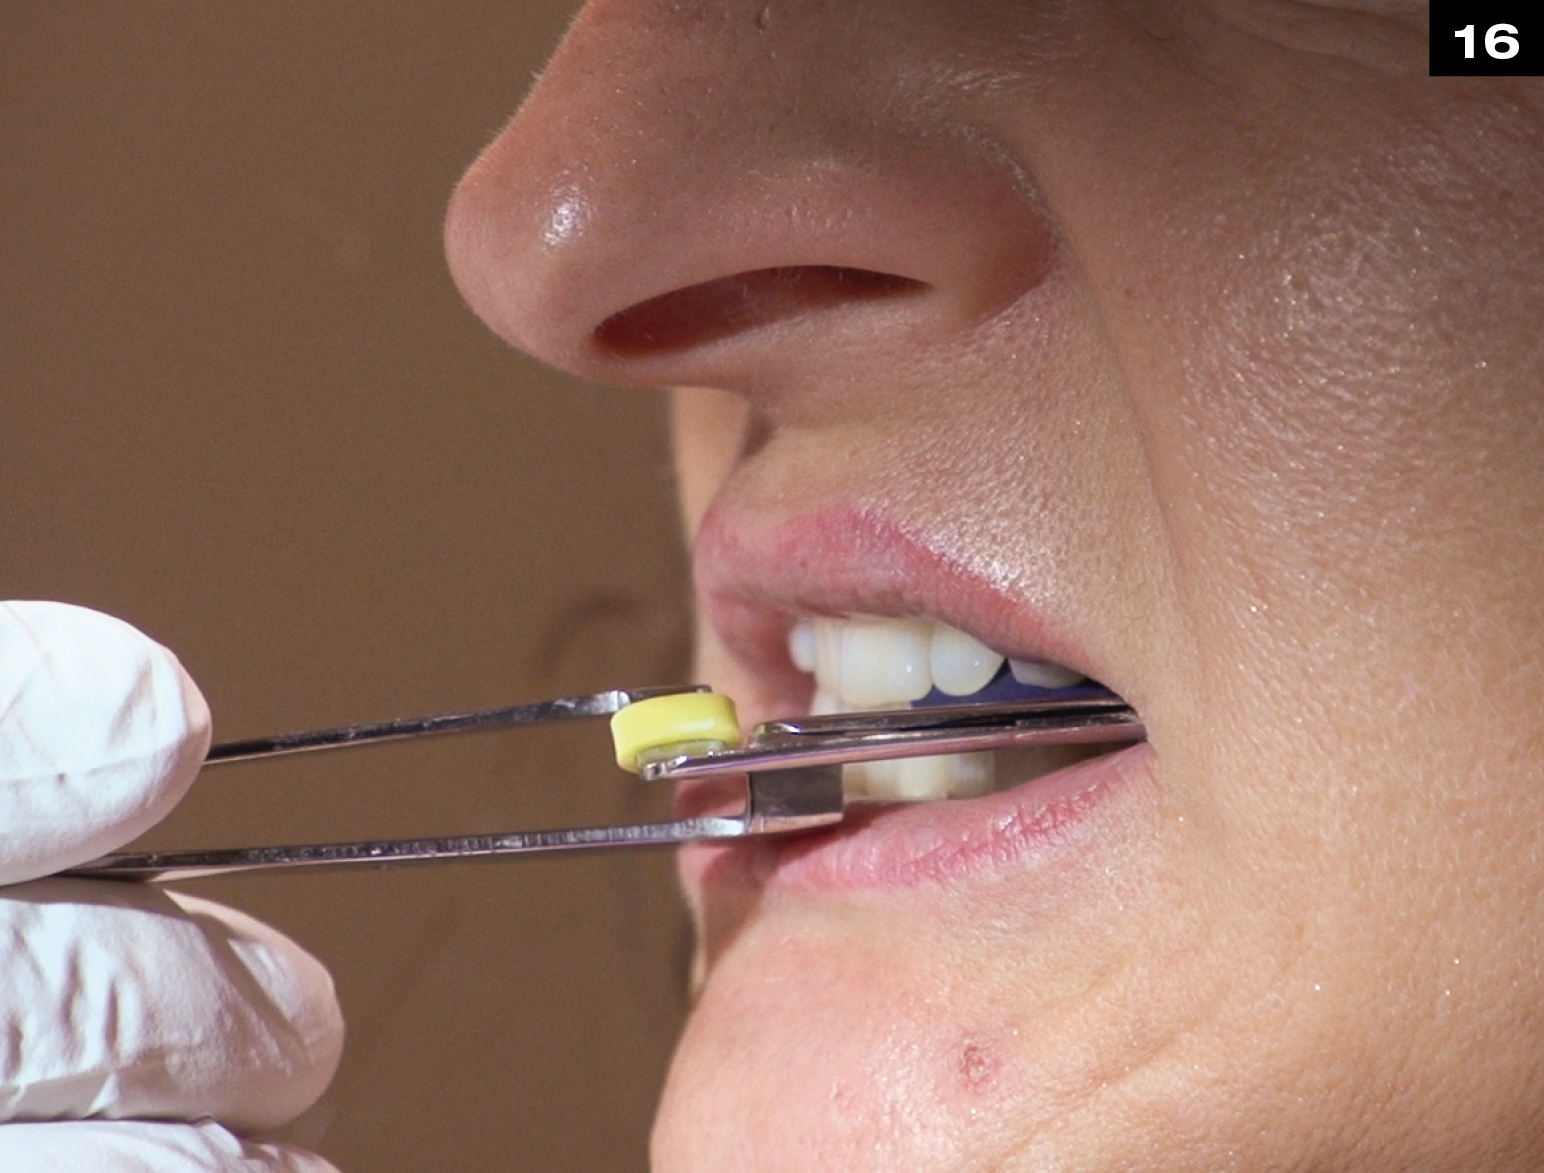
Insert retraction cord.
(00 ultrapak)
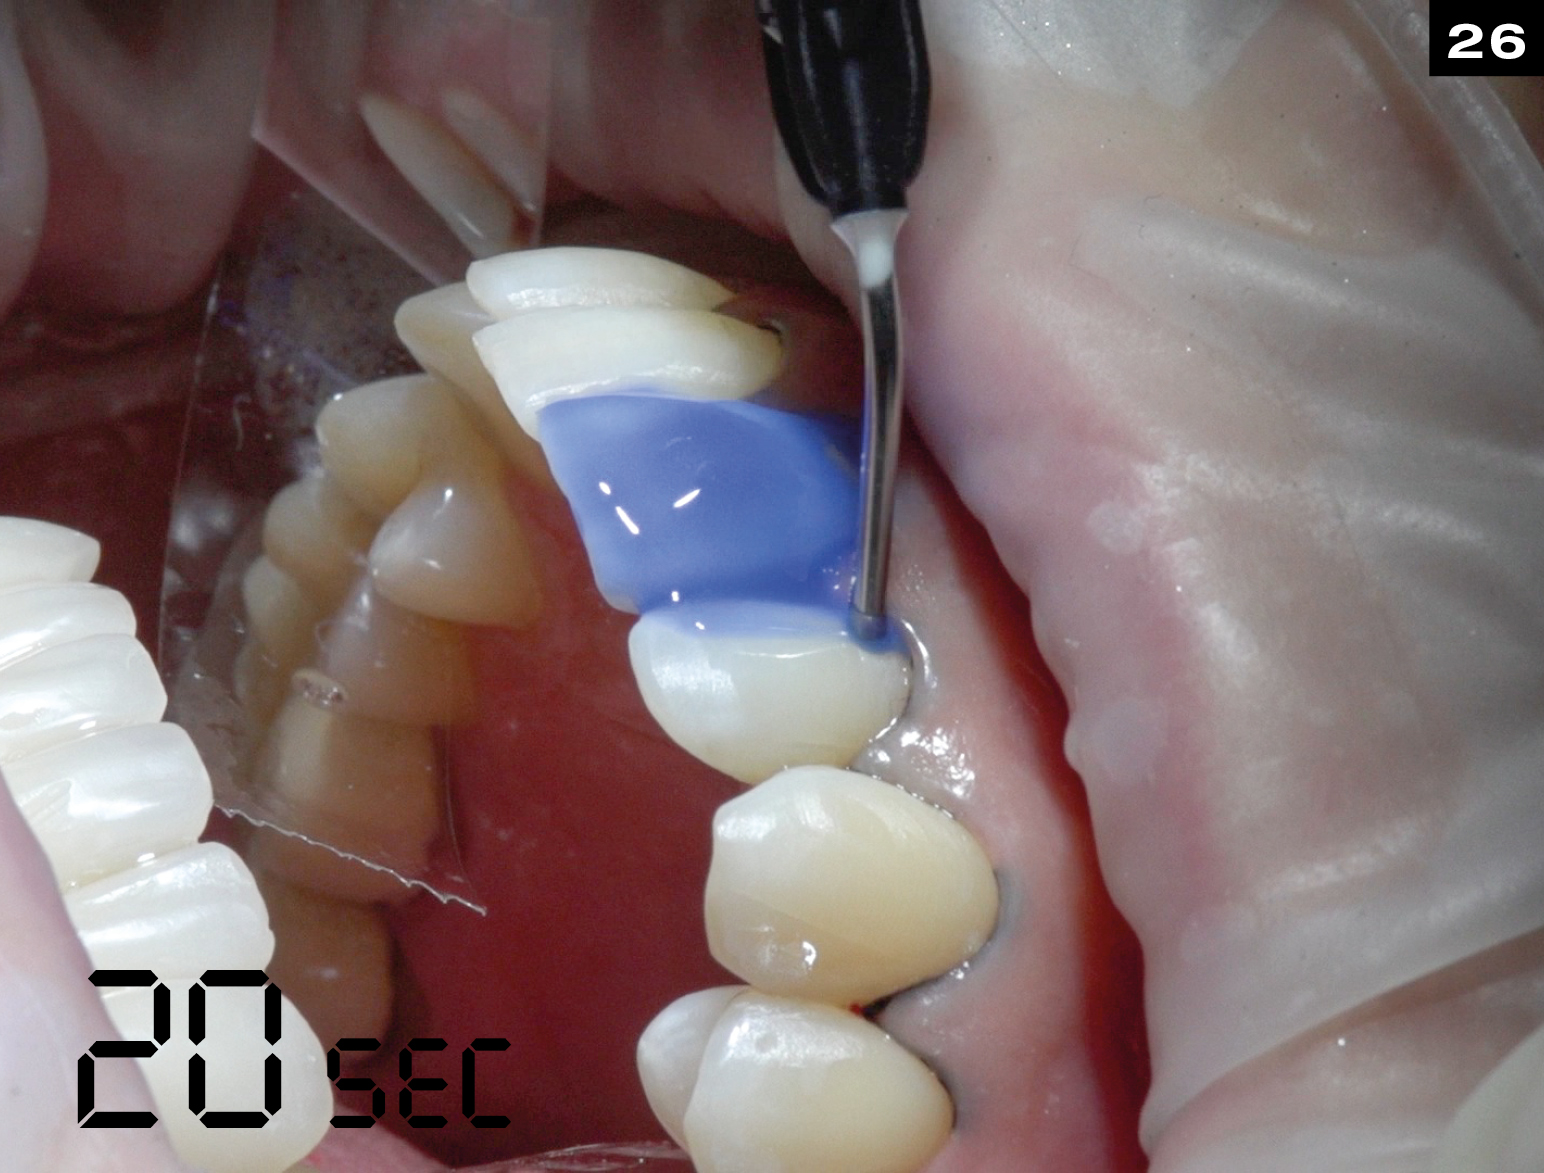
Place Mylar Strips both mesial and distal of all teeth to be treated. Apply Ultra-Etch (UPI) for 20 sec., then rinse and slightly dry, leaving surface damp.
Place a puddle coat of Peak Universal Bond (UPI) on tooth and gently agigate for 10 sec.
Blow air using half pressure to thin and remove solvents. Surface will appear shiny.
With VALO (UPI) cure for 10 sec. at standard power.
With other light cure for 20 sec.
Place a puddle coat of VENEER Bond on edelweiss VENEER and gently agitate for 10 sec. Blow air using half pressure to thin and remove solvents.
Light cure for 20 sec. with VALO (UPI) at standard power.
With other Light cure for 40 sec.
Gently air dry.

Dispense strip of edelweiss N.-H.Composite onto inner surface of the VENEER.
Adapt N.-H. Composite into edelweiss VENEER.
(Optional: characterize using flowable Enamel Composite or Effect Shades, for higher translucency on incisal area).
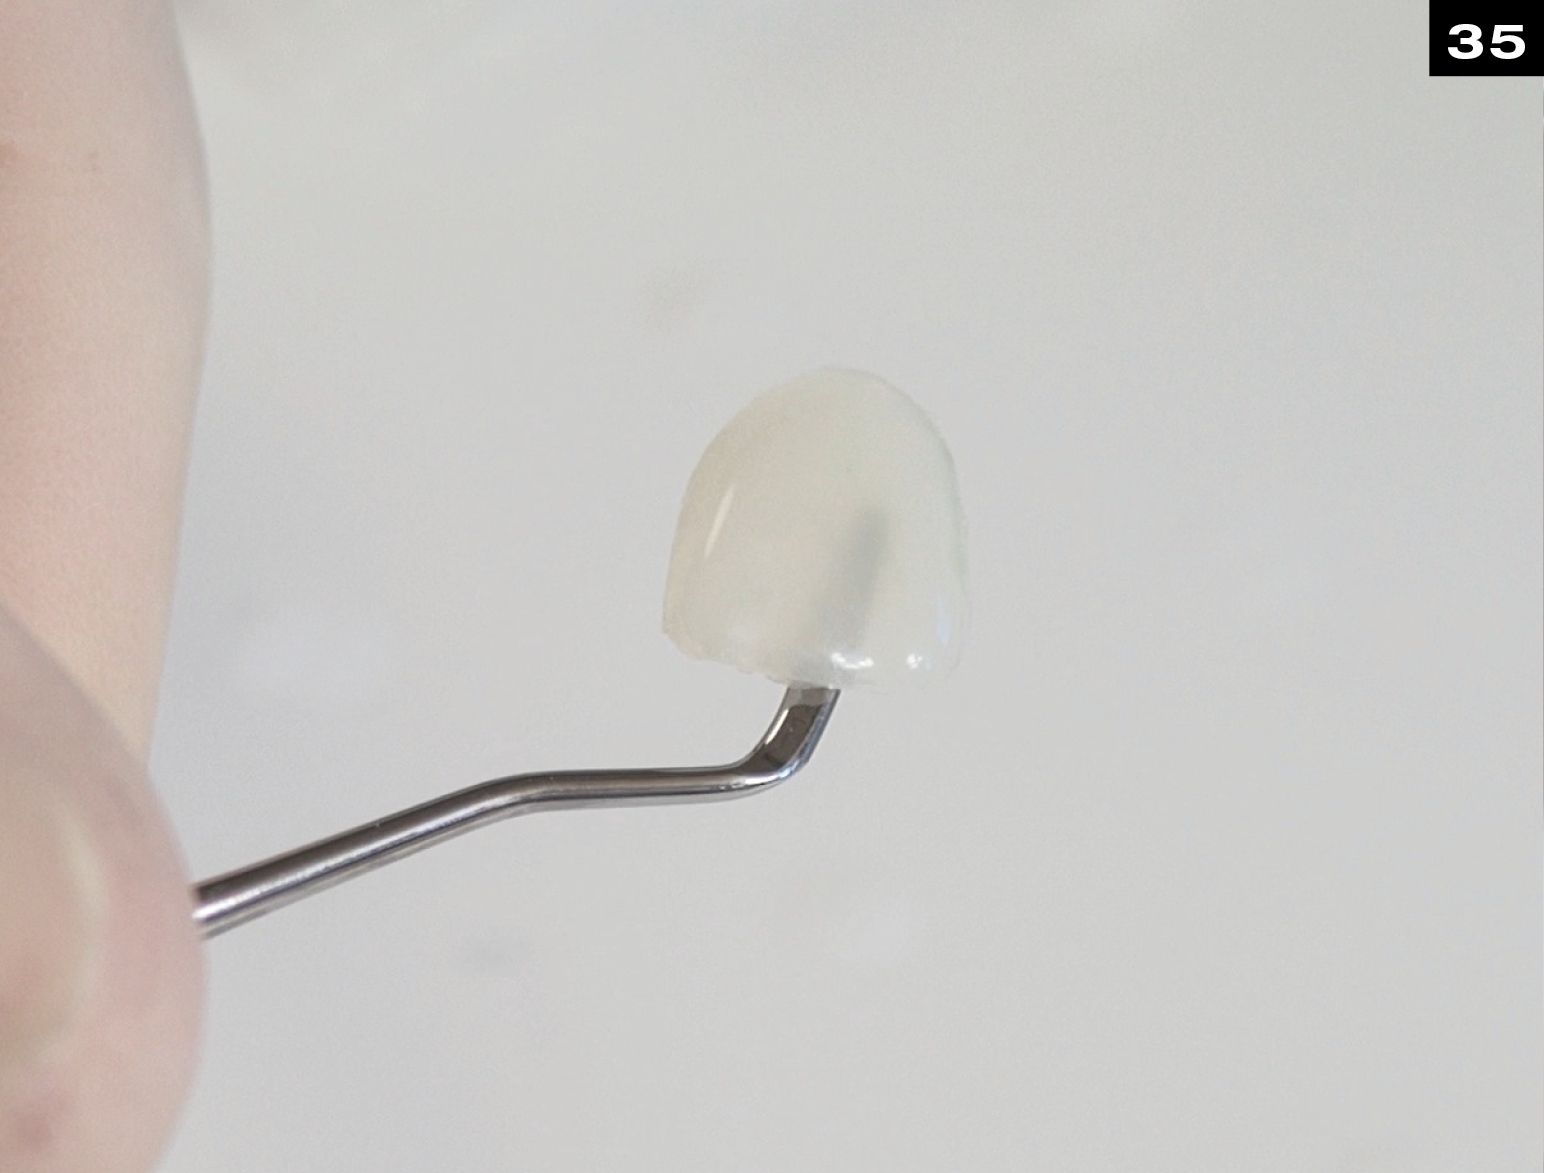
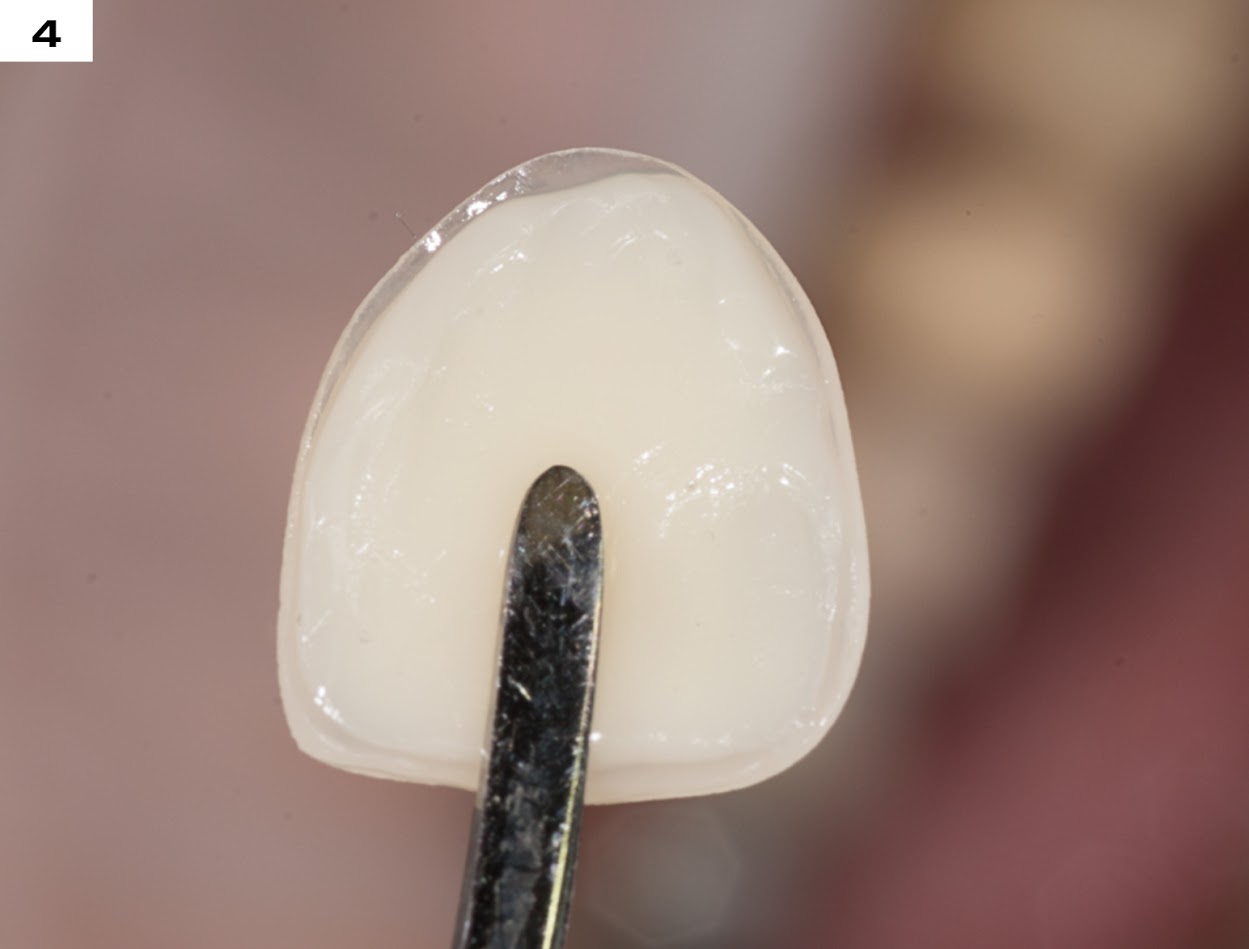
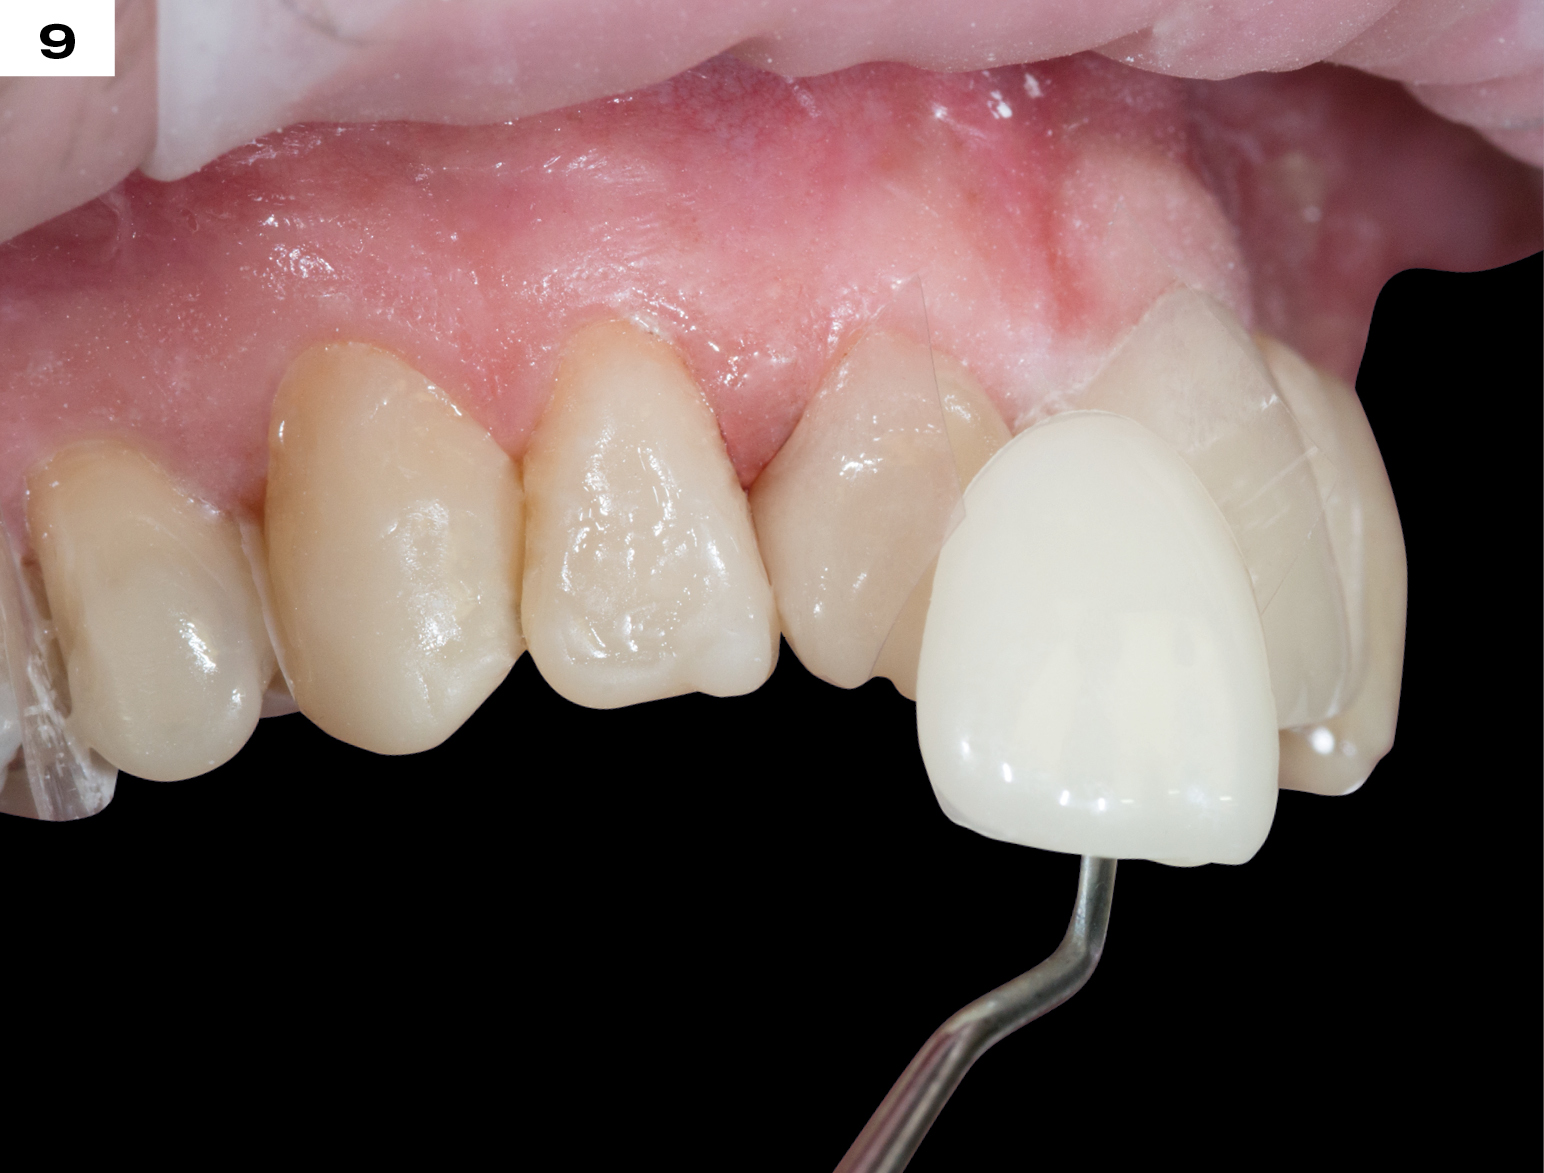
VENEER ready for placement.
Position and press the edelweiss VENEER into place
(Tip: reduce operatory light).
Remove excess edelweiss N.-H. Composite from incisal edge.
Tack cure with VALO (UPI) near the incisal edge for 3 sec. using a point cure lens to stabilize VENEER.
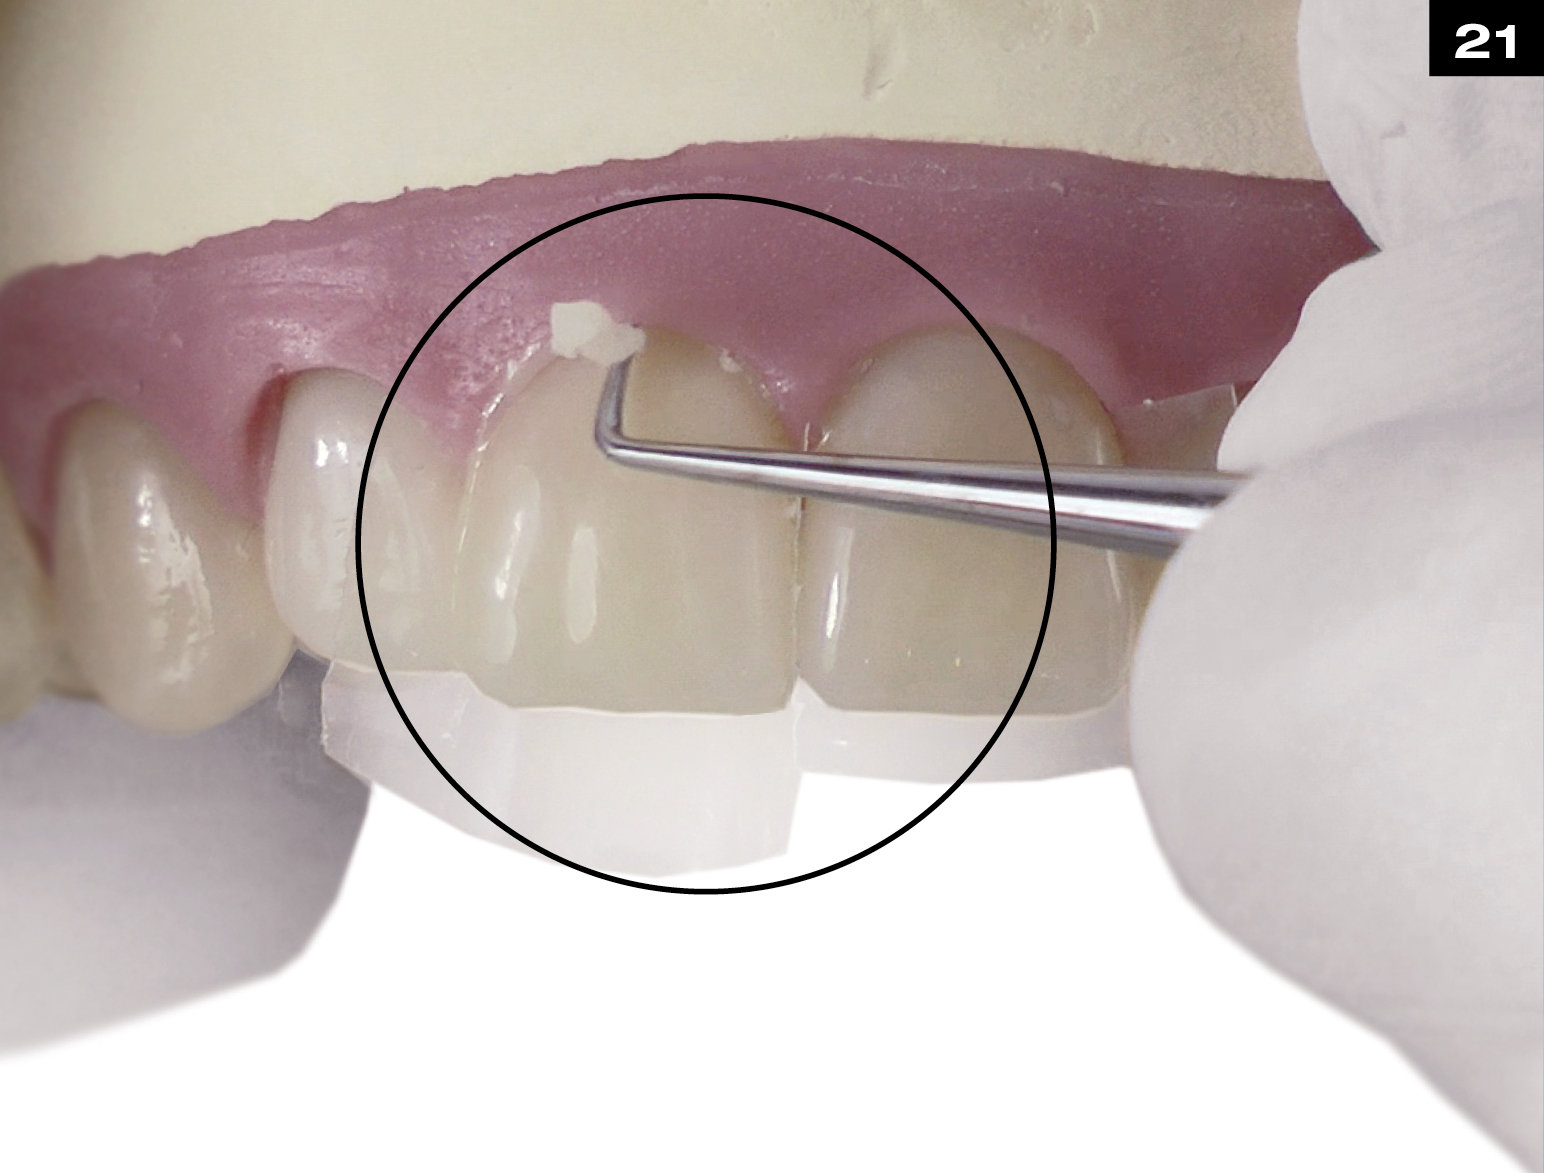
Remove excess edelweiss N.-H. Composite from the rest of the margins.
Pull Mylar Strips facially to achieve smooth margins.
Cure through Mylar Strips for 3 sec. (VALO UPI).
With other Light cure for 6 sec.
Bend Mylar Strip over interdental area.
Light cure with VALO (UPI) lingual and facial side of tooth for 20 sec. each.
With other Light cure for 40 sec.
Cemented VENEER.
Place a puddle coat of Peak Universal Bond (UPI) on tooth and gently agigate for 10 sec.
Blow air using half pressure to thin and remove solvents. Surface will appear shiny.
With VALO (UPI) cure for 10 sec. at standard power.
With other light cure for 20 sec.
Position and press the edelweiss VENEER into place
(Tip: Reduce operatory light).
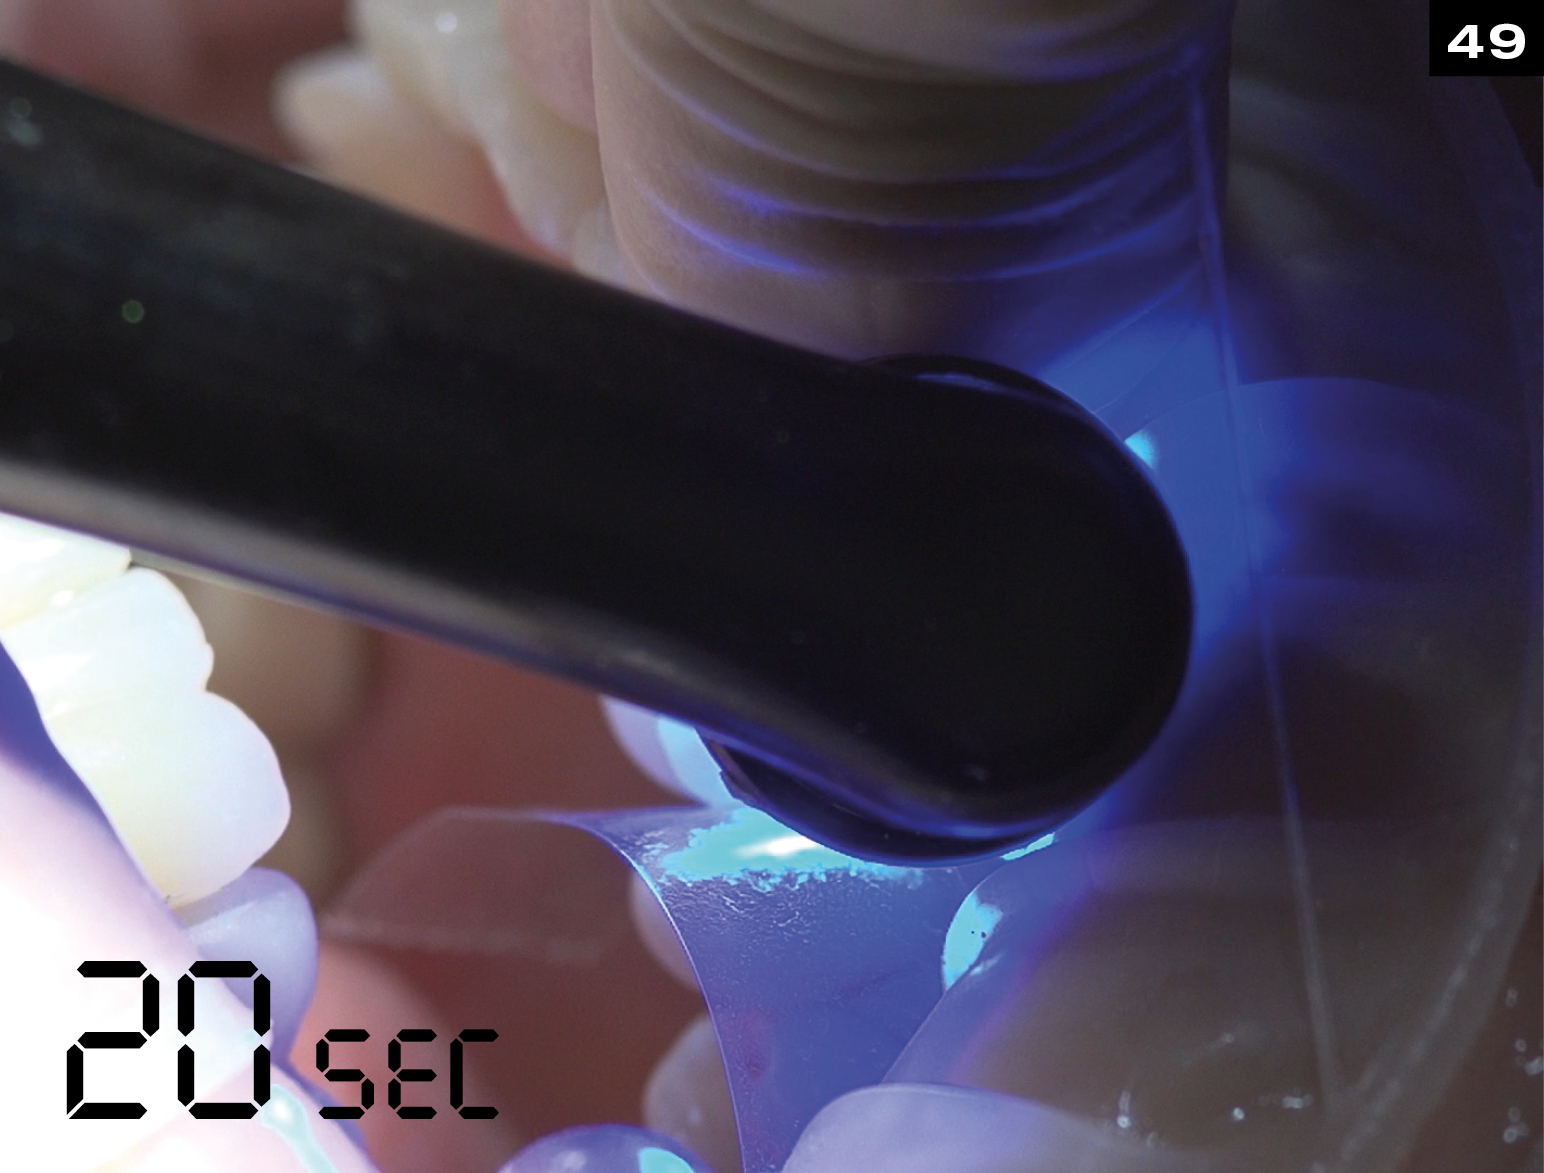
After positioning light cure with VALO (UPI) palatal and facial side of edelweiss VENEER for 20 sec. each.
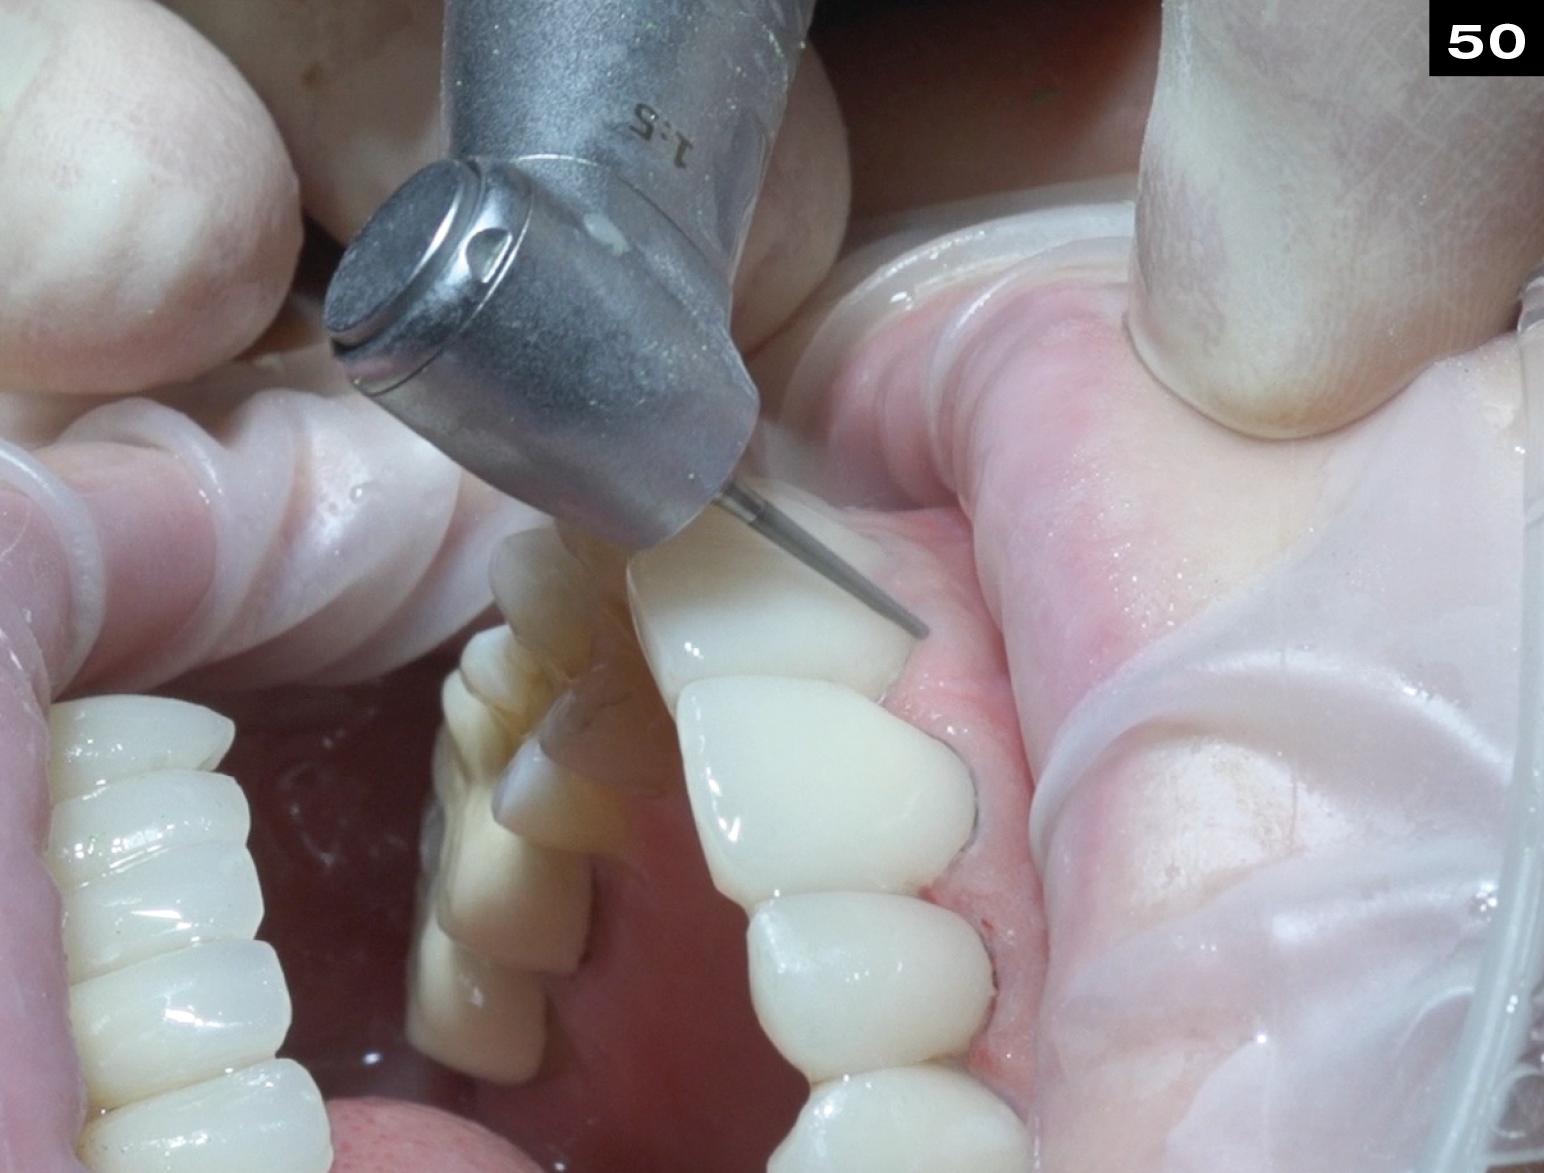
Finish cervical and interproximal margins using fine finishing diamonds.
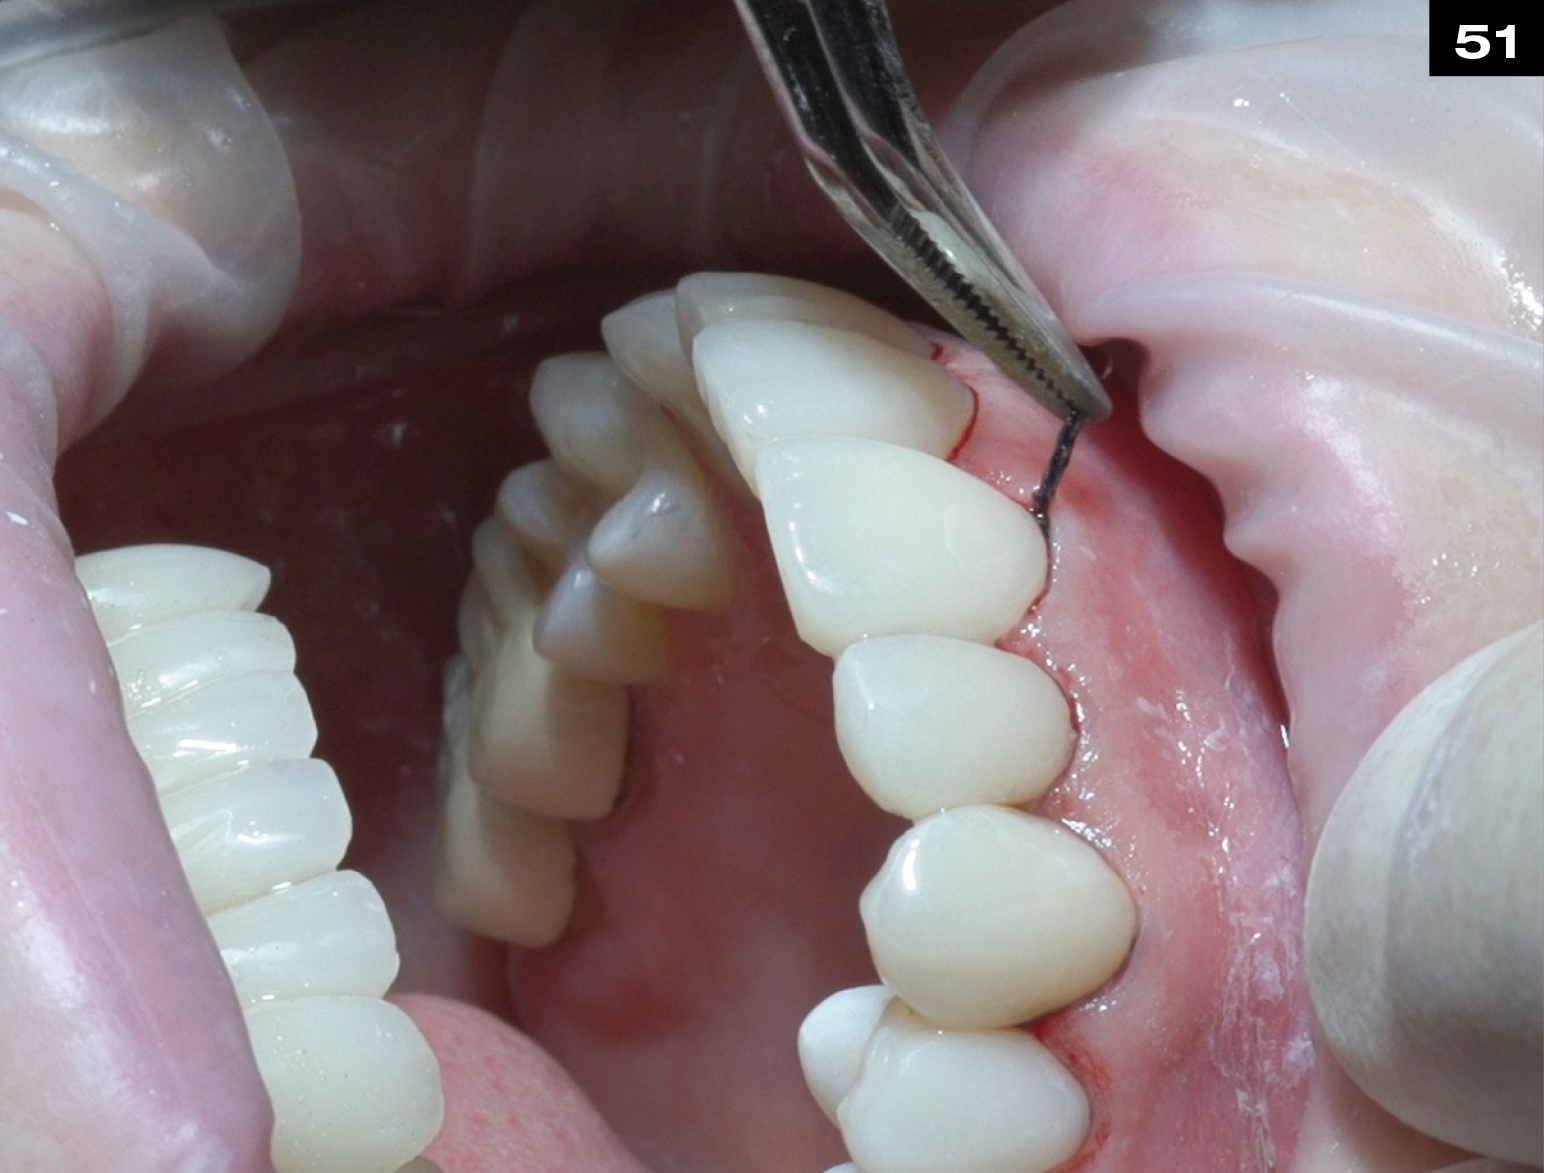
Removal of retraction cords.
Finishing of incisal edges.
Finish interproximal areas using finishing Soflex Discs.
Reocclusion.
Visual observation.
Polish VENEER margings using KENDA silicone rubber polishers.
For high shine polish VENEER margins with KENDA polishers.
Visual observation.
Mechanical Properties
Mechanical Properties & Benefits
- Low shrinkage due to nano-technology and high amount of filler 83 %
- Good abrasion resistance
- Very good physical and mechanical properties
- Antibacterial surface due to zinc and fluorine particles in the filler
- Easy polishing
- Natural fluorescence and opalescence
| N.-H. COMPOSITE | N.-H. FLOWABLE COMPOSITE | VENEER | |
|---|---|---|---|
| Flexural Strength | 150 MPa | 120 MPa | 200 MPa |
| Compressive Strength | 480 MPa | 350 MPa | 550 MPa |
| Flexural Modulus | 12.5 (dentin) - 16 GPa (enamel) | 68 HV | 20 GPa |
| Surface Hardness | 80 HV | 68 HV | 95 HV |
| Polymerization Shrinkage | 2,50 % | N.A. | — |
(Source: internal data from edelweiss dentistry)
THE TECHNICAL ASPECTS
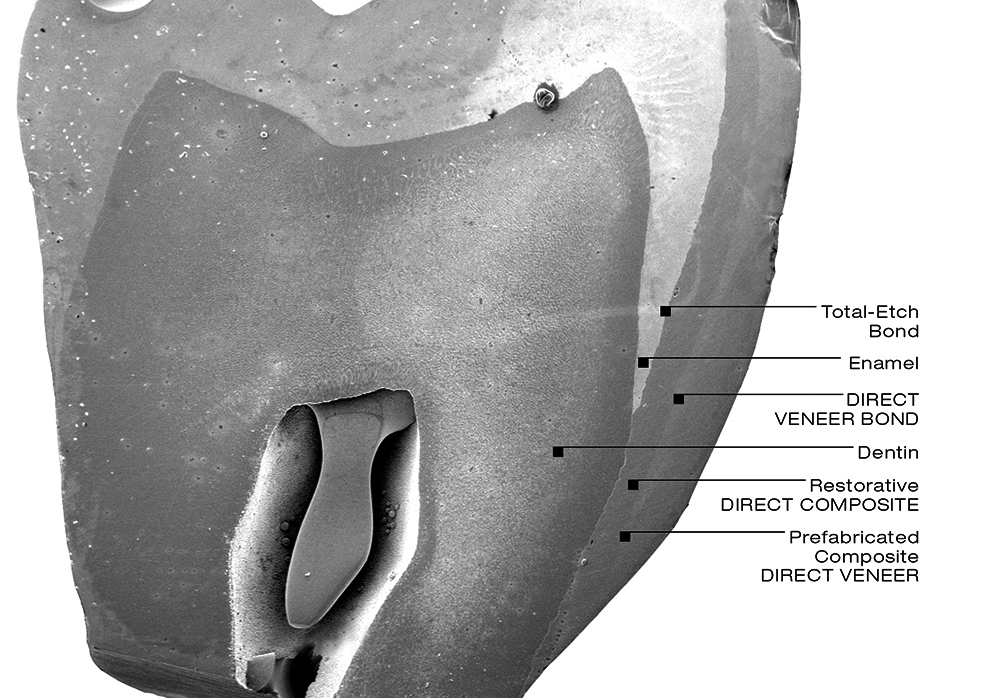
View of a sectioned extracted human molar with a cemented prefabricated composite VENEER / OCCLUSIONVD bonded to half of the enamel surface and the other half to the dentin surface.
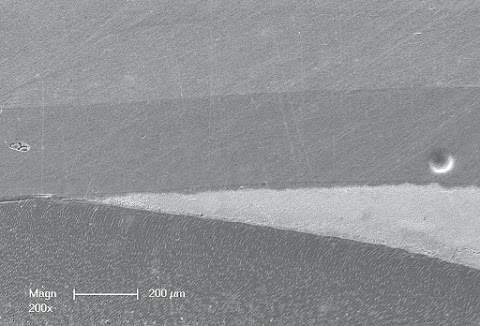
The most relevant observation made was obtained upon the evaluation of the inner adaptation of the restoration. No defects were visible at the interface of the enamel or in between the restorative composite and the VENEER / OCCLUSIONVD, which confirmed the excellent bond strength and stability at both interfaces (dentin/enamel to composite, composite to VENEER / OCCLUSIONVD).
FATIGUE BEHAVIOR
Fatigue behavior for composite VENEER / OCCLUSIONVD: A recent in vitro study demonstrated that prefabricated composite VENEER / OCCLUSIONVD cemented onto the enamel and dentin surface of molars, effectively resisted simulated functional fatigue and load testing. Virtually no defects were observed at both the enamel and dentin margins, either before or after loading, which typically represents the most vulnerable area of a restoration.
UNIVERSITÉ DE GENÈVE
Prof. Dr. Didier Dietschi D.M.D, PhD, Privat-Docent Specialist SVPR Assoc. Professor